Queue prioritization for live chat
Queue prioritization focuses agent resources on the conversations that matter most. It allows brands to efficiently allocate staffing resources and better handle incoming messages by prioritizing conversations in the queue based on importance.
Proper queue prioritization holds special weight in the world of contact centers since it sets the foundation for good customer service, agent efficiency, and the ability to scale the contact center’s operations.
Configuration
Brands wanting to provide faster service to certain customers can configure the ranking of the queue, by changing the priority of each engagement. This will allow some consumers to go straight to the top as soon as they arrive in the queue, above regular consumers who will be served based on their arrival time.

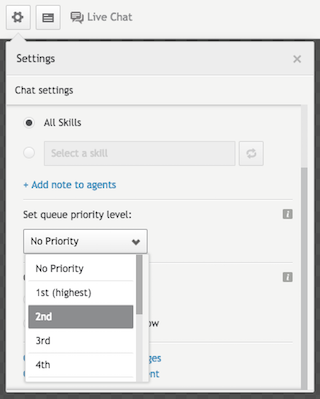
In the ‘Set priority queue level’ section in the engagement settings area, brands can configure the priority level for each engagement. The default state is “no priority”, meaning consumers exposed to the engagement are on the same level and will be served on a first-in first-served basis.
If the engagement is assigned a different priority level (between 1st and 10th), visitors exposed to this engagement will be served according to the engagement's queue priority level. If there are two conversations for the same skill waiting in the queue, the higher-ranked conversation will be served first.
For example, if you want to give consumers with a high cart value a faster service, you can set up an engagement that will mean they are routed right to the top of the queue. By selecting the ‘1st’ priority level in the engagement settings, and specifying a high basket total under behavioral targeting, you can ensure that these high-value consumers will go straight to the top of the queue when they click on the engagement.
Account setup
How to enable queue prioritization for chats:
Contact your LivePerson representative to enable this feature.
To prioritize an engagement:
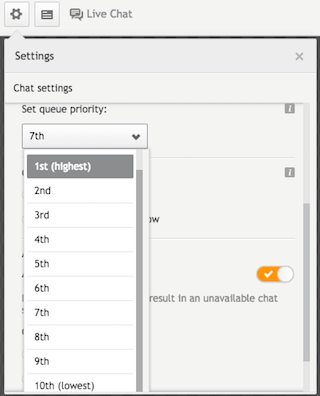
1. In the Engagement Studio, click on the Settings icon.

2. Scroll down to the ‘Set queue priority level’ section.
3. Select from 1st to 10th (1st being the highest, 10th being the lowest).
4. Click Save. The queue priority will be reflected in the engagement’s details in the Campaign Builder.


Limitations
- When automatic chat distribution (ACD) is enabled on your account with auto-accept, the first consumer to enter the queue will automatically remain first in the queue and will not be prioritized according to the configured ranking. All subsequent consumers entering the queue will be prioritized correctly according to the configured priority level.
- When ACD is disabled, or is enabled but with manual mode, the configured priority level will apply to all consumers.
Missing Something?
Check out our Developer Center for more in-depth documentation. Please share your documentation feedback with us using the feedback button. We'd be happy to hear from you.