Agent user guide
LivePerson now embeds the Conversational Cloud agent workspace directly into our brands Salesforce Sales or Service Cloud, providing agents with a complete messaging experience right inside Salesforce.
As an agent, you can now handle all of your conversations with customers across multiple messaging channels from the LivePerson agent workspace within Salesforce Sales or Service Cloud. Below are the main areas and tools you'll be using within the workspace for your daily messaging operations.
Getting Started
Login to your Workspace
In the bottom right corner of the Sales or Service Console, you can access the LivePerson embedded UI by clicking on “LivePerson” and by entering your LivePerson login credentials.

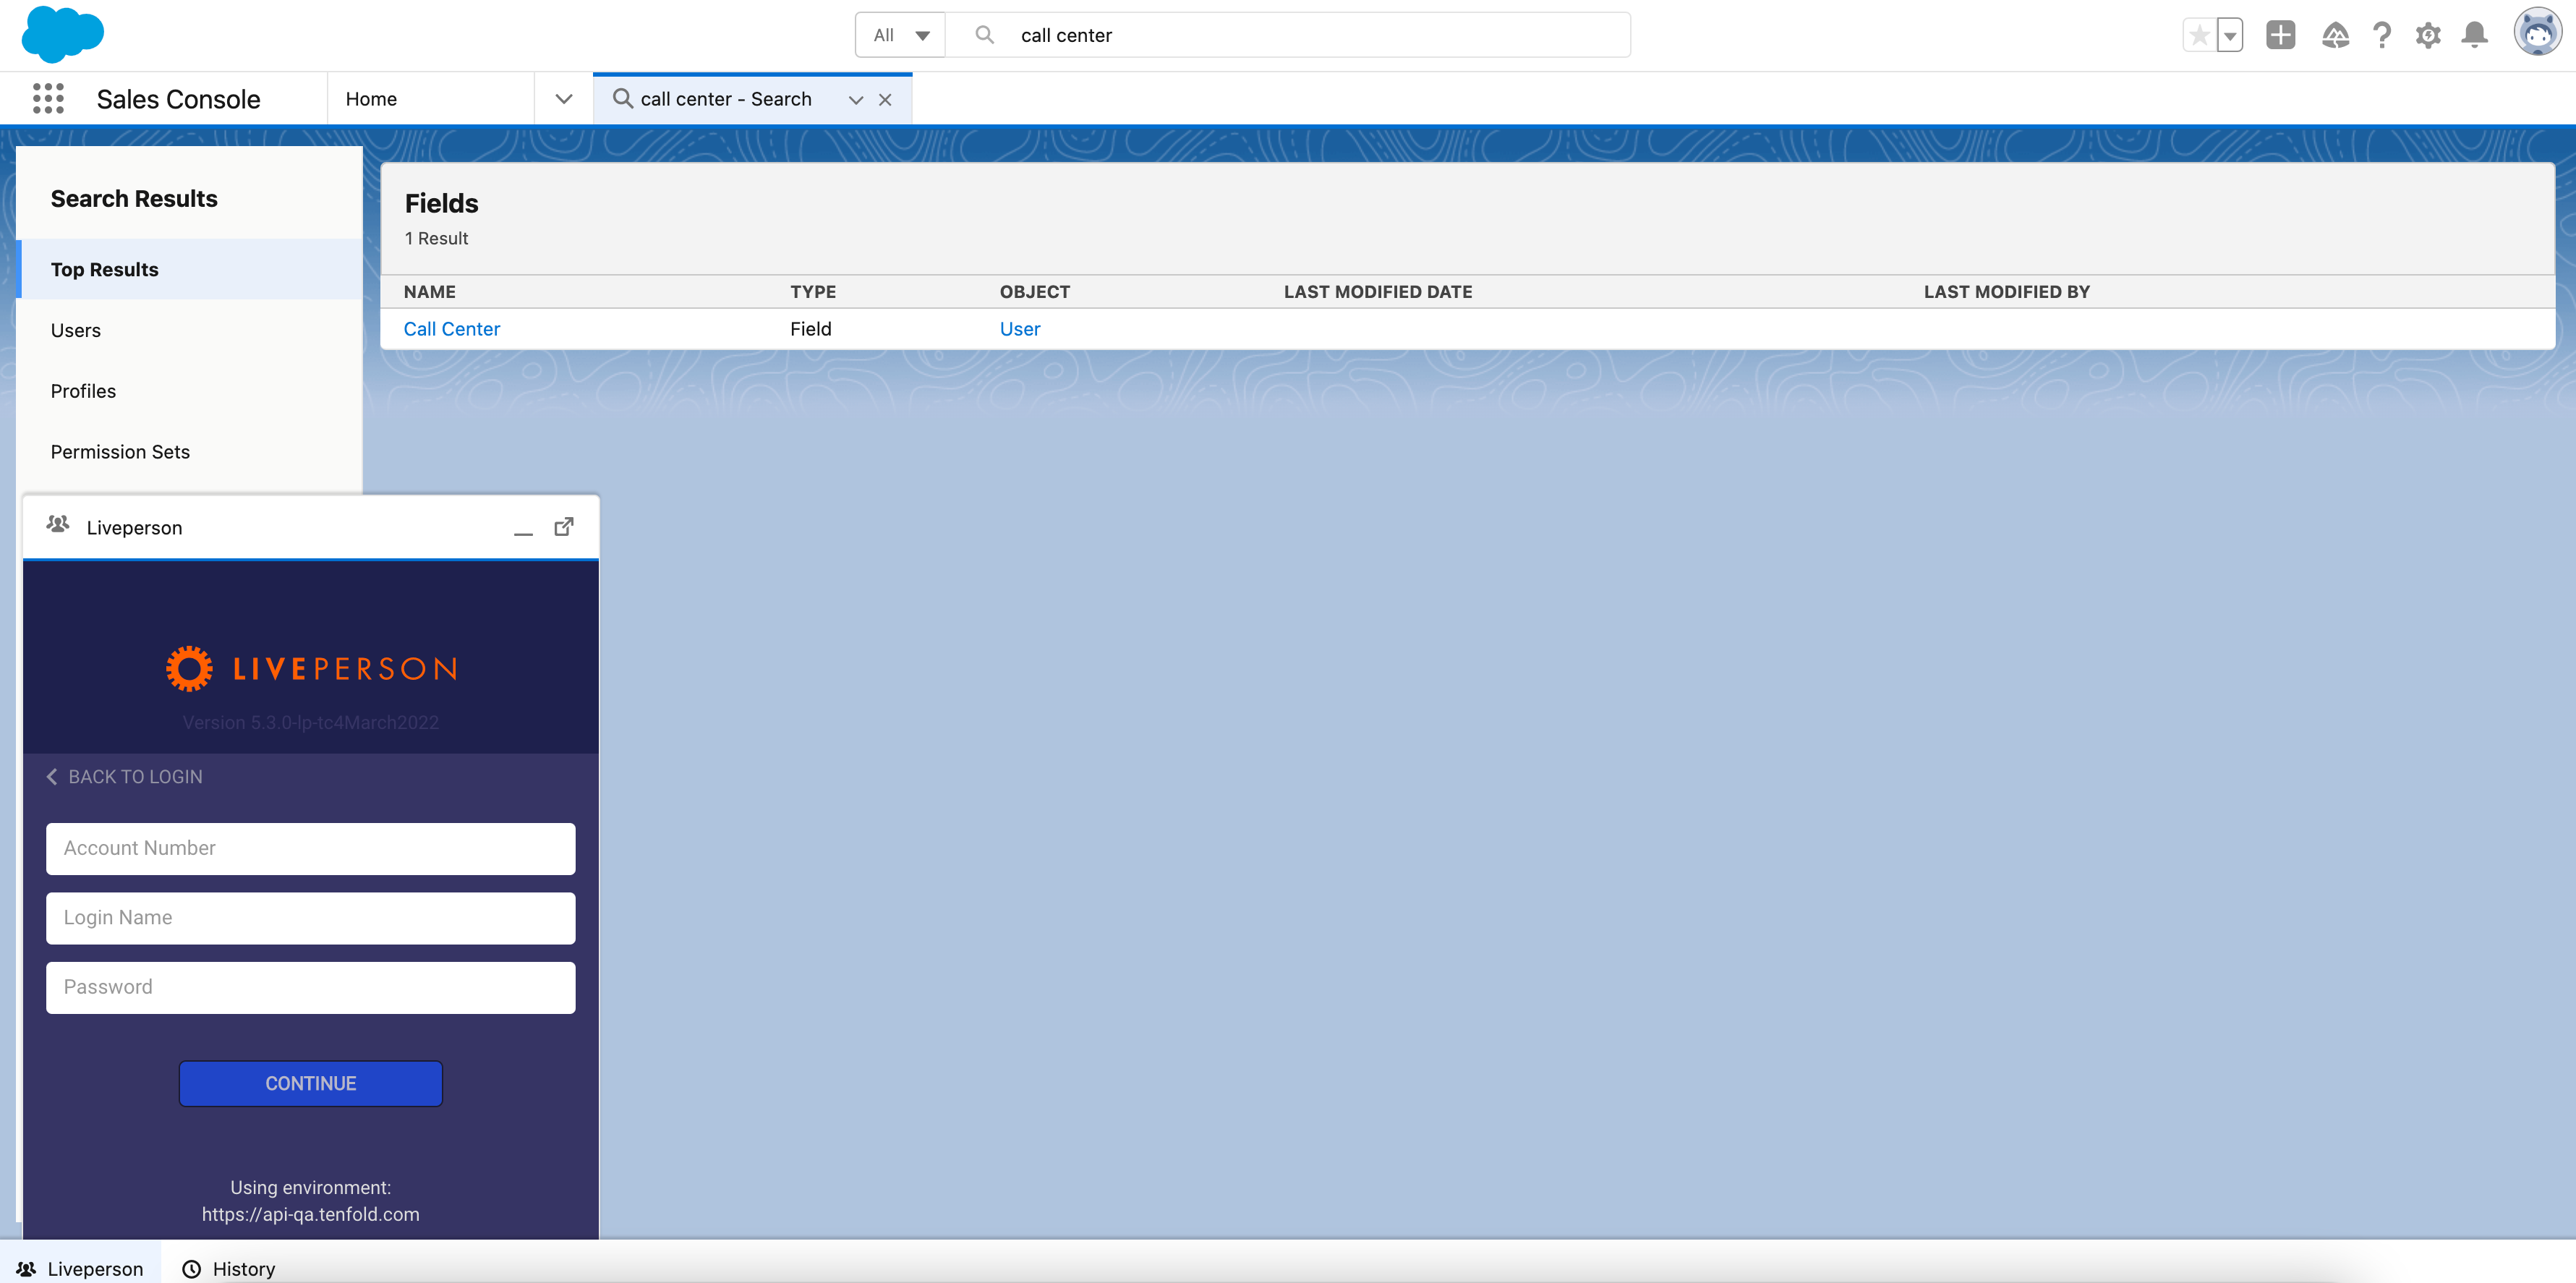
Salesforce connector - workspace
Please note, you may need to use your tenfold credentials as the first login step until there is complete support for LivePerson SSO.
Active Conversations
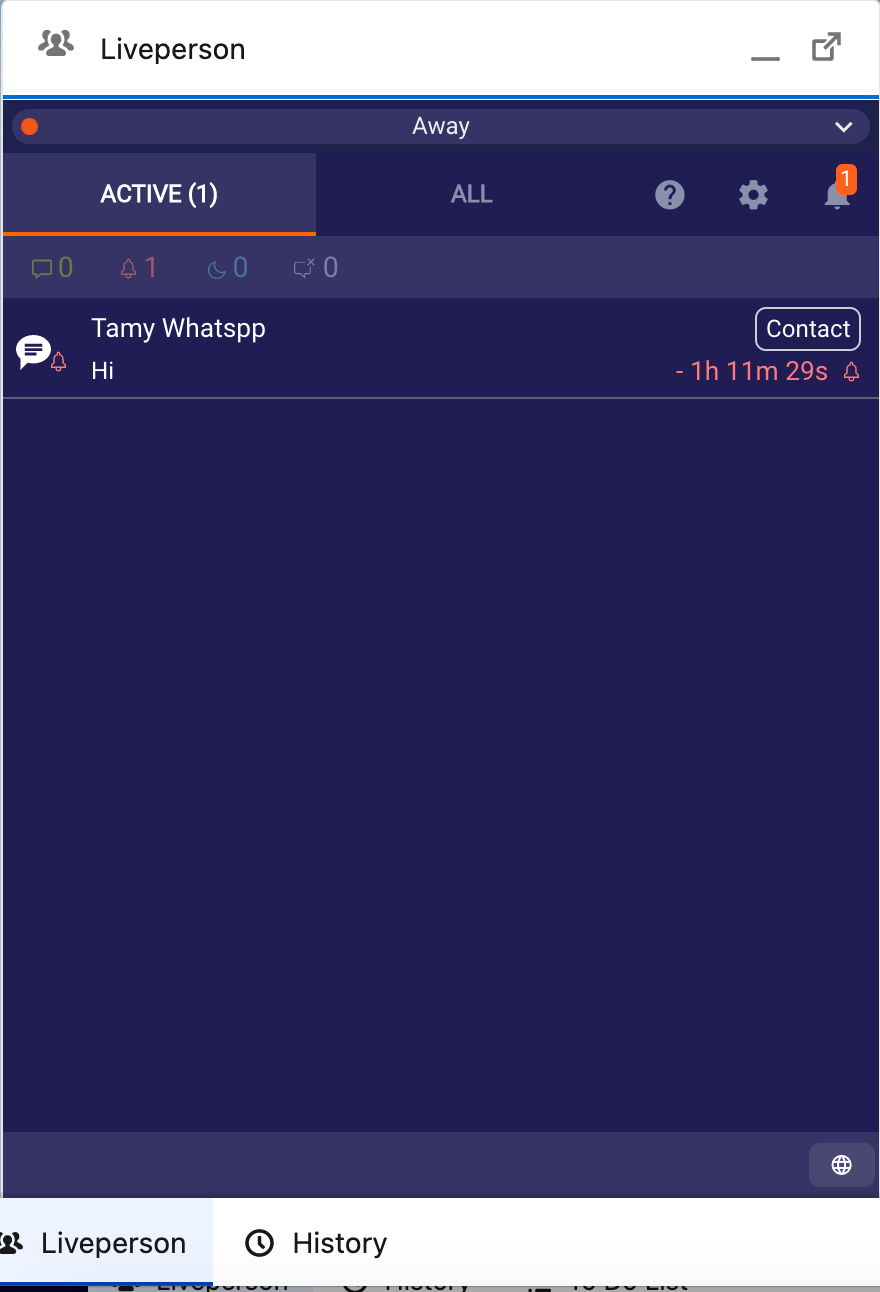
The Active conversations list includes all of the recent conversations that were assigned to you, including conversations that were recently closed. You can work through your Active Conversations list from the top down, and narrow down the conversations to show ongoing conversations, overdue conversations, idle conversations or closed conversations.

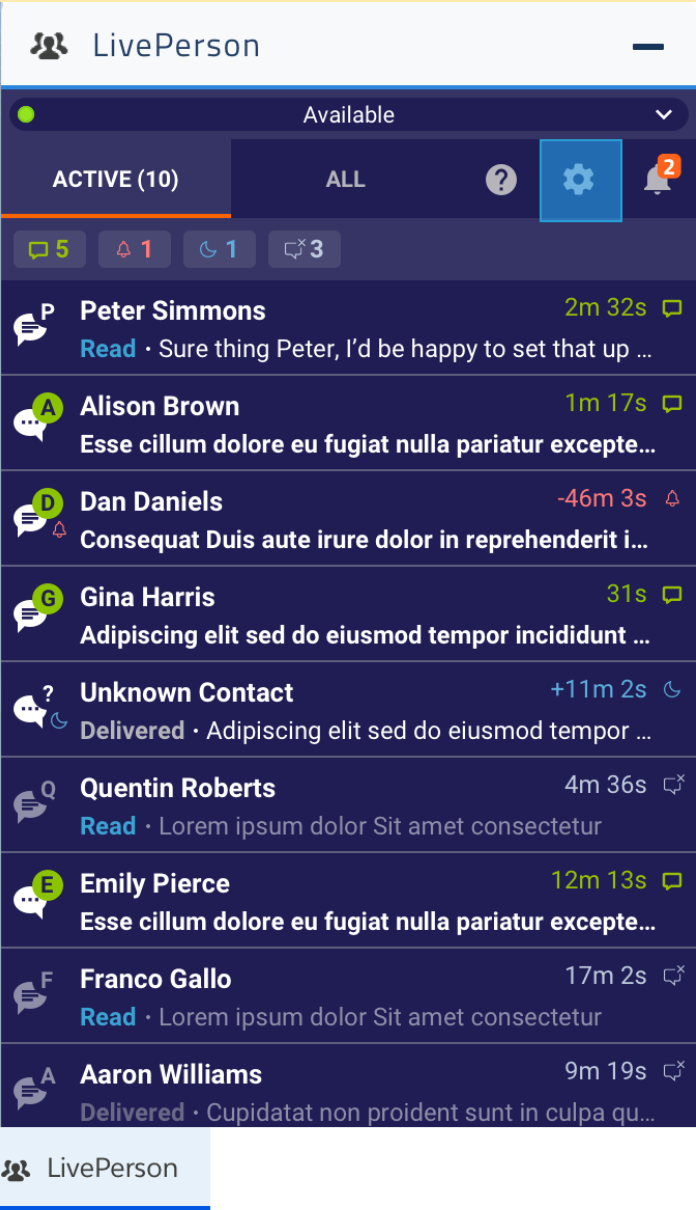
Salesforce connector - active conversations list
Dynamic conversation list
The Active conversations list is a dynamic conversation list which is automatically sorted by SLA, otherwise known as response time. Conversations with the shortest SLA are the most urgent and are therefore sorted to the top of the list. The list updates automatically after every agent action or incoming conversation, ensuring that the most important conversations are always prioritized. This allows you to efficiently work through the conversation list by always focusing your attention on the conversation at the top of the list, rather than manually determining who to help next.
Clicking on each conversation will allow you to read the transcript and start engaging with your customers. If you choose to click on a consumer’s name, it will open up the entire conversation and you can begin messaging.
Conversation status and filters
The active conversation list includes ongoing, overdue, idle, and closed conversations. You will see at the top of the list a count of how many conversations with each status are currently in your workspace. Clicking on each of the statuses will allow you to narrow down the list of conversations with the specific status.
You can filter conversations in the list by status:

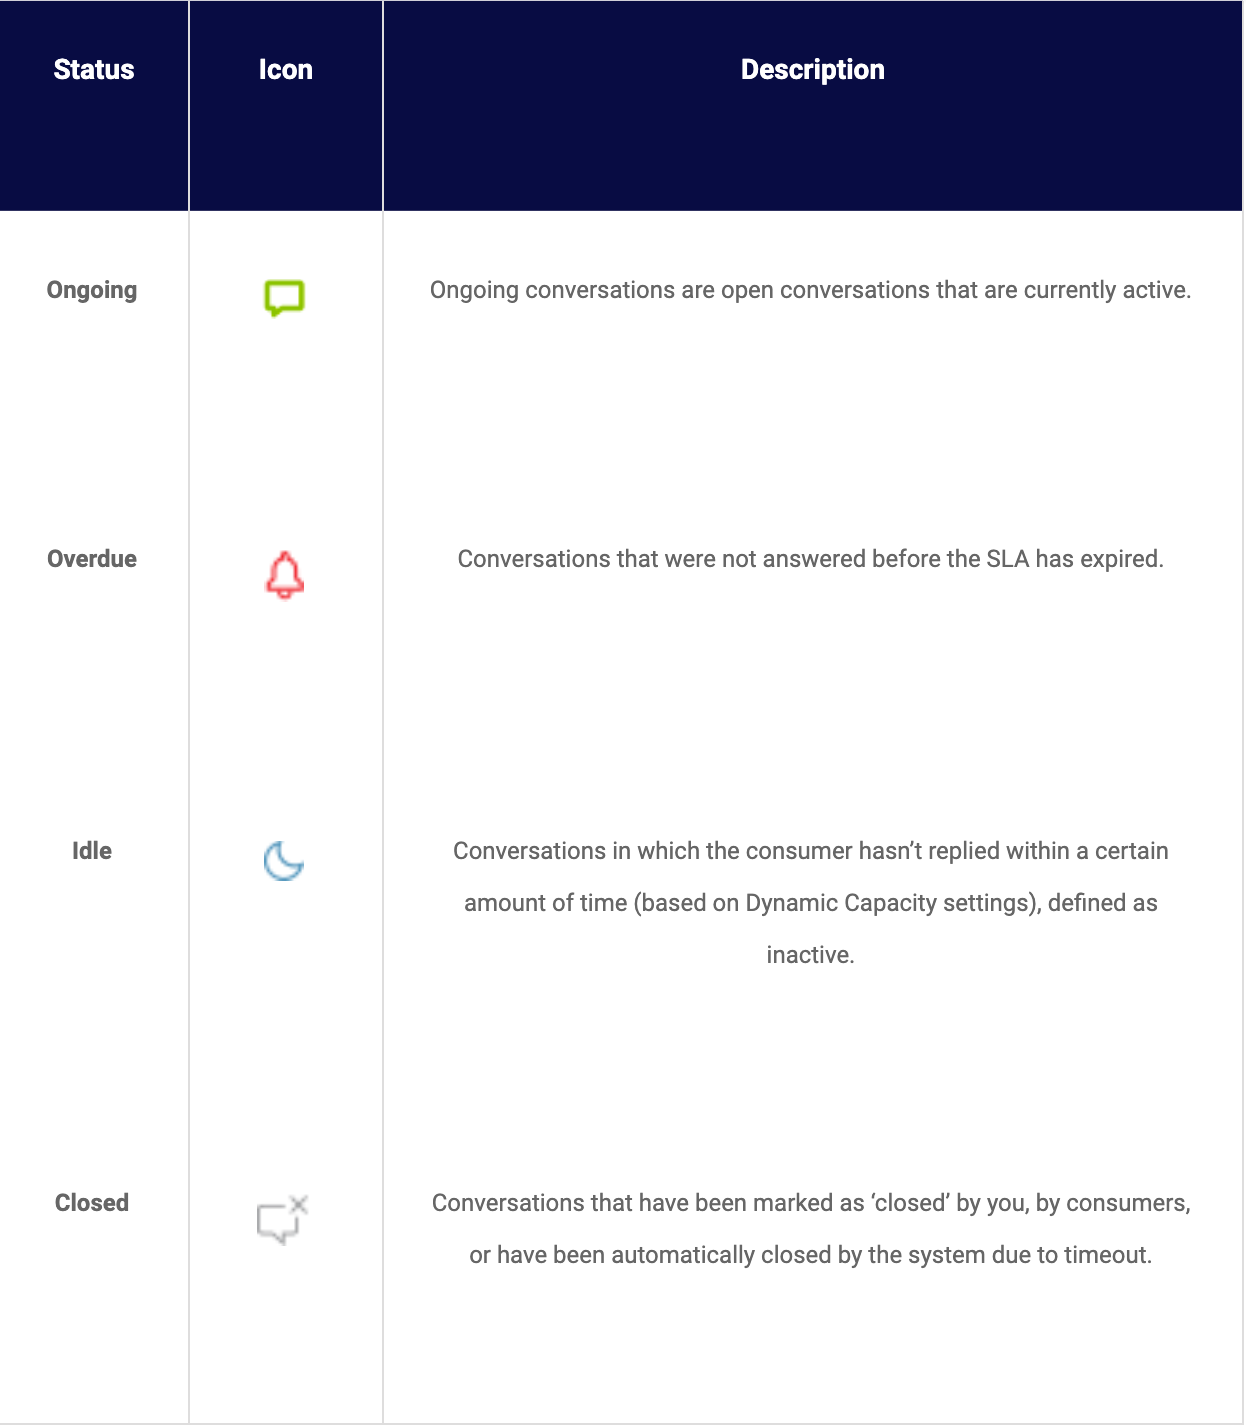
Salesforce connector - Conversation status and filters
All Conversations
The All tab allows you to view all conversations that started within the past 13 months. The list will default to the conversations from the last 7 days and you can click on “Load more” to view additional conversations beyond 7 days. In list mode, you’ll see high-level information about each conversation. When you select a conversation from the list it will open in conversation mode where you can view the full transcript.
Global links and Interaction based links
Based on your account configuration, you may have access to Global weblinks that are useful links that can be accessed from the application at any time. A globe displays in the lower-right corner of the UI. Clicking the globe icon opens a list of web-links.

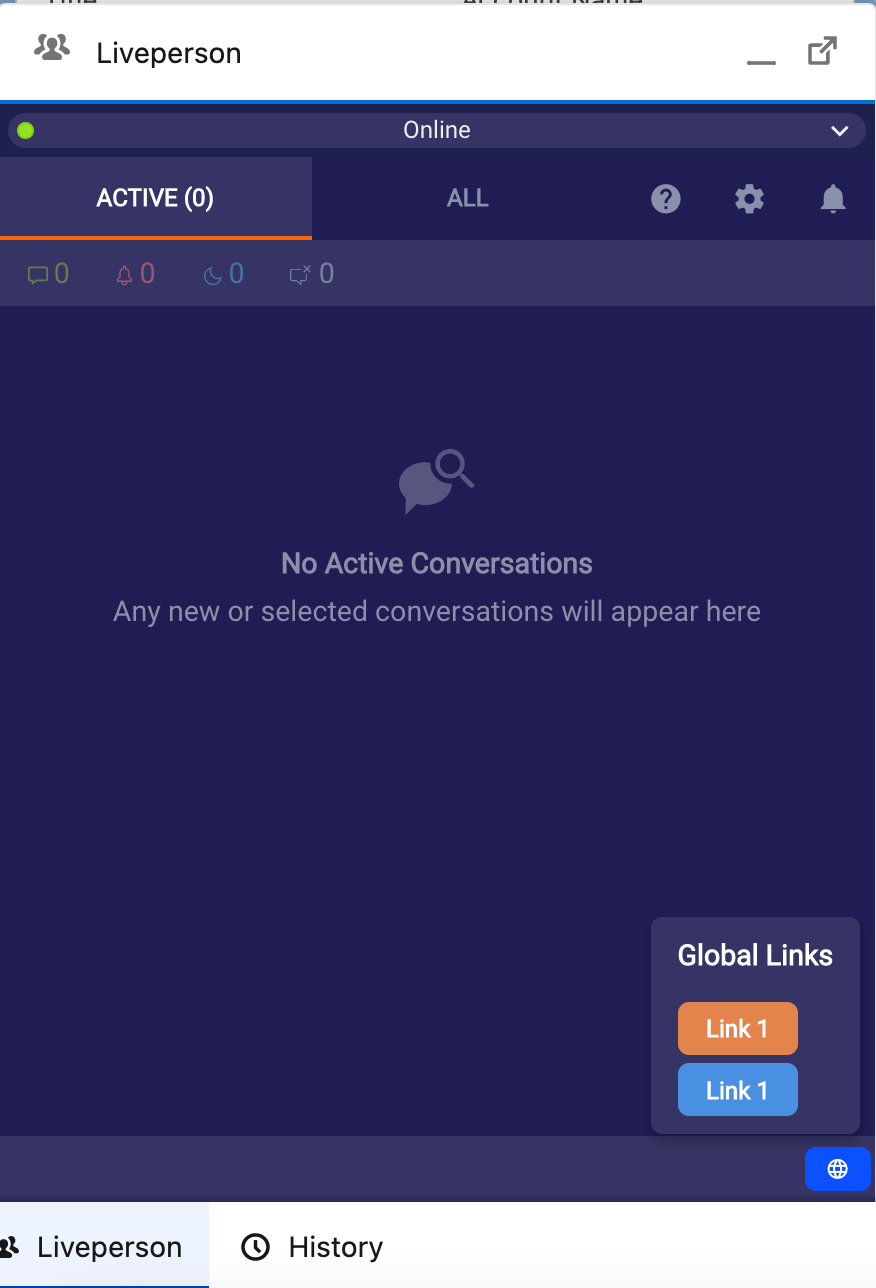
In addition, there are certain links that can be configured that include certain parameters from the contact or messaging interaction.
- "More Links" Menu: Displays as a list of links in a "Links" section on the back side of the contact card. The links only display during interactions, such as Conversation, and phone/email attributes for use as parameters in the configured URL.
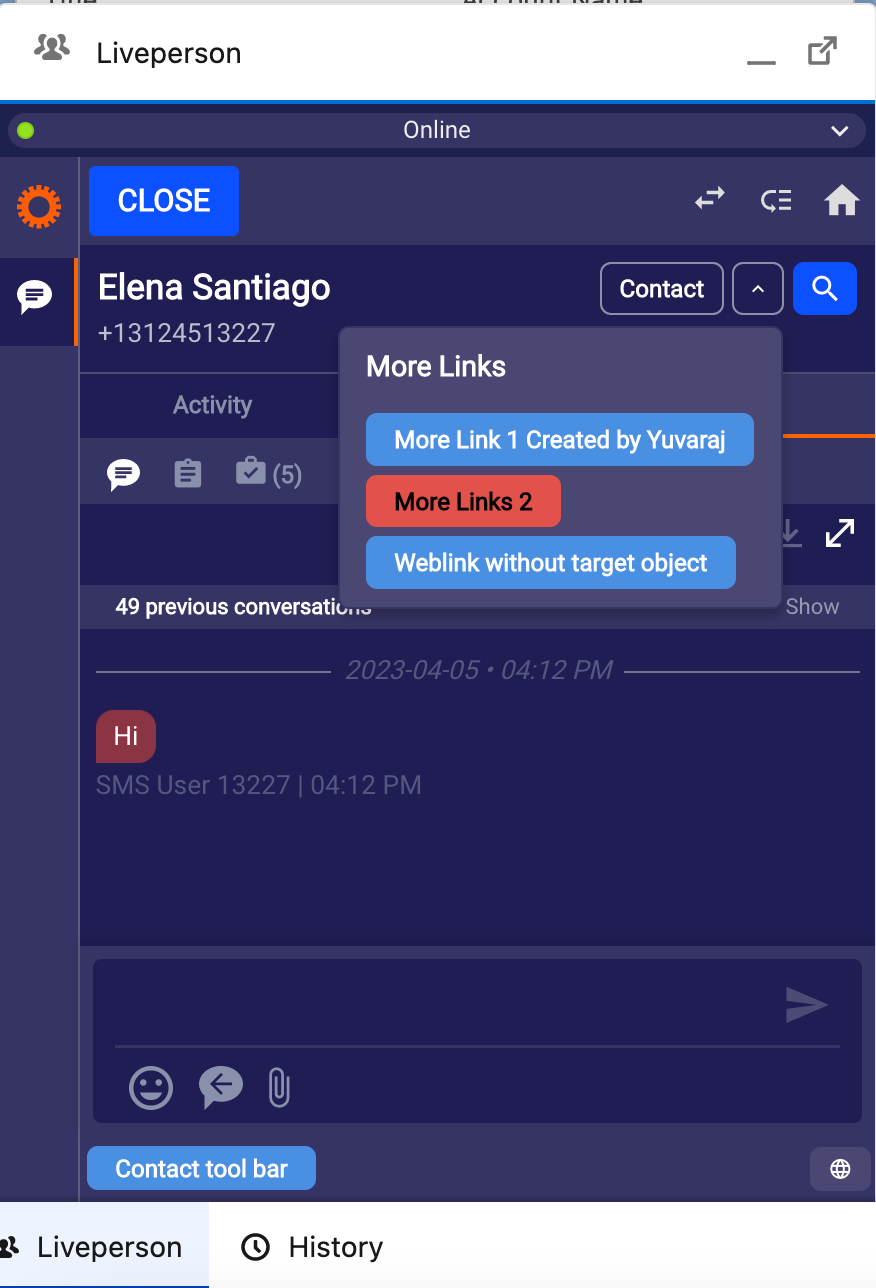
- Toolbar: Displays in the lower-left corner of the UI. The links only display during interactions, such as Conversations, and phone/email attributes for use as parameters in the configured URL.
Managing messaging conversations
Beginning your shift
When you start your shift, you should change your status to online in order to start receiving messages. To change your status, click on the top left corner to open the drop down status menu and select Online. Once you do that, conversations from the queue will be assigned to you based on their priority. If there are already existing conversations in your queue, you will see them here, in the Active conversations list.
Warm up: staggered incoming conversations at the beginning of your shift
Some contact centers opt to configure the ‘warm up’ function for agents. If this is enabled, the incoming conversations assigned to you at the beginning of your shift will be slower and build gradually. The warm up feature will send you one message at a time with a defined interval between the first few incoming conversations, allowing you to adjust to your shift and get into the flow of your messaging workload.
Taking incoming conversations
The updated Agent Workspace uses SLA to prioritize conversations on your behalf, allowing you to simply respond to the conversation at the top of the list. When you first enter the conversation list you will first see that there is no conversation selected. Click on the conversation at the top of the list to start handling conversations.
You should always answer the conversation at the top of the list. You can also scroll manually through the list if you need to answer another conversation. When you receive incoming conversations, they will automatically be sorted into your conversation list in the order that you should answer them, based on their SLA. Also, after you respond to a conversation it will be resorted and prioritized accordingly
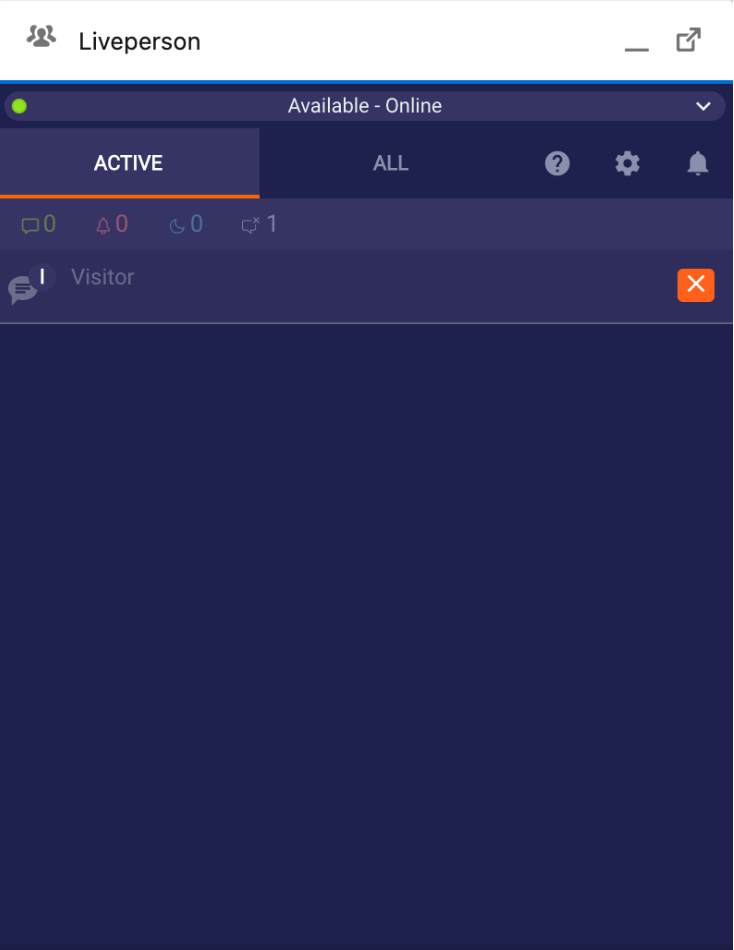
Incoming message alerts
You can now see the number of incoming conversations in the navigation bar. A notification will appear on the Agent Workspace icon indicating the number of conversations with incoming messages, and a green dot will appear on the conversation in the list that has a new incoming message.
New Customer Interactions and Incoming Messages

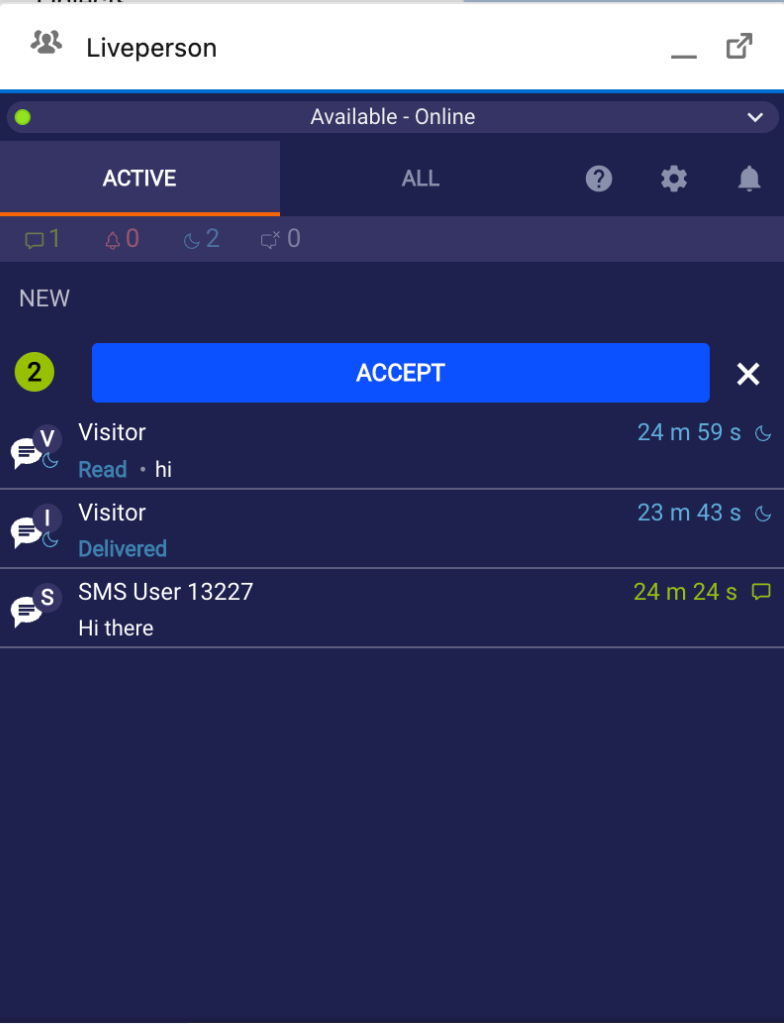
Salesforce connector - Incoming message alerts
Ongoing Conversation with new incoming message

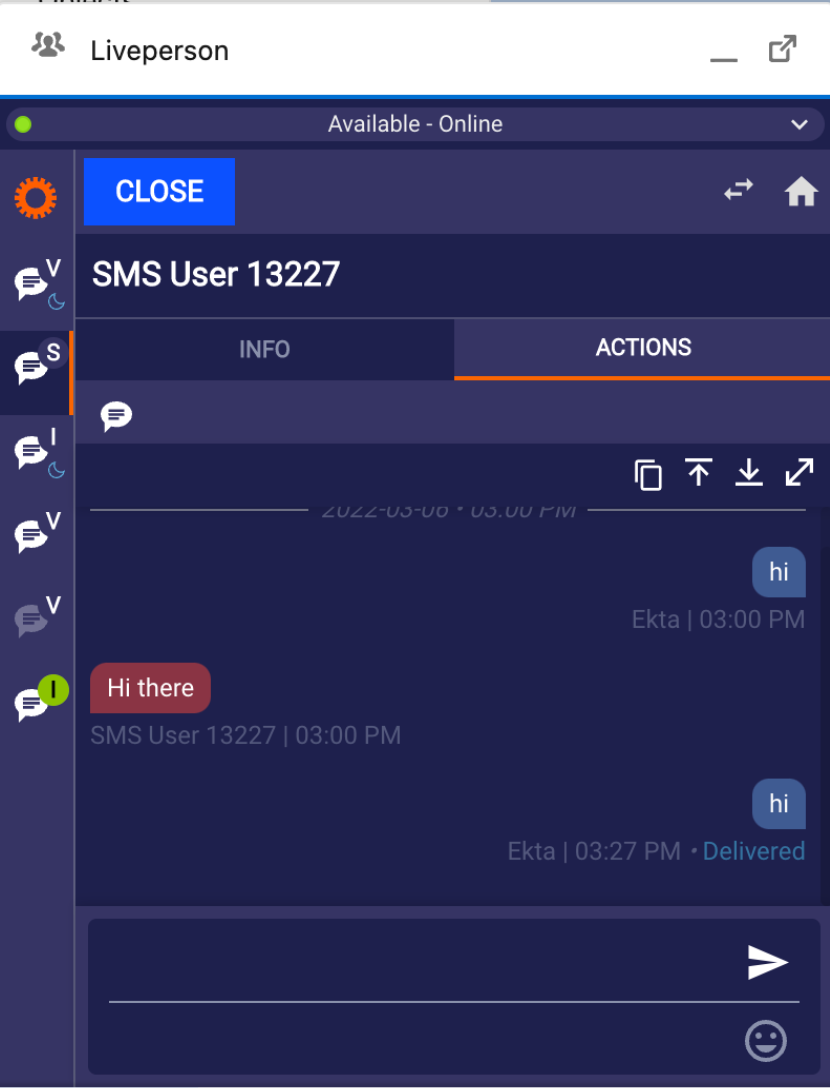
Salesforce connector - Ongoing Conversation with new incoming message
Once you start handling conversations, you should work through the conversation list from top to bottom. Once you handle a customer, more customers can come in, and when you finish the conversation you will be taken to the next conversation in the list. Each selected conversation will appear in the left navigation bar to allow easy access to the conversations you are actively working on. Once the conversation is closed, you may deselect it from your purview by clicking on the orange “x” option. This will remove it both from the “Active” Conversations and the left navigation bar.

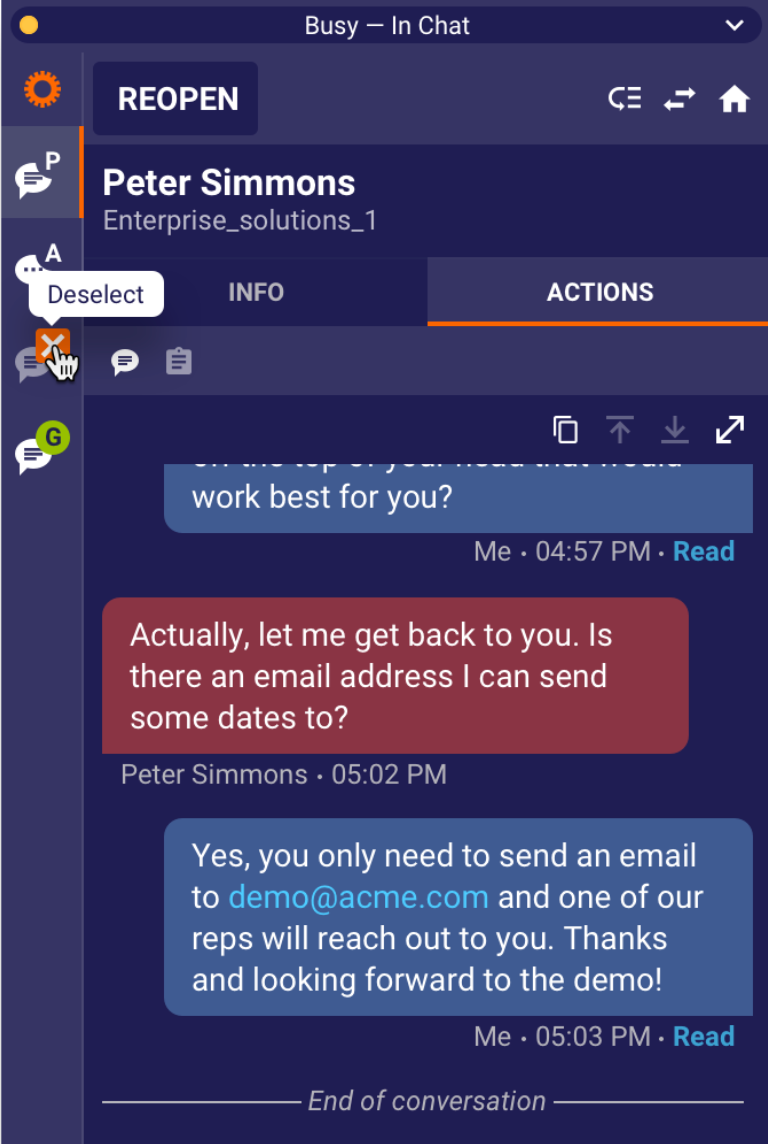
Salesforce connector - “Active” Conversations

Salesforce connector - Remove “Active” Conversations
Conversations that reach your workplace have already undergone detailed analysis and prioritization. Based on the configurations selected by your contact center manager, there are two ways to accept incoming conversations into your workspace:
- Auto accept: This means conversations will automatically enter your list and be sorted without any action on your end, and your conversation list will automatically update when a new conversation is added. This is a more popular configuration for call centers.
- Advanced mode: For this option, incoming messages will ‘ring’ in your workspace and you’ll have to manually click to open and move this conversation to your conversation list, sorted by SLA. If you do not click to accept an incoming conversation and other agents are available, it will circle and ring to other available agents.
Matching the consumer to the consumer profile in Salesforce
When you receive an incoming message that is associated with only one record in your CRM, the match will be automatically detected and the customer name will be reflected in the Conversation. If the correct record is associated with the phone number, email or name, you do not need to perform any additional actions. You can click on the button on the contact card to be taken to the customer record in the CRM or this may automatically pop up depending on how this is configured in your account.
NOTE: There are two reasons that a record might incorrectly appear in a Single Match scenario:
- The phone number/email is associated with the wrong record in the CRM.
- The phone number/email is associated with multiple records (in the case of a business line) but is only saved to a single record in the CRM.
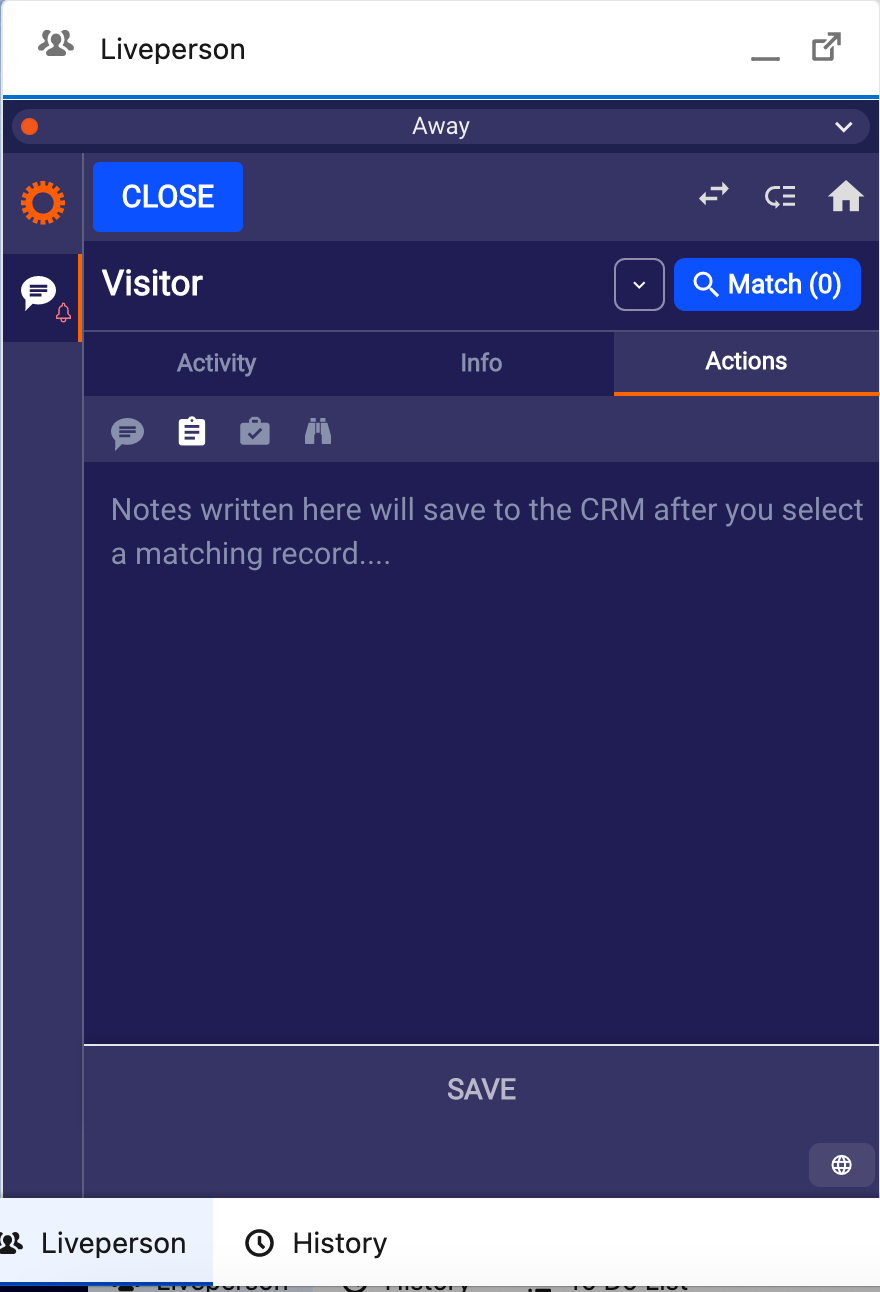
No Match Scenario
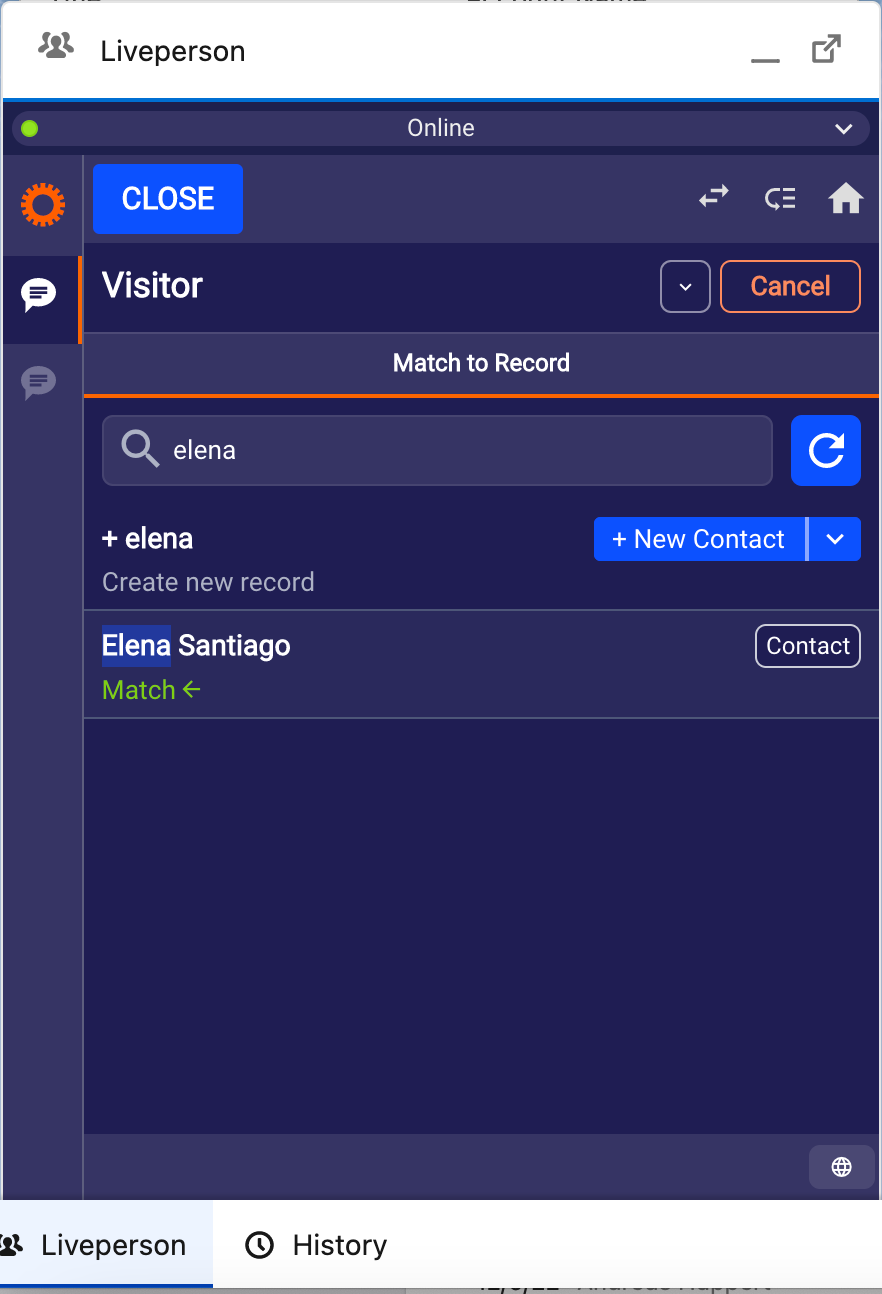
If there is no matching entry found associated with the incoming phone, email or name, you have the ability to manually search using the name against the CRM. After the first few letters are typed, it will automatically display the list of entries found in the CRM.
You have the ability to save the matching entry once you have found the match. The next time you receive an incoming message from the phone or email, this will automatically match to this entry.

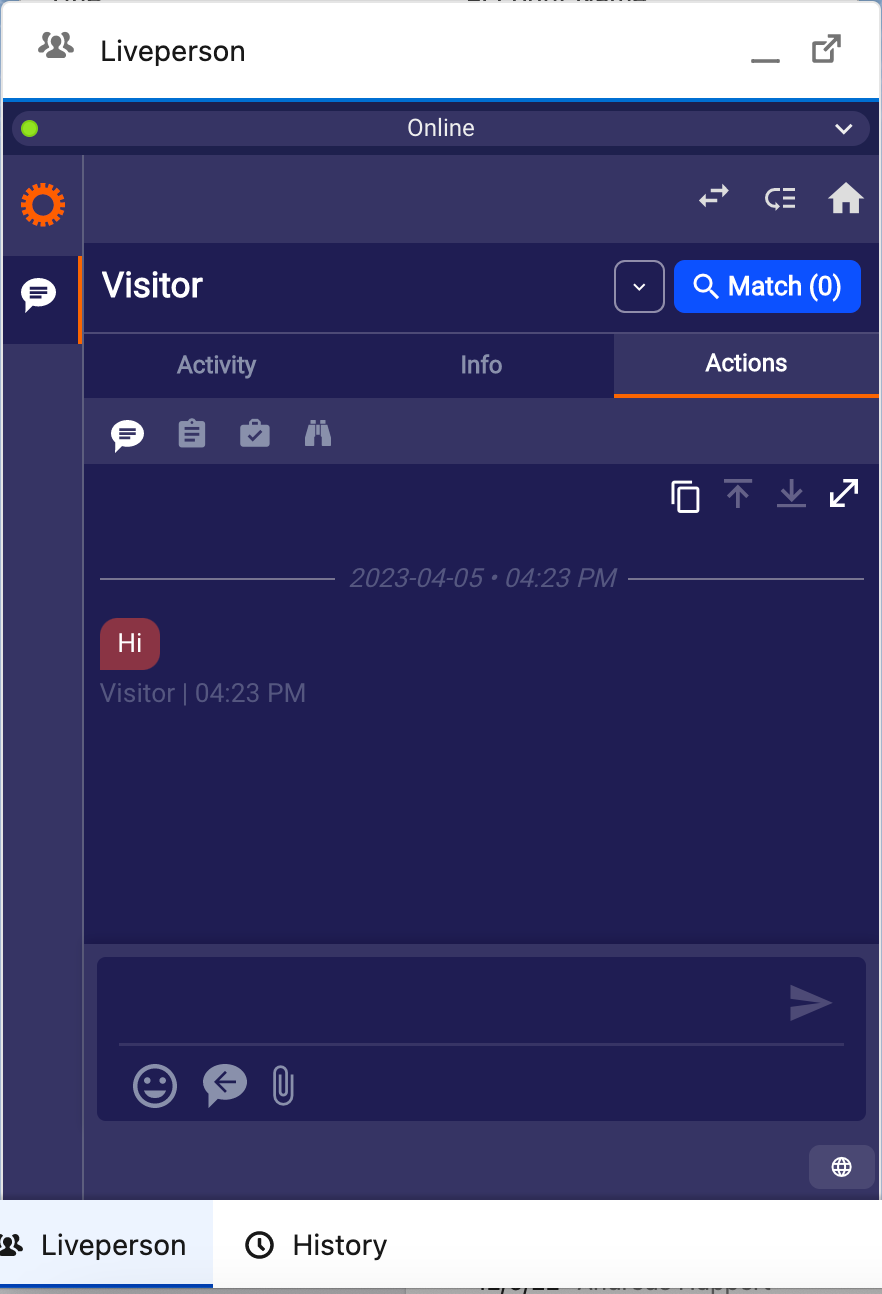

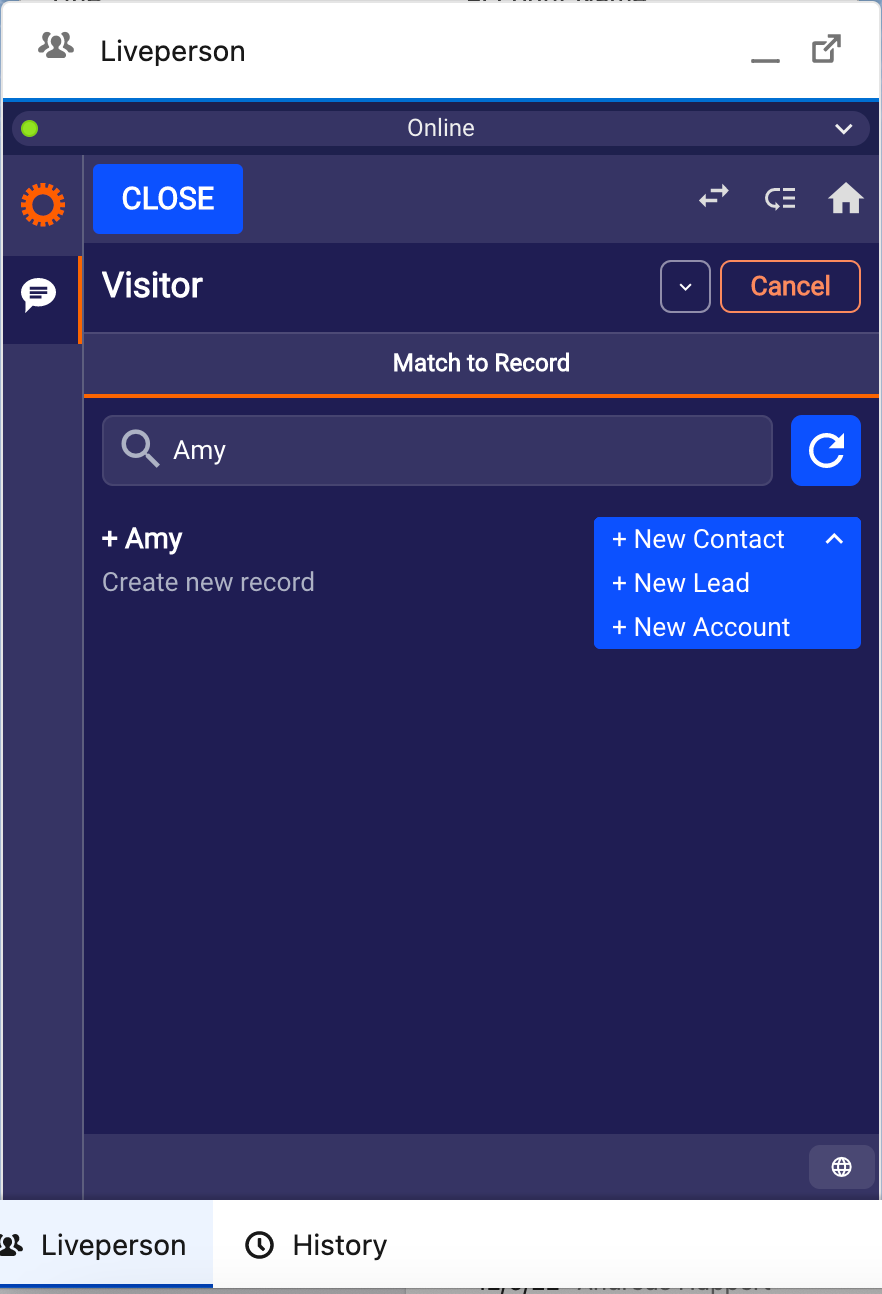
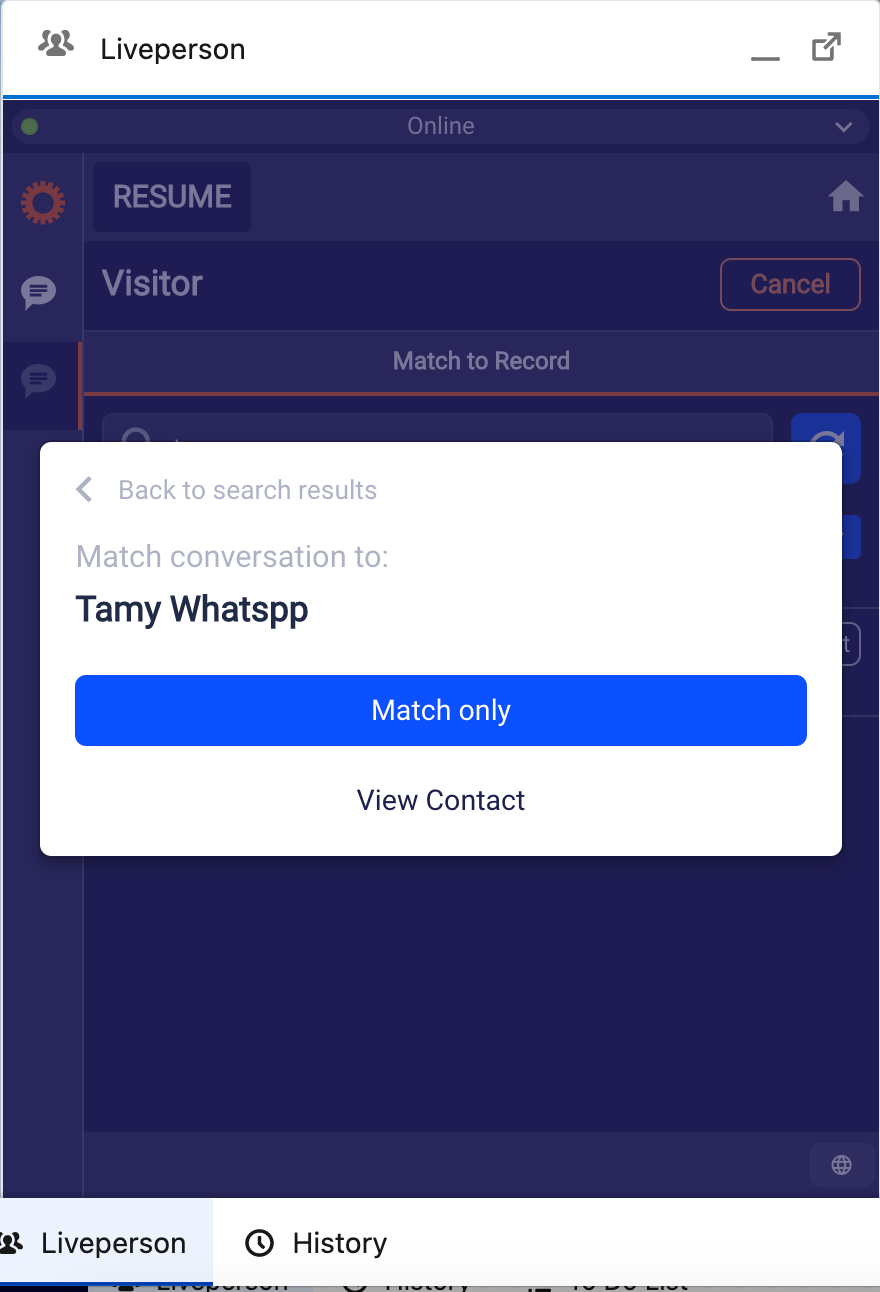
If the CRM does not locate a matching record, you can create a new one as a lead, contact or account. You will only be able to match the record but not save it to the CRM if the consumer information such as name, phone or email are unknown. This will at least allow all the conversation context to be stored in the CRM for the matched customer.
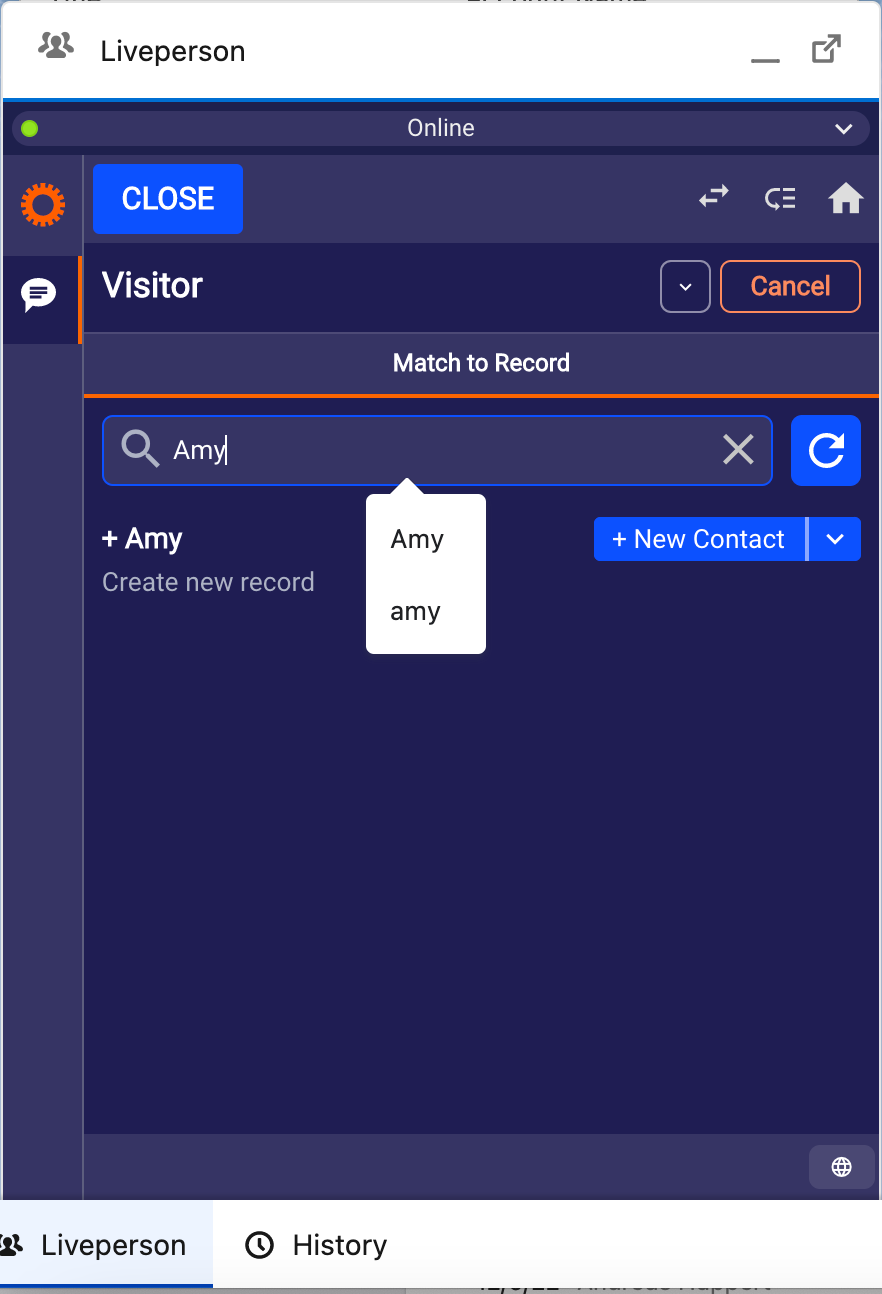
Multi-match scenario
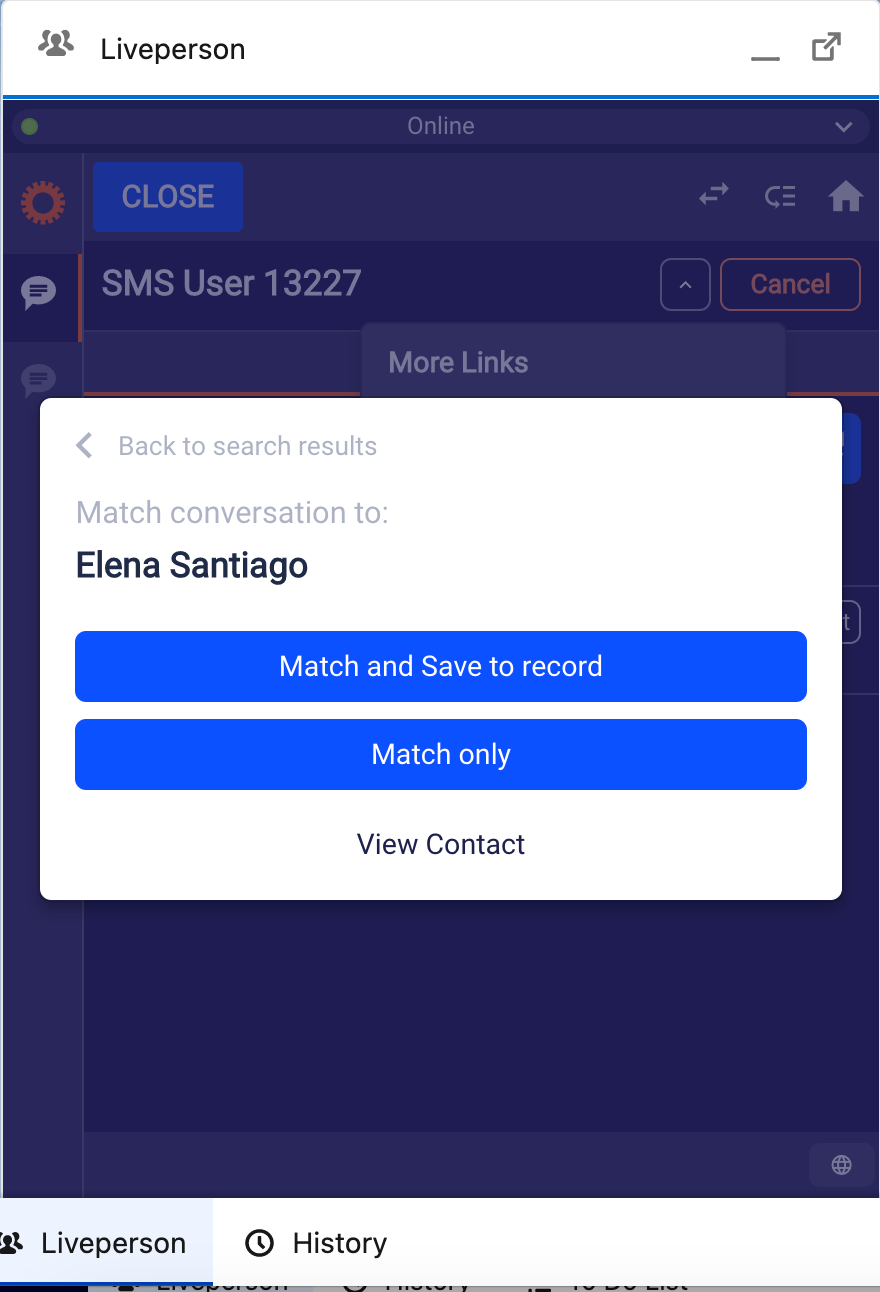
When multiple records match the phone number, email or name on an interaction, You may view all matching records to enable you to quickly pair the phone, email or name with the correct profile.
The multi-match scenario can be resolved in two ways:
- If your search locates the relevant CRM record, simply click on the record and assign the phone number or email to that record as shown in the screenshot below.
- If none of the matches in a multi-match scenario include the record you need, you can create a new one.
If the customer match is incorrect, you can simply unassign the match and re-match it to the correct record. This can be done by clicking on the search button next to the matched name and then by clicking on the “Unmatch record” link below.
Automatic Triggers
If set up by your administrator, multiple triggers and actions are supported with Salesforce. For instance, if a matching record is found, the corresponding contact/account/lead can be automatically opened in Salesforce. Please note this is only possible with certain feature configurations.
Return to the “Active” conversations list
You can click on the home button to return to the complete list of active conversations at any time.
Understanding the context & history of conversations
There are several tools in place to help you access the information you’ll need to provide excellent service and understand your consumers and their intent.
- Previous Conversations: For repeat customers, any previous messaging history will be displayed directly in the conversation transcript. This way you can simply scroll up to review previous conversations. The conversation history will be stored within the conversation for up to 13 months.
- Conversation history: For each conversation in the “ALL” tab, you can select a conversation with a customer and view the full conversation transcript.
- Consumer Info Tab: This tab automatically displays important information about the consumer who is messaging you. This will be a customized view of contact/account/lead fields from Salesforce and will include information from LivePerson such as the source channel of the conversation or any custom variables collected by your contact center.

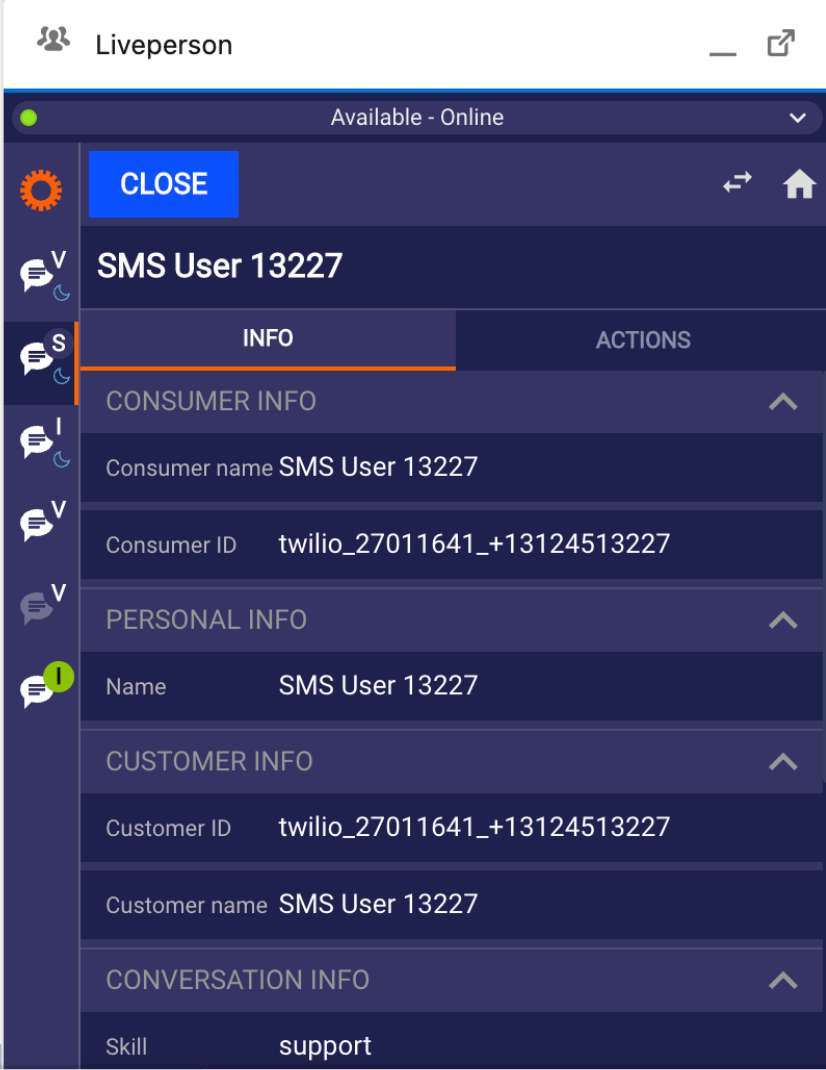
Salesforce connector - context & history of conversations
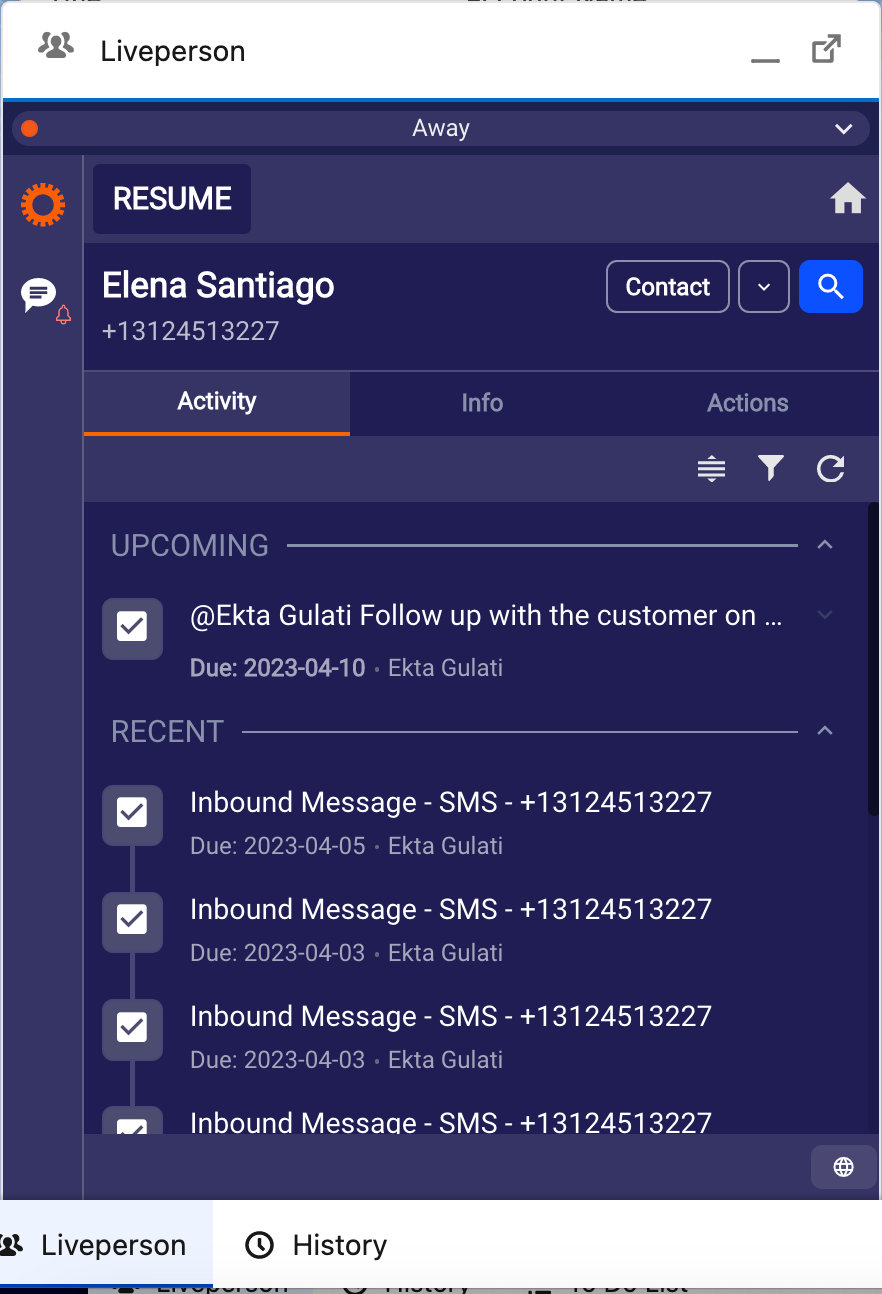
- Activity Tab: The Activity tab provides the context of the matched record. By default, it displays open activities and completed activities saved in the CRM. The Activity tab includes tasks, follow-up tasks, cases and opportunities associated with the matched record. Each activity and event has an icon next to it that allows you to access the CRM record with one click. Please note that LivePerson creates a task, either automatically or upon note save depending on the admin setting, in Salesforce for every Inbound Message and associates the Conversation transcript with this task or any related cases and opportunities with this task. For unmatched records, the Activity tab will include the automatically created task for the Inbound message.
Note: Please do not delete any task created for the inbound message or the follow up task or the related case/opportunity in Salesforce. Doing this will cause may cause the link between the app and the Salesforce to be corrupt for that specific interaction.
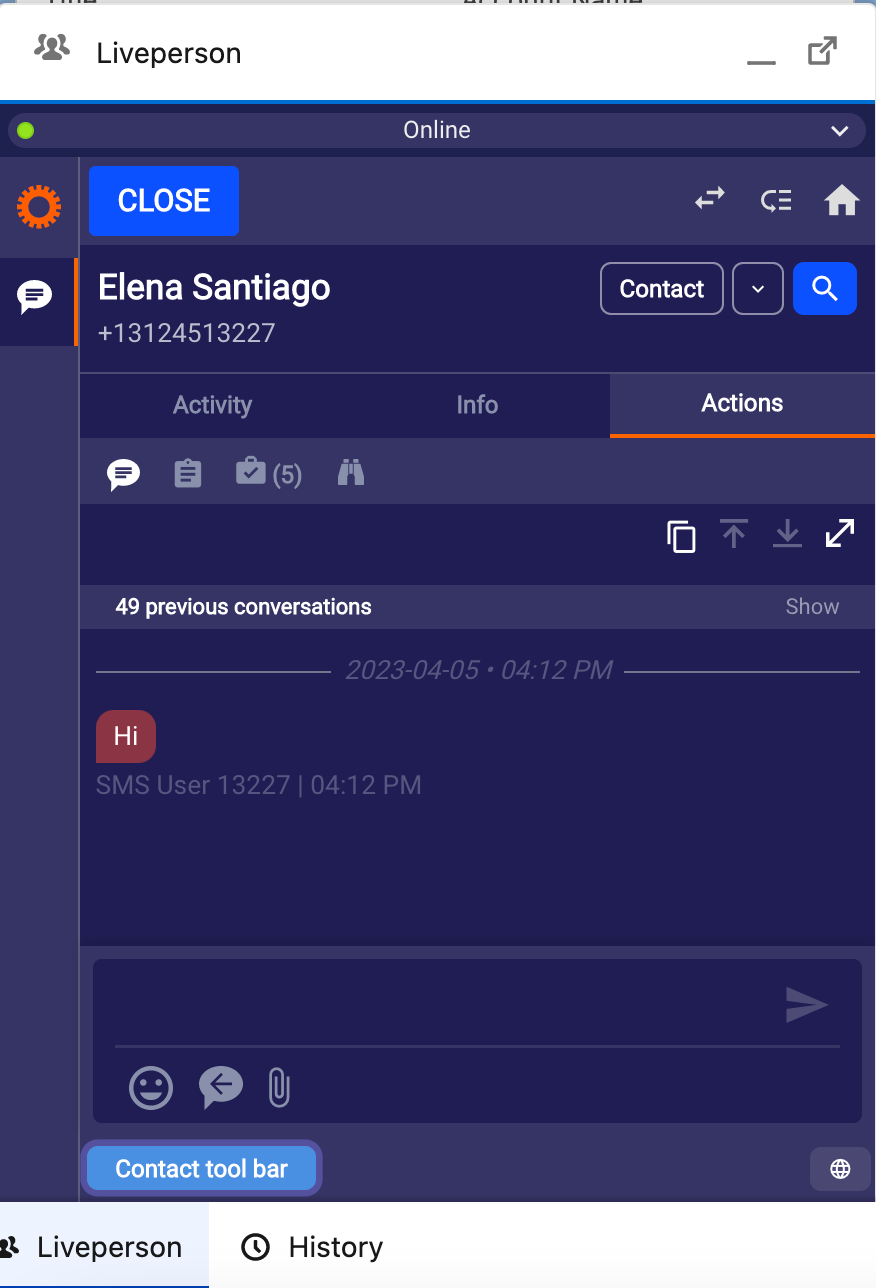
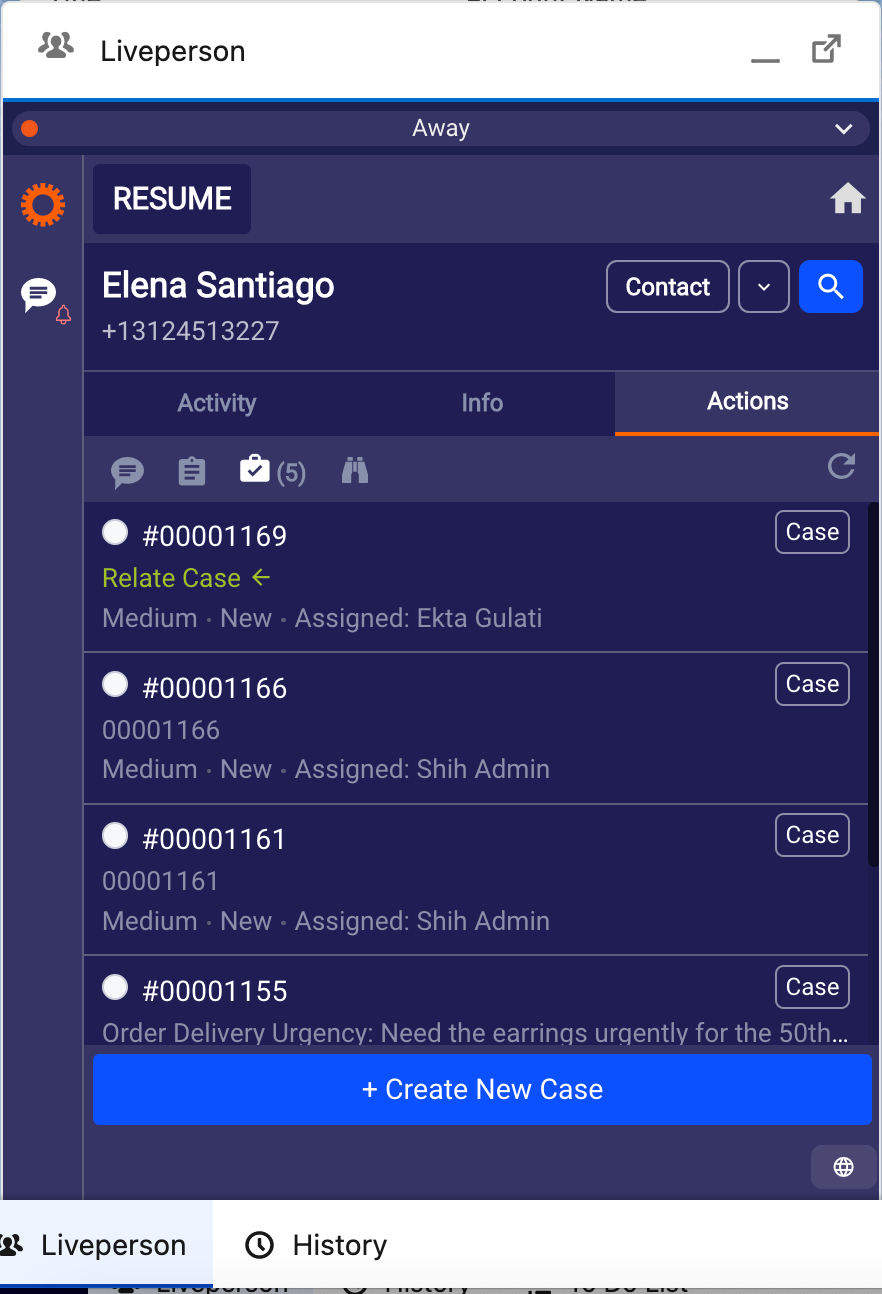
Relate an interaction to a Case/Opportunity
The Actions tab includes allows your users to link their customer interactions to existing (open or closed) cases or create a new case or opportunity while messaging with the customer. All cases and opportunities are listed conveniently under the suitcase and binoculars icons in your UI, with a case or opportunity creation button (depending on the user selection) located at the bottom of the tab. The UI will show a max of 10 most recent cases or opportunities.
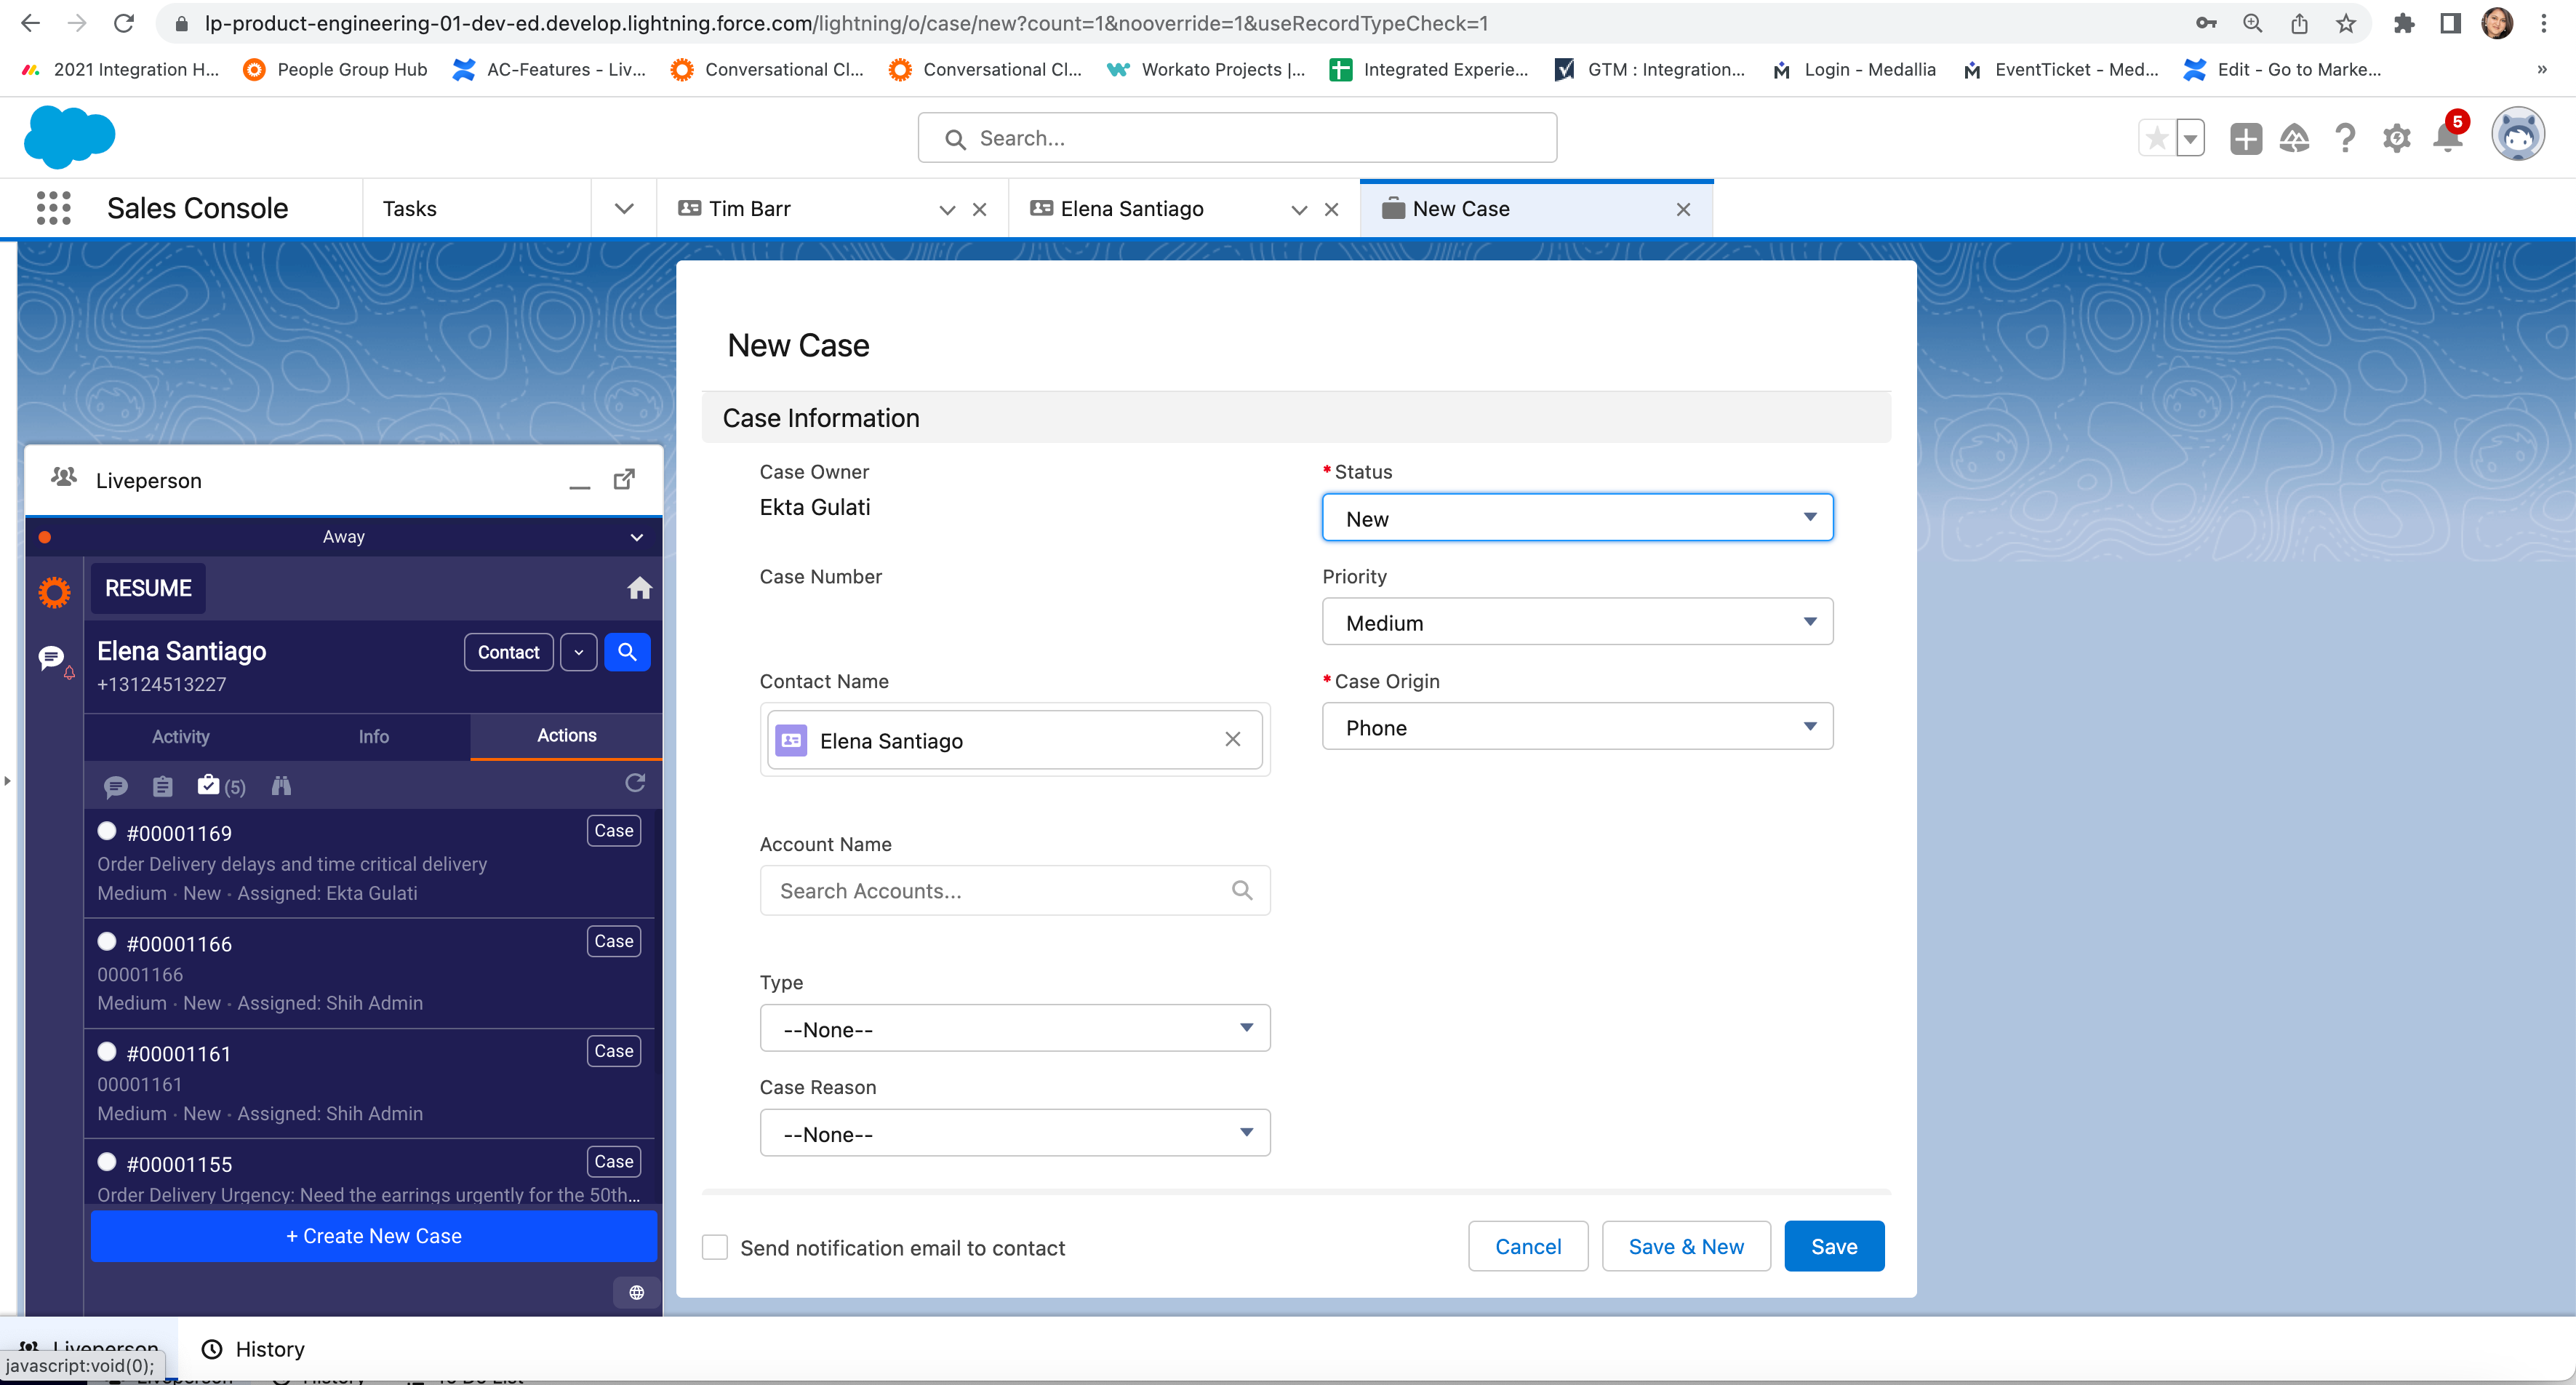
Out of the box, the Create New Case or Opportunity button will pop up a page to the standard case or opportunity creation page in your CRM. LivePerson will pre-fill certain fields based on the match found with the account/contact/lead.

Replying to consumers
Predefined Content
You can reply by using free text, but we recommend using predefined content. Your contact center manager would have created a set of quick answers to the most common inquiries that you can easily enter into the conversation. By choosing predefined content templates, you can lower your average response time by saving time that would have been spent typing out responses.

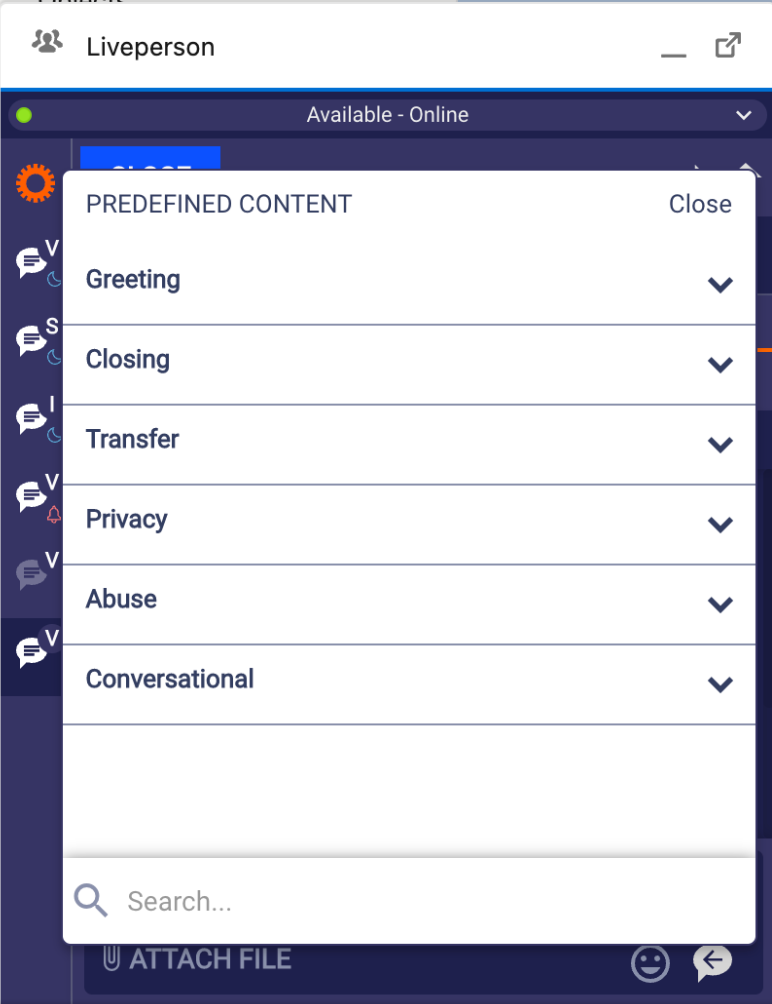
Salesforce connector - Predefined Content
You can use the search text box to search for the desired content. Please note: The search results will not include category names.
Rich Conversations
There are many tools at your disposal that can be used to foster relationships and carry out effective conversations. Rich Conversation capabilities enhance the consumer experience by providing a richer, more engaging channel of communication.
The following types of Rich Conversations are being supported for the enhanced Agent Workspace:
- Consumer to agent photo sharing
- Agent to consumer file sharing

Salesforce connectors - Rich Conversations
The following file types are supported: JPEG, JPG, PNG, GIF, PDF, DOCx, XLSx, and PPTx when the corresponding AC features are enabled.
Additional actions
While conducting a conversation, there are a few actions you can take.
Copy to Clipboard: Click on the Copy to Clipboard icon in a conversation.This action copies all the text of the conversation that can be copied to anywhere you need, such as into a CRM record.
Transfer conversation: Select a skill or agent status to transfer your conversation to. Use the search bar to find the relevant skill or agent. Once you do this, the conversation will move out of your workspace and enter the relevant queue. The conversation will advance in the queue according to the queue policy defined on the account. By default, this conversation will be handled by the queue like any other conversation, with no weighting or preference given to it. Transferred conversations are marked as actionable by default, meaning that they will not be auto-closed by the system until they have reached an agent.
Back to queue: You can send a conversation back to the queue where it will be redirected to another online agent. A queue prioritization rule can be defined so that conversations that are sent back to the queue will receive priority for handling, pushing them to the top of the queue using a velocity factor. Sending a conversation back to the queue does not affect it's actionability, so the conversation may be auto-closed if it is inactive.
Resume conversation: This action reopens a closed conversation in order for you to follow up with a customer.
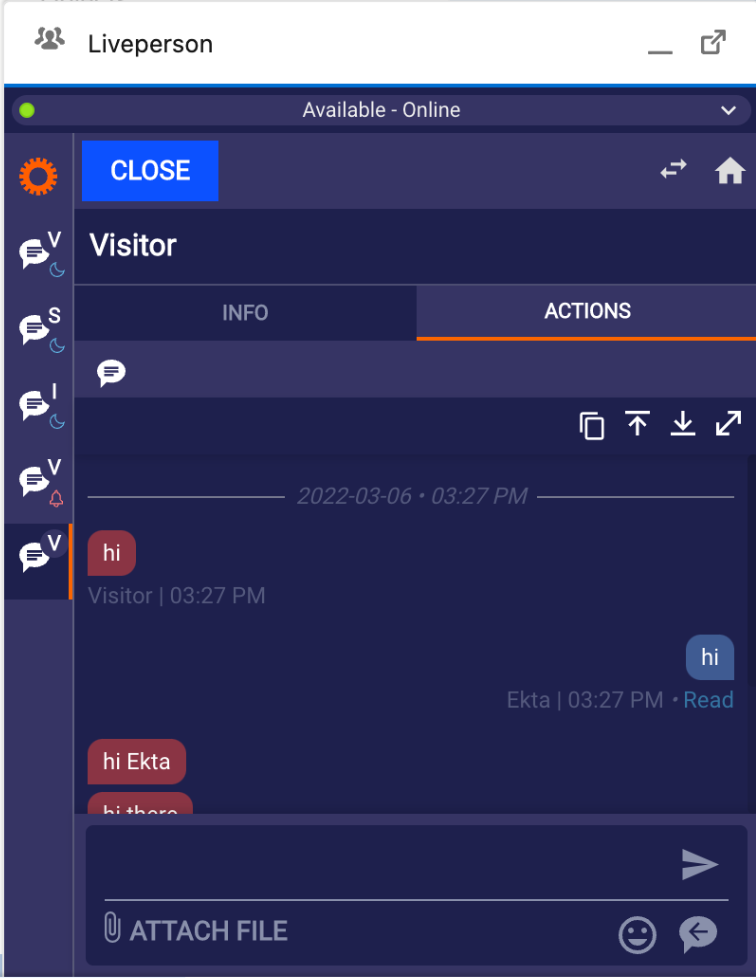
Closing conversations
The nature of messaging conversations is that they are ongoing and can be resumed at anytime. However, in order to manage agent work streams and ensure consumer requests have been fulfilled, conversations can be marked as ‘closed.’ A closed conversation can be reopened again - either by the consumer or by the agent - with the entire history kept intact.
The conversations can be marked as resolved or closed, either by the consumer or the agent. Within the conversation window, customers have options, one of which is to select to close a conversation. For messaging channels such as SMS or Facebook Messenger, where a custom ‘options’ table is not available, customers will not be able to mark conversations as closed. As an agent, you can close a conversation when you know that it has been resolved. Closing a conversation is done via the “CLOSE” button within the conversation window. It is important that you close conversations as soon as you are confident that they are resolved in order to clear your work queue and keep your performance KPIs accurate.
At the end of your shift or during downtime you can use the status filter to filter closed conversations back into your Active conversations. This will allow you to review your conversations and ensure that they were properly documented. Closed conversations are stored in the Active list for between 24 hours up to 14 days, depending on your contact center's configuration. Conversations that exceed this can be found in the All Conversations list.
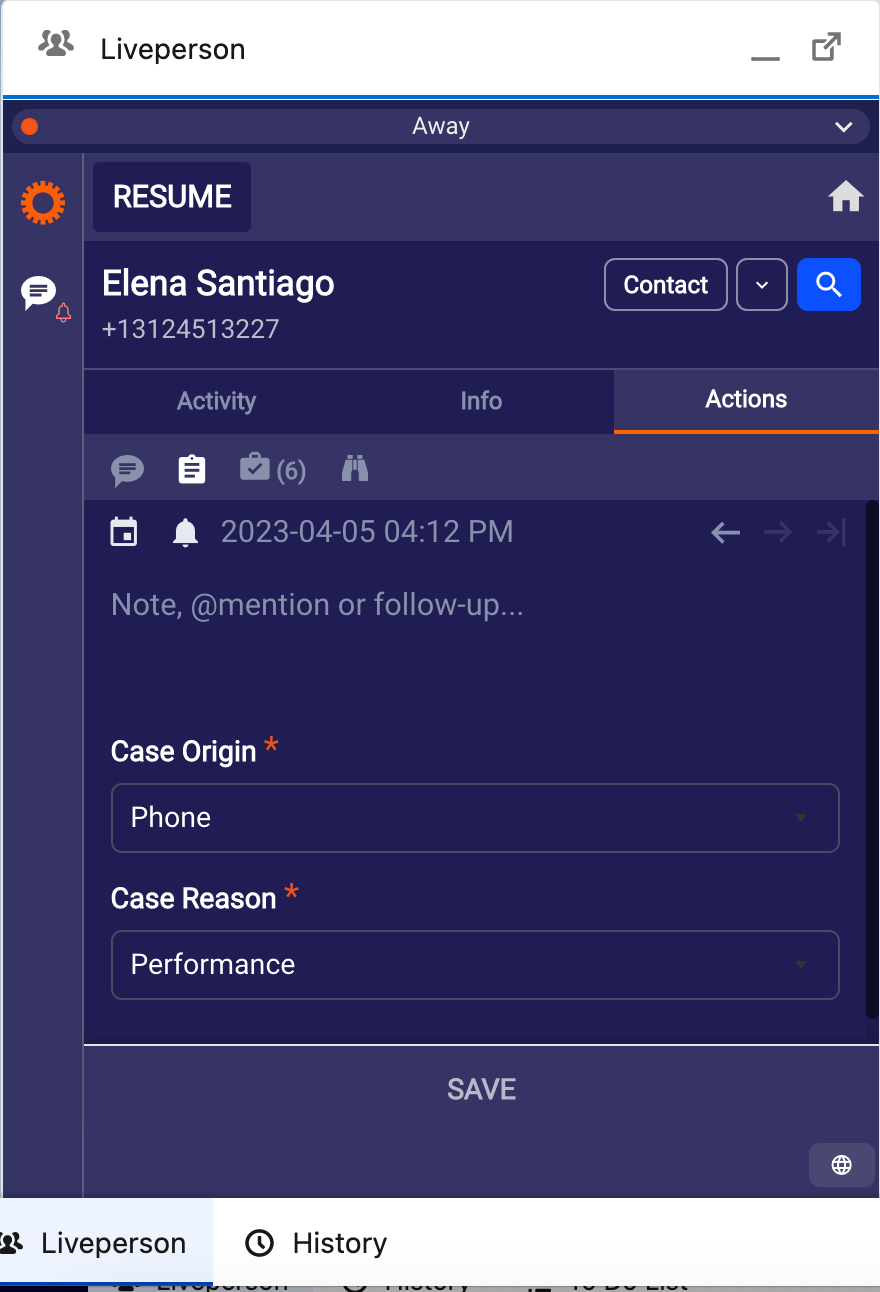
Note Logging
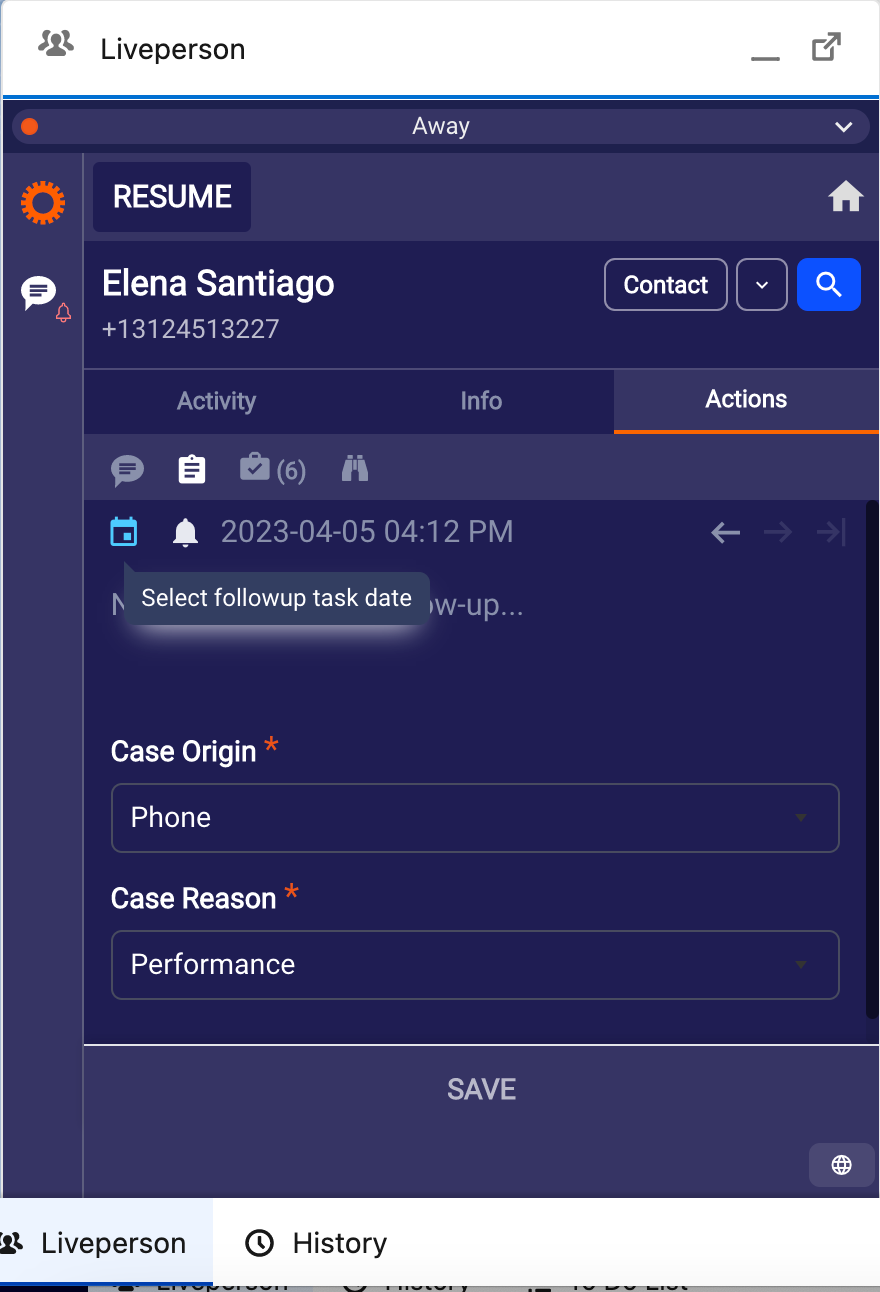
Before closing a conversation, you may add specific notes associated with the conversation. This can be added in the form of free text or you may also select dispositions or specific outcomes of the conversation from the drop down if this is configured in your account. The dispositions will only show if there is a match or if the interaction is associated with a case or opportunity because the fields in the drop down are coming from these entries in the CRM. This saves the notes in the comments field of the Salesforce task that was created for the corresponding conversation. If your admin chooses, this note or follow up task could be stored as an event in Salesforce. This is a setting that needs to be set in the features.
Please note, saving notes and making changes to notes will also update the notes in LivePerson Conversational Cloud.
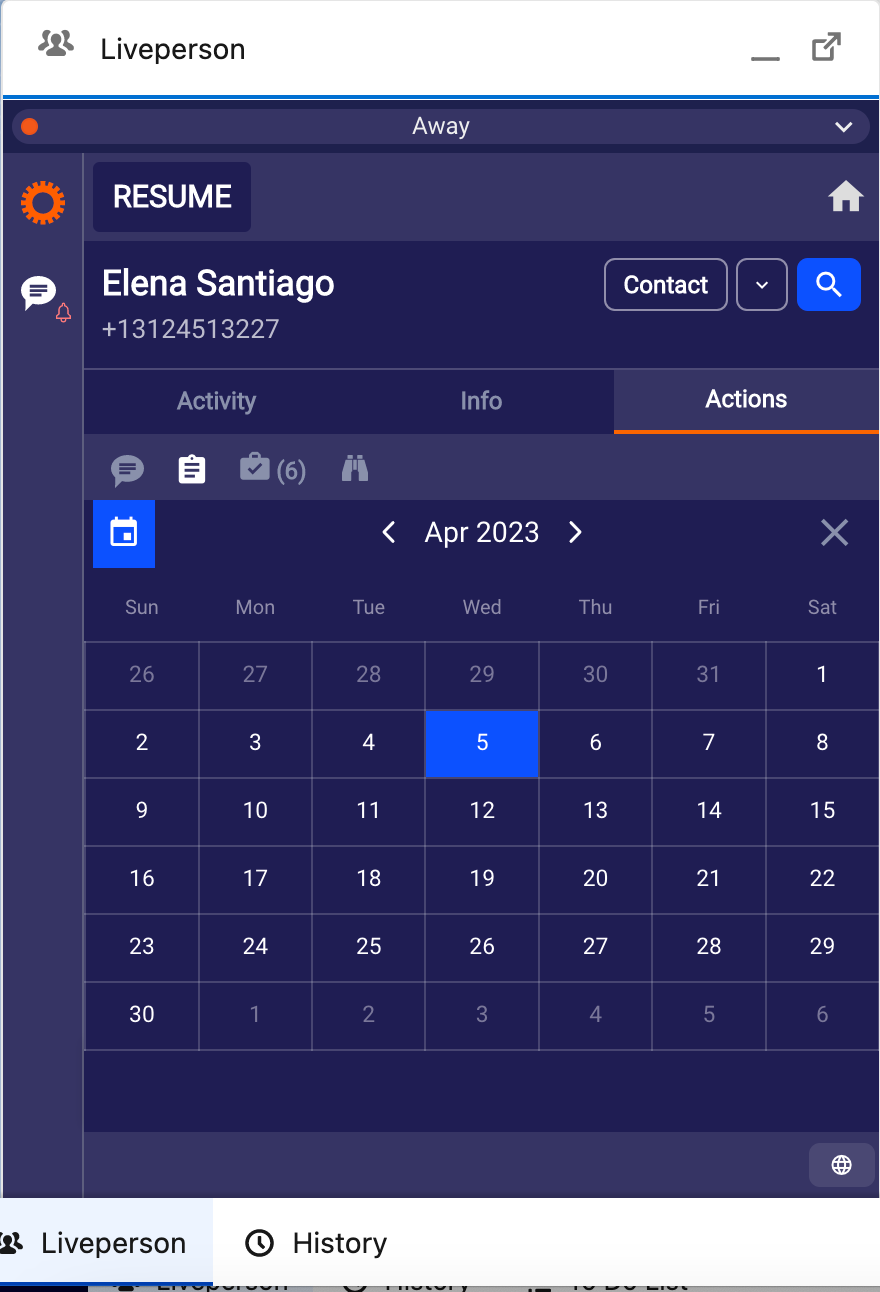
In addition, you may use the date picker to select a follow up date and task. This could serve as a reminder to close the loop with the customer. Please note, follow up tasks can only be created if there is a customer match found.
You may also use the @mention feature to mention another agent. This sends an email and a notification in the application to the agent being mentioned and creates a follow up task associated with the contact. You may choose to transfer the conversation as well. The agent mentioned in the note will not have any visibility to the conversation in his open conversations unless it is transferred to him/her explicitly. A task also created and linked to the chat transcript for every inbound message in the CRM.
@Mention
How @Mention works
Upon typing "@", the application automatically displays a list of CRM users by name or username (email address), based on your organization's preference. You may then click on a user or type the complete name or username of the user to @mention.
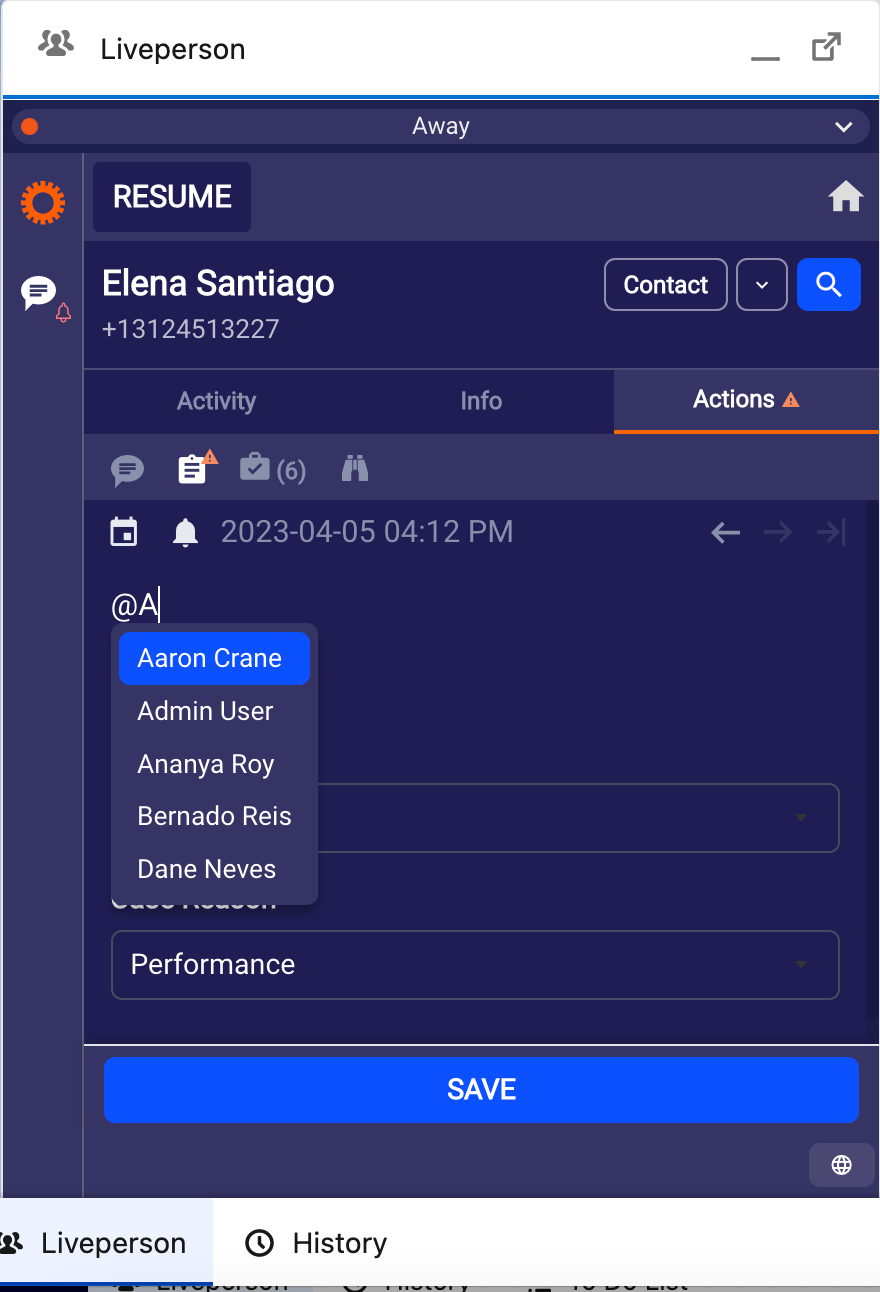
Selecting one or more users to @mention causes the bell icon, at the top right corner, to light up. The bell icon indicates that the app will send the mentioned users an email with a copy of your notes from this customer interaction.
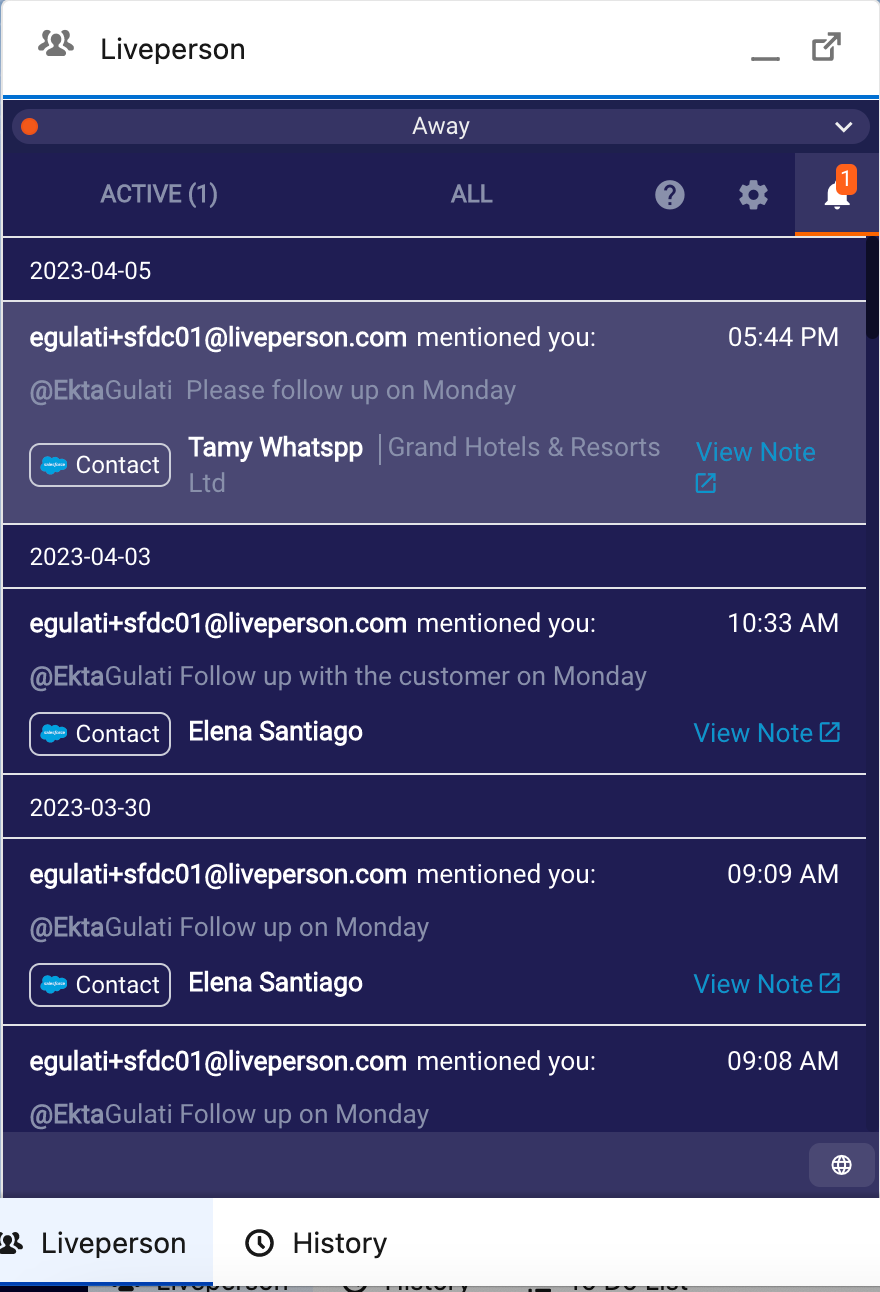
Additionally, the user that is @mentioned receives a notification in the IU, and also can open the notes in Salesforce from their UI. New and historical in-UI notifications are viewable by. clicking the bell icon in the top-right corner of the UI.
Dispositions
Quickly assign attributes and outcomes to interactions
As part of the conversation wrap up, you may also select from a drop down of options which updates the entries directly in Salesforce. You may designate an Opportunity Stage Lead status as “Qualified” or “Hot” to help establish priority, while designating the customer “Communication Preference” at the same time. Dispositions are highly adaptable and may also be configured to help record an interaction's purpose or outcome.

Surveys
Post Conversation Survey: Upon the closing of a conversation (whether done by the customer, by you or automatically) the Post Conversation Survey may be triggered to the customer (as defined by your brand). This survey consists of CSAT, NPS or other custom questions. The CSAT scores calculated for your performance in the KPI bar are derived from results calculated from the Post Conversation Survey.
Auto Close for inactive conversations
For conversations that are awaiting a consumer response, the auto close mechanism will automatically close these conversations after a length of time that has been defined by your contact center manager. Conversations will not be subject to auto close if they are pending an agent’s reply or if you have set up a manual SLA. Learn more about auto close for messaging here.
Taking breaks & ending your shift
Before you take a break
- Set your status to “Back Soon” or “Unavailable” so that you do not have new incoming conversations assigned to you.
- Don’t leave conversations waiting. If you have any active conversations, you can take one of these two actions:
- Let each customer know that you will get back to them in x amount of time and set the manual SLA to reflect this commitment
- Return conversations to queue so that another agent will be able to answer the consumer (you can leave notes to help your colleagues)
Before you leave for the day
- Set your status to away about 10 minutes before you are ready to leave so that you do not receive new incoming conversations (refer to your company’s manual on guidance for the accurate amount of time in advance)
- Review your open conversations and resolve the ones that can be closed
- Determine which conversations you want to continue servicing the next day, let the customers know, and manually set the SLA for the next day
- For conversations that should continue immediately - return them to the queue so that another agent will be able to answer the consumer (you can leave notes to help your colleagues) or transfer them to another agent so that another agent will be able to answer the consumer.
- Filter closed conversations into the list to review the conversations you handled during the shift and ensure that everything has been documented properly.
- If you filtered out the idle conversations, be sure to filter them back into the list and either return them to the queue or send them to another agent before you wrap up your shift, otherwise they will remain assigned to you and go unanswered until your next login.
- Logout of your workspace
General Settings
Home
Clicking on the home button at any time will take you back to the list of Active conversations.
Settings
Go to settings to simply review your user and account information or to make some specific changes to your language preference, date/time formats or the layout and defaults you would like to set and retain each time you login.

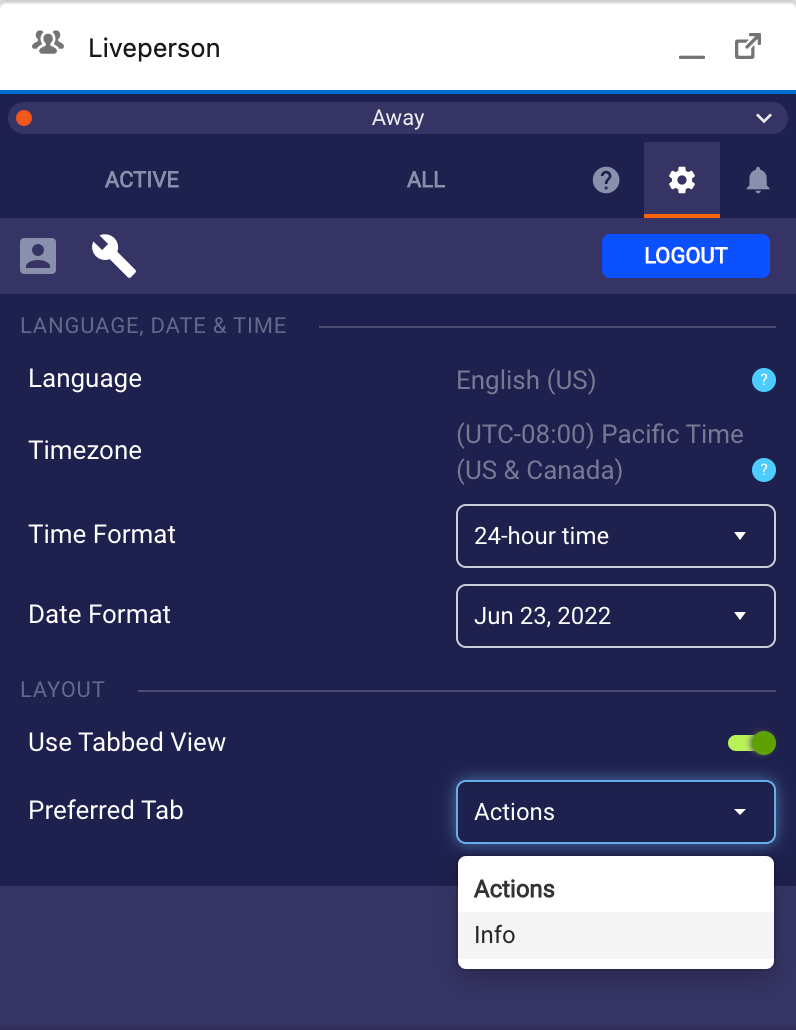
Salesforce connector - settings
Notifications
The notifications area displays notes you've been tagged in (sorted by date), as well as update reminders for the application.
Language Support
The following languages are supported in the application:
- Chinese Simplified
- Danish
- Dutch
- English (UK, US)
- French (France, Canada)
- German
- Italian
- Japanese
- Polish
- Portuguese (Brazil)
- Spanish (Latin America, Spain)
- Swedish
Missing Something?
Check out our Developer Center for more in-depth documentation. Please share your documentation feedback with us using the feedback button. We'd be happy to hear from you.