Whitelist your domains
You can prevent attackers from using the LivePerson Monitor Tag in unauthorized domains, and visitors from luring agents to download malicious content.
Admins are able to define domains which are allowed to send monitoring data, as well as from which domains they are willing to accept engagements. You can define an allowed domain by adding it to your whitelist.
On the flip side, you can add a domain to a blacklist, allowing you to prevent unwanted activity, such as the placement of a chat button on a website.
Once the capability is enabled, only the domains in the whitelist will be monitored and domains in the blacklist will not be monitored.
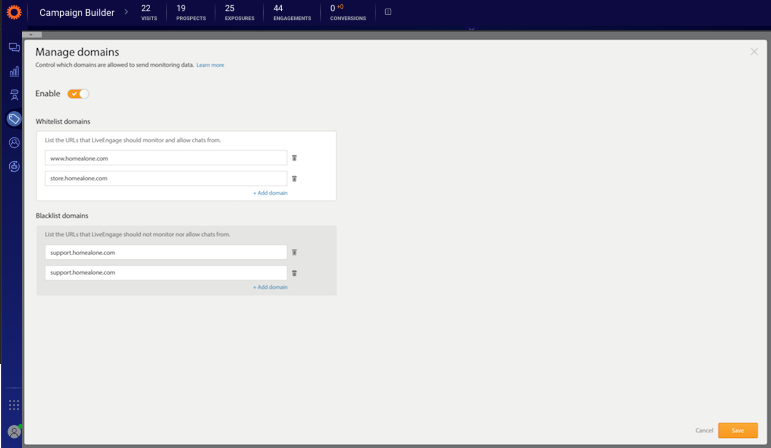
To achieve this end, admins block domains by adding them to the blacklist, and allow domains by placing them on the whitelist, as shown in the illustration below. Once a domain appears on the blacklist, it is blocked from sending monitoring data (even if it also appears on the whitelist).
To include multiple subdomains, you can use wildcards (*.) at the beginning of the domain name. For example, to include both www.customer.com and subdomain.customer.com use the syntax *.customer.com.
To include domains and subdomains you should add both domain name and subdomains separately. For example, to include customer.com and www.customer.com and subdomain.customer.com add both customer.com and *.customer.com to the whitelist.
It is important to add Liveperson's domains (.liveperson.net, .liveperson.com, .lprnd.net, .lpsnmedia.net) to the list of monitored domains, to ensure your service works efficiently.
To enable monitored domains:
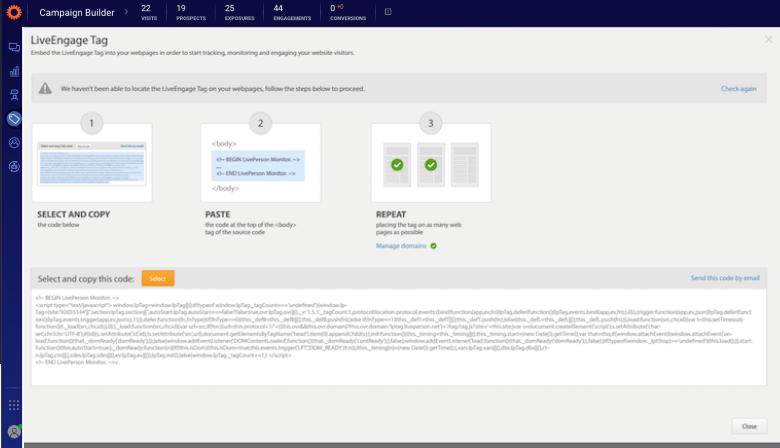
On the Web Tag page, click Manage Domains.

LivePerson tag Manage Domains
Type in the domain names in the relevant fields. Ensure you include the LivePerson domain names mentioned above.

Click Enable and then click Save.
Missing Something?
Check out our Developer Center for more in-depth documentation. Please share your documentation feedback with us using the feedback button. We'd be happy to hear from you.