Salesforce Widget Overview
Introducing LivePerson's Salesforce Widget along with its agent experience, prerequisites, enablement, access, and key components.
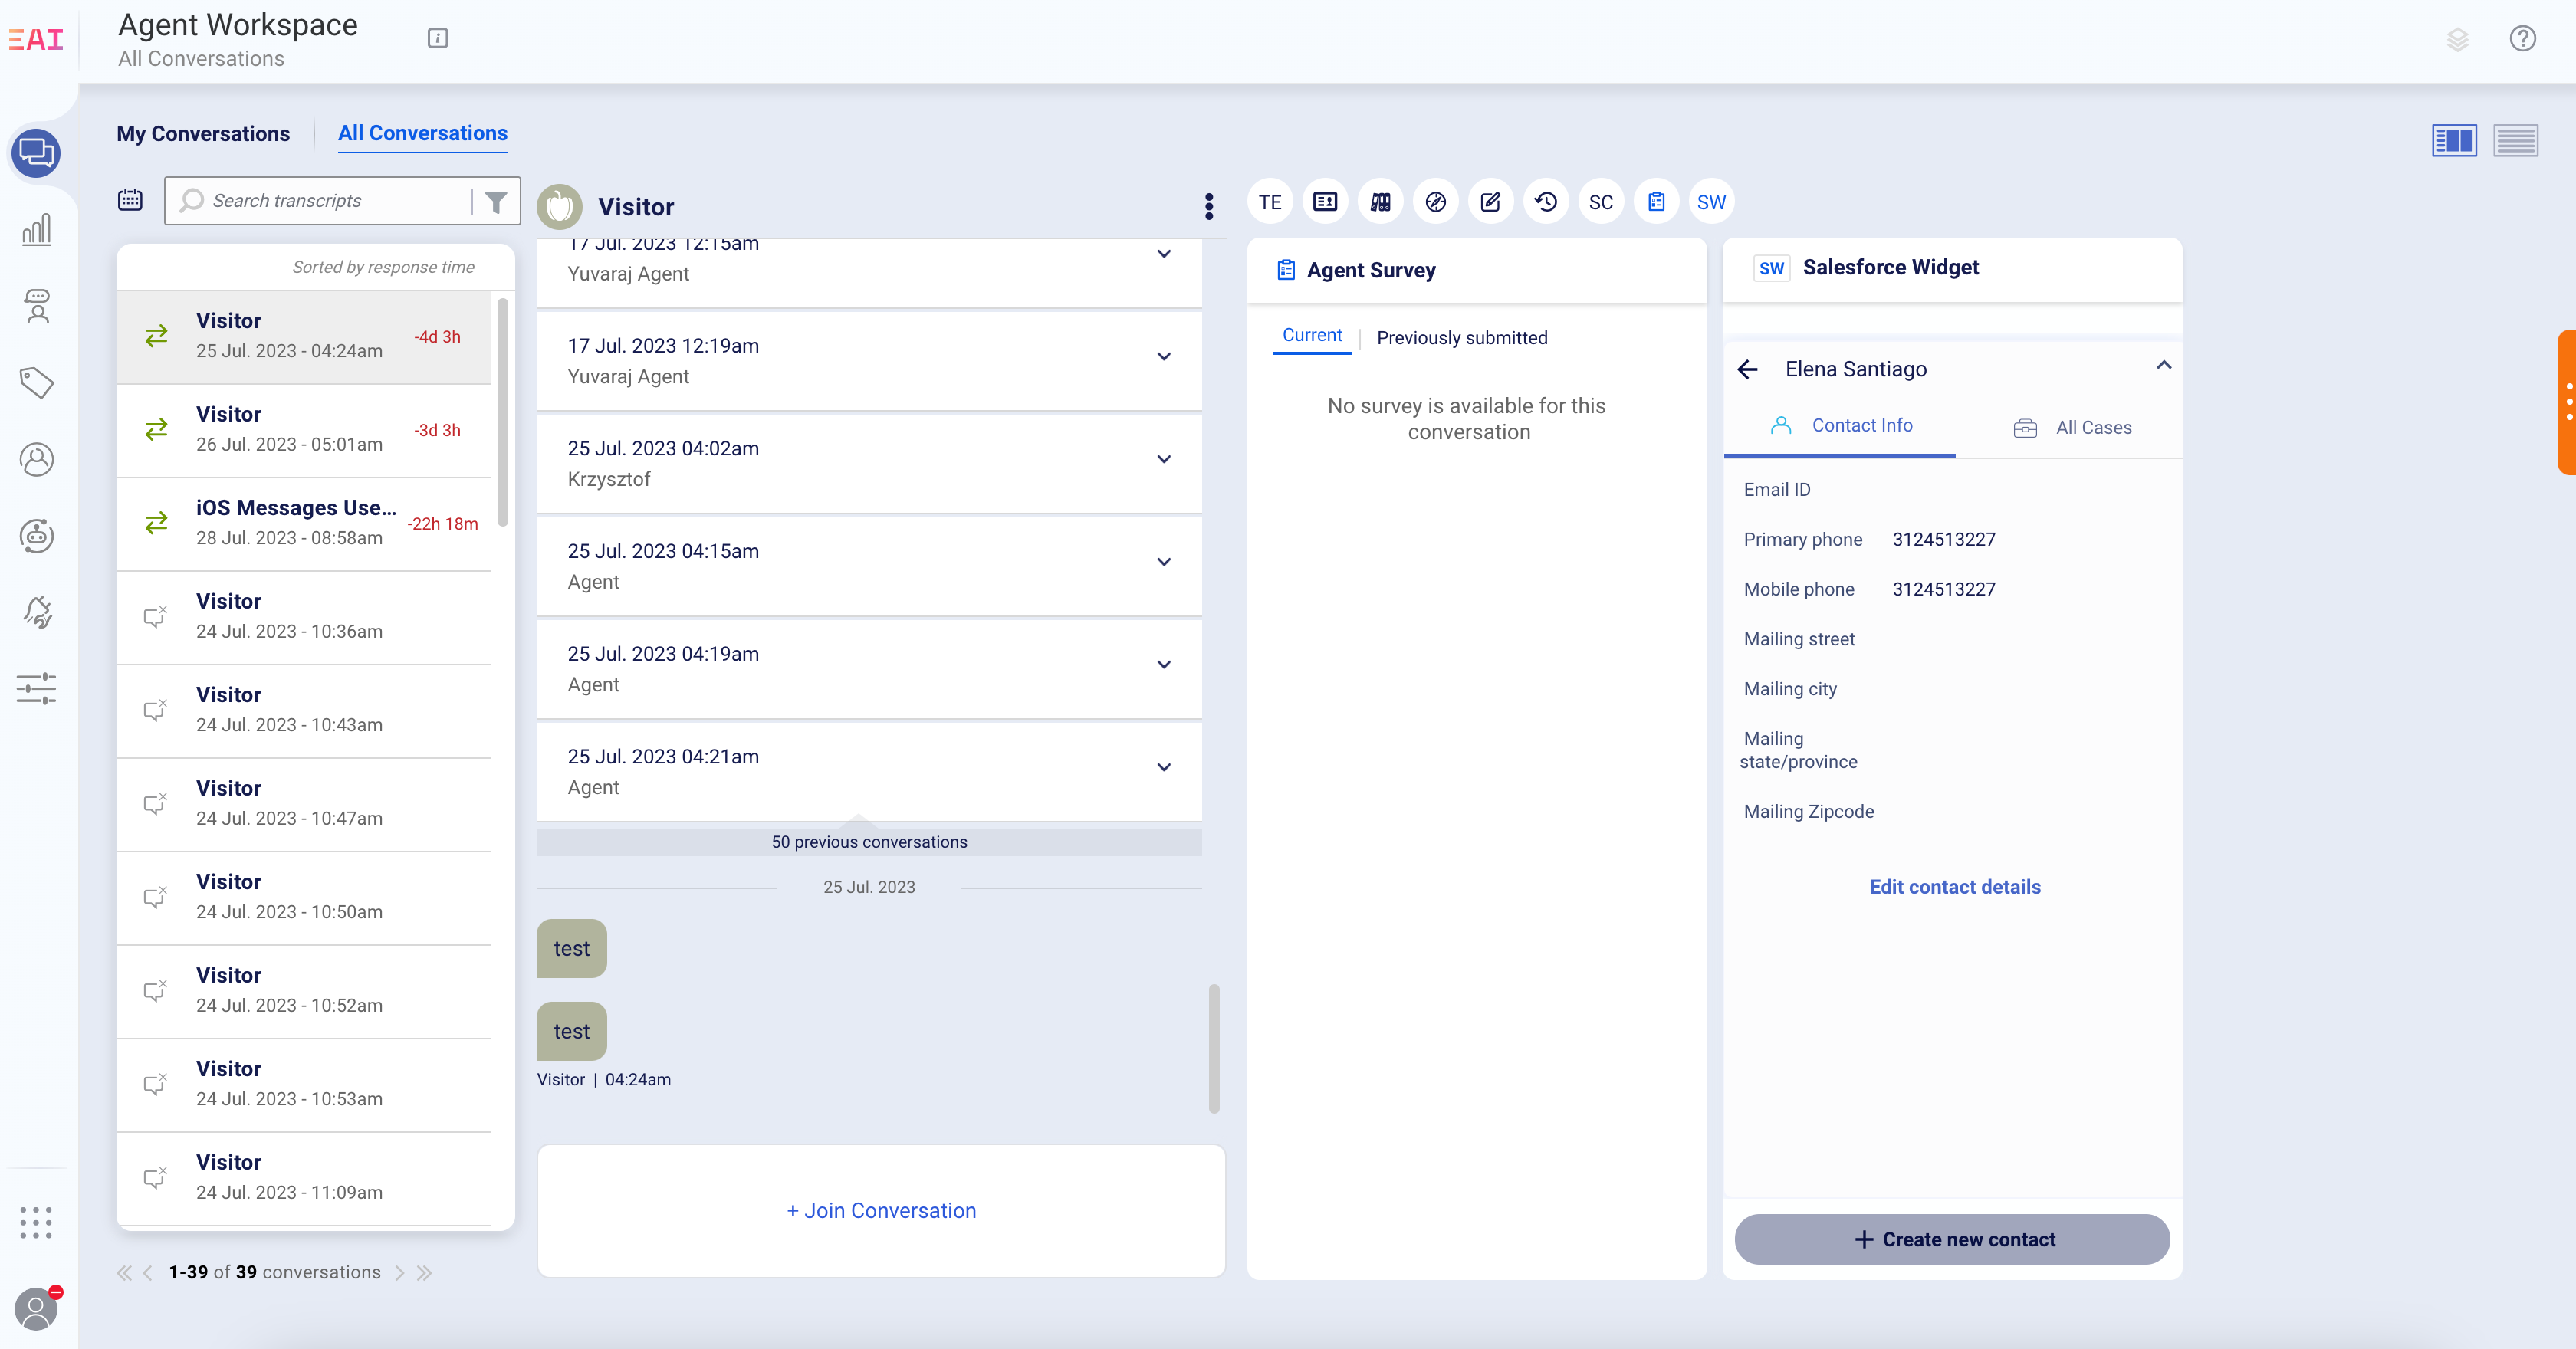
The Salesforce widget allows brands to provide a highly personalized customer experience by collating a 360 view of the customer and all relevant cases from Salesforce inside the Agent Workspace itself.
For brands that currently use Salesforce as their preferred CRM platform, this solution offers an out-of-box integration and empowers agents with meaningful context. With this solution, brands can save agents time by reducing the need for dual maintenance and updates of notes in the CRM. Brands can also lower overall operational costs by driving automation of the flows from the customer interactions with the agents to updates in the CRMs. This will allow brands to streamline the process so that the relevant teams can focus on cases based on the inputs from the agent interactions with the customer. The complete chat transcript can be synced to Salesforce and related to the specific case for context.
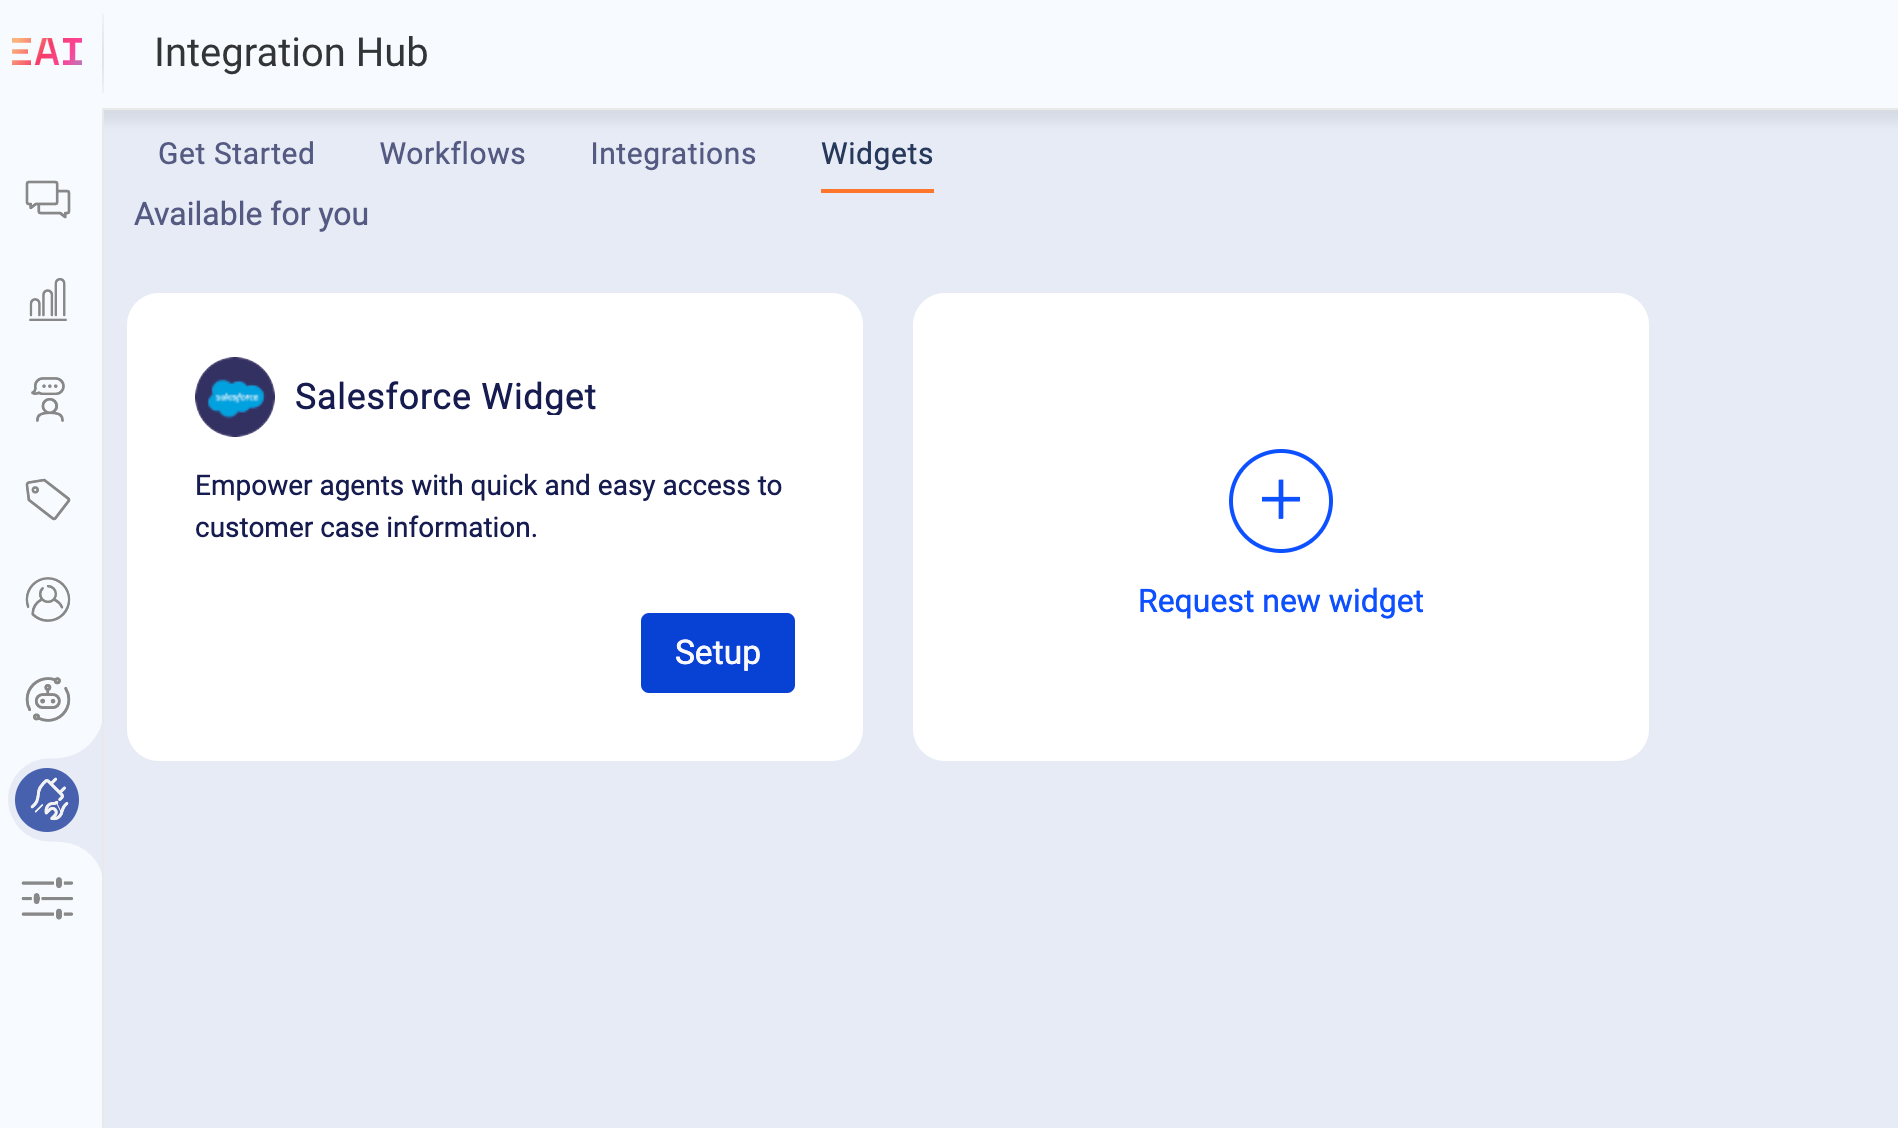
Integration Hub, which is accessible via the left navigation in Conversational Cloud, provides a self-service brand onboarding of the widget with brand-directed definitions for the specific customer and case objects and fields in the widget.
Prerequisites
Before enabling the Salesforce widget, brands must create an app connection on the Salesforce account. The LivePerson Salesforce Widget uses OAuth 2.0 JWT Bearer Flow for Server-to-Server Integration as an authorization scheme in Salesforce Enablement and Access. Steps to complete this setup up are documented in the installation guide.
Glossary
| Widget | Agents often need to access external systems while they are working in the agent workspace and to do so, they need to open additional tabs or browsers. Now, you can integrate external systems right into the agent workspace, allotting them their own widget next to the standard widgets. The Salesforce widget is enabled in the Agent Workspace via Integration Hub. For more details on widgets, please reference the following article. |
| LivePerson Conversation object in Salesforce | Agents are able to access the widget in the Agent workspace in Conversational Cloud and can choose to sync chat transcripts to Salesforce. LivePerson provides a custom Salesforce object to write the Conversational transcripts and metadata such as start time, end time, and skills to the object in Salesforce. |
Key features and components
Salesforce Widget Overview
LivePerson now offers an out-of-the-box Salesforce widget within the Conversational Cloud Agent workspace. Agents can access this widget to look up details on existing customer cases or create new cases without having to leave the workspace to navigate to Salesforce. With this widget, agents have the ability to:
| Feature | Definition |
| Search Customer | For all incoming messages, agents may be able to search based on the authenticated customer name or may choose to ask for the specifics of the customer to search for their specific record via the widget. This may be pulled from the contact/account/lead or any specified custom object in Salesforce based on the onboarding and widget setup. 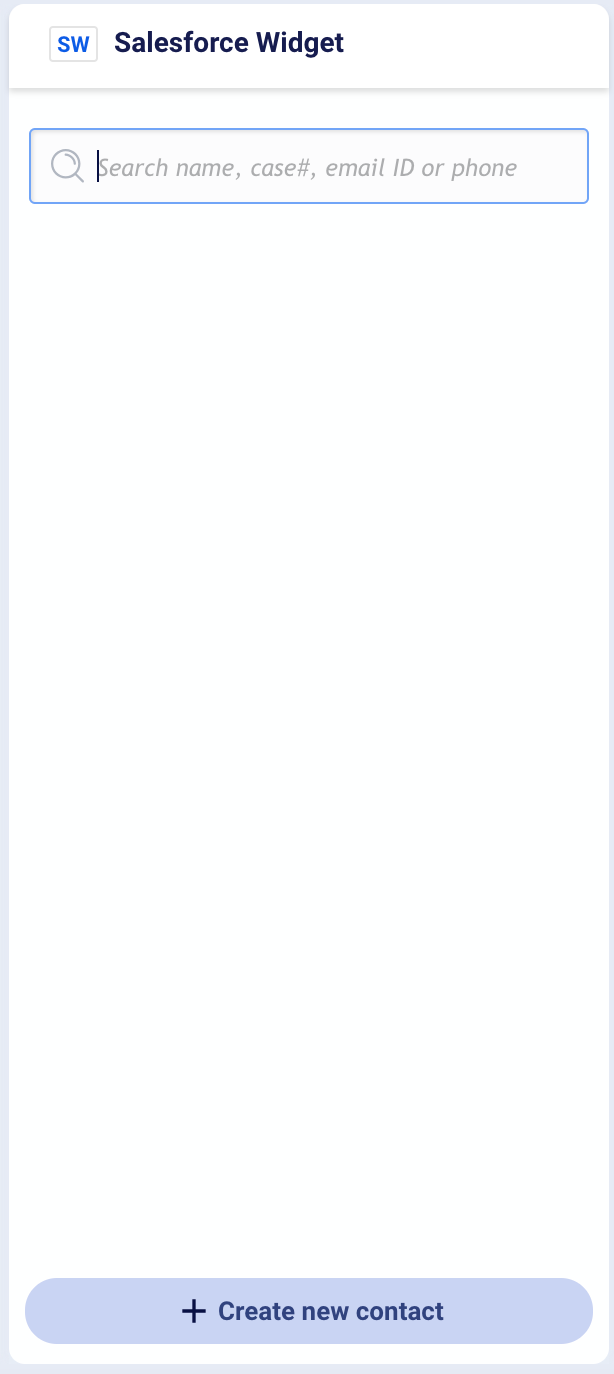 Auto-Search
|
| Get Customer | If an entry is found based on the search criteria, the customer information for all matches are listed in the widget. Please note, this will find all relevant keyword matches. 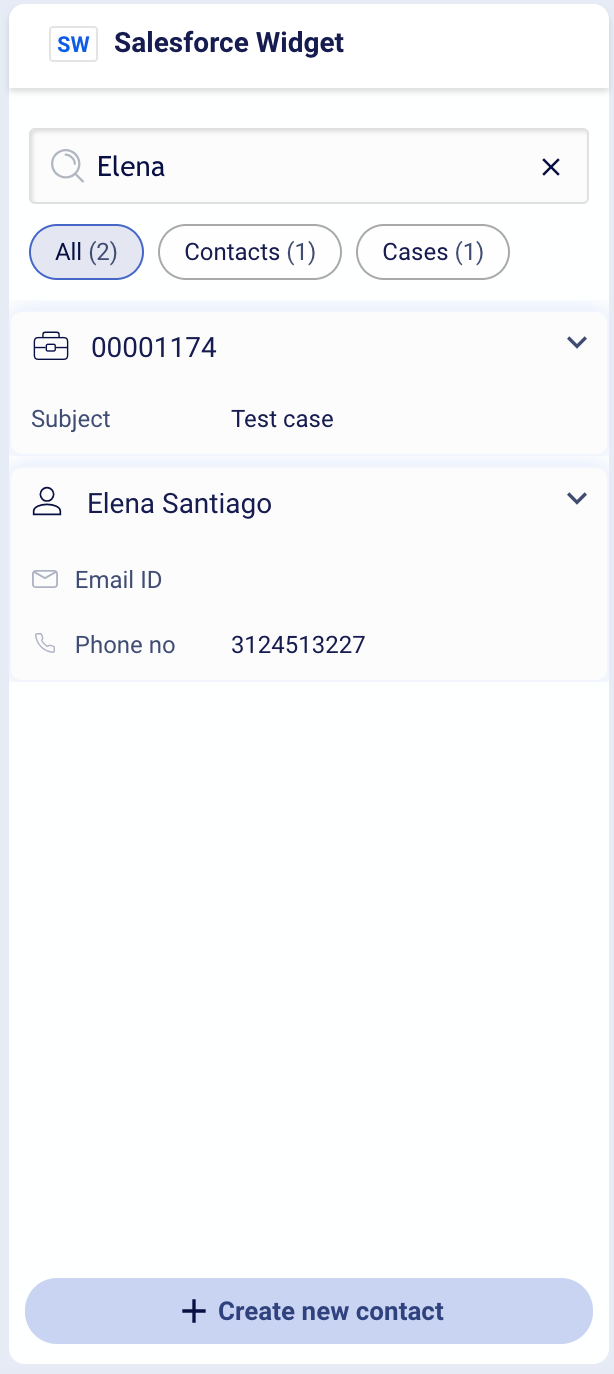 |
| Create Customer | If no customer match is found, the agent can create a new record directly from the Salesforce widget. 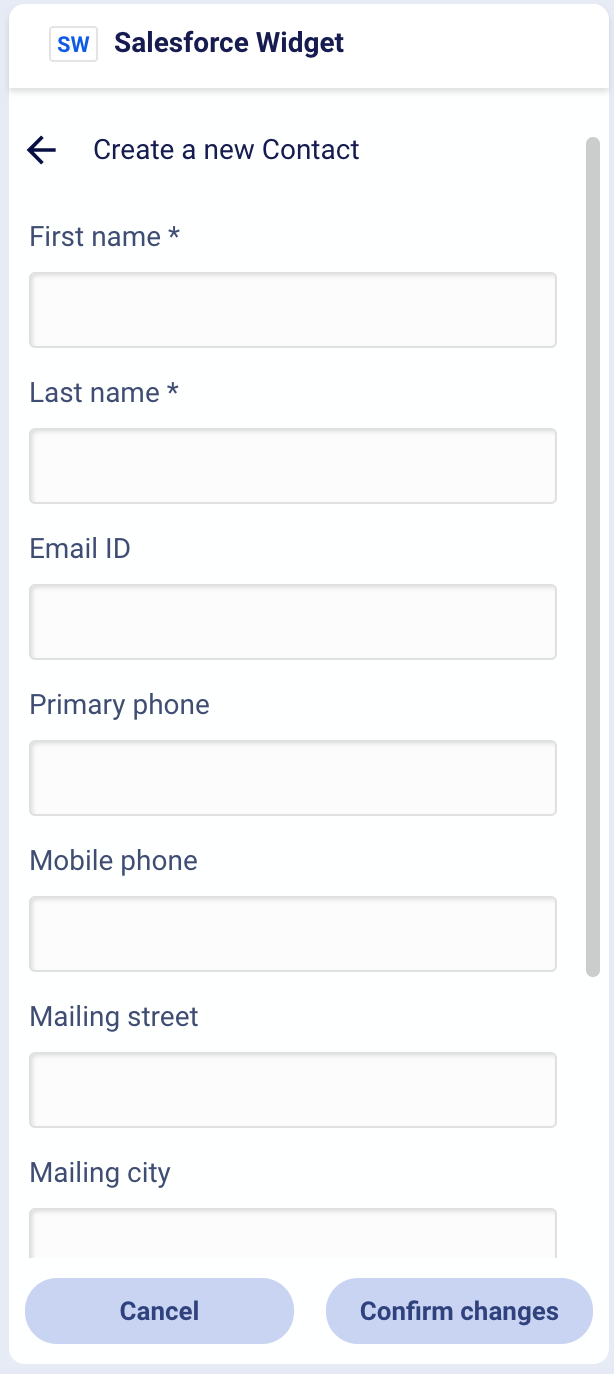 |
| Update Customer | Customer details may be edited from the widget directly. 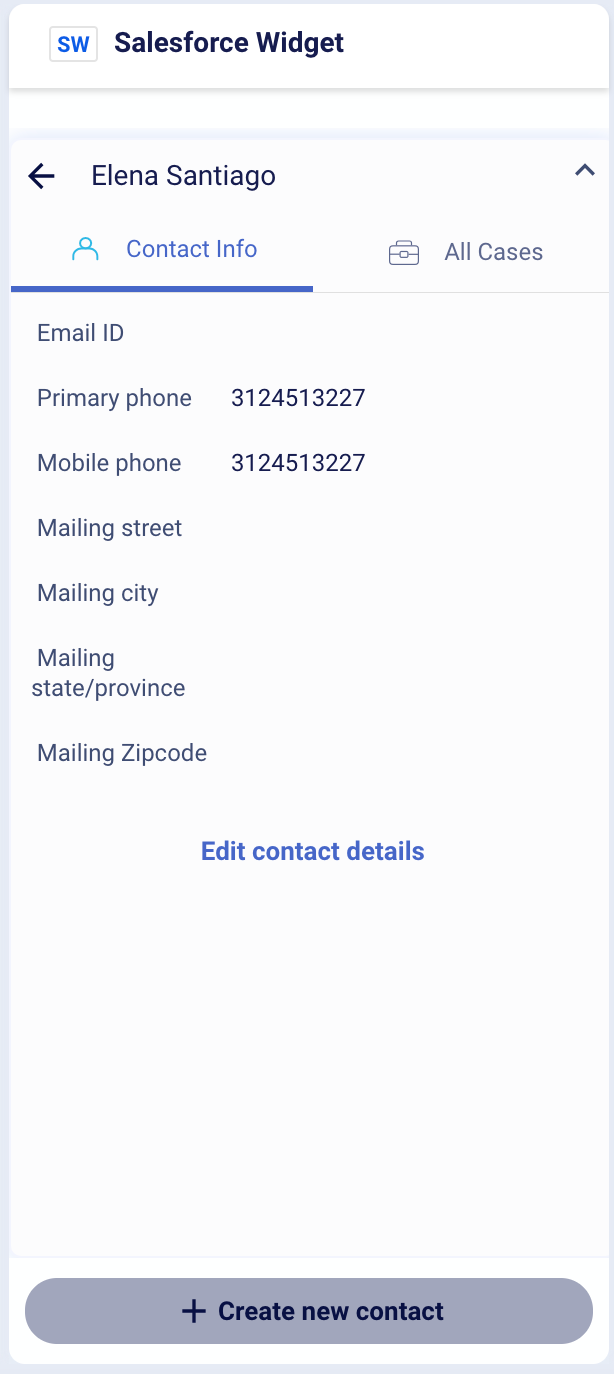 |
| Search Case | Agents may choose to search based on a specific case id, or view all relevant cases associated with the customer. 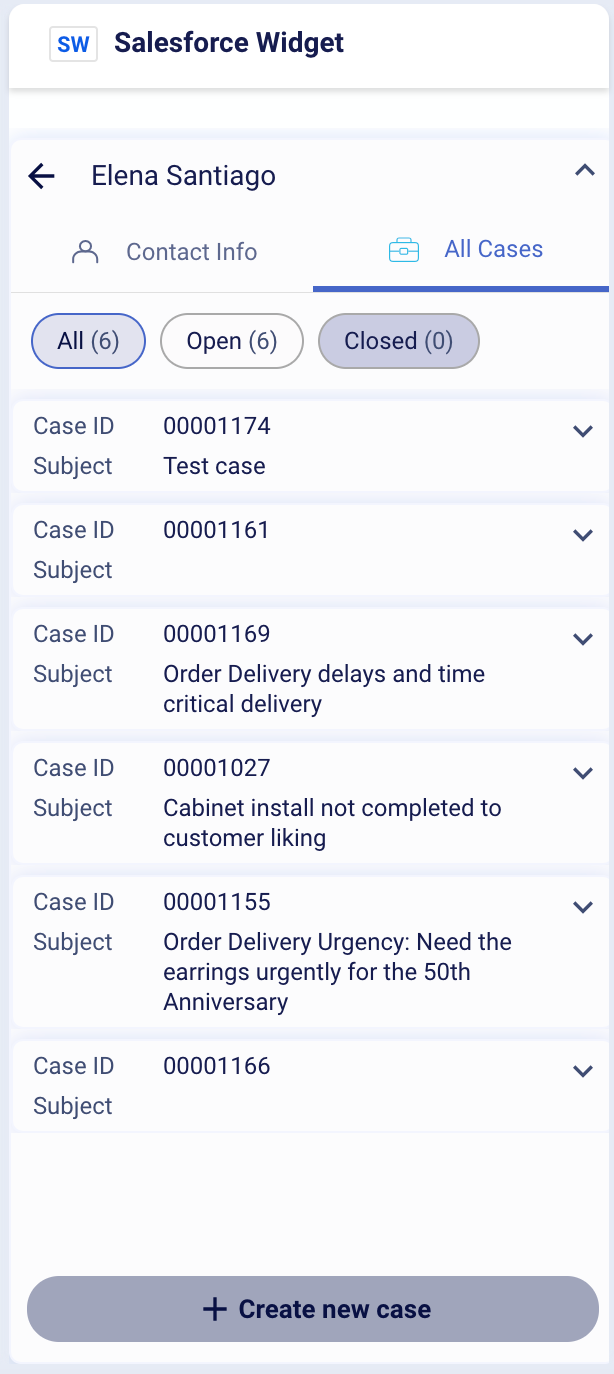 |
| Get Case | If an entry is found based on the search criteria, the case will be shown in the widget. |
| Create Case | If no case is found, the agent can create a new case directly from the Salesforce widget. This will allow the agent to enter information from drop downs or as text input based on the definition of the widget that is set up in the onboarding experience. 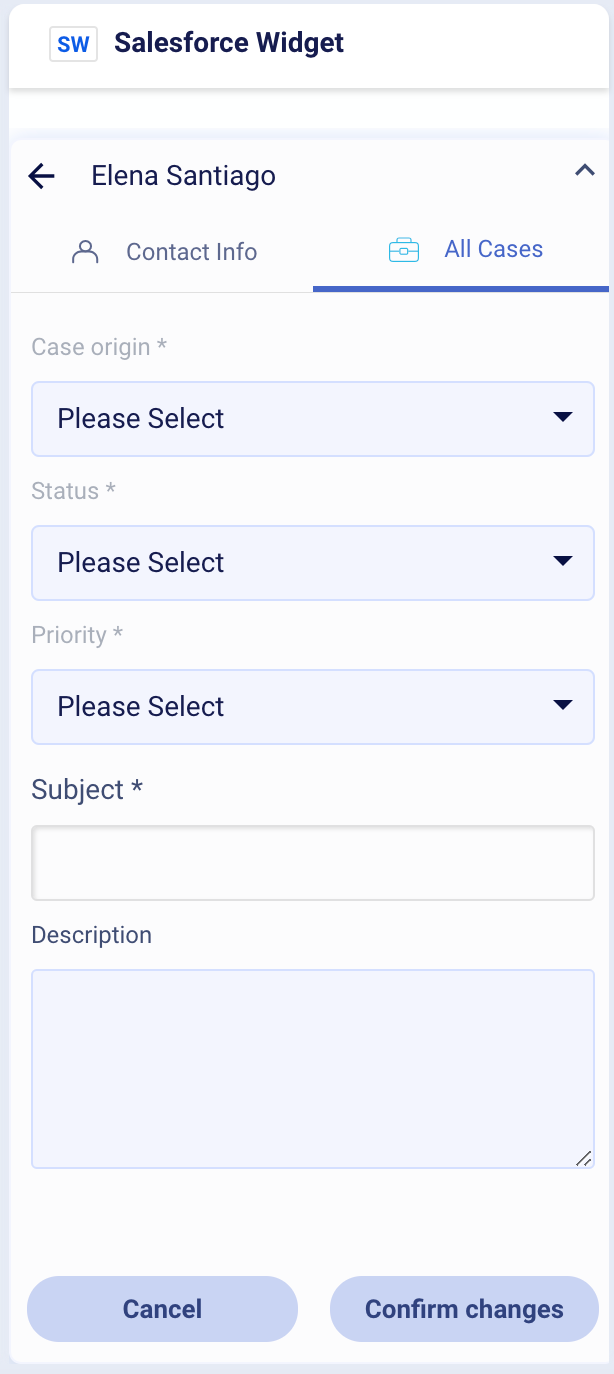 |
| Update Case | Update a case in Salesforce by adding a comment to the existing opened case or updating the priorities etc. |
| Case quick close | Agents can change the status of the case to closed from the widget if required. 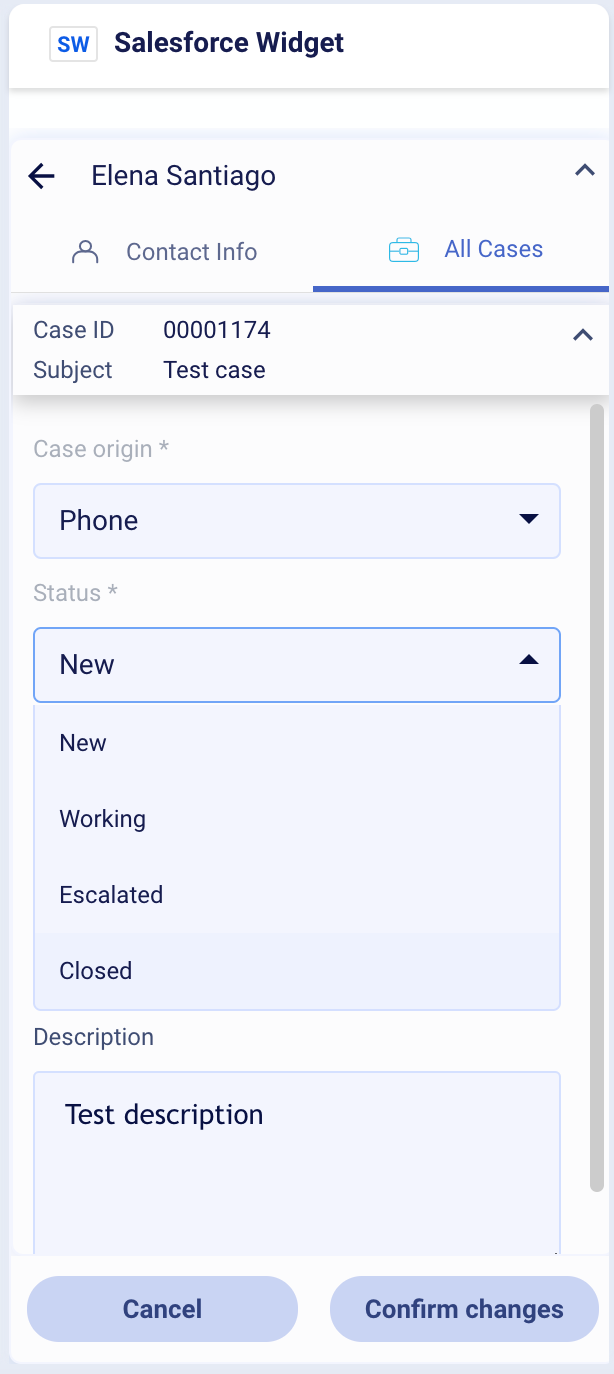 |
| Chat Transcript Synchronization | Currently, agents can manually sync chat transcripts to Salesforce by clicking the "Sync transcript" button in the widget. 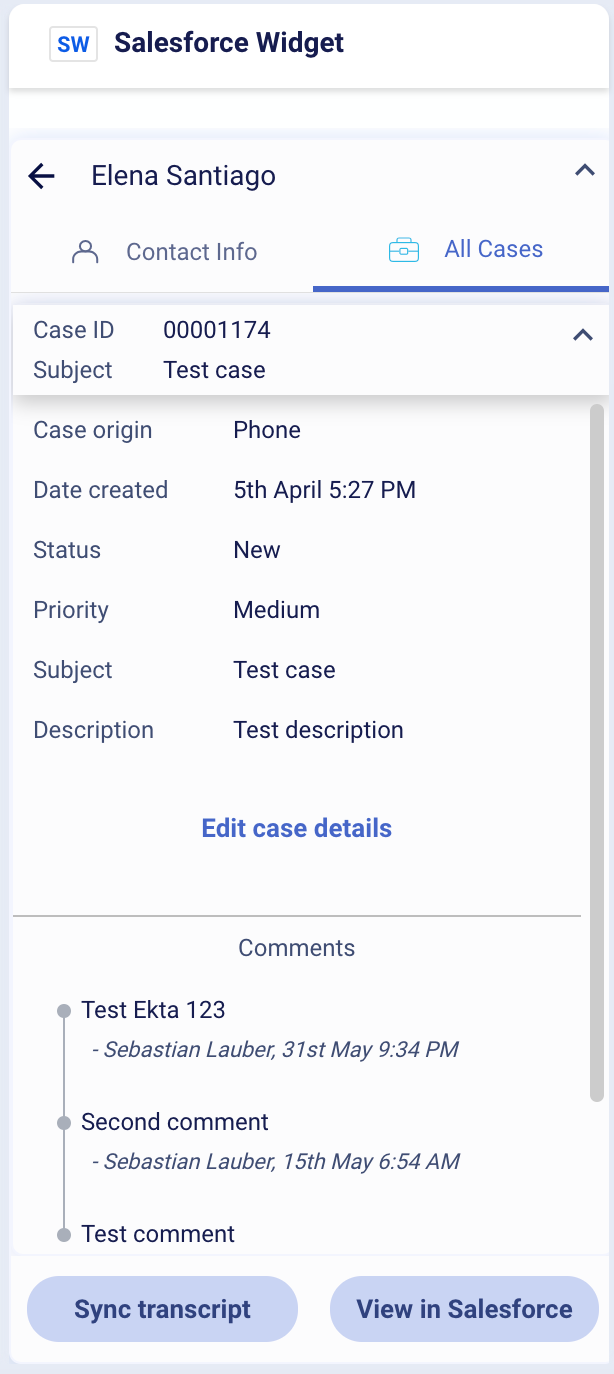 |
Agent Experience
The widget is visible to agents associated with the specific skills that the widget is configured for. If the agent is not assigned to the skill that is associated with the widget, then the widget will not be visible to the agent.
How to access the widget
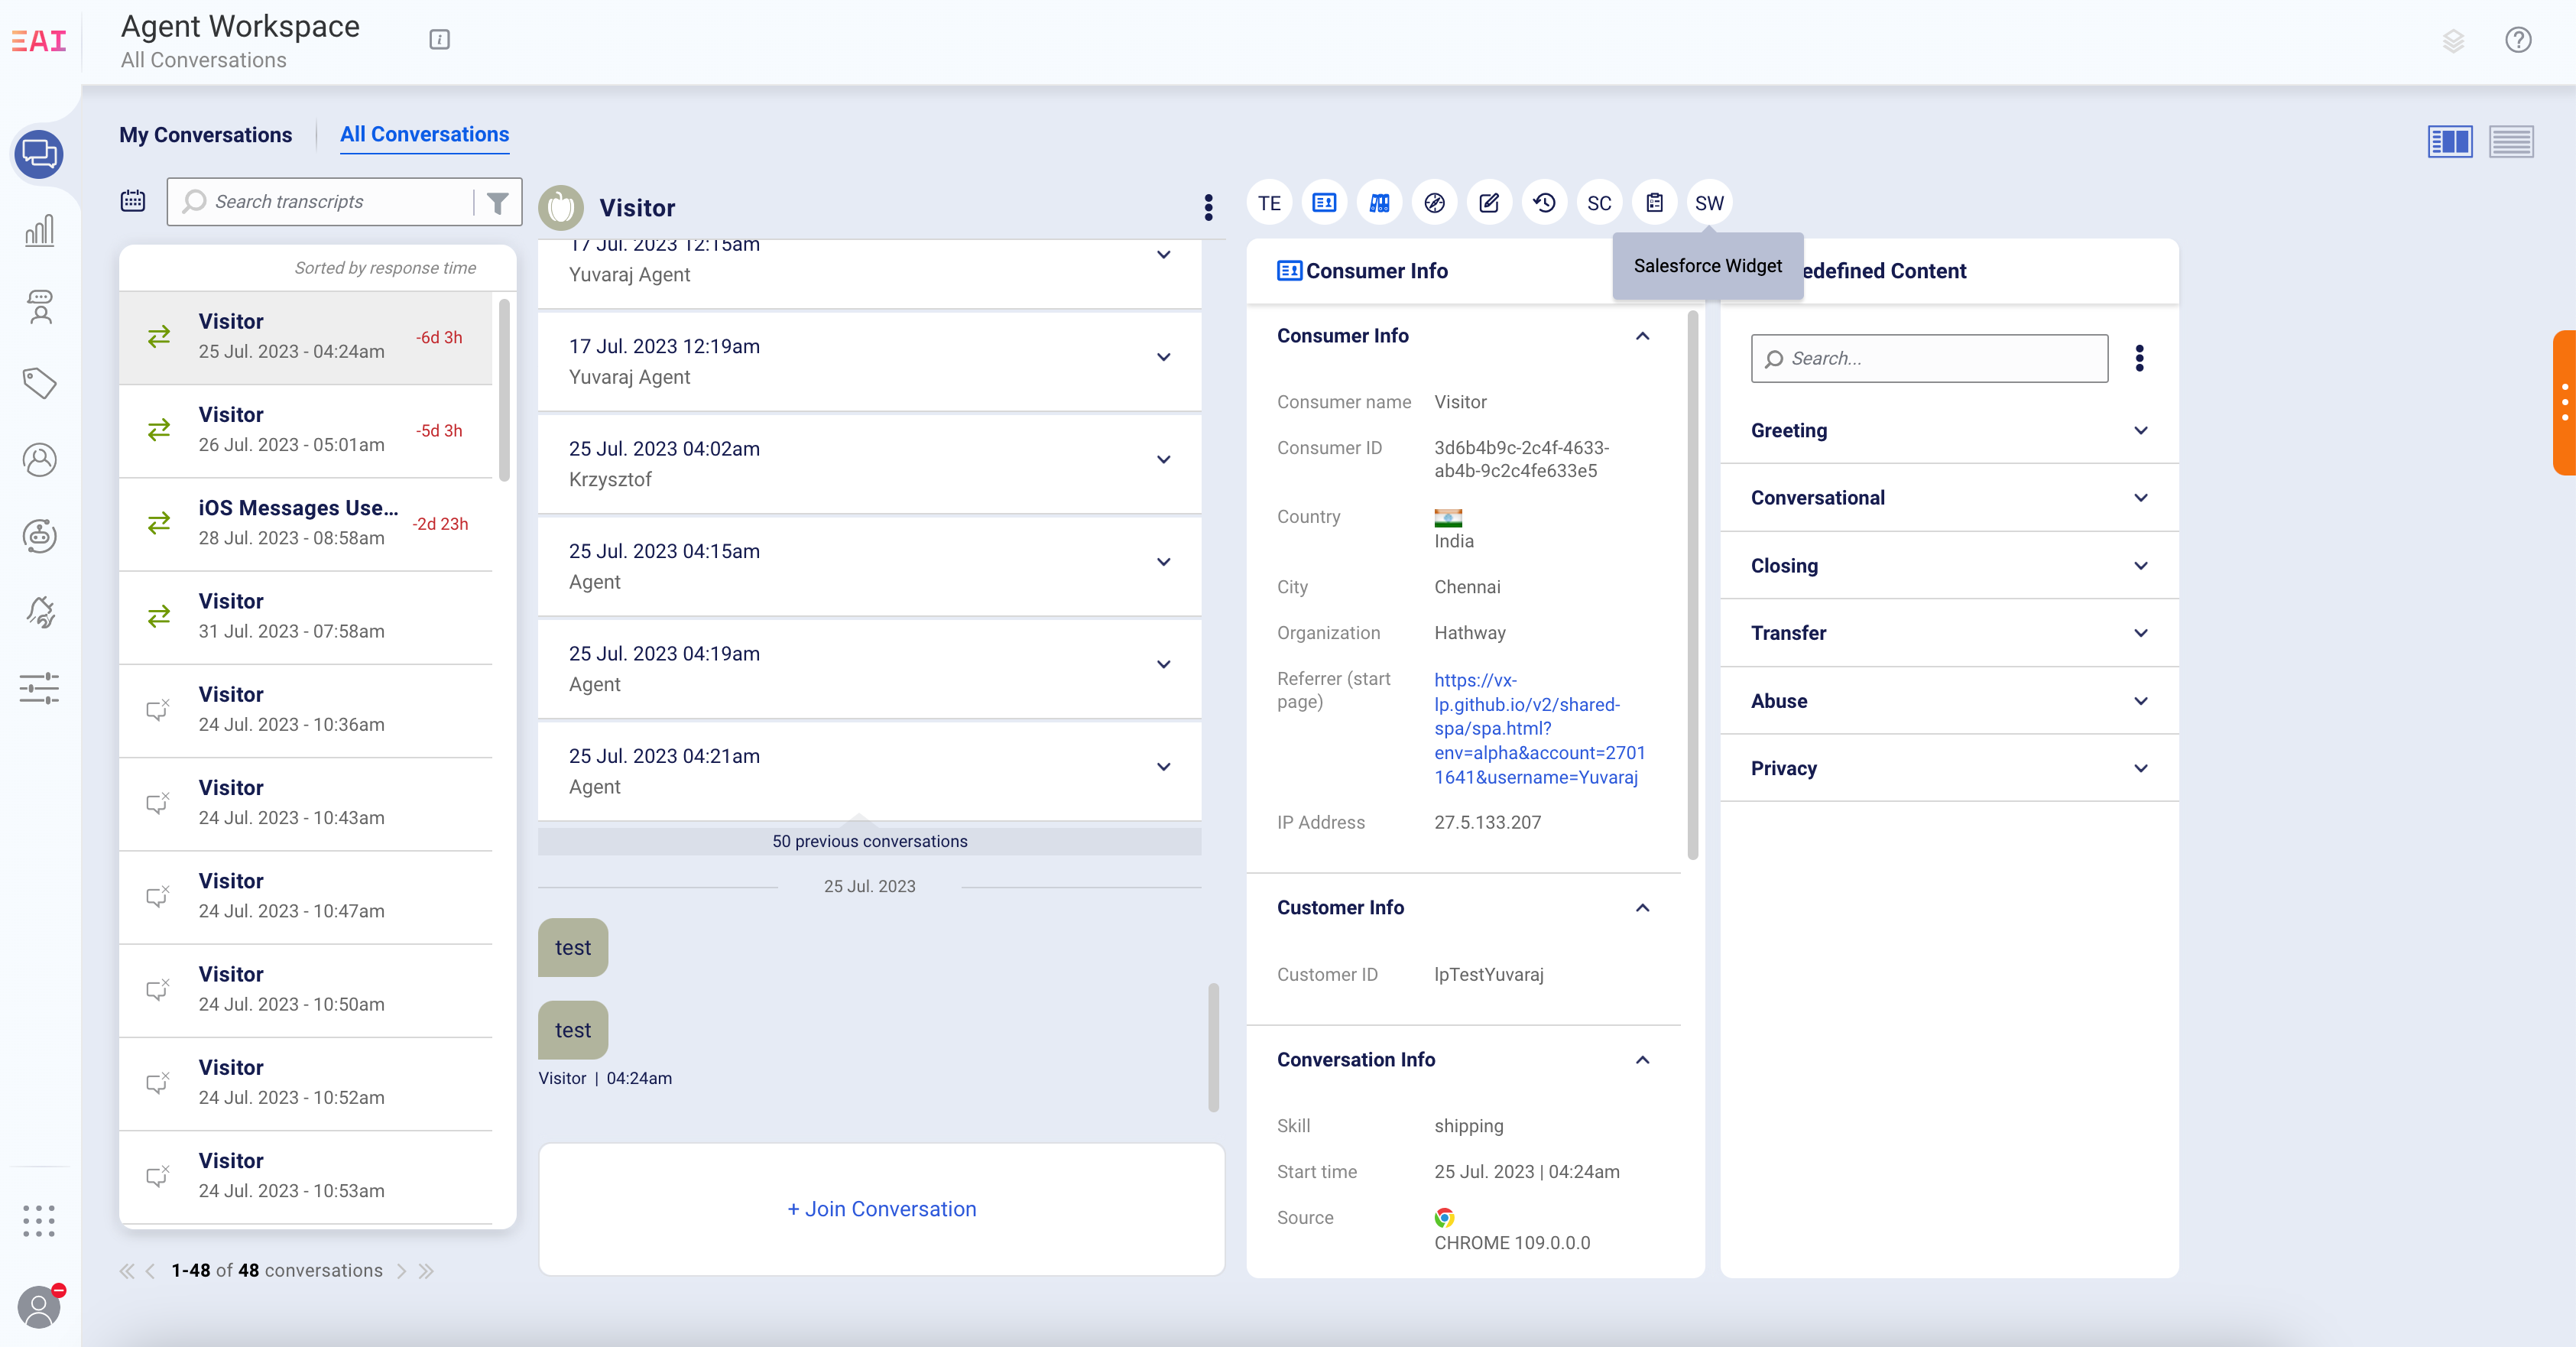
Once the widget configuration is completed in iHub, agents can add the widget into their purview by clicking on the Salesforce Widget as shown below.
How to authenticate to the widget
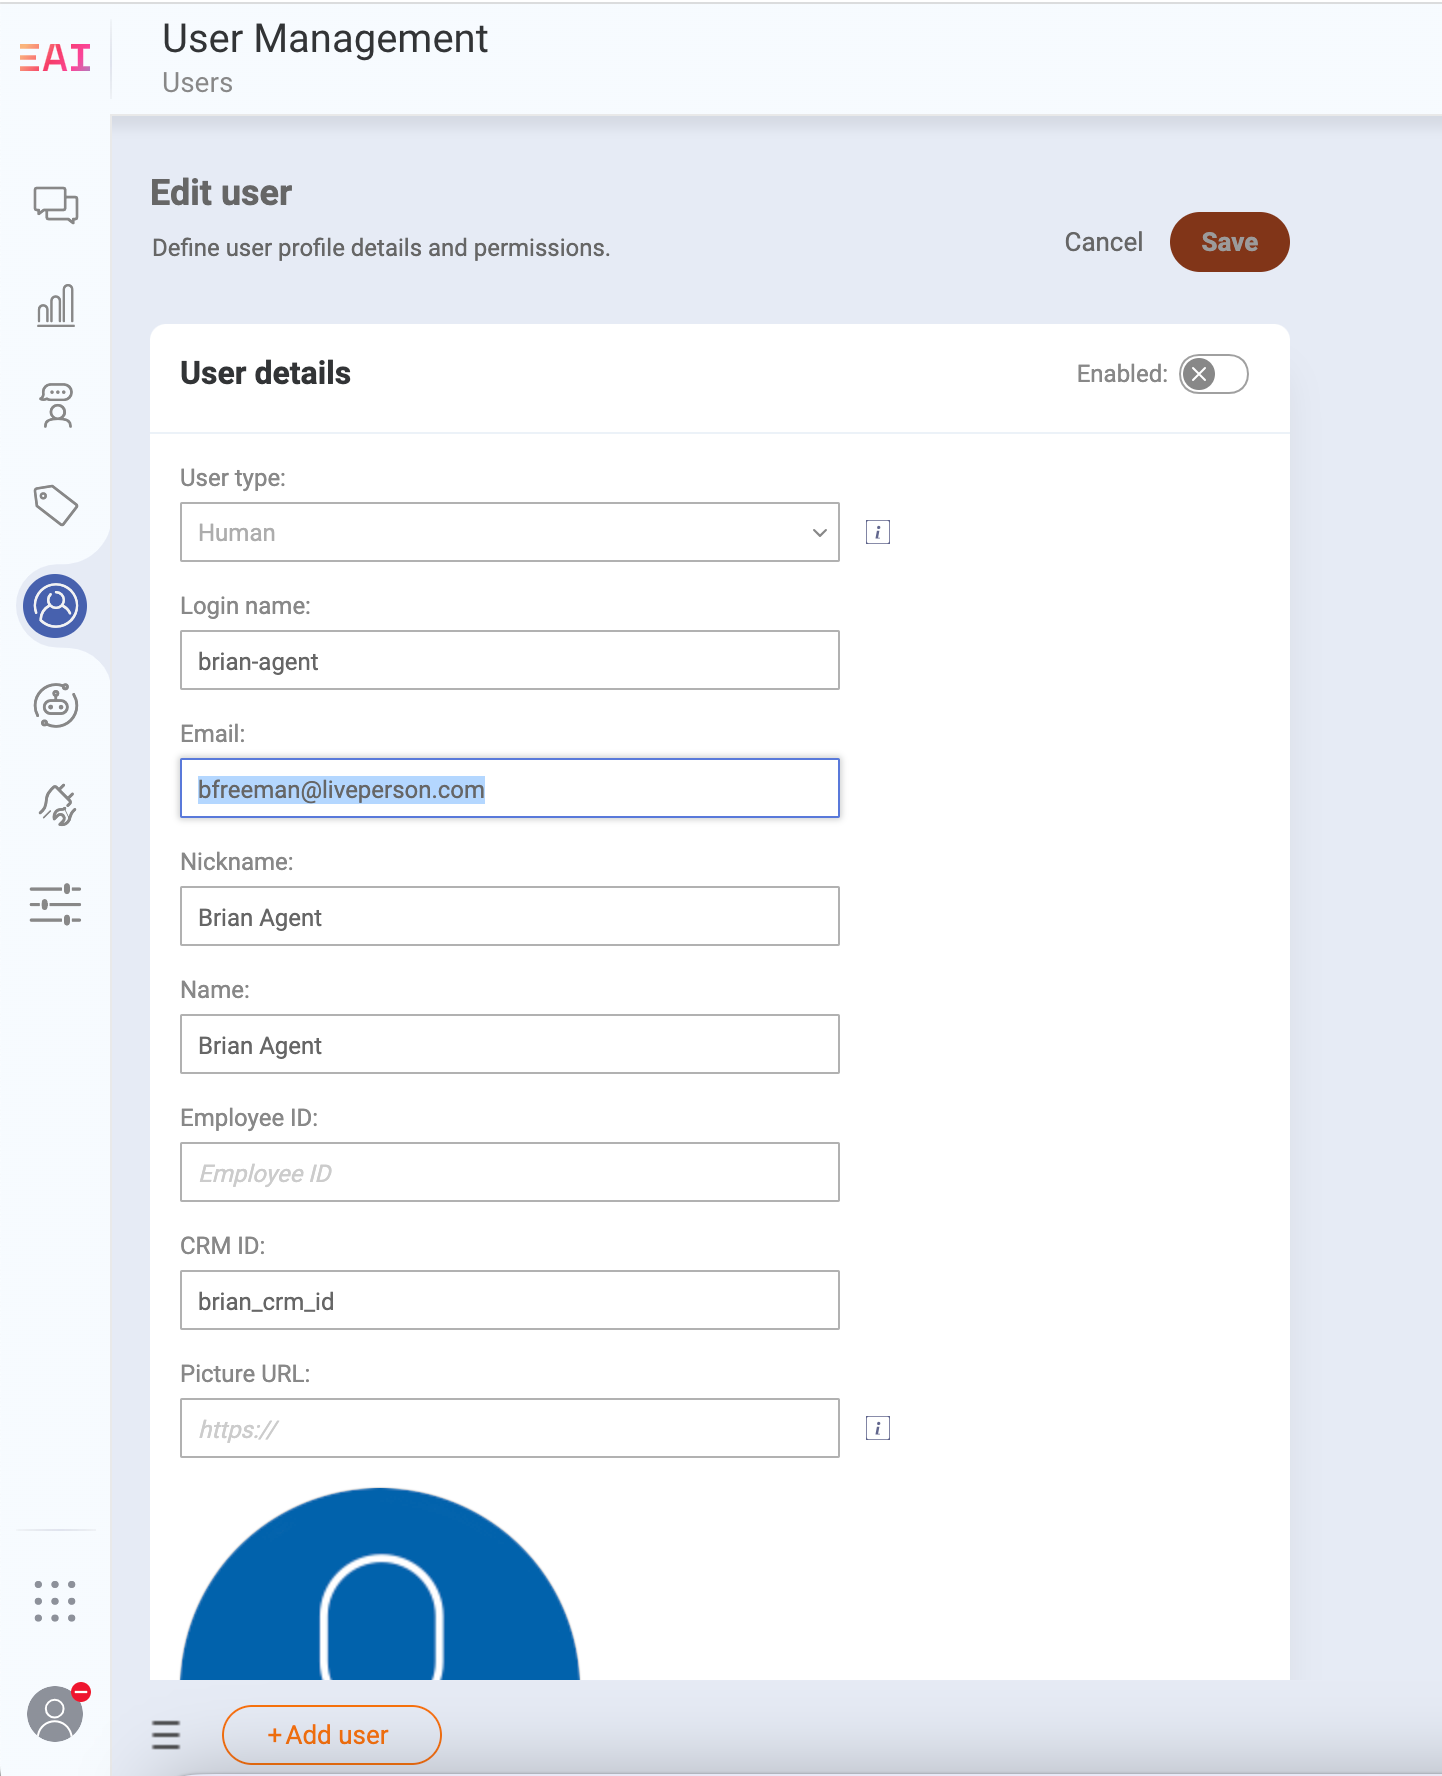
Brands may choose to use system-to-system or Agent user authentication to the widget. If Agent user authentication is selected in the onboarding of the widget, then each agent user in LivePerson must have the CRM ID populated. If this is not maintained, the agents will not be able to authenticate to the widget.
Please note: LivePerson Admin roles will have access to the widget if system to system authentication is enabled.
Configuration
The Salesforce widget can now be enabled via the self-service onboarding via iHub. If you are interested in enabling this for your brand, you may follow these steps for a self-service onboarding or you may submit this form or contact your CSM for further assistance with the setup process.
In order to set up this widget, please follow the following steps below. Start by navigating to the left navigation menu in Conversational Cloud. Select Integration Hub -> Widgets -> Salesforce Widget.
Please note, the following setup must be completed in Salesforce before you proceed to the widget setup. The LivePerson Salesforce Widget uses OAuth 2.0 JWT Bearer Flow for Server-to-Server Integration as an authorization scheme in Salesforce.
Step 1: Start the setup process and provide the necessary Salesforce details to establish the connection. This is required to set up the Salesforce widget.
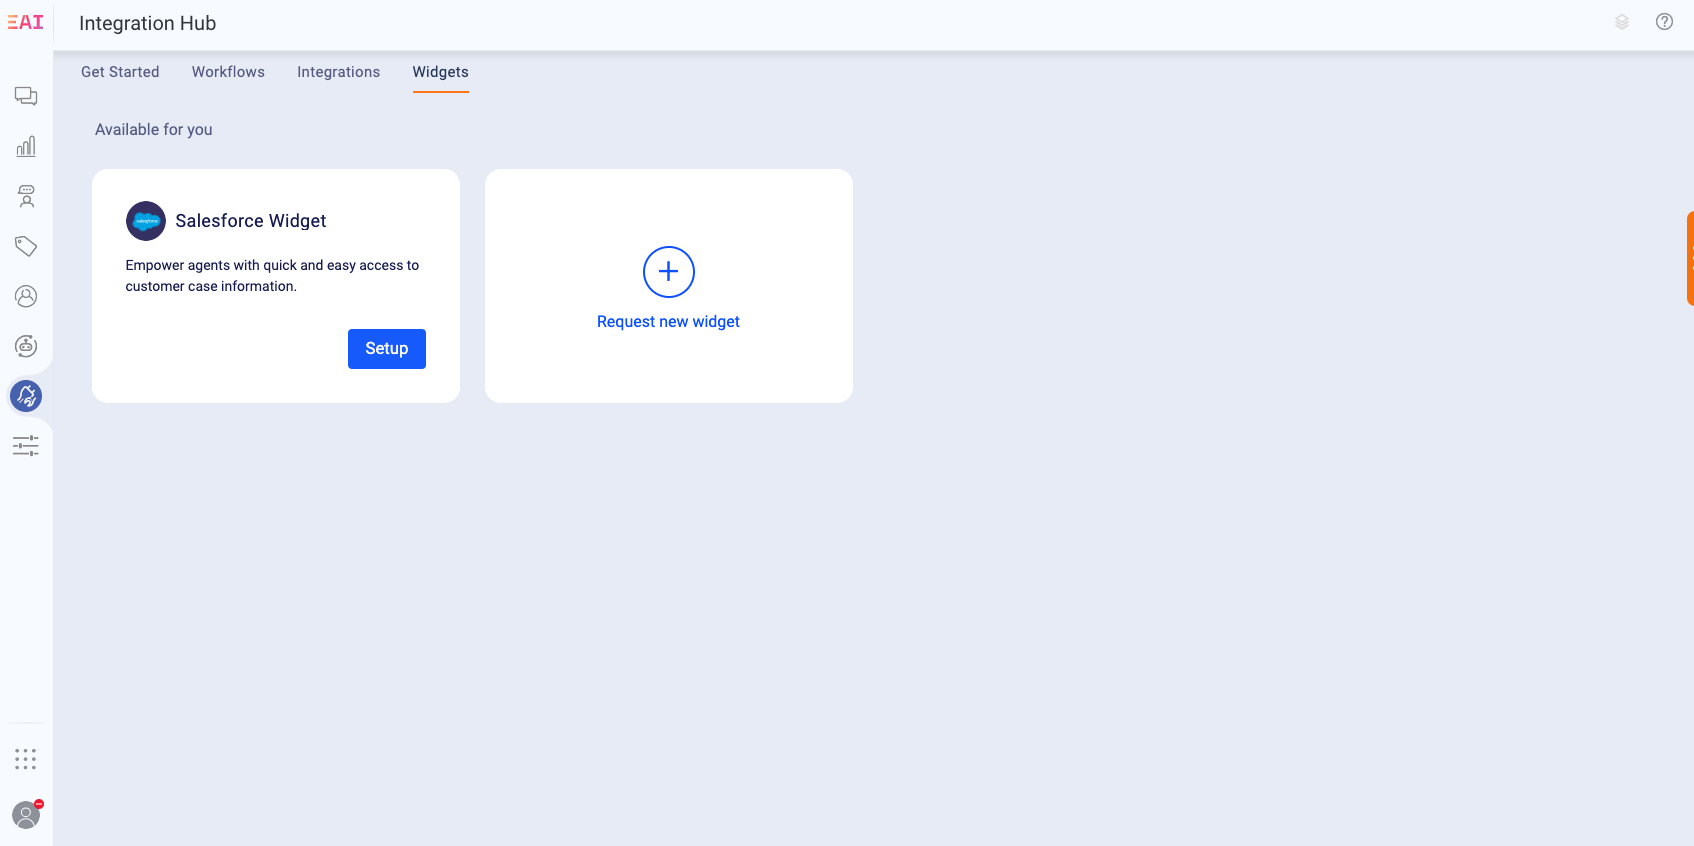
Ensure that you have every necessary connection detail handy and add it to the form.
Authorization Server URL: This is the Salesforce Authorization server URL (formatted like this: https://xyz.abc.my.salesforce.com). Check that you'll get a Salesforce Login page or that you can reach your Salesforce instance using this URL.
Client ID: Salesforce OAuth Key (called Client ID in the setup wizard). You copied this during the initial setup of the Salesforce Connected App for this widget (Consumer Key and Secret -> Manage Consumer Details -> Consumer Key).
Private Key (PEM): Copy the contents of the PEM file you generated using OpenSSL during the initial setup. Make sure that you copy the contents of the entire file (including -----BEGIN PRIVATE KEY----- and -----END PRIVATE KEY-----) and remove any trailing new lines.
CRM ID: This is the Salesforce Username of the System User (used for chat transcript sync & access to the data within SF if the system-to-system authentication is selected)
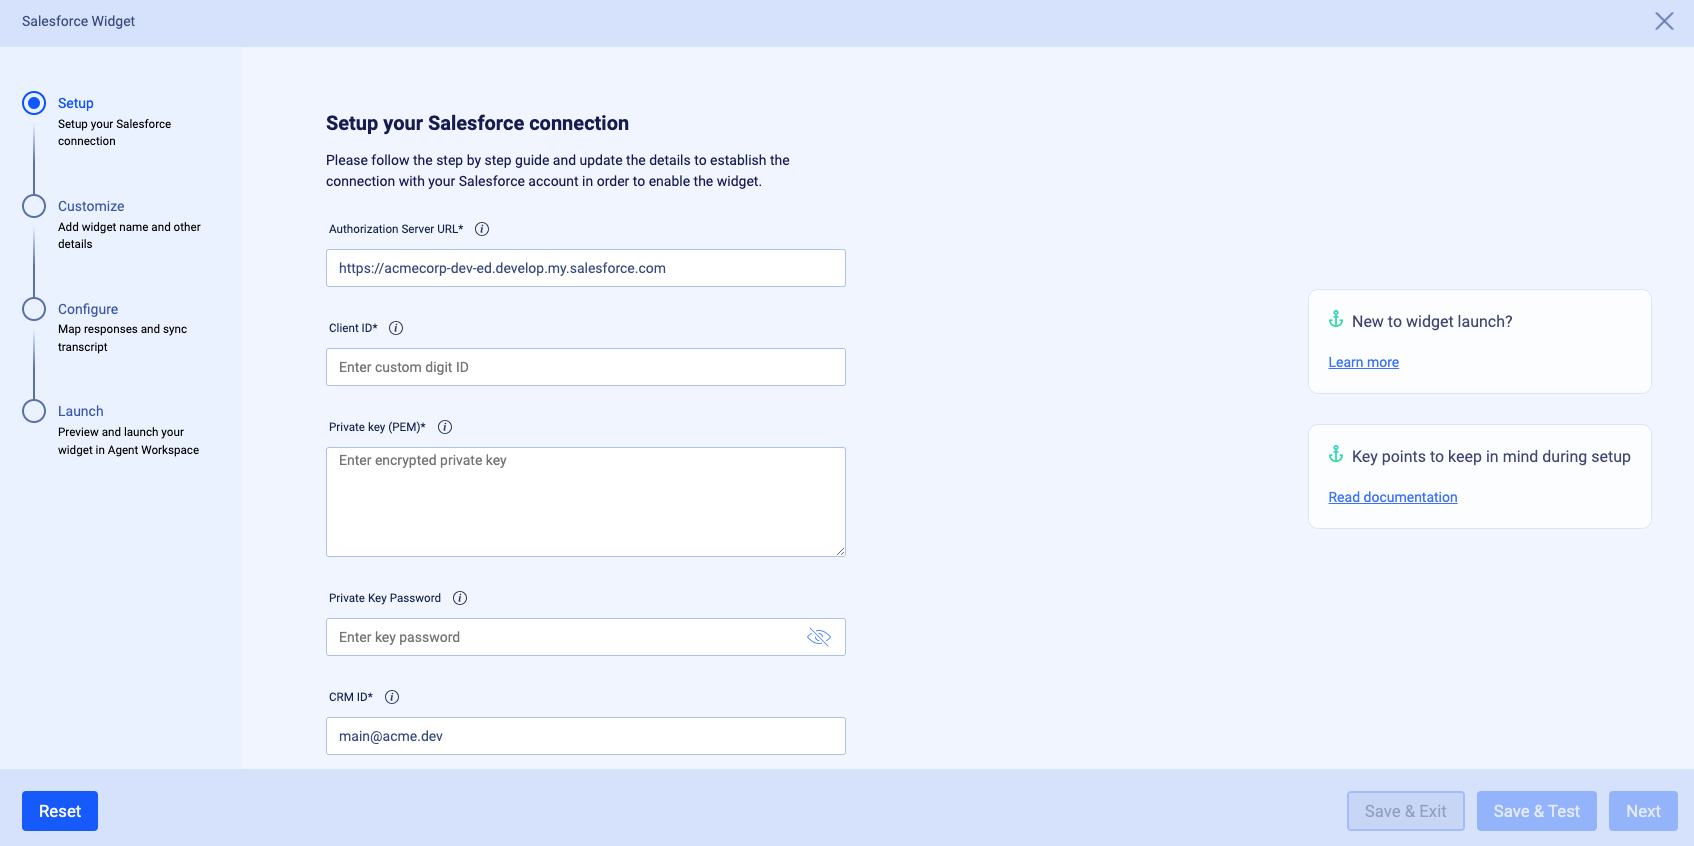
You may choose to use a system-to-system authentication or user authentication for the widget. Please note, if you decide to use user authentication, you must ensure that all agent users who require access to the widget have a CRM ID populated in their user record in LivePerson.
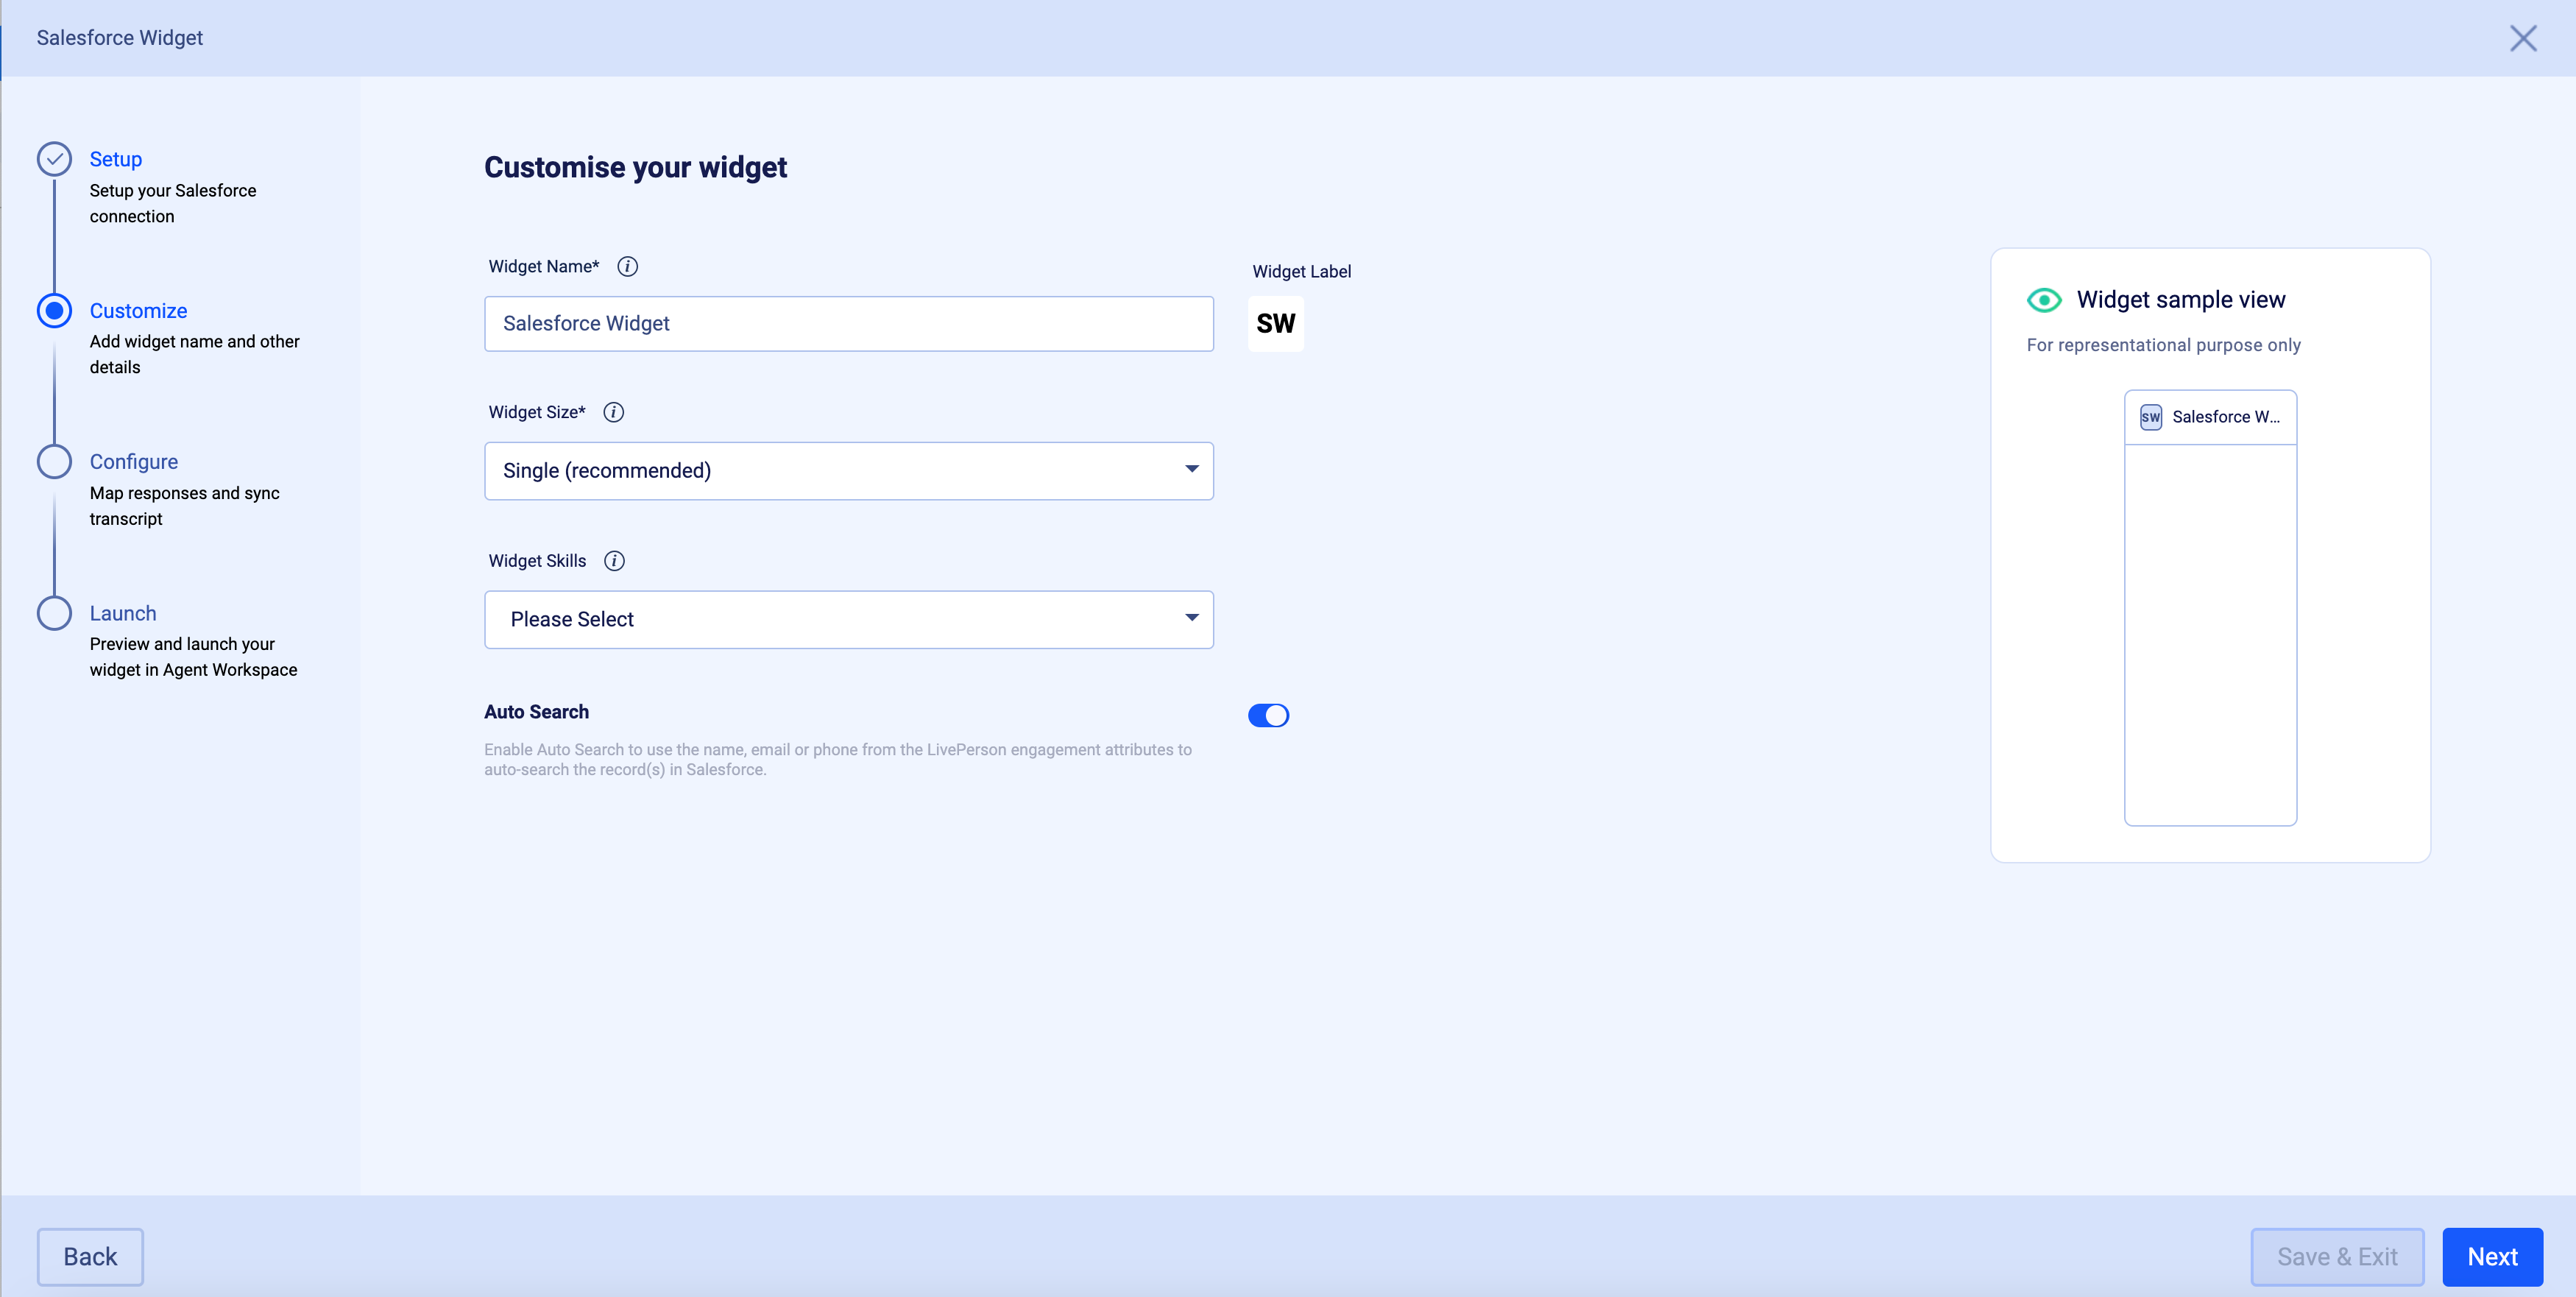
Once the connection is established with Salesforce, you can proceed to configure the widget.
Step 2: Now that the connection is established, you may now define a few widget details such as the name, the span, and the skills it must be applied to. Agents associated with those specific skills will be able to view and access the widget. You may also enable the auto-search feature here which will search Salesforce using the name, email or phone from the LivePerson engagement attributes.
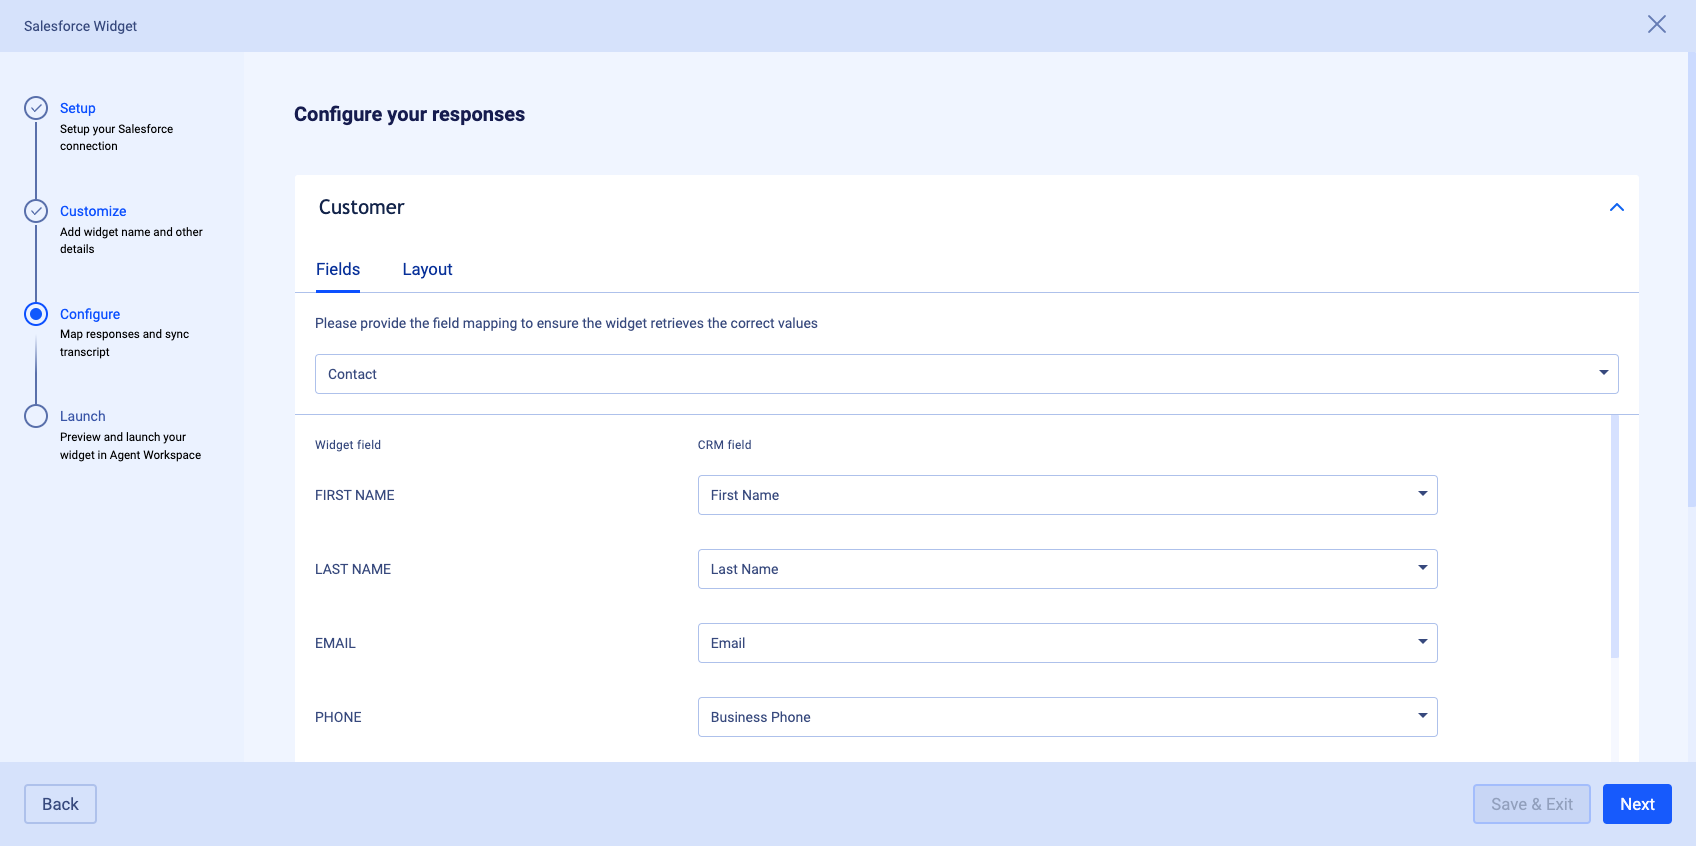
Step 3: Establish which CRM objects and fields you would like to use in the Widget for the two main sections, customer and case management. You may choose to add up to 10 additional fields in the widget.
Step 4: The Layout tab allows you to customize the behaviour of the fields in the Salesforce widget. For more details about setting up the Auto Populate feature, see the Advanced Configuration page.
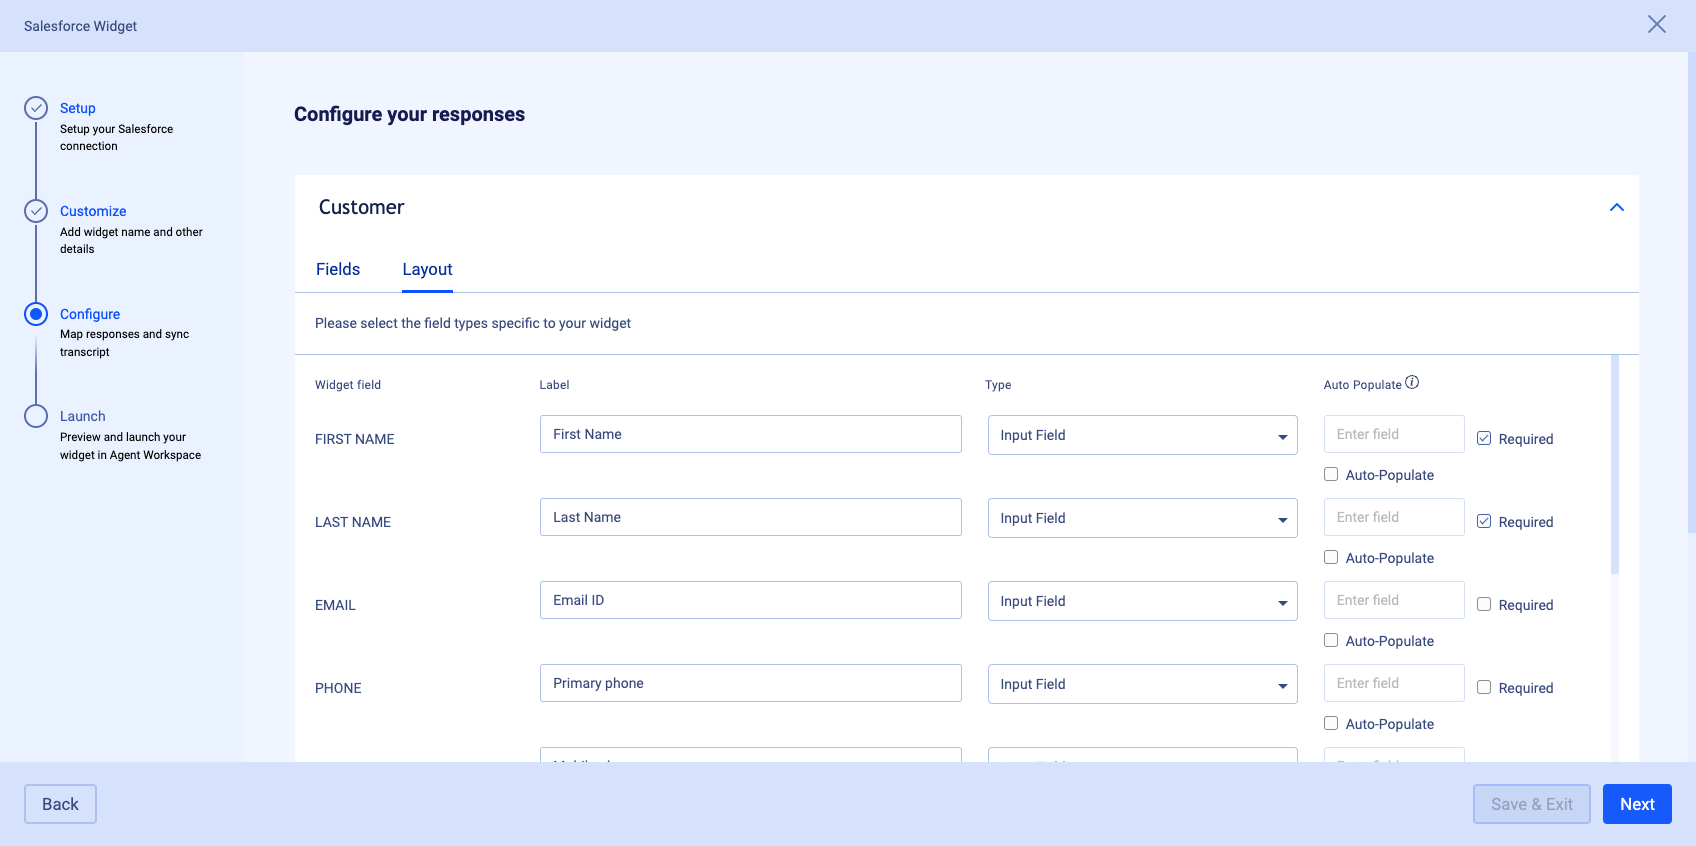
Step 5: If you choose to, you may enable automatic or manual chat transcript syncs. Automatic chat transcripts will sync with Salesforce if it is linked to a CRM record when a conversation ends. Manual sync will allow the agents to sync chat transcripts for the case associated with the conversation.
Please be sure to install the following package, which contains the custom LivePerson Conversation object in which the transcript will be saved.

Step 6: Launch the Widget
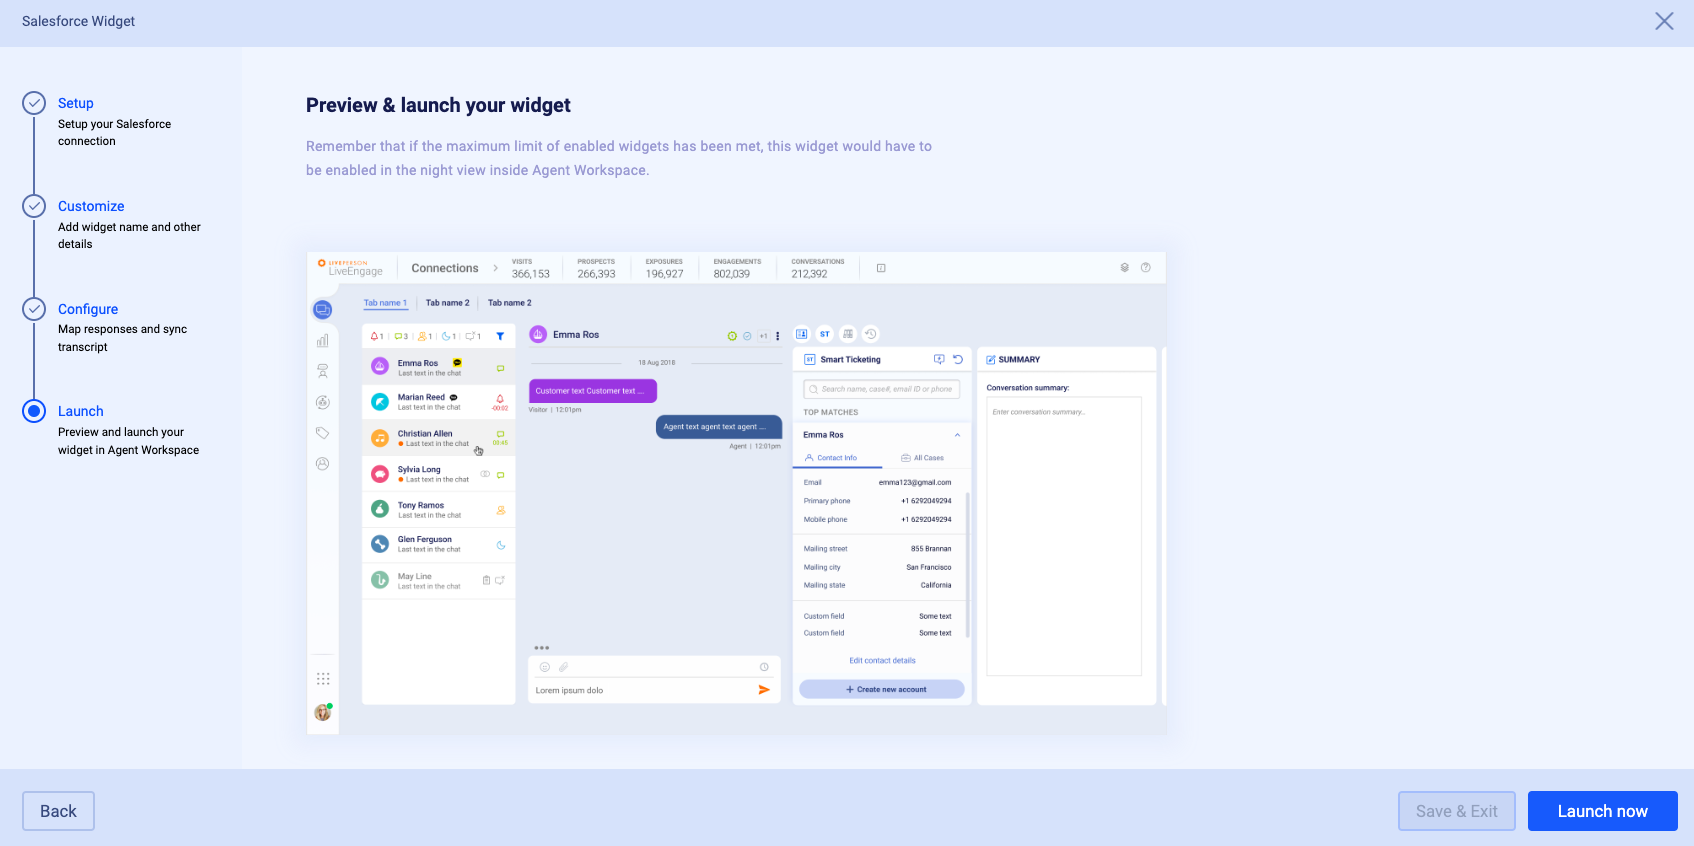
Once you are done with the configuration in each of the steps, the widget is technically live. The last step just confirms your setup for the widget.
If you would like to reorder and organize the widget to boost agent efficiency, this can be done via the Night Vision settings.
Limitations
- Currently, separate widget definitions per skill are not permitted. The same widget can be used across skills.
- Connections to multiple Salesforce instances are not permitted.
- Automatic search of the customer based on the phone or name. This is planned for a subsequent release.
Missing Something?
Check out our Developer Center for more in-depth documentation. Please use the feedback button to share your documentation feedback with us. We'd be happy to hear from you.
Missing Something?
Check out our Developer Center for more in-depth documentation. Please share your documentation feedback with us using the feedback button. We'd be happy to hear from you.