Web Messaging quick start
Set up Web Messaging between the Conversational Cloud and your website.
Step 1: Get the Web Tag
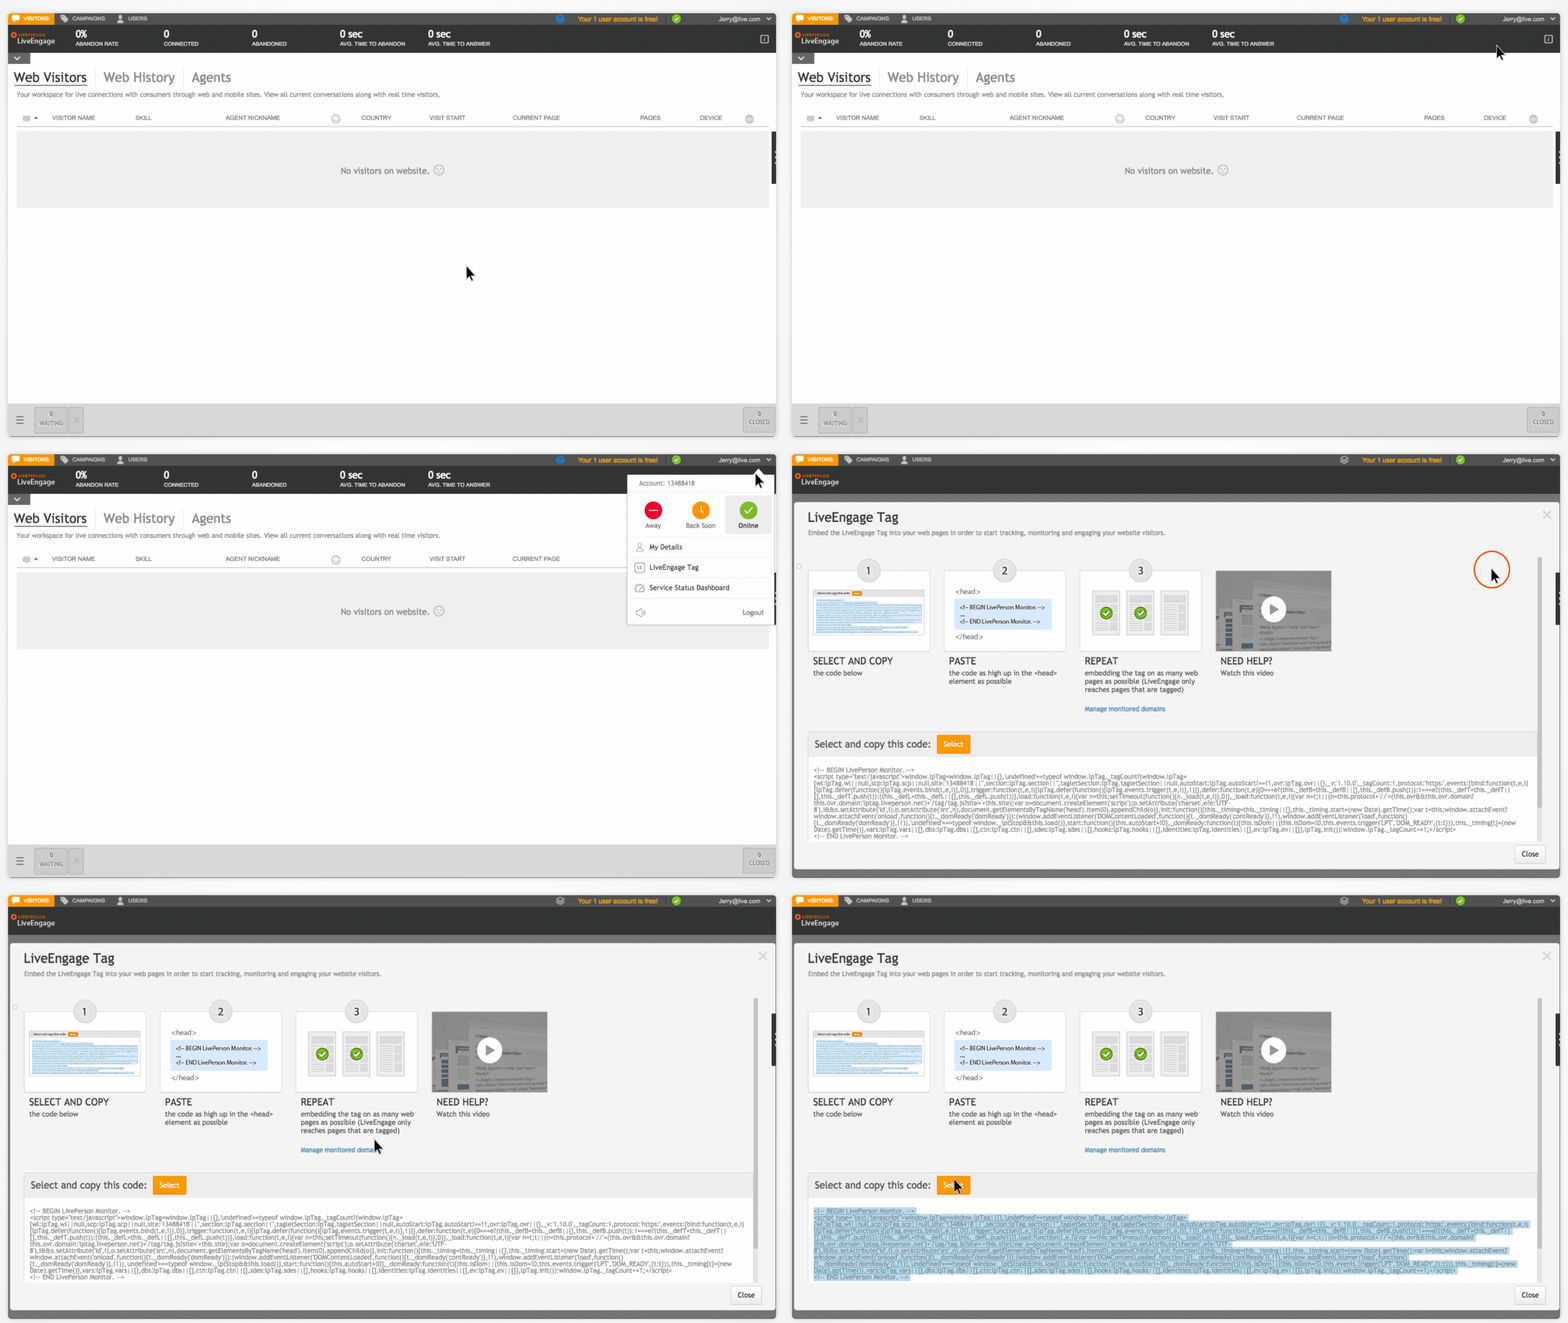
To obtain your Web Tag, login to the Conversational Cloud and click on your avatar in the lower left corner, selecting "Web Tag" from the pop-up menu. Note that this is only available to account Administrators.

Step 2: Add the Web Tag to your website
Copy and paste the tag into your website's <head> section. The tag should be included as high up in the <head> section as possible. For more information, click here.
Step 3: Set up a new messaging campaign
In the Conversational Cloud, first click on the Campaign Builder tab located in the left navigation bar. Select the default campaign ("Live Chat on your site") and click Unpublish to disable this campaign.
Next, click the Add campaign button at the bottom left of the screen. Click Add goal, select Interact with consumers and click Done at the bottom right. You can read more about goals here.
Click Add engagement and select Web. Choose any of the available engagement types and then continue clicking Next until the Done button is available. Click Done. Click Publish at the top right to publish your campaign. You can read more about campaigns here.
Steps 4: Send and receive Web Messages
Load the website that you inserted your Web Tag into. If you’ve successfully completed Steps 1-3, the engagement button that you selected in Step 3 will appear. Click on the engagement button and send a message. The message will appear in the Conversational Cloud. Clicking "Accept" will allow you to respond.
Additional resources
Missing Something?
Check out our Developer Center for more in-depth documentation. Please share your documentation feedback with us using the feedback button. We'd be happy to hear from you.