Customizing Predefined Content
The Custom Predefined Content feature streamlines communication by allowing agents to access, create, and manage personalized templates and messages efficiently. Agents can tailor responses to their workflow, enhancing productivity and customer interactions. The key capabilities include:
- Personalized Storage: Agents can add, edit, delete, and organize templates, customizing them for their unique communication needs.
- Custom Categories: A dedicated My Content section stores personalized items, enabling quick and easy access without repetitive typing.
- Search and Favorites: Agents can search templates by title, mark frequently used ones as favorites, and choose to display titles with or without preview text for easier navigation.
- Seamless Integration: This intuitive feature integrates effortlessly into the Agent Workspace, ensuring a smooth user experience and improved efficiency.
Adding New Custom Predefined Content
1. At the top of the Agent Workspace page, click the Predefined Content Widget icon. The Predefined Content section appears, displaying a list of predefined templates.
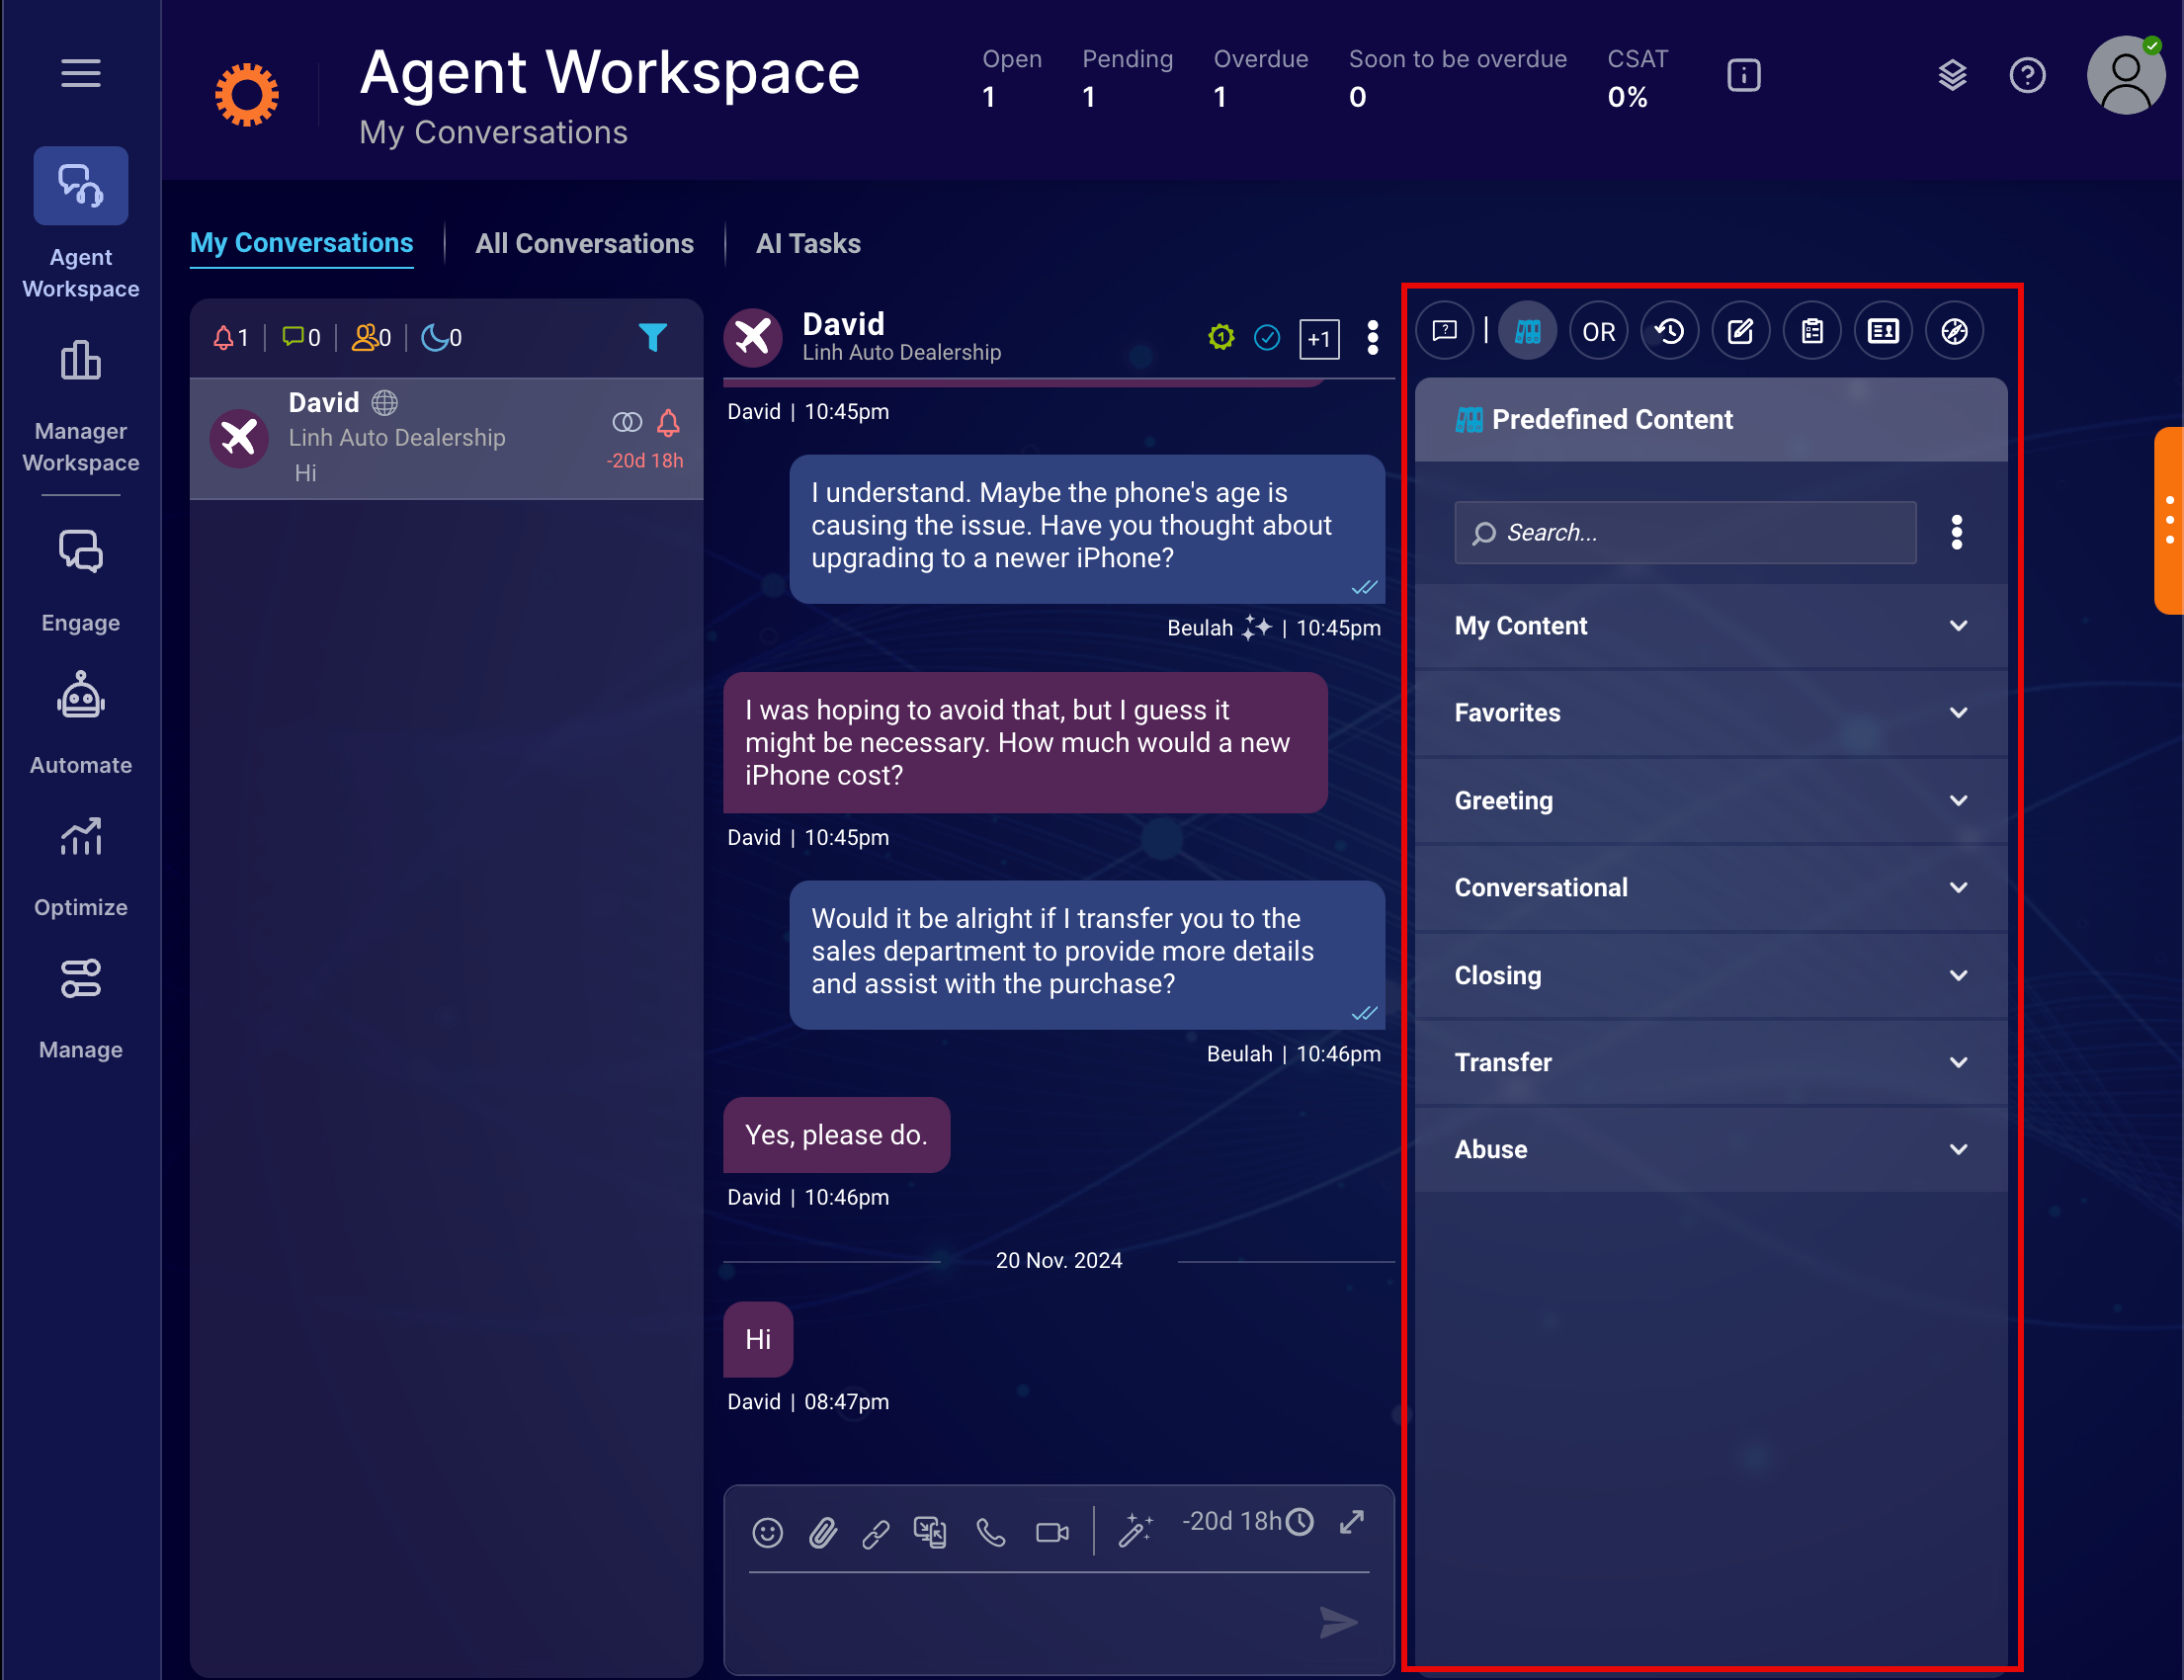
Predefined Content
2. Click My Content > + Add New Content. The Add Content section appears.
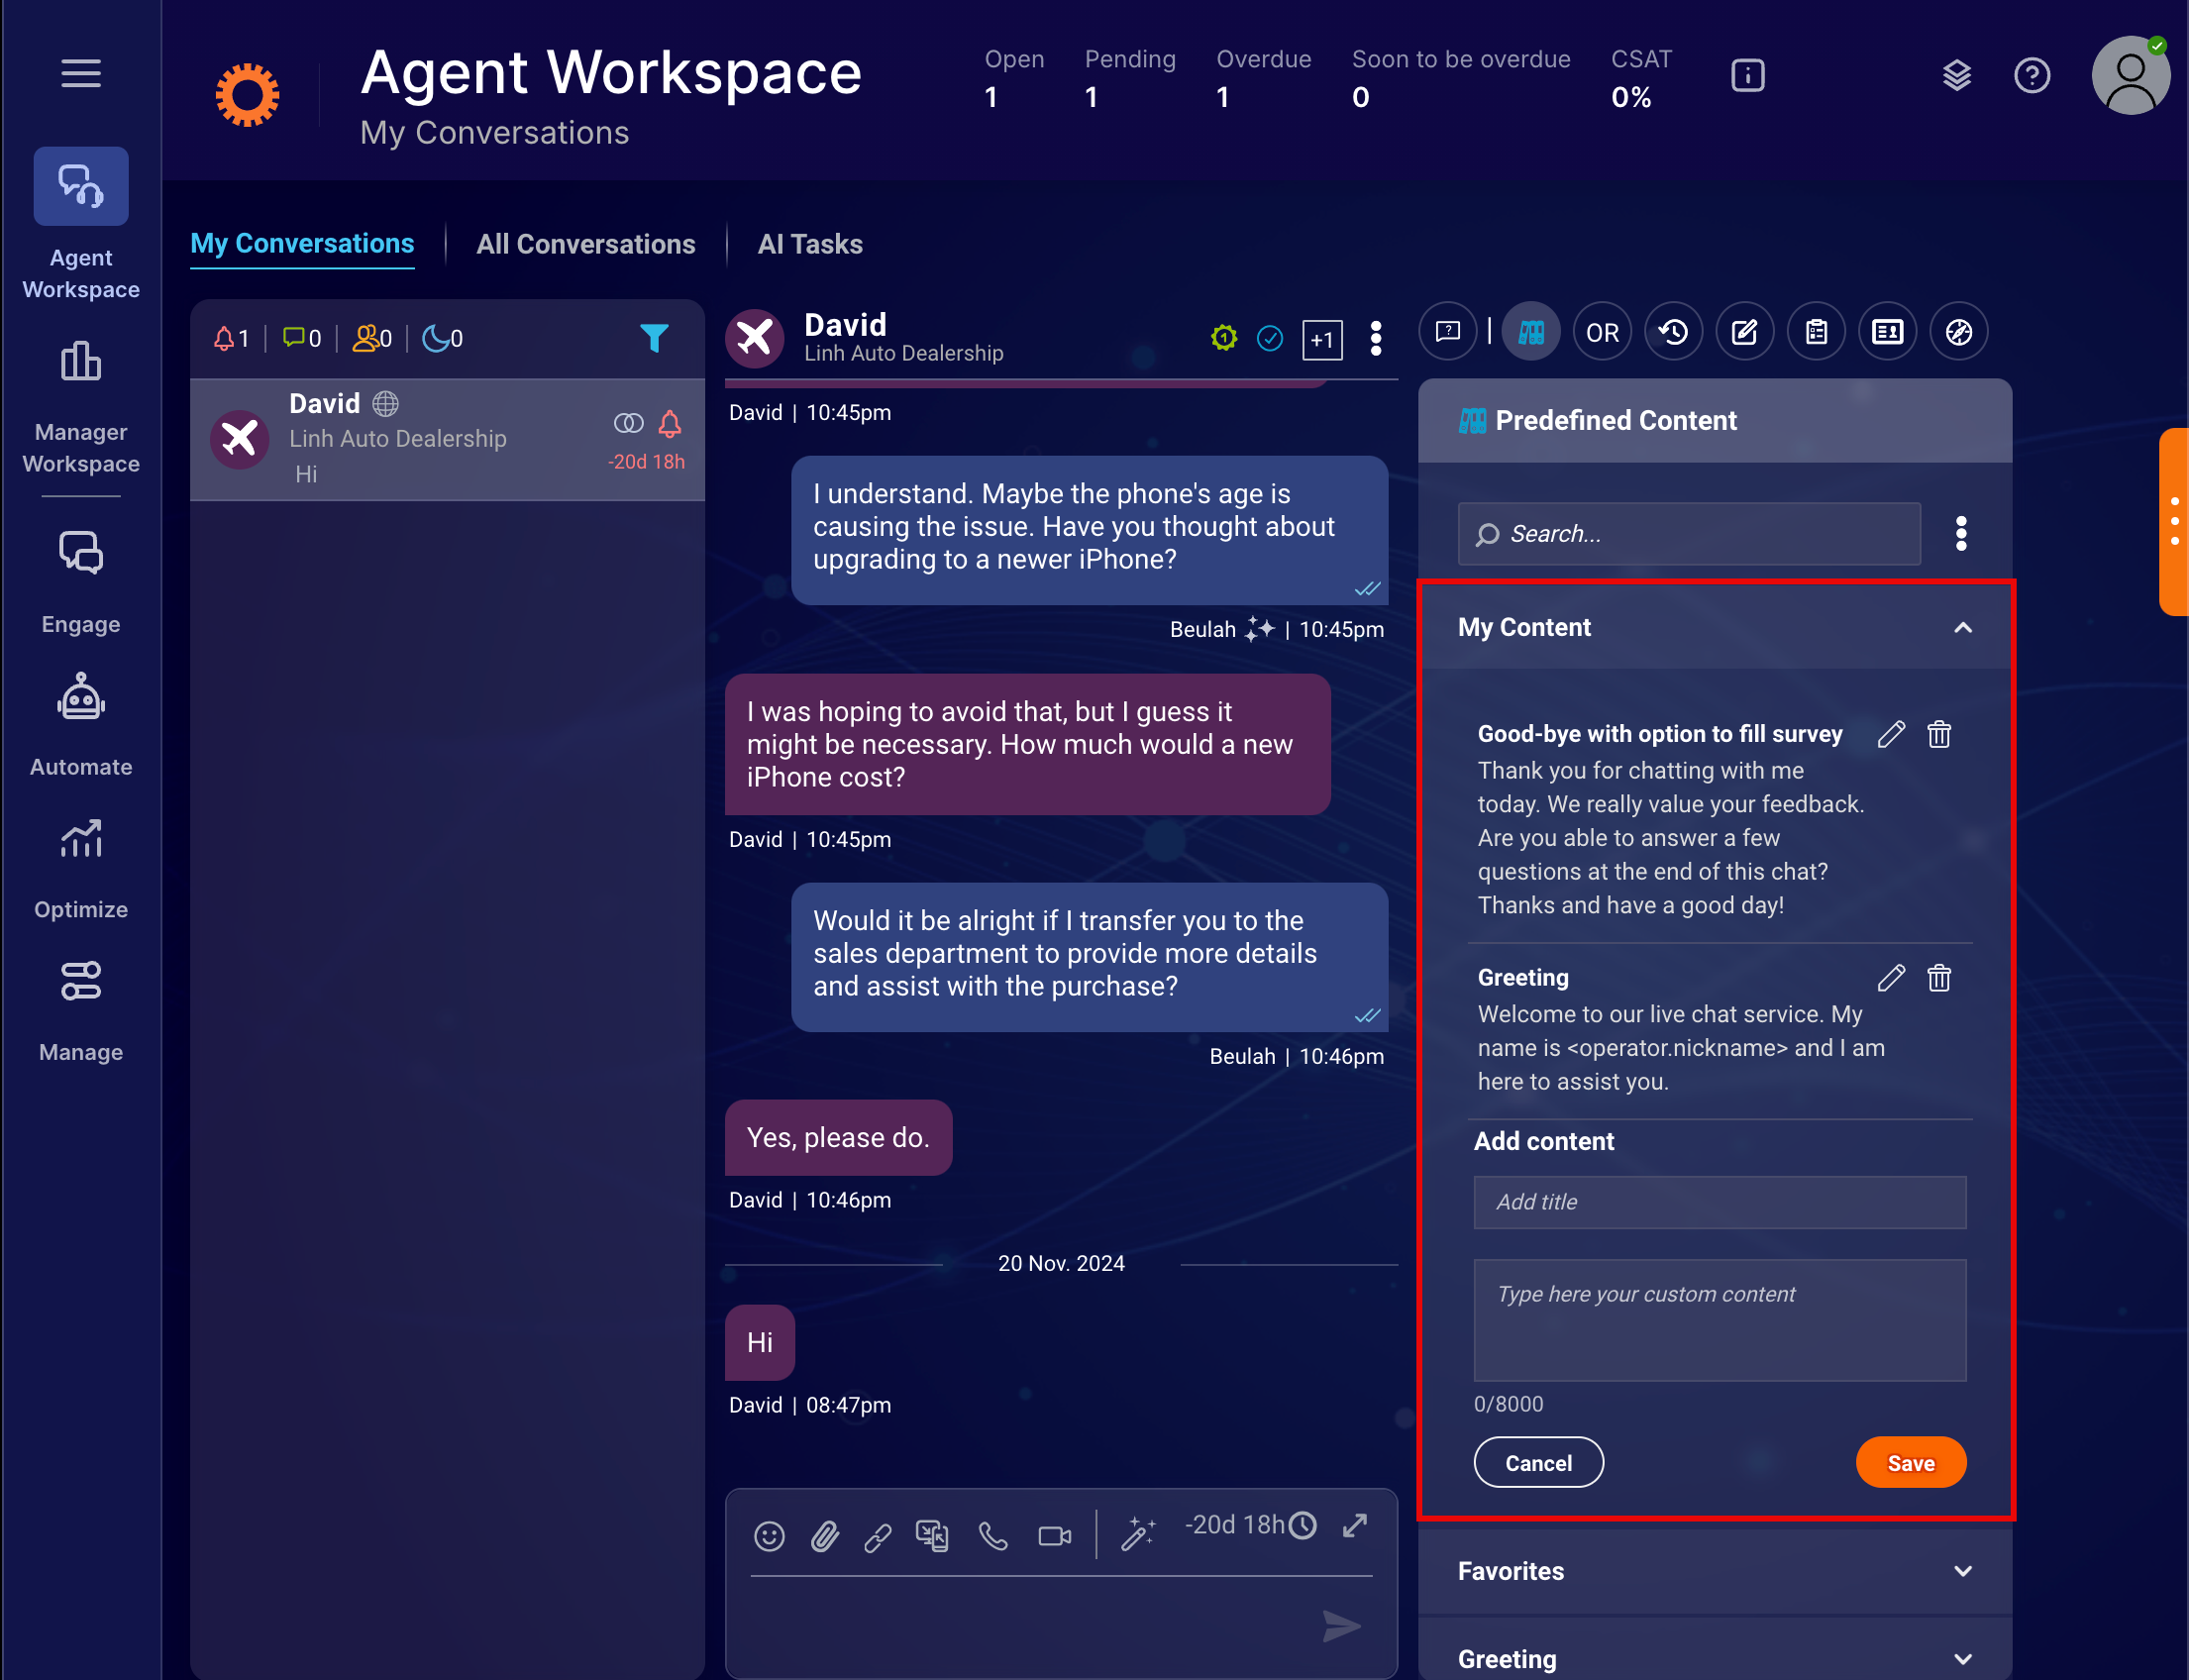
Add Content
3. Enter the details in the Add Title and Type here your custom content fields, then click Save. The new predefined content is added to the list under My Content.
Editing Existing Custom Predefined Content
1. At the top of the Agent Workspace page, click the Predefined Content icon. The Predefined Content section appears, displaying a list of predefined templates.
2. Click My Content to view the list of predefined templates.
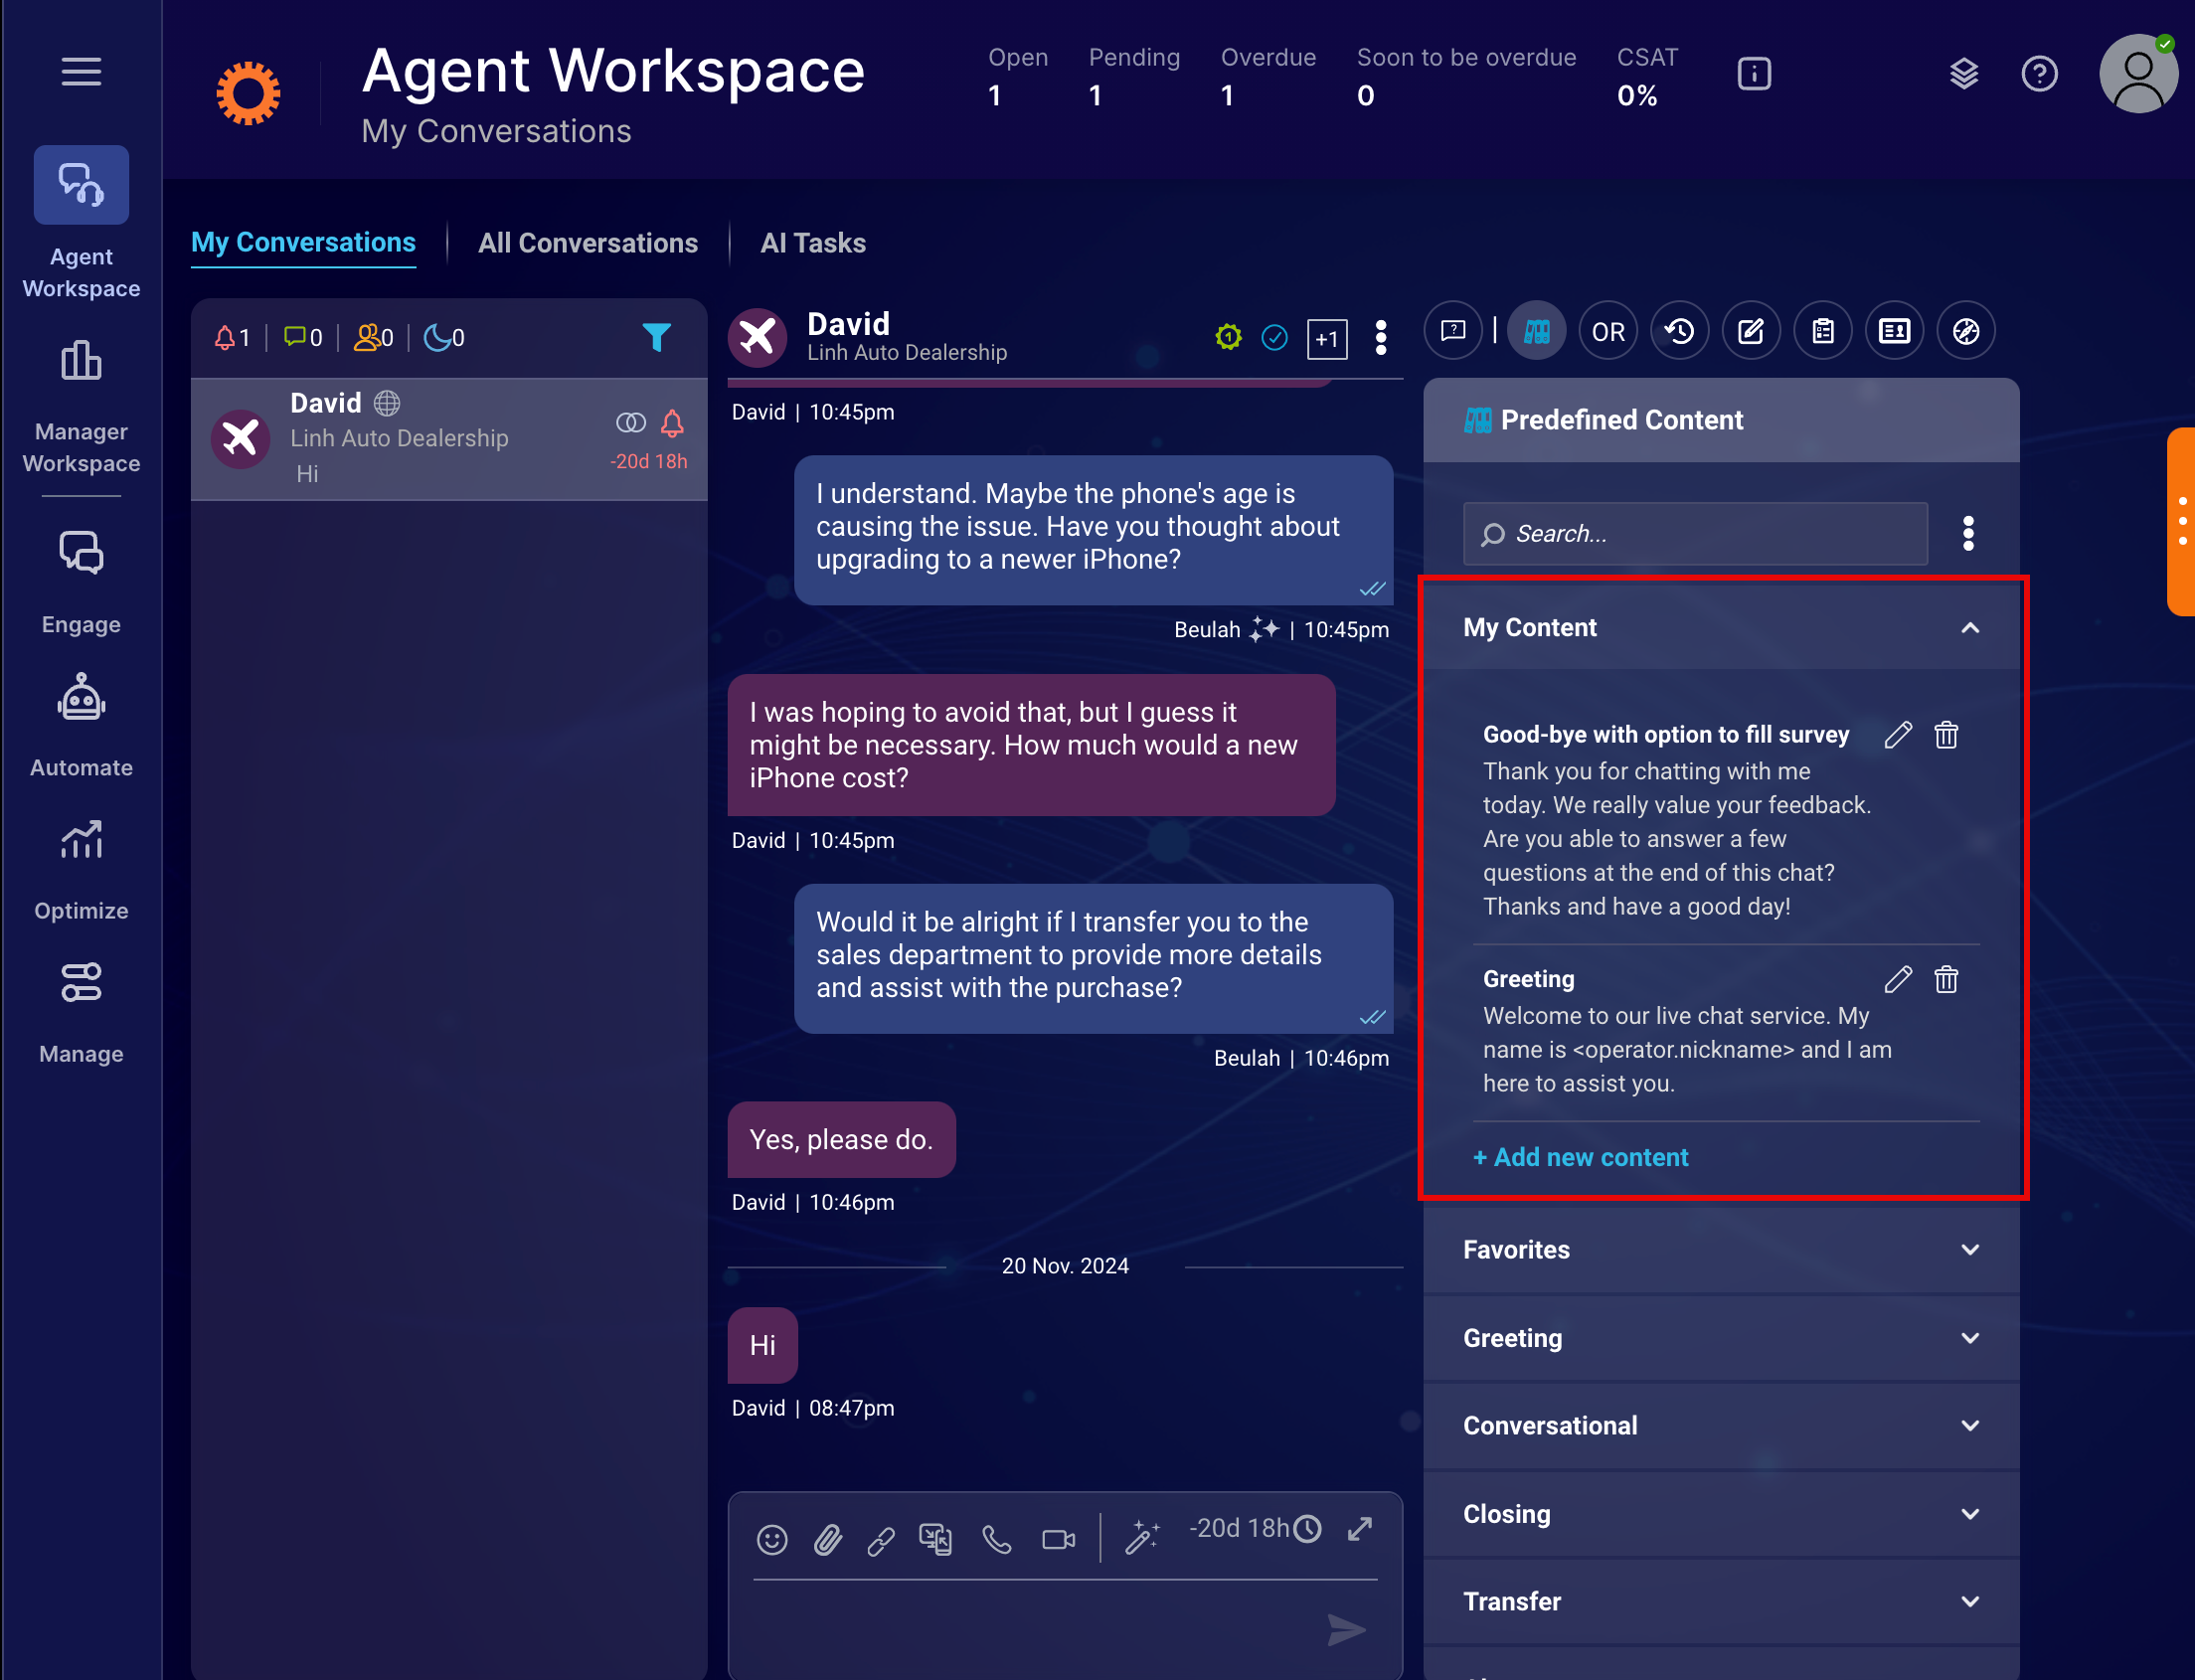
My Content
3. Next to the desired predefined content, click the Edit icon. The Edit Content section appears.
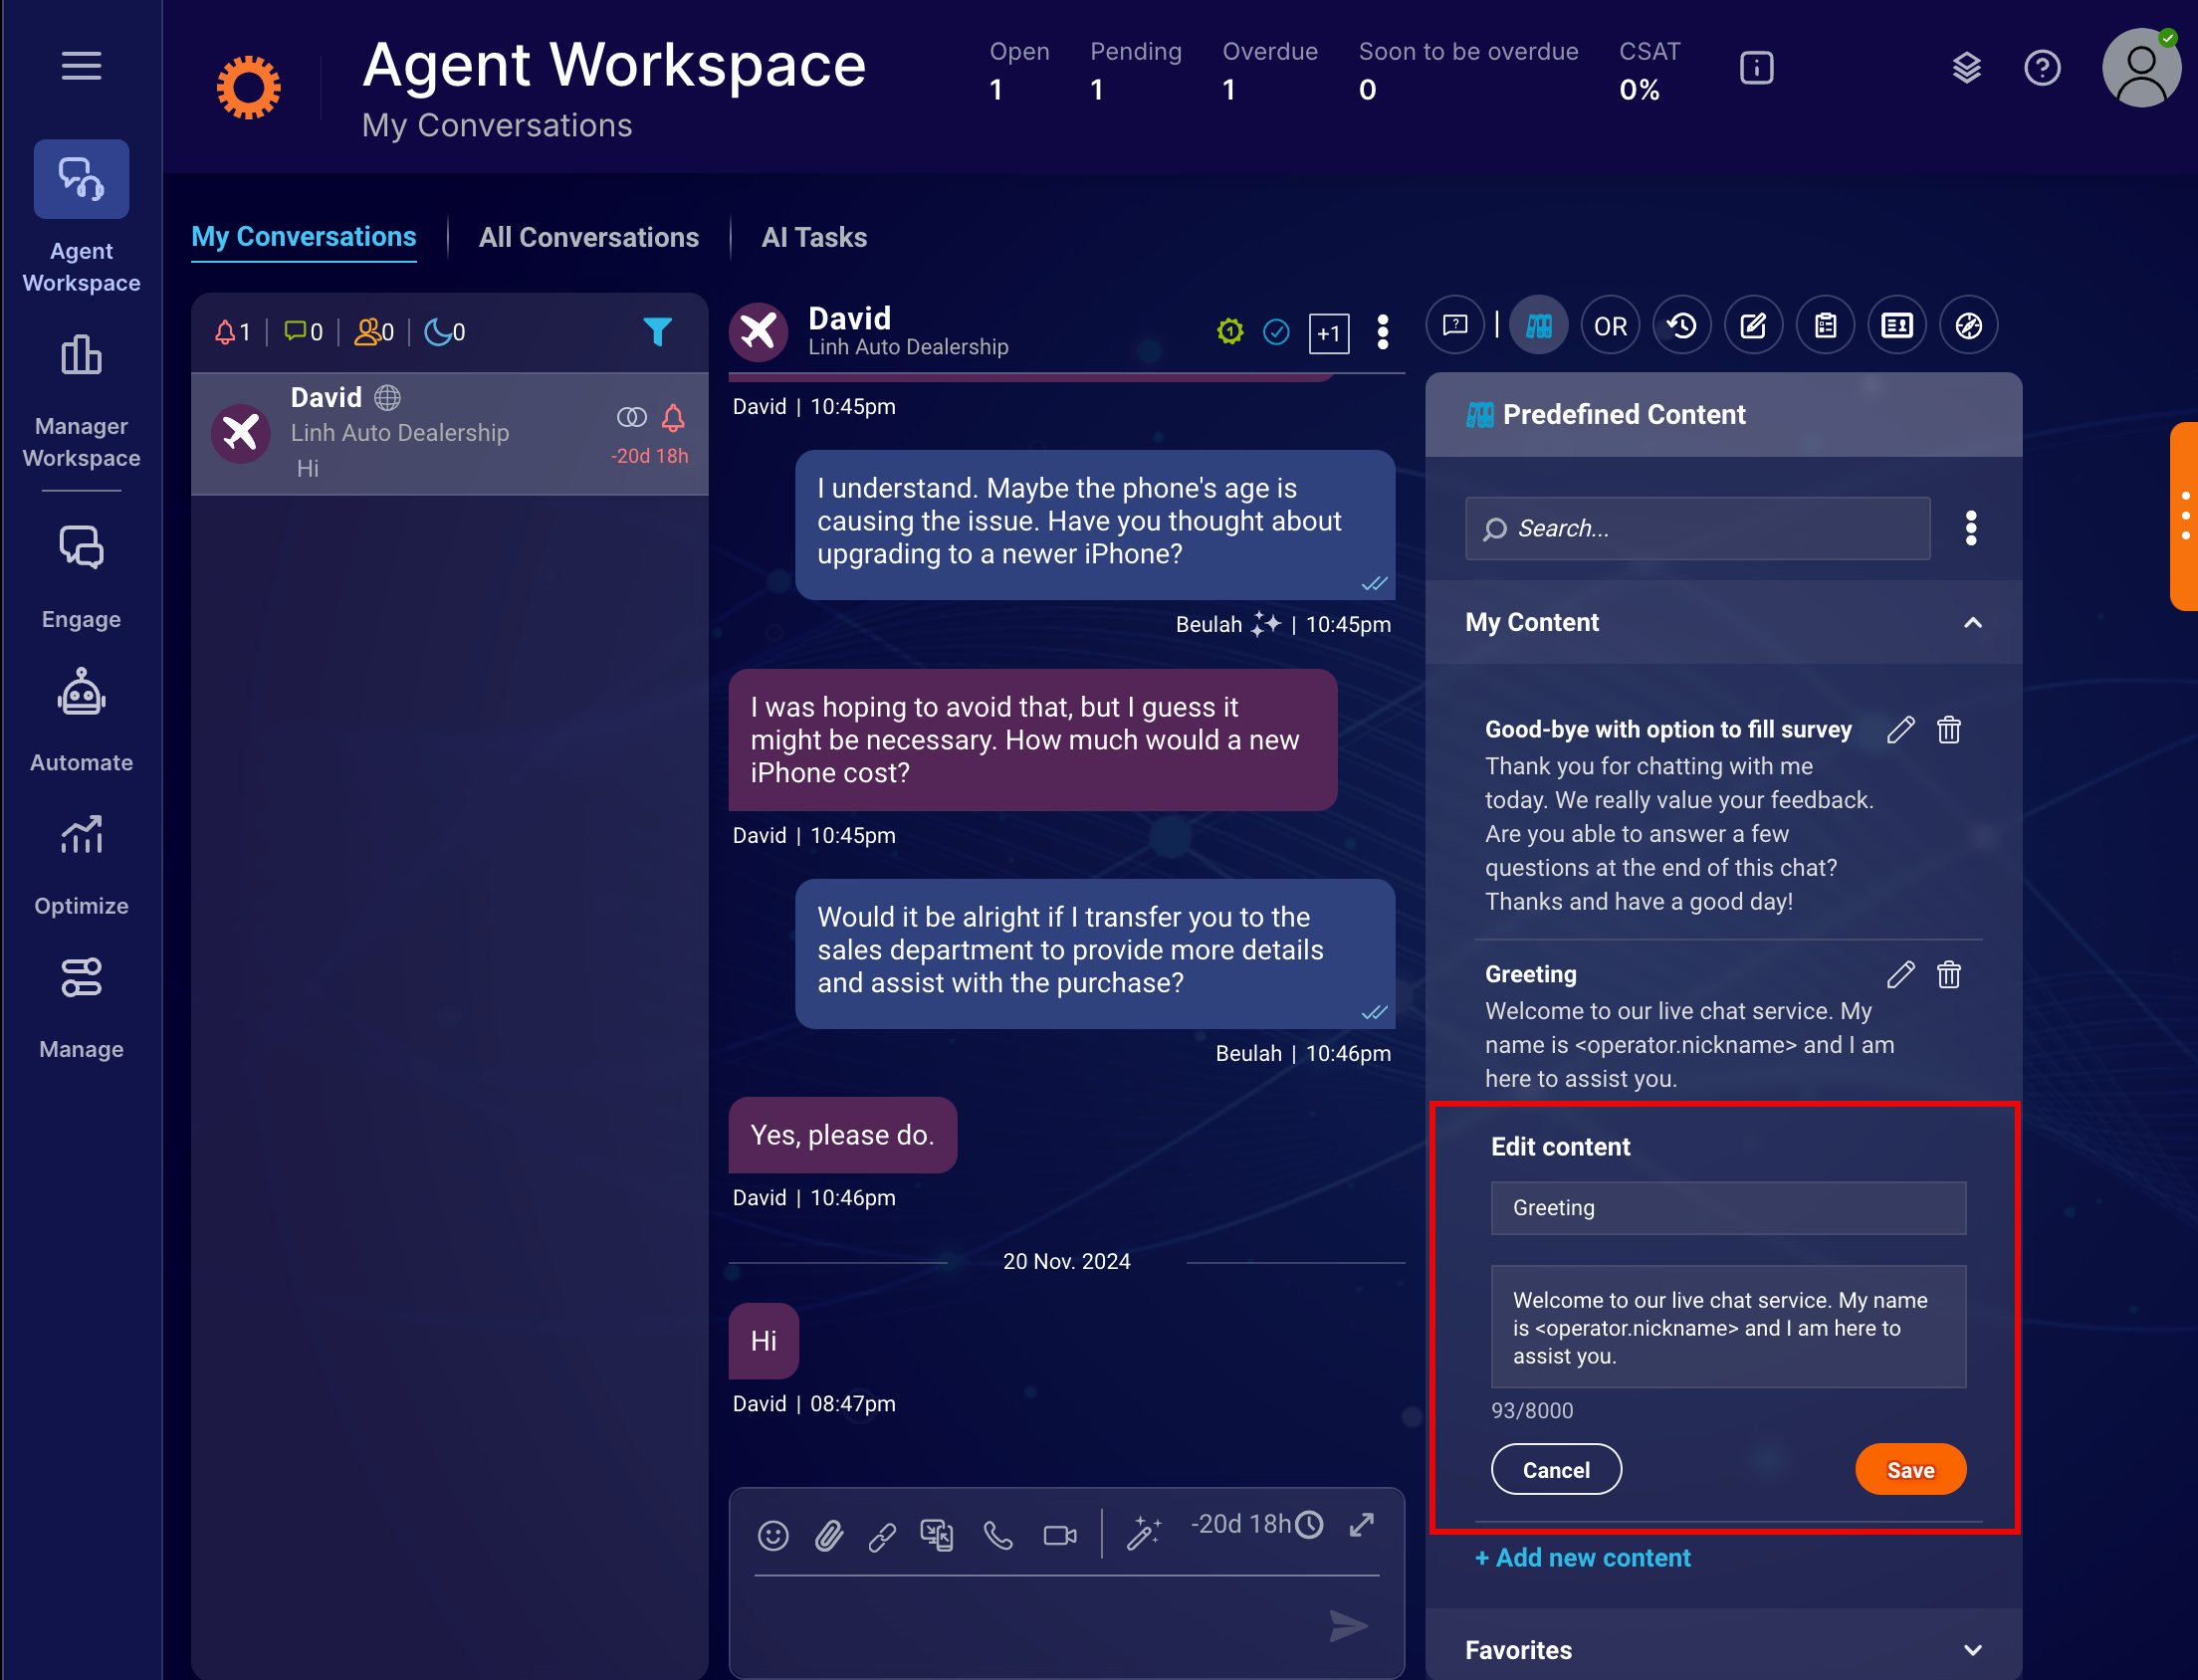
Edit Content
4. Modify the title and content details you want, then click Save. The predefined content is updated with the changes.
Deleting Existing Custom Predefined Content
1. At the top of the Agent Workspace page, click the Predefined Content icon. The Predefined Content section appears, displaying a list of predefined templates.
2. Click My Content to view the list of predefined templates.

My Content
3. Next to the desired predefined content, click the Delete icon. The Delete Custom Content dialog appears.
4. Click OK to confirm. The predefined content is removed from the list.
Marking Predefined Content As Favorite
1. At the top of the Agent Workspace page, click the Predefined Content icon. The Predefined Content section appears, displaying a list of predefined templates.
2. Click the desired section to view its list of predefined templates.

Add to Favorites
3. Next to the desired predefined content, click the Add to Favorites icon. All templates marked as favorites are displayed under the Favorites section.
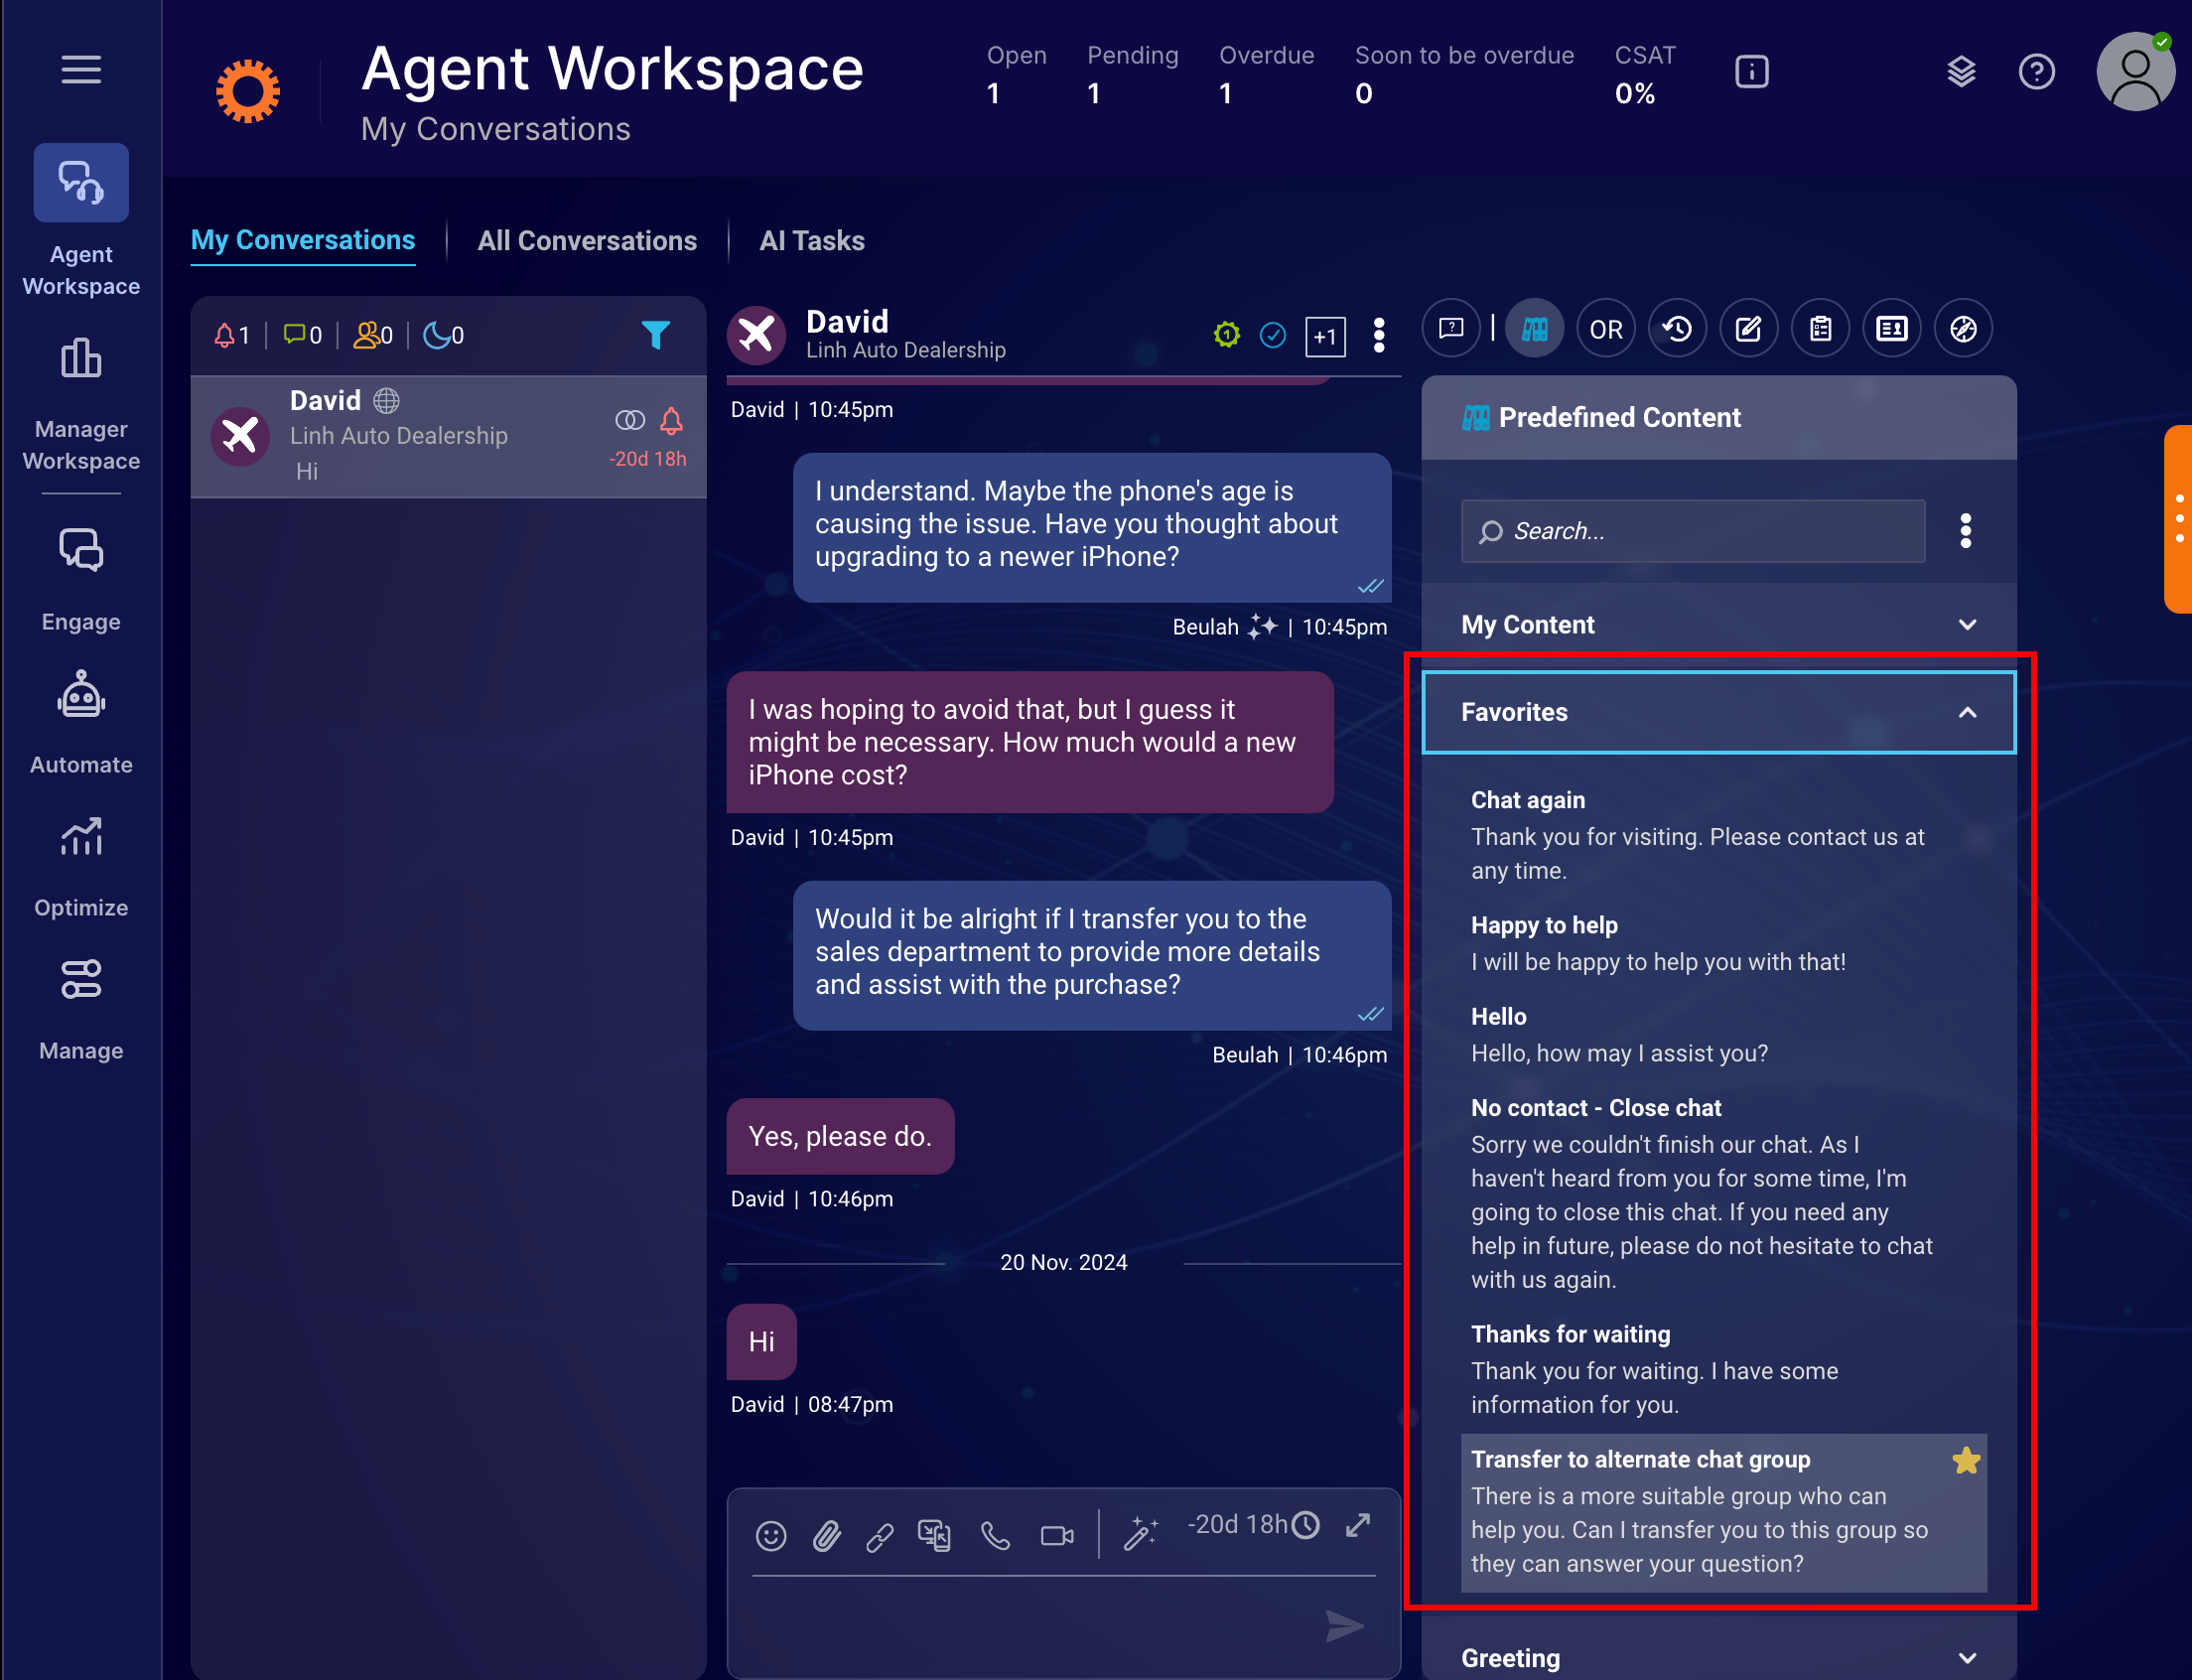
Favorites
Configuring Predefined Content Settings
1. In the left menu, navigate to Manage > Management Console. The Management Console page appears.
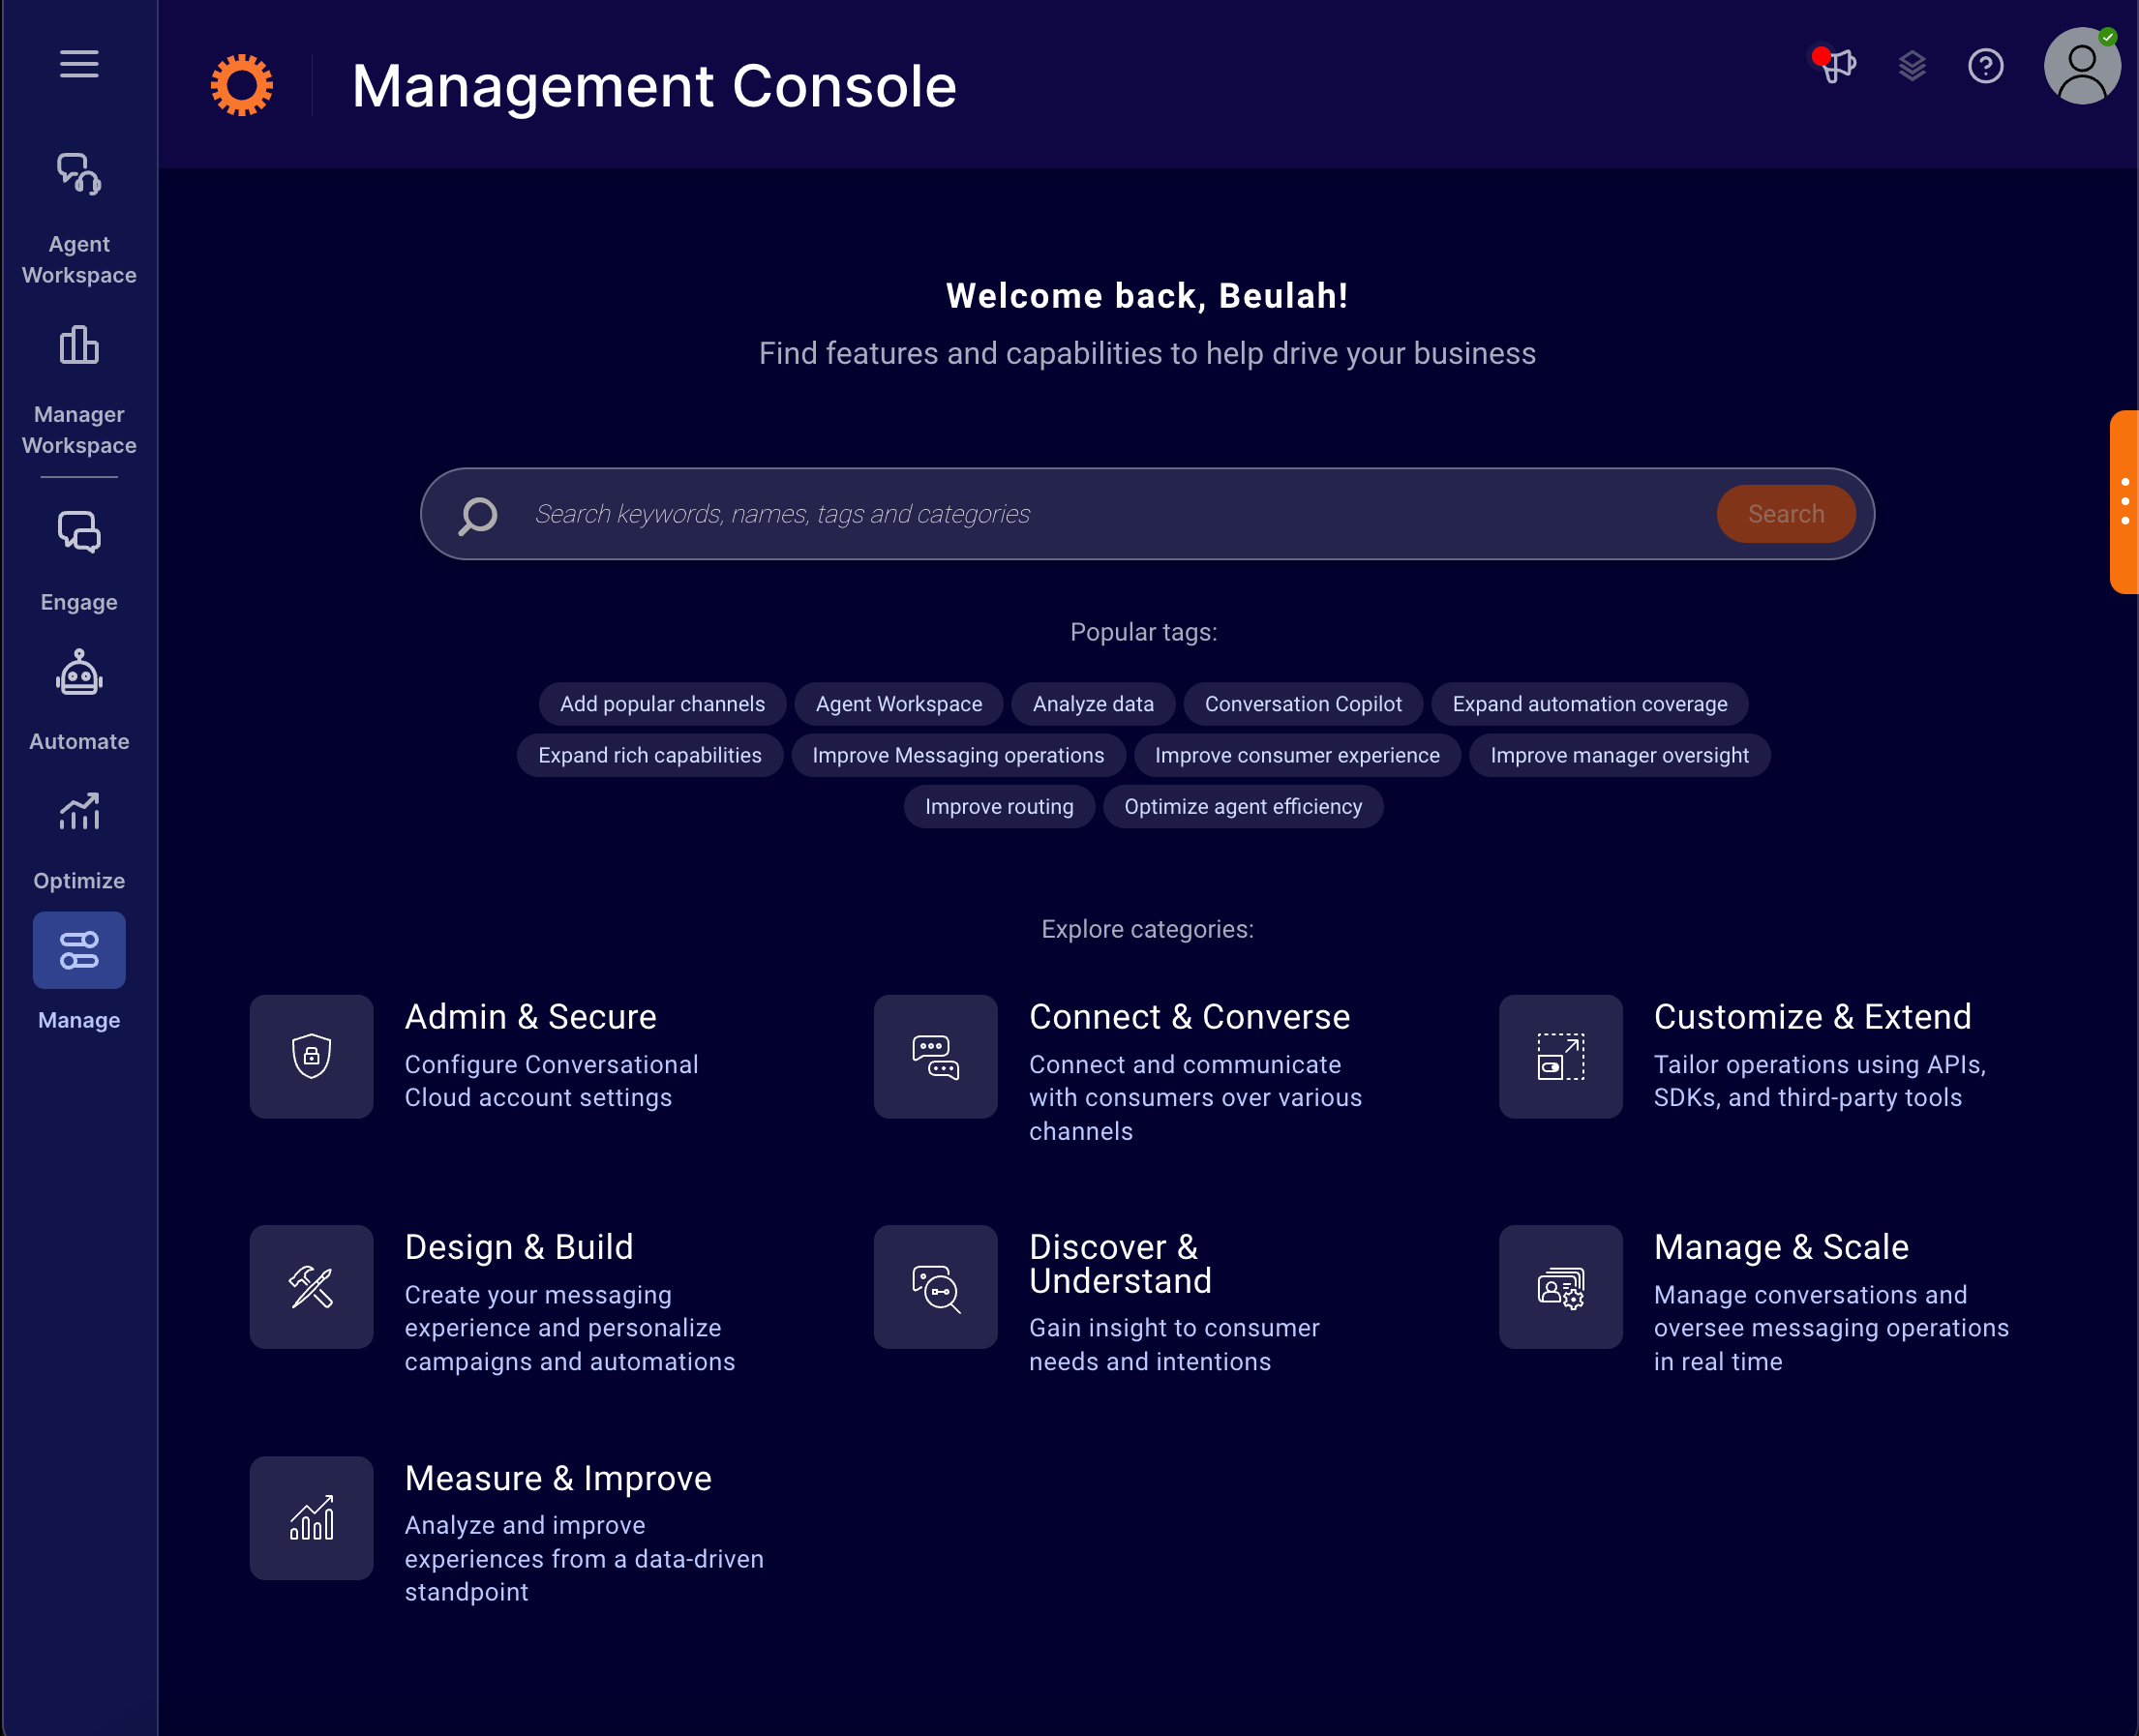
Management Console
2. Click Manage & Scale > Predefined Content. The Predefined Content configuration page appears.

Predefined Content Configuration
3. Toggle My Content and Favorite Predefined Content to enable the predefined content settings.
4. To set and manage the number of favorite predefined content items per agent, enter a value in the Favorite PDC Limit field, then click Save.
Missing Something?
Check out our Developer Center for more in-depth documentation. Please share your documentation feedback with us using the feedback button. We'd be happy to hear from you.