Entry point
The entry point allows you to define where you want your engagement to appear within your website. You can use one of the predefined entry points, such as Entire Website or Entire App, or focus your targeting on a particular page or section.
Assigning an entry point to your engagement
To create a new entry point, simply name the entry point and copy its URL into the field “Contains/Exact/Advance.” To define where the engagement cannot display, copy the excluded page URL into the applicable field.
To create or edit the entry point:
- Click Entry Point to enter the entry point library, now you can add new entry points for displaying engagements
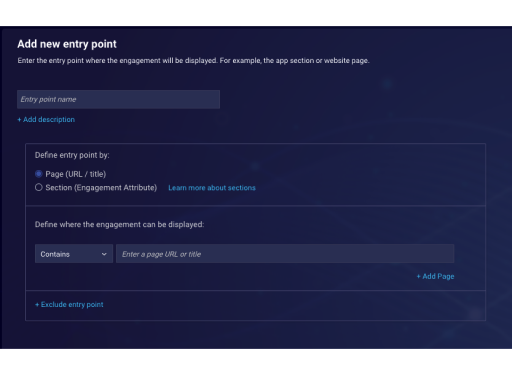
- Click Add new entry point and enter an entry point name
- Select contains, exact, or advanced from the dropdown menu and copy the target URL into the field on the right
- Click + Add URL to add more URLs
- If you want to exclude the engagement from specific pages, click + Exclude entry point and copy the target URL into the field on the right
- Click the Save button

Map your site categories using code
You’ve just finished creating an engagement for one of the categories on your website or mobile app. For example, the cameras category on your website. You want the engagement to display on all the pages in the camera category. One option is to use a URL that defines where the engagement should display. However, this means that you will need to manually add each camera-related page URL into the Conversational Cloud.
To save you time, it is also possible to add a tag, or section, to your page code. These sections can also be defined when creating engagements for mobile apps. A section associates a category name (camera, in our example) to the page; any new or existing page on your website or within your app that you tag with the camera section will display the engagement automatically. A page can be represented by one or more tags – for example, you can tag camera or camera and DSLR - giving you greater flexibility in targeting your engagement, which in turn makes your campaign more effective.
In the Conversational Cloud UI, adding the tag using quotes (e.g, “camera DSLR”) will ensure that the engagement is displayed on all pages with this exact tag (camera DSLR). Adding the tag without quotes (e.g. camera) will mean the engagement is displayed on all pages with a tag containing that text (e.g. camera, camera DSLR, waterproof camera, etc).
Section engagement attributes
Sections can be used for both web and mobile app engagements. Since website locations in the Conversational Cloud are based (by default), on URLs, sections will be particularly valuable for web engagements when:
- You make frequent changes to your website and it’s hard to keep track of the pages in each category.
- Your URLs are not readable. For example, the URL “www.urlexample.uk/articles/aaa/bbb.html” doesn’t indicate the location of the visitor on your website.
- Your website URLs are not structured. For example, the URL “www.urlexample.com/XX3000” doesn’t indicate the XX3000 product category. By adding a section to the page, you can identify its category.
- You have a single-page application (SPA), where a page has several internally-linked sections, but only one URL for the entire page.
Configuration
1. Go to the Campaign Builder, and click Data Sources in the footnote.


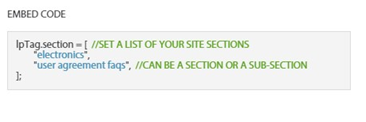
2. Under Engagement, Attributes click Visitor Journey and use the example code under sections.
3. Paste the code on the pages where you want to display the engagement. Change the code sample section names according to your category names:

4. In the campaign view, under the engagement, click Entry Point.
5. From the Entry Point Library, click Add new.
6. Enter an entry point name (a category, e.g., loans).
7. Select the section and type the names of the sections where you want the engagement to display. Remember you can tag as many sections as you want to one entry point and if you want exact matches, you will need to use quotes.
8. Click Save.


Missing Something?
Check out our Developer Center for more in-depth documentation. Please share your documentation feedback with us using the feedback button. We'd be happy to hear from you.