Configuring Agent Workspace Widgets
Agents frequently need to access external systems while working in the Agent Workspace, often requiring them to open additional tabs or browsers. To streamline this process, you can integrate external systems directly into the Agent Workspace by assigning them a dedicated widget alongside the standard widgets.
The widget configuration enables customization of the Agent Workspace by adding or modifying widgets based on skills or profiles. Widgets provide quick access to essential information, enhancing productivity.
You can assign widgets to one or more skills to ensure agents are focused on the tools most relevant for them. The widget subsequently appears only to agents handling chats associated with that skill. The unassigned widgets still appear to all agents handling any chat.
For adding and integrating new widgets, refer to Adding Widgets Documentation in the Developer Center.
Adding New Widget
1. At the top right corner of the Agent Workspace page, click the Night Vision icon. The Edit Widgets pop-up message appears highlighting the existing widgets in a row.
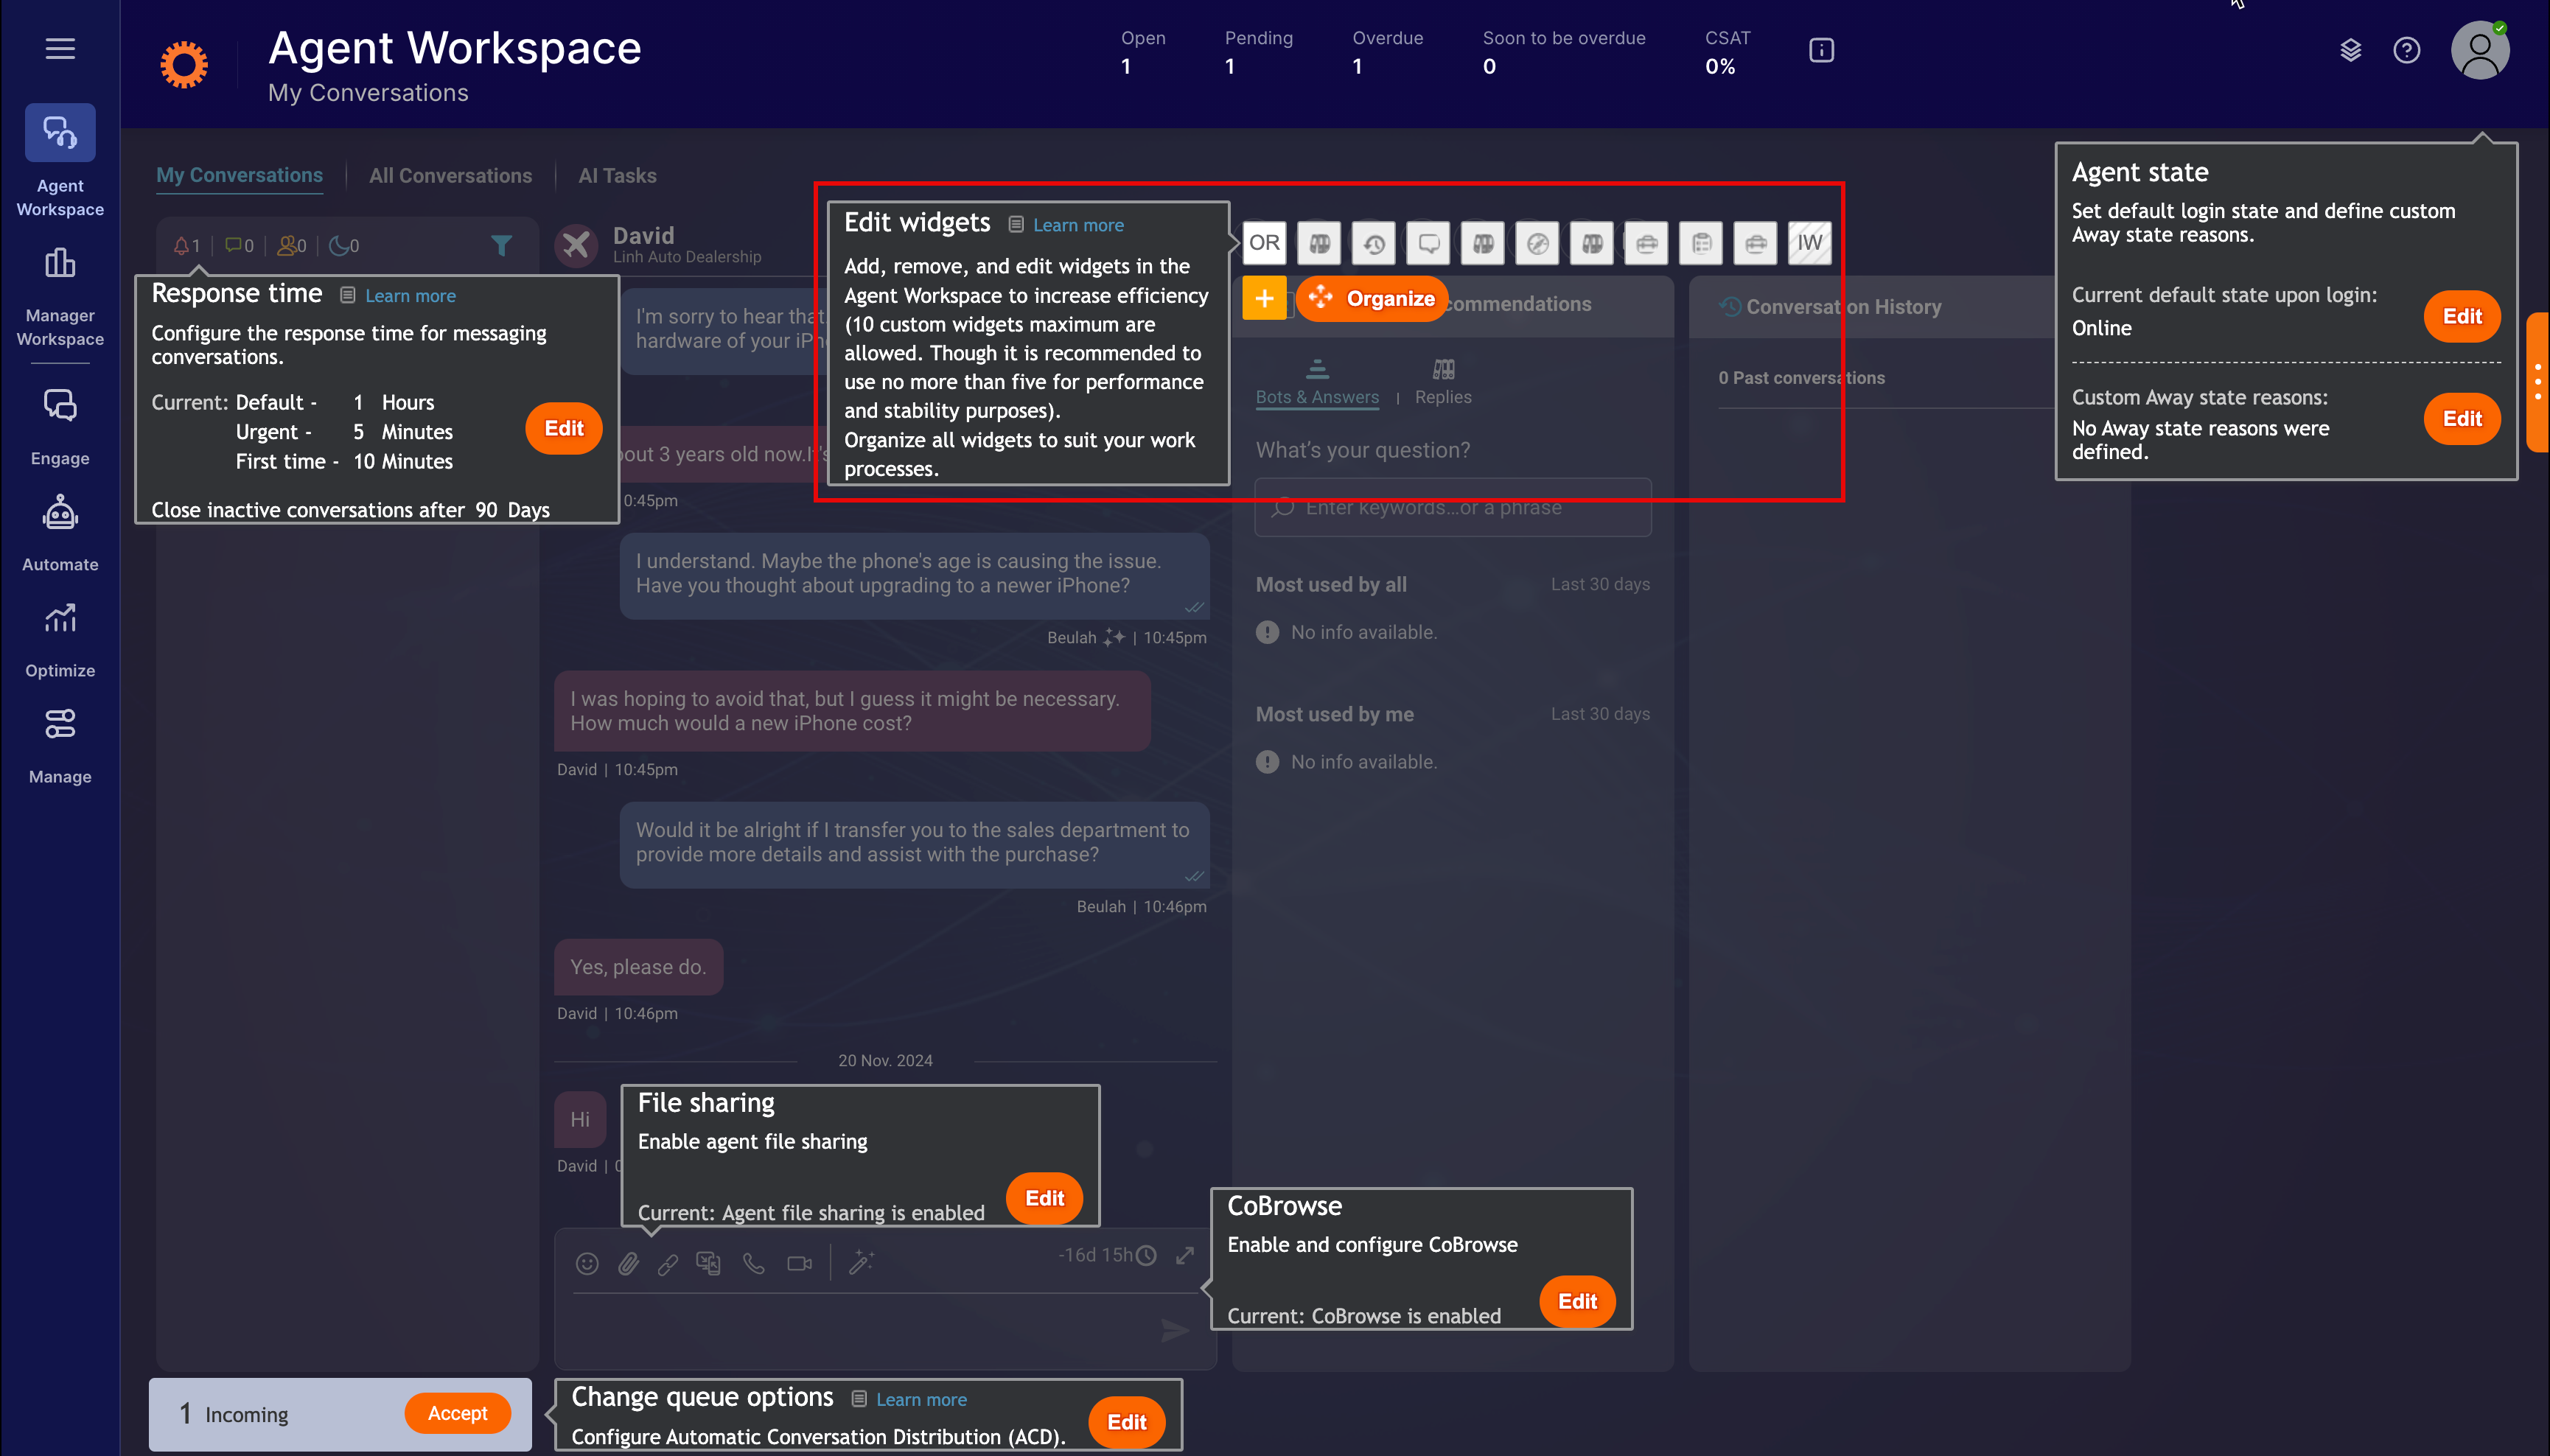
Edit Widgets
2. Click the + (Add new widget) icon. The Integration Widget pop-up window opens.
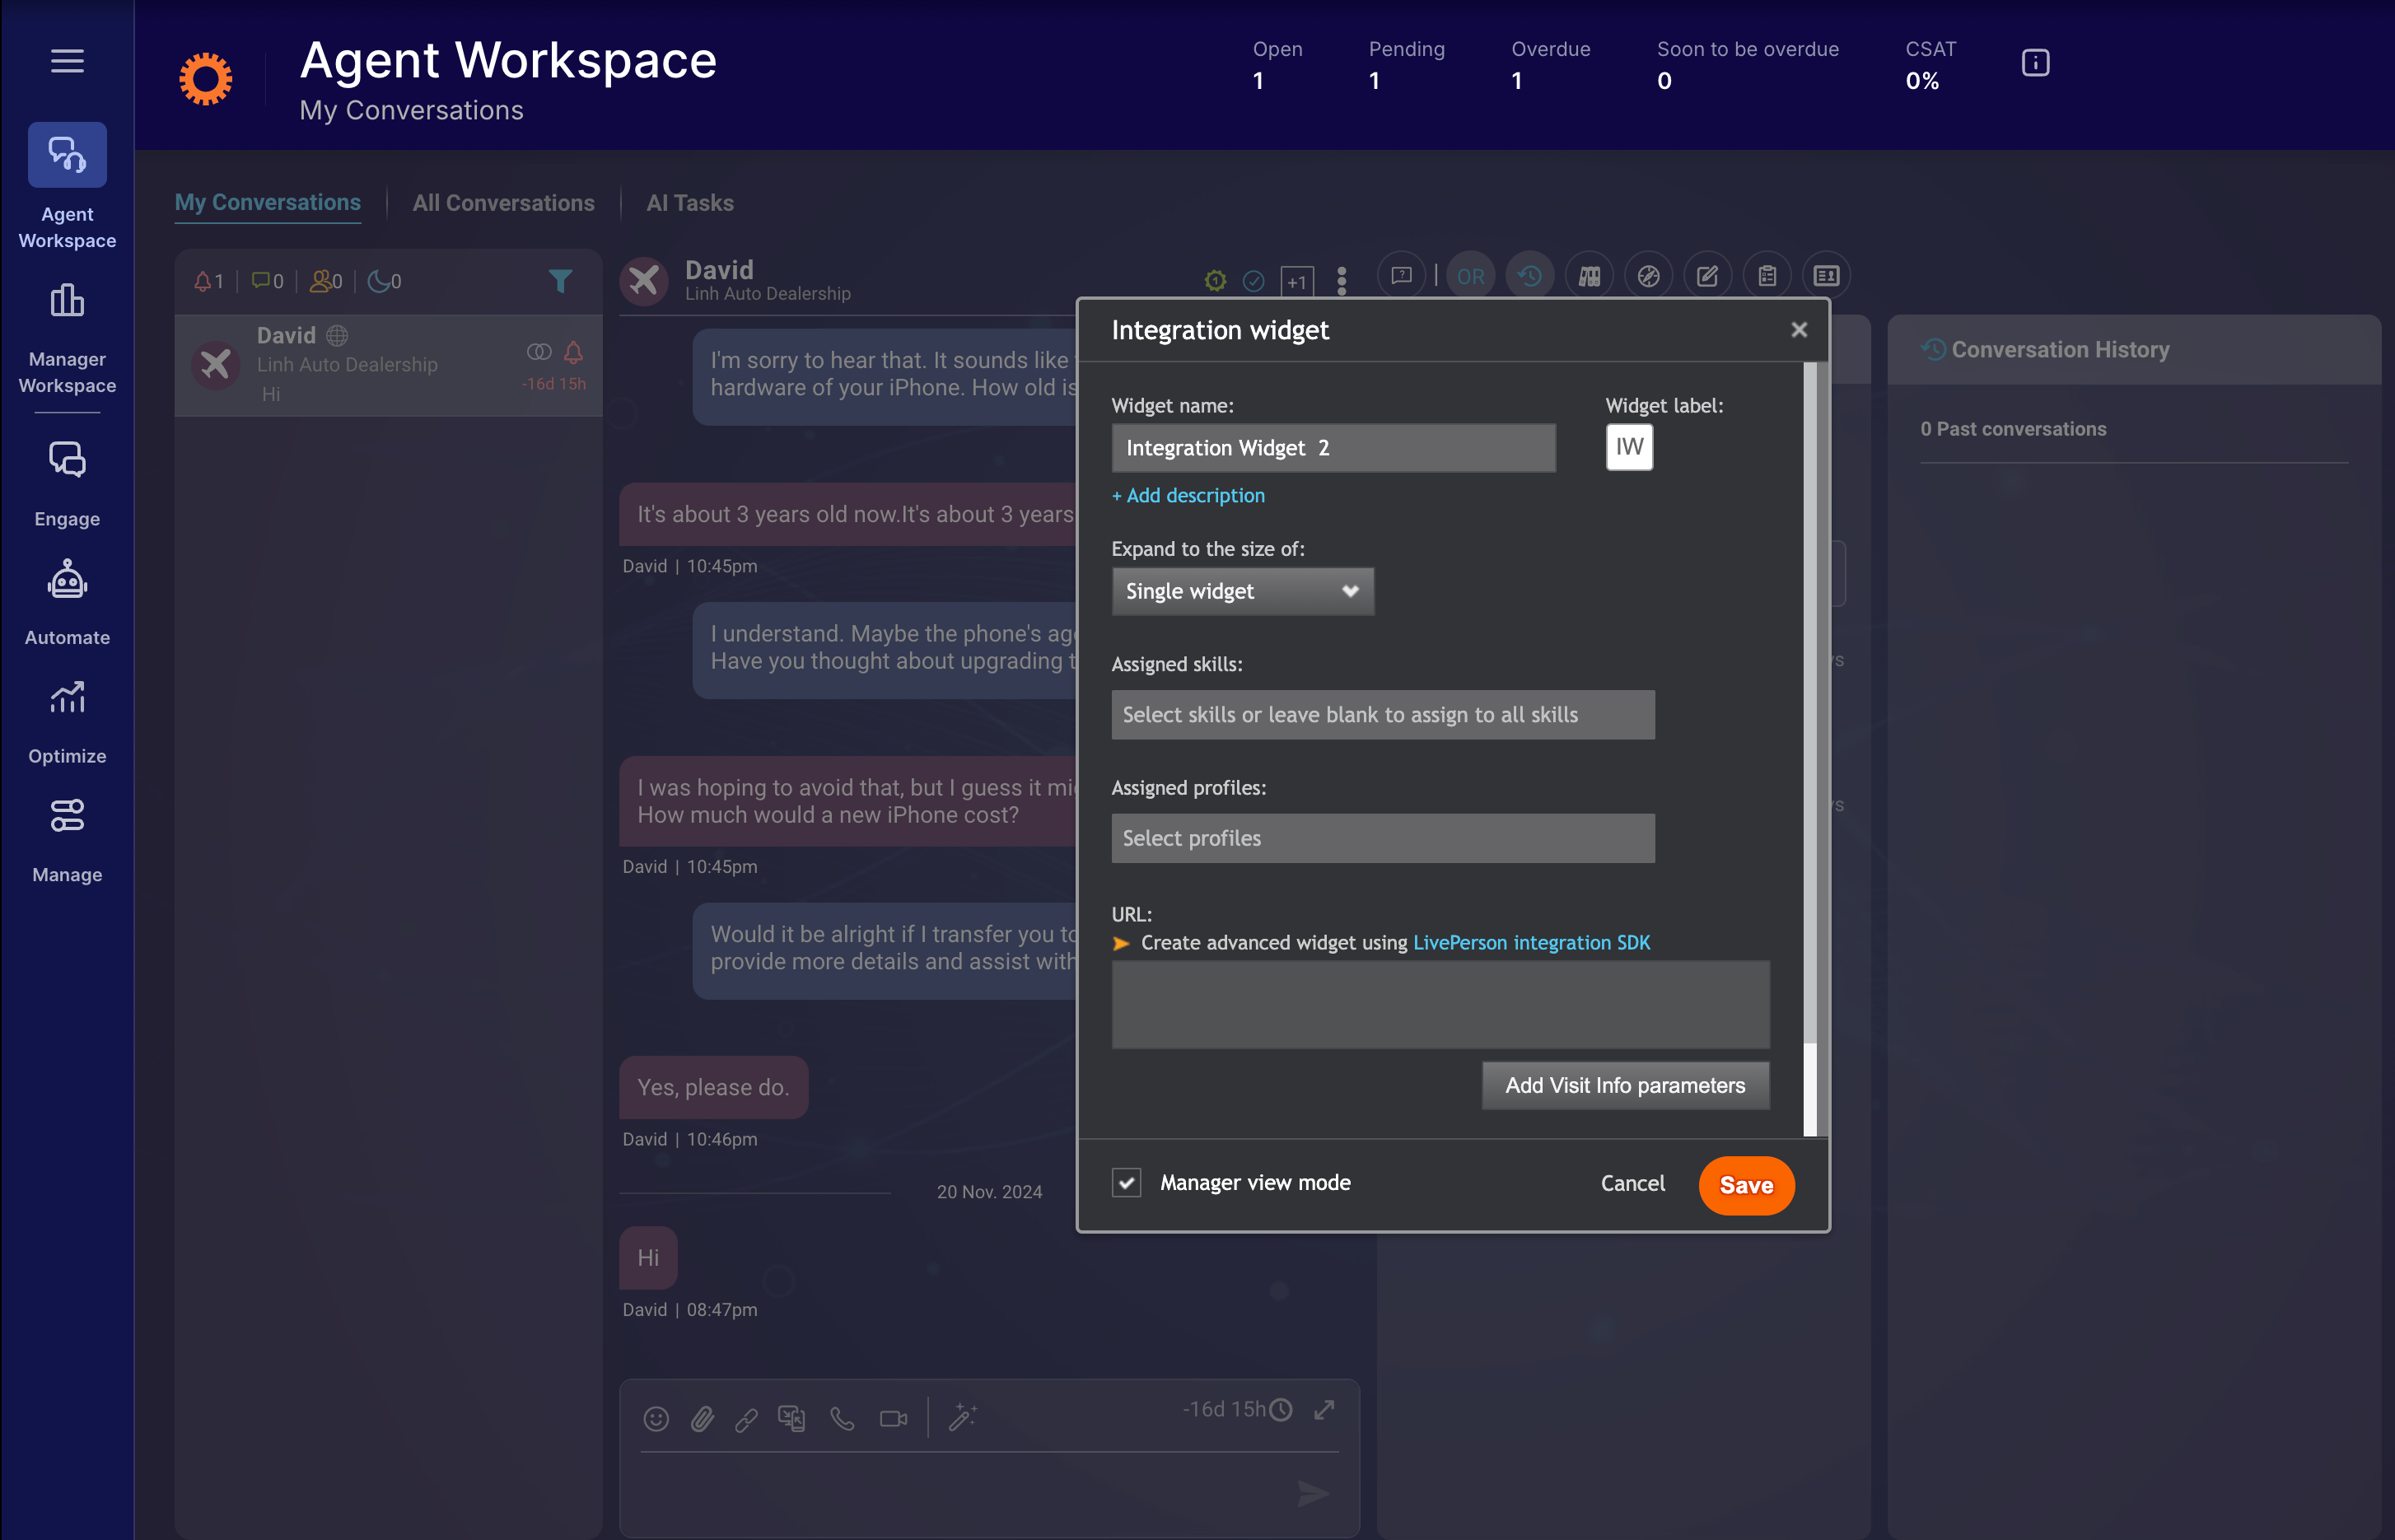
Integration Widget
3. Provide the details for Widget Name and Widget Label as needed.
4. Click + Add description to add the description of the widget.
5. Select the widget size from the Expand to the size of dropdown. You can select the desired width of the new widget as single (the same width as the default widgets), double, triple, or quadruple to ensure compatibility with the external webpage you want to display.
6. Select the options you want from the Assigned Skills and Assigned Profiles dropdowns to make the widget appear alongside chats associated with a specific skill(s). If no skill is assigned, the widget appears in all chats.
7. In the URL text box, enter the link of the webpage or external application you want to display within the widget.
8. To add more parameters to the URL, click Add Visit Info Parameters. The Visit Info Parameters pop-up window opens.
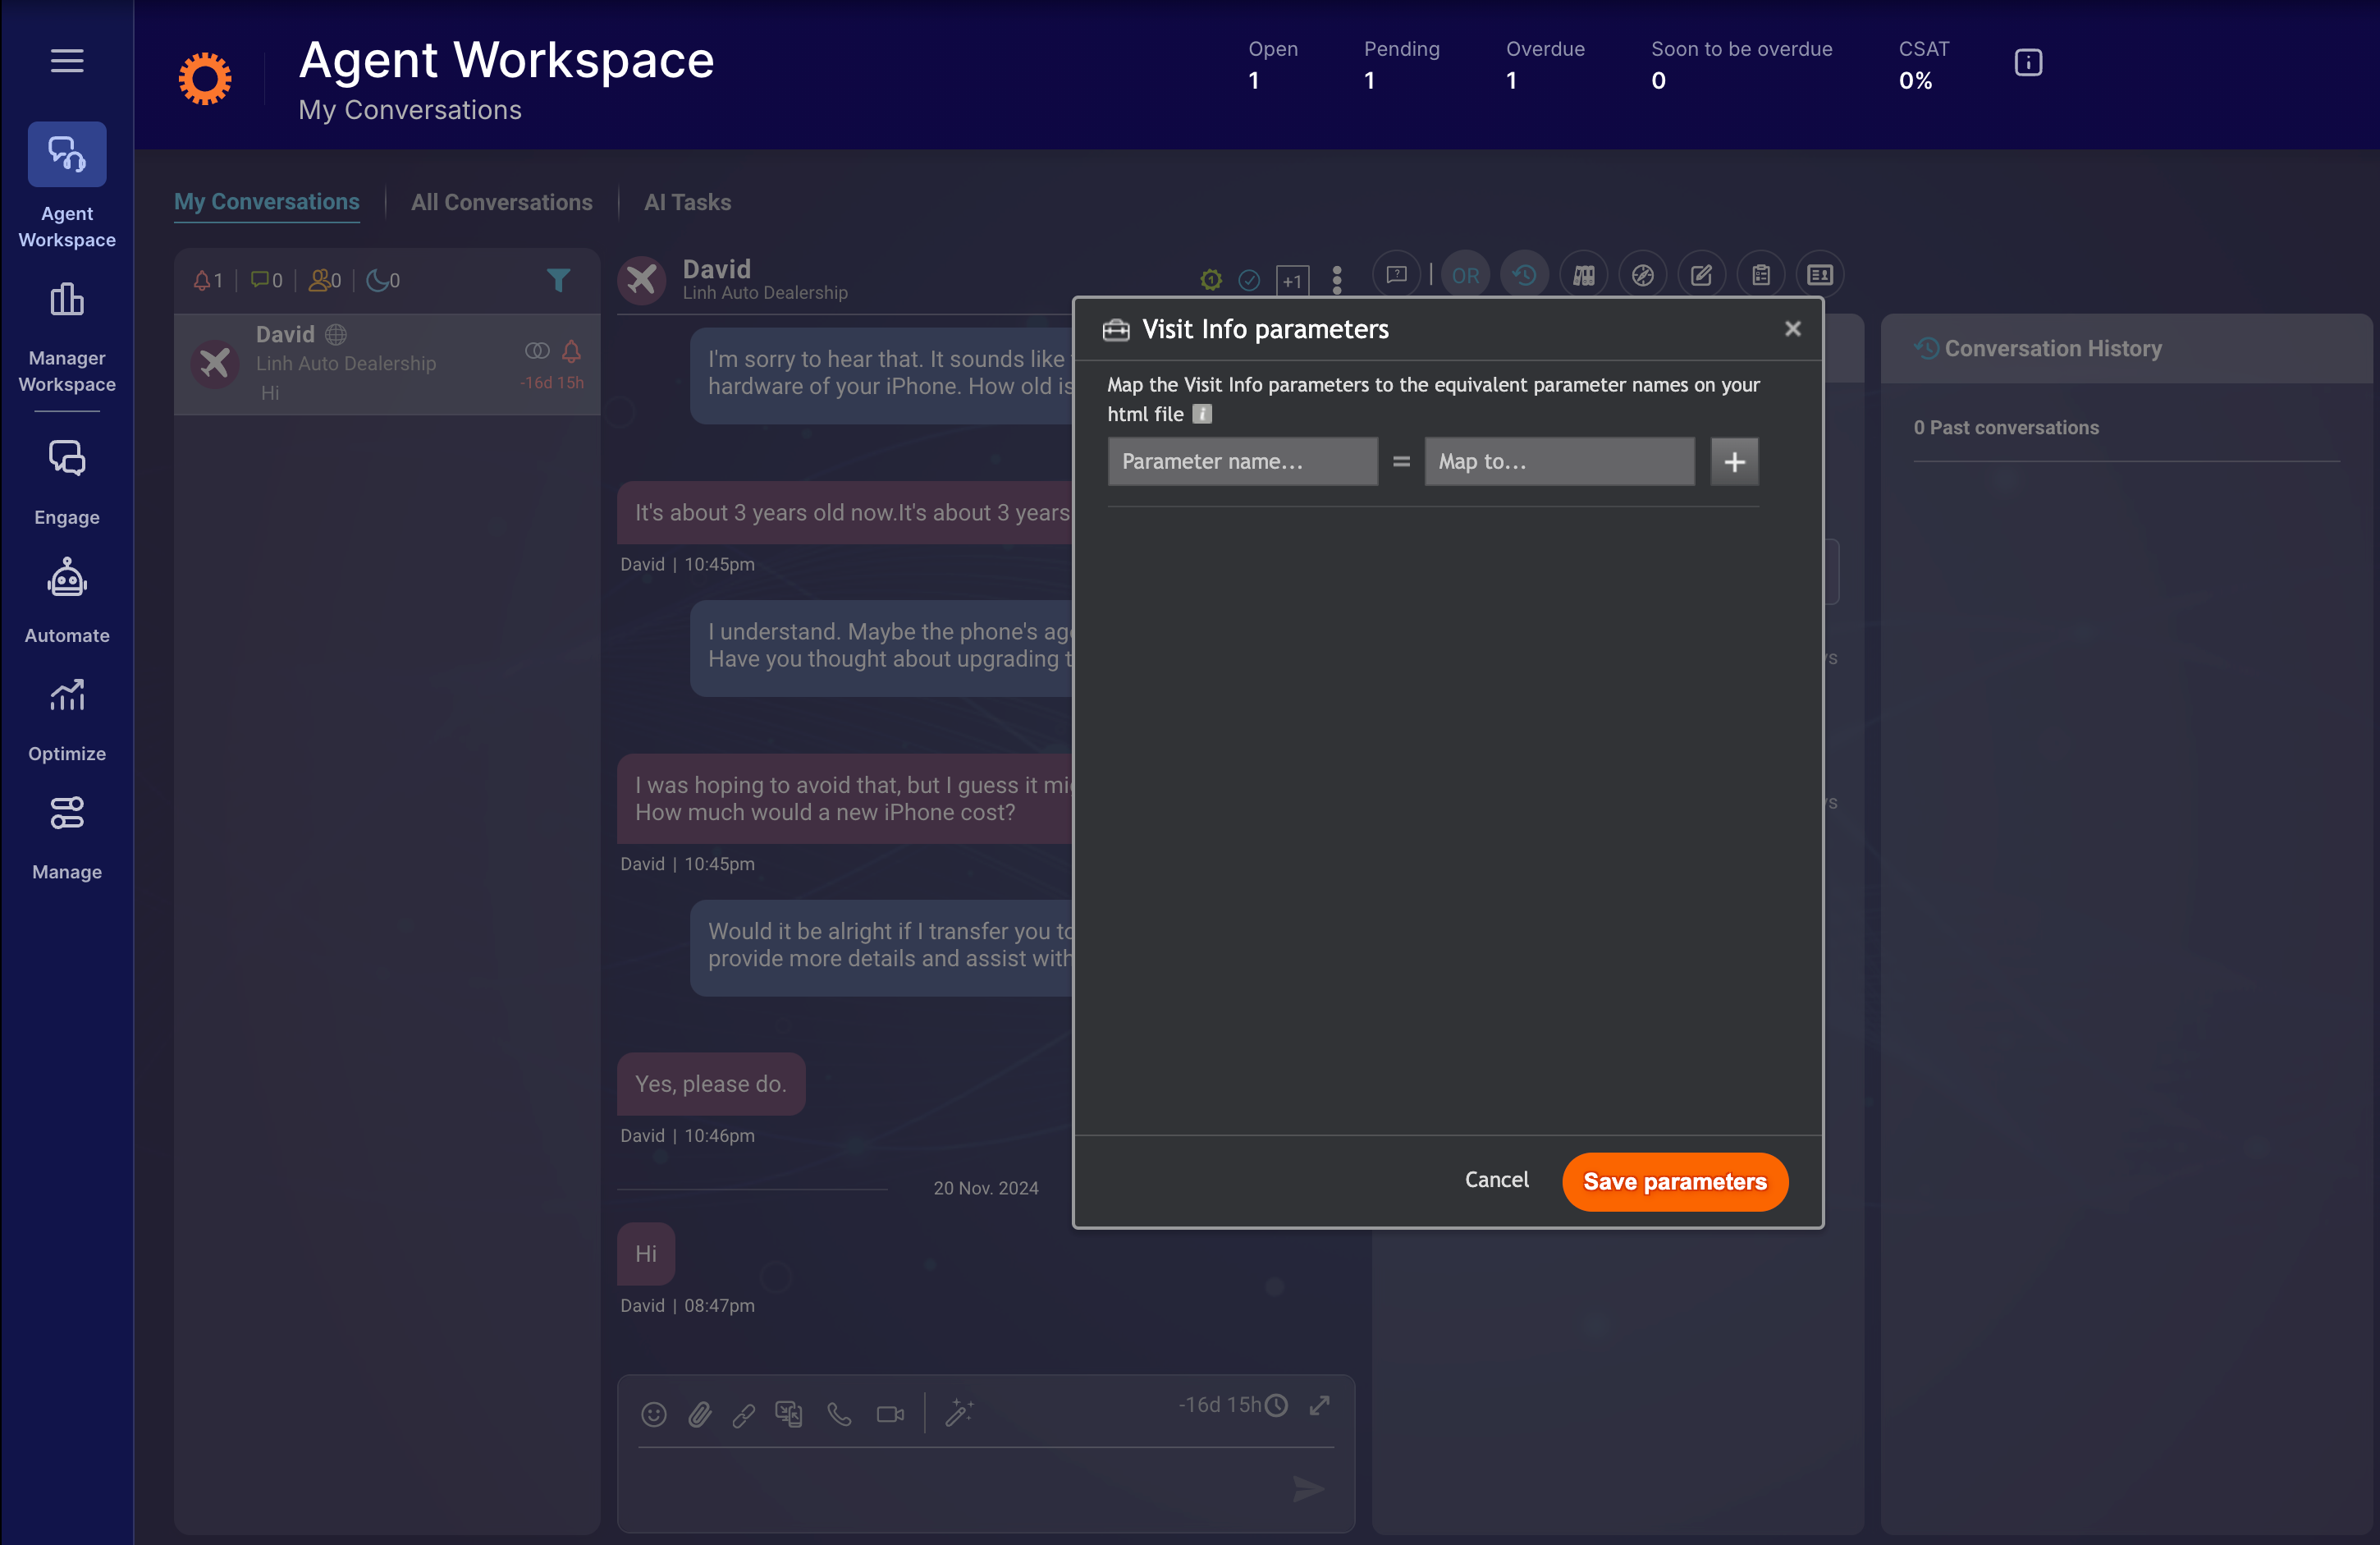
Visit Info Parameters
9. In the Parameter name field, enter the query string identifier you want to bind the value.
10. From the Map to dropdown, select the Conversational Cloud parameter you want to transfer.
11. Click the + icon to add additional parameters.
12. Click Save parameters. The visitor information parameters are mapped to the equivalent parameter names on your html file and the complete URL appears in the text box. This action maps which information is transferred from the Conversational Cloud to the external webpage.
13. Click Advanced settings for LivePerson integration SDK to provide a link that displays an error page if the widget fails to load, then enter the number of seconds in the Show link after field.
14. Select the Manager view mode checkbox if you want to make the widget visible only to Admins or Agent Managers.
15. Click Save. The new widget appears as an additional icon next to the existing widget icons at the top of the agent workspace.
Editing, Hiding, or Removing Existing Widget
At the top right corner of the Agent Workspace page, click the Night Vision icon. The Edit Widgets pop-up message appears highlighting the existing widgets in a row.
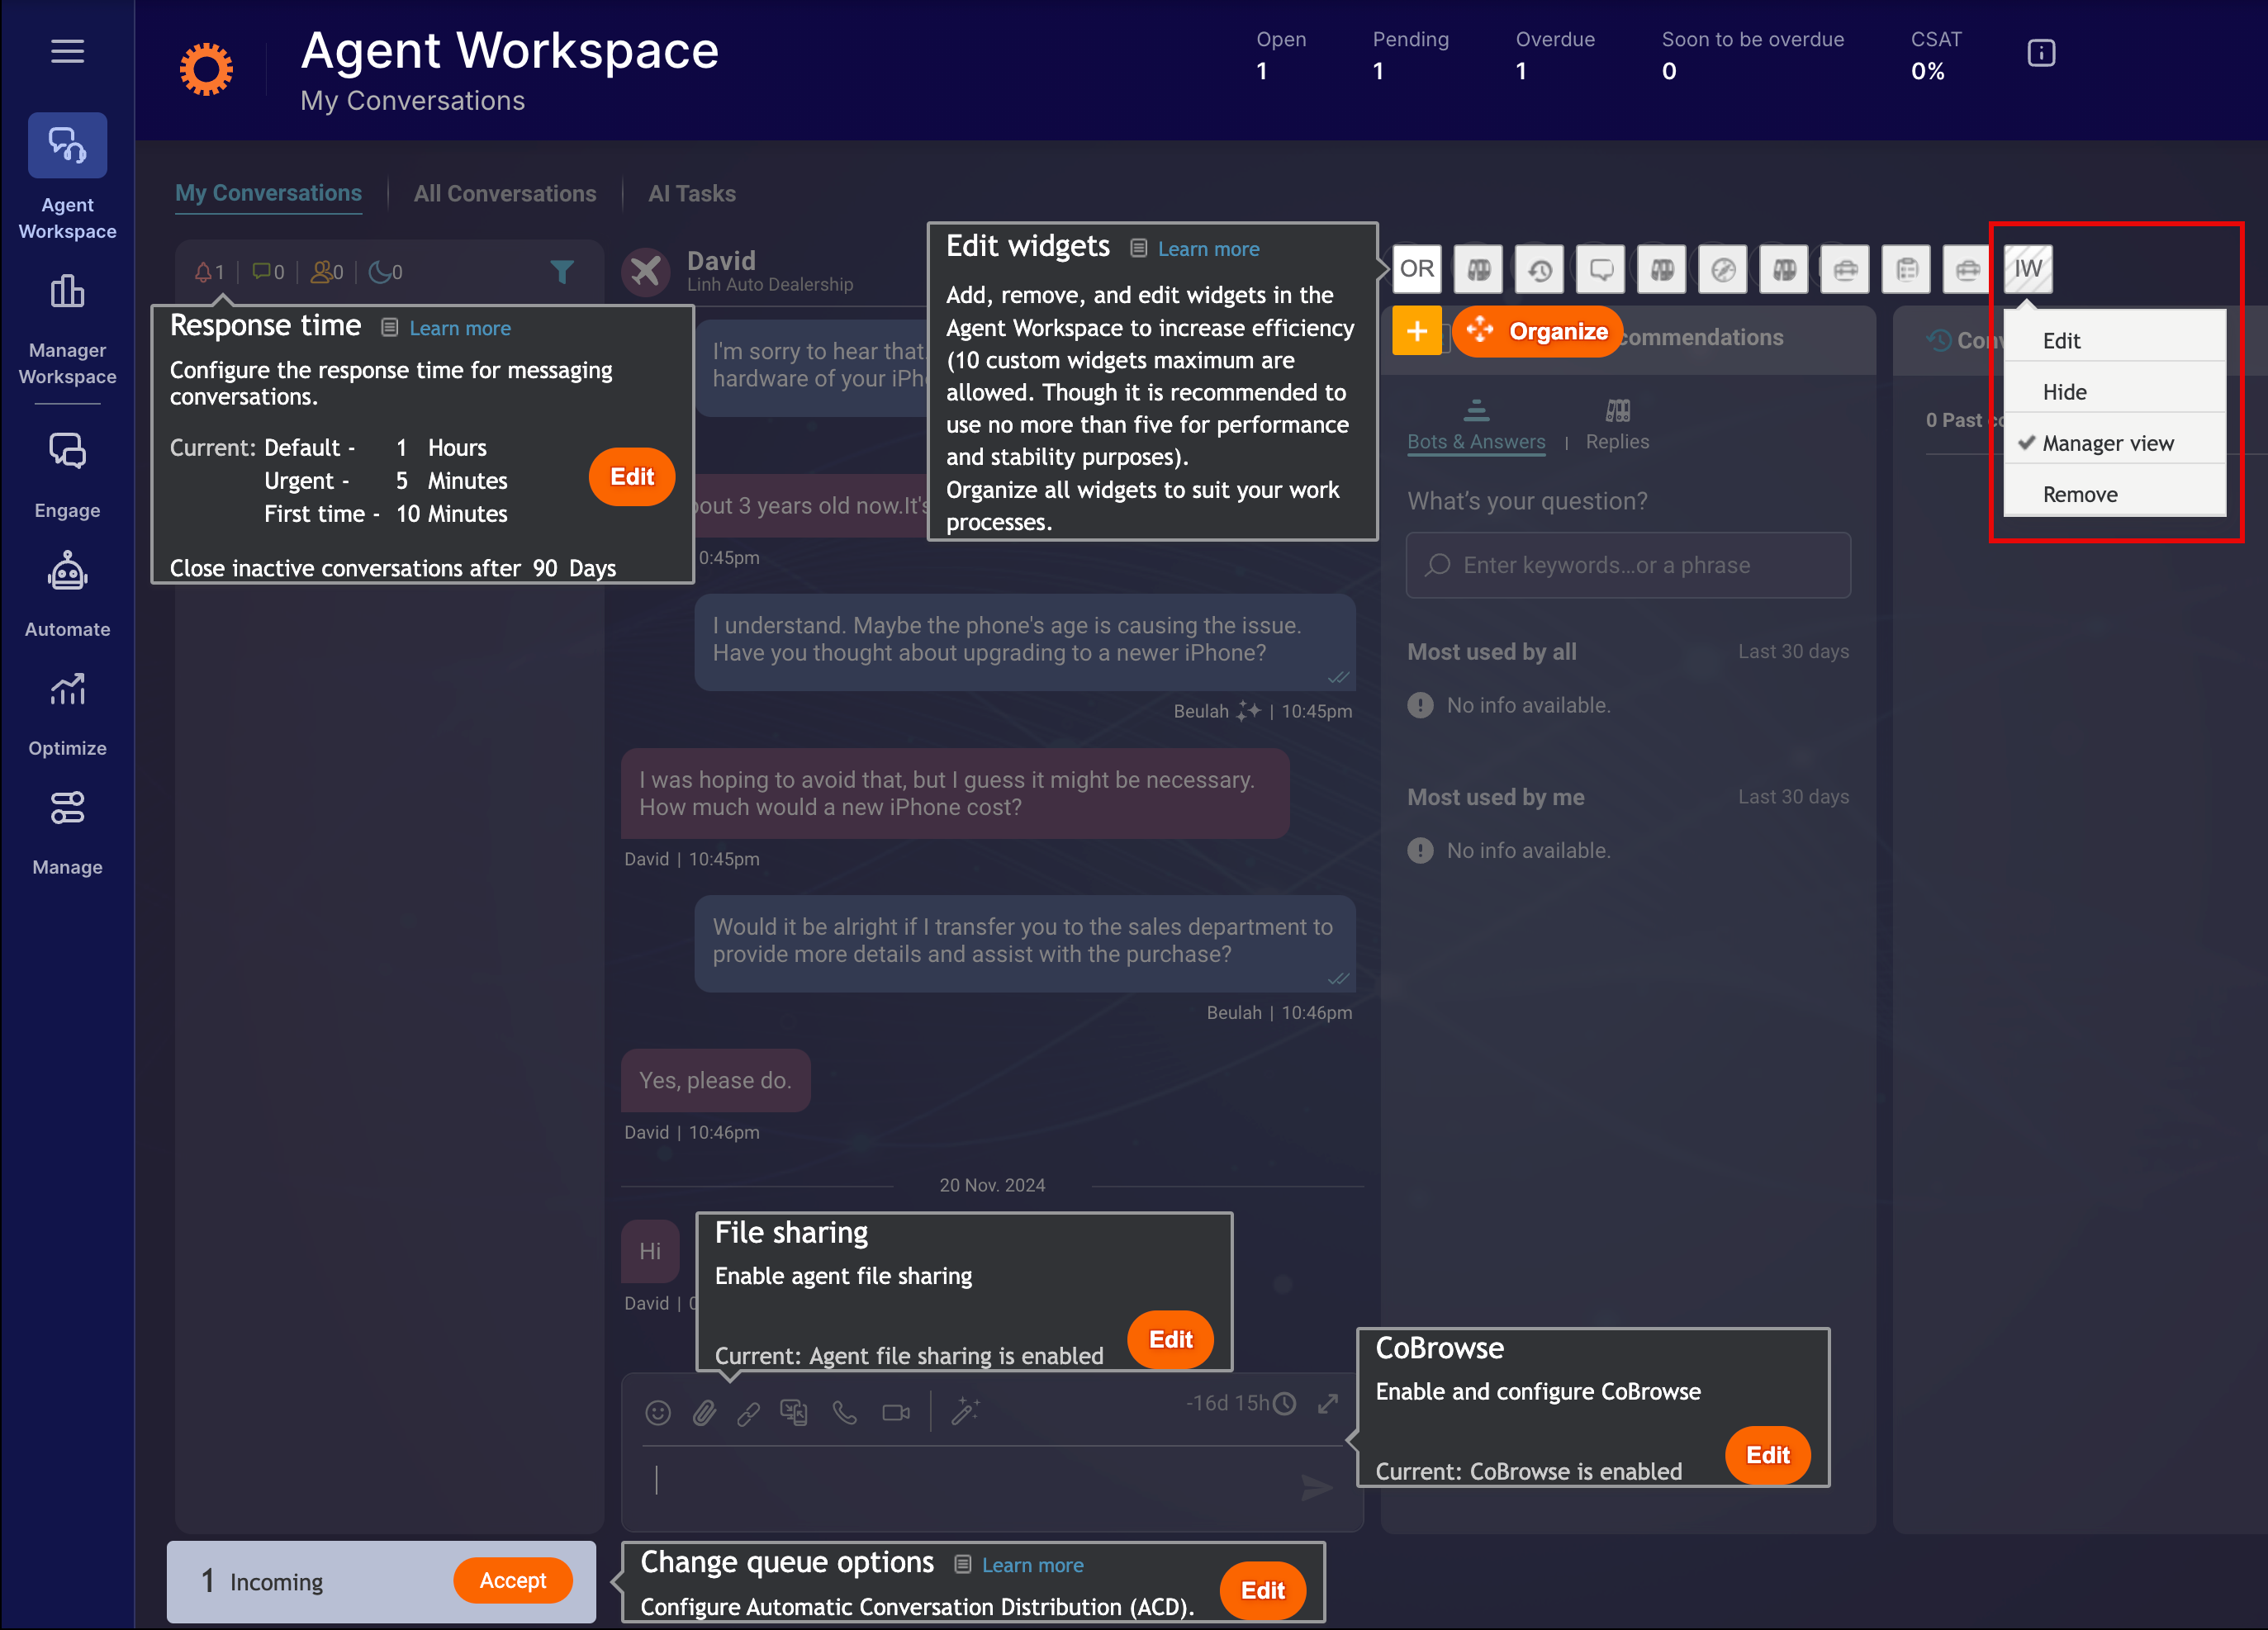
Edit, Hide, or Remove Widget
- To edit:
- Click the Widget icon > Edit. The Integration Widget pop-up window opens.
- Modify the details you want, then click Save.
- To disable the widget, click the Widget icon > Hide. The widget is hidden for all the agents.
- To enable the widget:
- Click the Widget icon > Hide. The Unhide Widget dialog appears.
- Click Yes.
- To delete:
- Click the Widget icon > Remove. The Remove Widget dialog appears.
- Click Yes. The widget is removed for all the agents.
Organizing Widgets
Arranging widgets in the right order within the Agent Workspace ensures that the most useful widgets are easily accessible for agents. Since every contact center operates differently, widget reordering allows brands to fully customize the widget order at the account level for both chat and messaging operations. Account admins can organize widgets using Night Vision, including the ability to hide core and custom widgets as needed.
To reorder the widgets:
1. At the top right corner of the Agent Workspace page, click the Night Vision icon. The Edit Widgets pop-up message appears highlighting the existing widgets in a row.

Edit Widgets
2. Click Organize. The Organize widgets pop-up window opens.
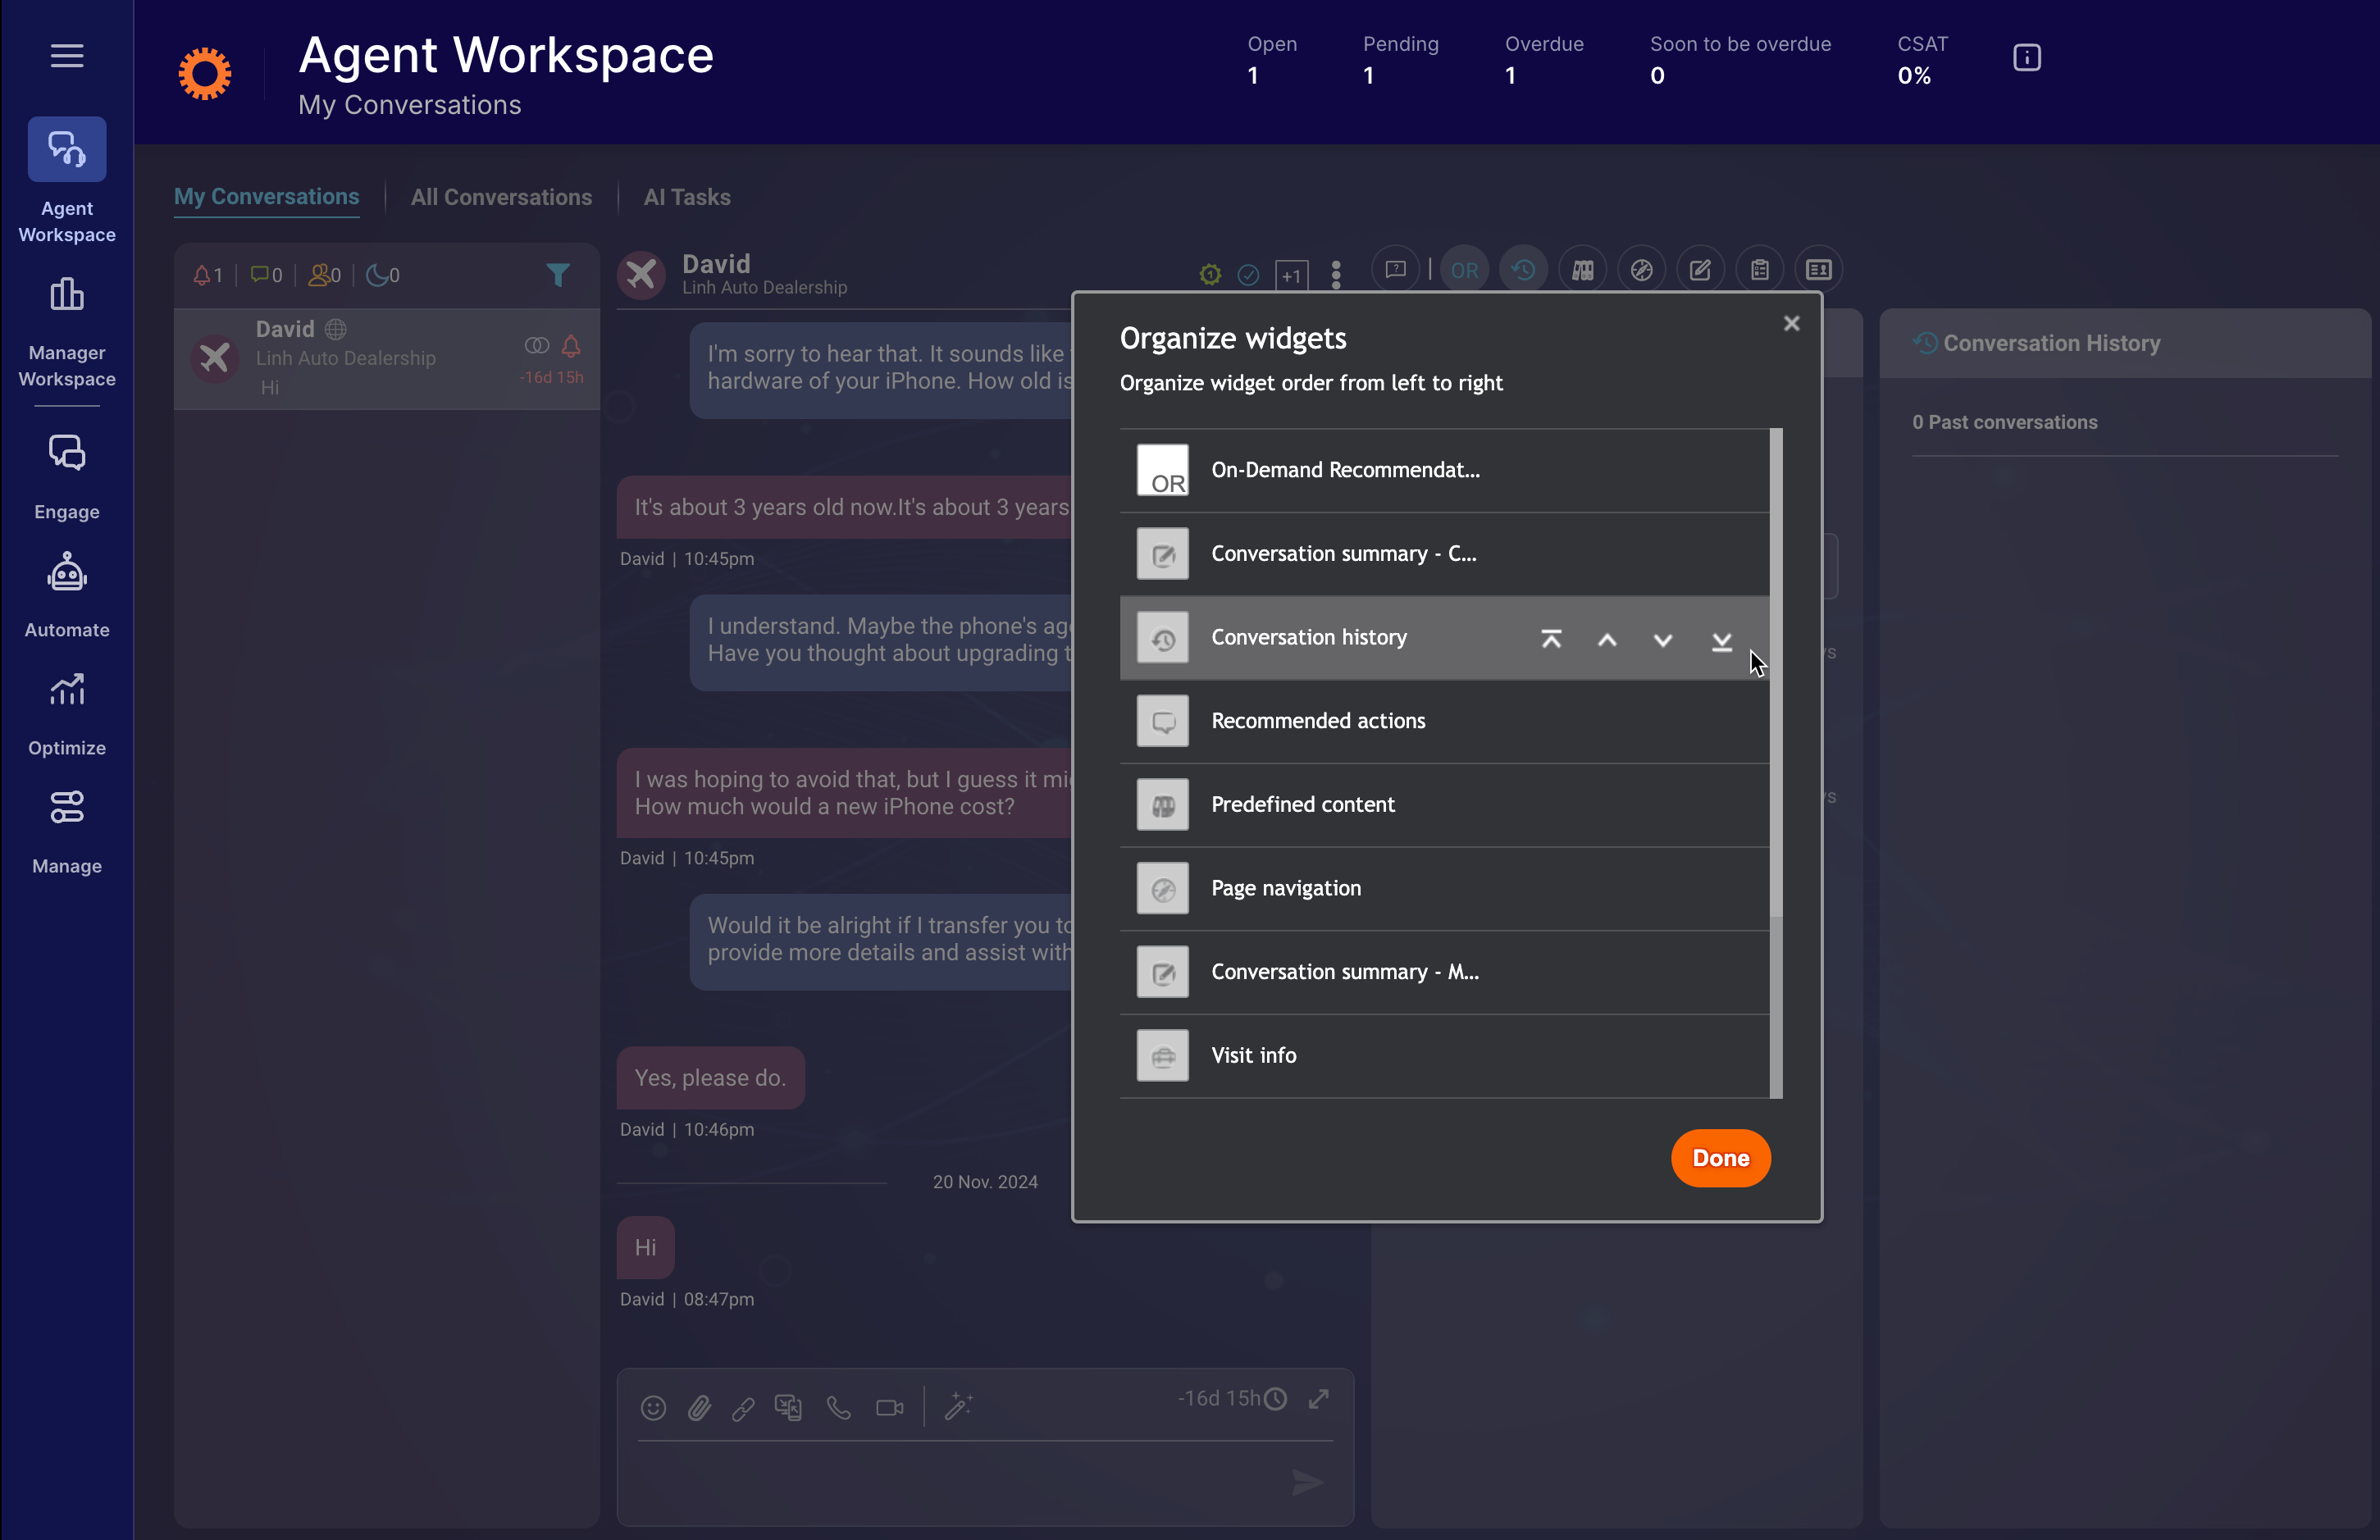
Organize Widgets
3. Next to the widget you want, click the arrows to move the widgets up, down, top, or bottom to organize the widget order from left to right on the agent workspace, then click Done.
Widget Integration Framework
The integration of the Engagement Window Widget SDK and Agent Workspace Widget SDK allows rich media to be easily and instantly shared between the consumer and the agent. Using unique session IDs, an external platform facilitates a direct connection between the two SDKs, providing a seamless widget integration framework.
- A more personal service with agent-consumer rich media sharing and video chat
- Faster responses through collaborative conversations between agent and consumer
- Flexible integrations with a variety of engagement tools
Agents can share a variety of interactive content in the Agent window, such as images, links, and forms. This content will immediately be displayed in the consumer’s engagement window, enhancing their conversation experience and their connection with the Agent.
In the same way, consumers can upload content - such as a product’s web page, a screenshot of an error message - that will instantly be displayed to the Agent, enabling them to provide a more effective and efficient service. Moreover, the flexibility of this framework opens the door for integrations with other engagement tools, such as live video connection.
For more information on how to set up this connectivity between the two SDKs, please refer to their respective documentation in the Developer Center.
Why don’t I see my customized widget?
For successful integration, please note the following:
- The application must be able to open within an iFrame: Some applications prevent themselves from opening within an iFrame (these are known as ‘Frame Busters’). If you try to integrate such an application within an Agent Workspace widget, you will get a blank widget, or an error message in the widget (depending on your browser).
- Internet Explorer support: Custom widgets are supported on Internet Explorer 10 and higher only.
- The application must be hosted over SSL: Secure Sockets Layer is a protocol that provides network security and privacy. SSL uses trusted certificates to perform client and server authentication. This means your application must be hosted on a valid SSL certificate site and, as part of the application, the URL must begin with HTTPS.
- Automatic focus management may be problematic: Applications with focus stealing can cause issues in the user interface of the Agent Workspace.
Widget Notifications
It’s important to keep agents informed of activity within widgets while handling other tasks. For both chat and messaging operations, the Agent Widget SDK is enhanced to allow notifications to appear in the Agent Workspace whenever an event occurs in a widget, ensuring agents are alerted as soon as any activity occurs.
For further information, refer to SDK Documentation in the Developer Center.
Missing Something?
Check out our Developer Center for more in-depth documentation. Please share your documentation feedback with us using the feedback button. We'd be happy to hear from you.