Set up Salesforce for Service Cloud Voice
Complete the procedures in this section to set up Salesforce for Service Cloud Voice.
Create a namespace in your organization for Service Cloud Voice.
- Create user permission sets for Service Cloud Voice. Many permission sets are possible, though you will likely need to set up admin and user permissions, at minimum. Create the permission sets that are applicable for your organization. The following user permissions are available to assign to users:
- Contact Center Agent for External Telephony Provider: Access contact centers that use an external telephony provider
- Contact Center Admin for External Telephony Provider: Manage contact centers that use an external telephony provider
- View Call Recording: View call recordings
- Control Call Recording: Pause and resume recording of individual calls
- Assign the permission sets to users as appropriate for the users' roles. Assign a permission set to a single user Assign a permission set to multiple users
- Set up a Lightning console app.
- Set up a single sign-on (SSO) connected app and Salesforce as IdP:
- On the Salesforce Setup Home page, type "my domain" in the Quick Find box. Click My Domain when it displays.
- On the My Domain page, check to see if you have a My Domain name enabled. If you need to set up a My Domain name, see Configure My Domain.
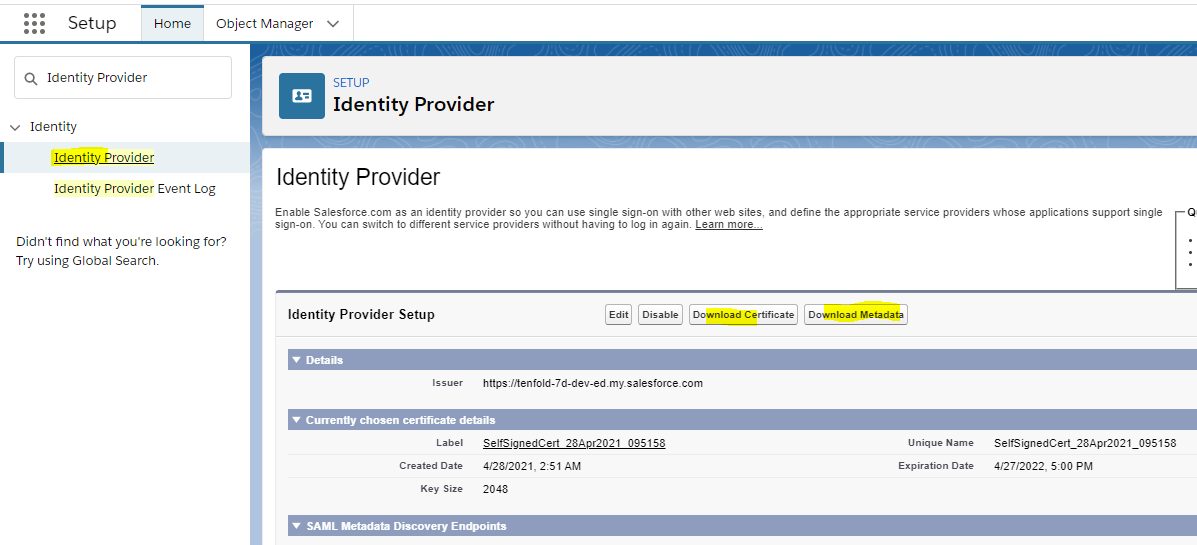
- On the Setup Home page, type "identity" in the Quick Find box. Click Identity Provider when it displays.
- On the Identity Provider page, click Enable Identity Provider.
- Under Identity Provider Setup, click Save.
- Download the certificate and metadata file.
Important
Save these files. You will need the metadata file to configure SSO in Tenfold Dashboard.
- Type "app manager" in the Quick Find box, click "App Manager" in your search results, and then click New connected App on the Lightning Experience App Manager page.

- Create a new connected app and provide the details in Basic information and Web App settings.
- In the Connected App Name box, type Tenfold SSO.
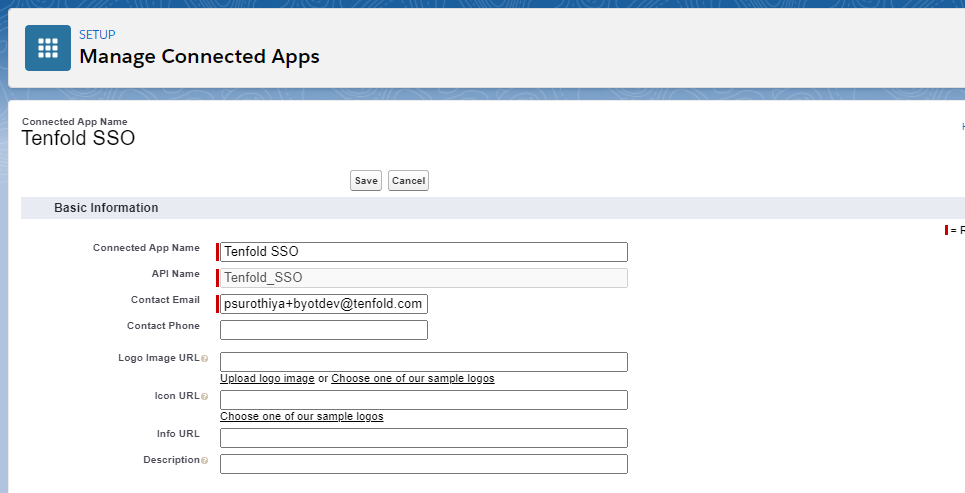
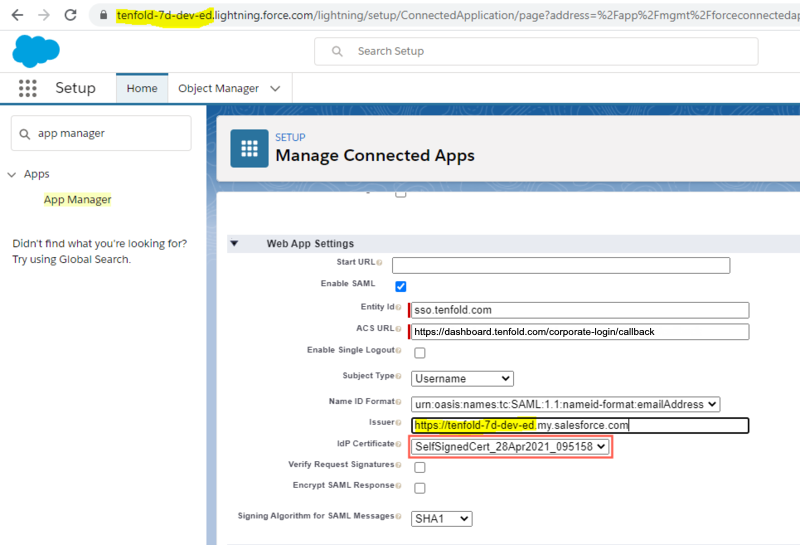
- Select Enable SAML.
- Enter the Entity ID and ACS URL as follows:
- Entity ID: sso.tenfold.com
- ACS URL: https://dashboard.tenfold.com/corporate-login/callback
- Select Subject Type as required and update the name ID format to match the SSO expected.
- Select your IdP Certificate from the IdP Certificate menu.
- Click Save.
- Click Manage profile and select all the profiles for which you want to grant access to use SSO.

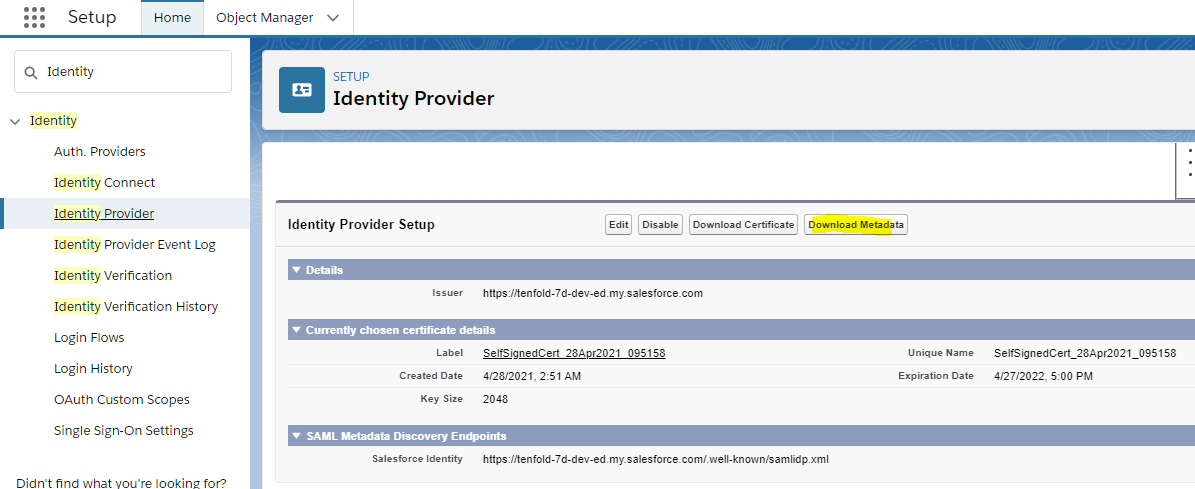
- After enabling Identify Provider, download the metadata file for using Salesforce as IdP.
- This metadata XML file is used for setting up SSO in Tenfold.
- Install the Tenfold for Service Cloud Voice package:
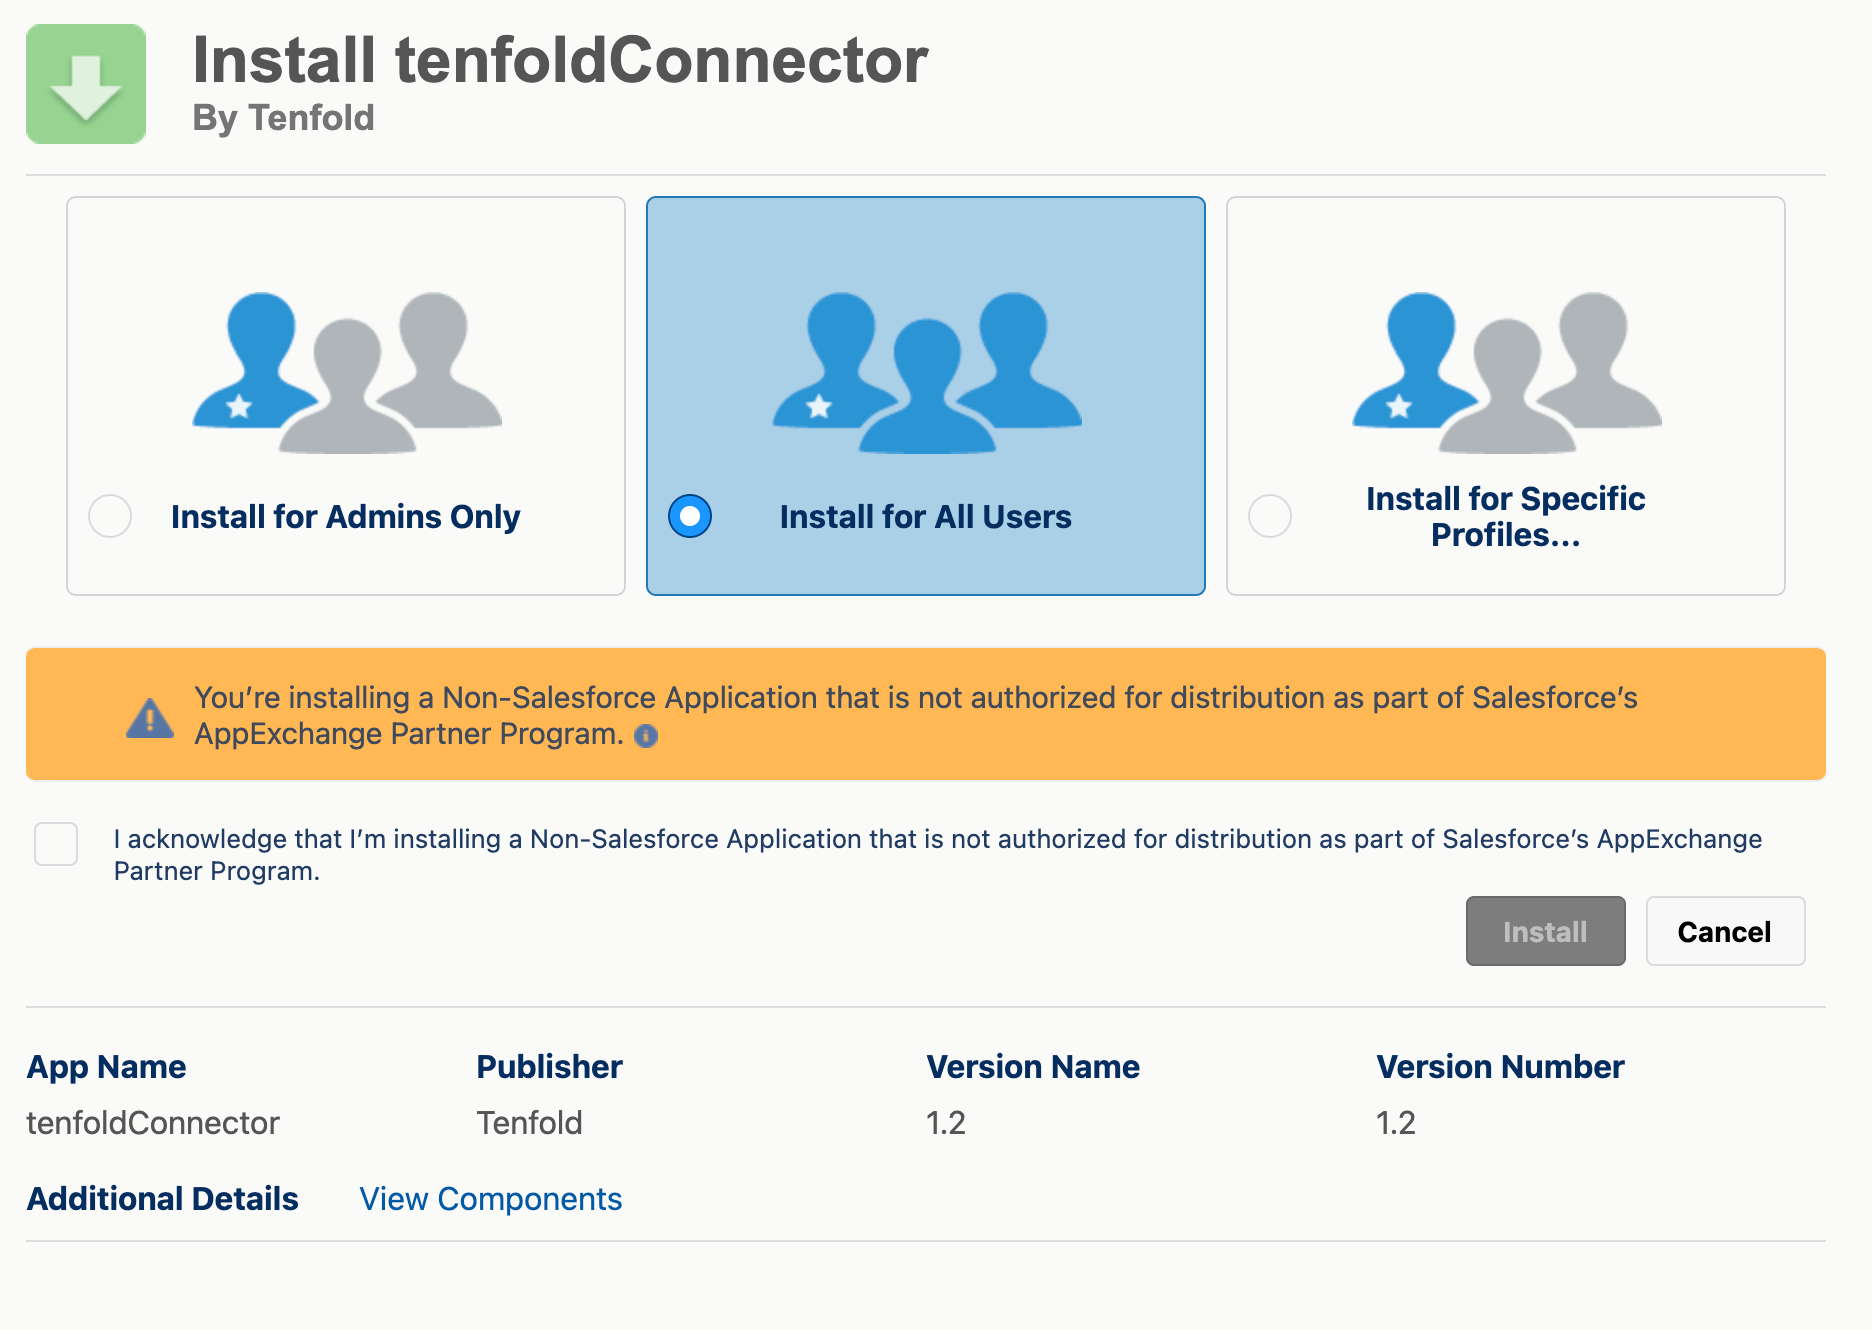
- Navigate to the latest Tenfold for Service Cloud Voice release page in a supported browser and click the link to install Tenfold for OpenCTI.
- Select Install for All Users.
- Note Selecting Install for All Users will not make the package immediately available to all of your Salesforce users. To control who can use the package, go to Call Center configuration in Salesforce Setup.
- Read the statement at the bottom of the screen regarding the Salesforce AppExchange Partner Program. If you agree with the terms, check the box.
- Click Install.
- Add users to the Salesforce Service Cloud Voice contact center.
- Apply relevant permissions to the contact center users. For example:
- For each user that will leverage Service Cloud Voice, apply the Contact Center Agent (Partner Telephony) permission via Permission Set Assignments.
- Apply relevant permissions to the contact center users. For example:
- For users who will also administer Service Cloud Voice, also enable the Contact Center Admin (Partner Telephony) permission.

- Navigate to the Setup page and search for "Contact Center". Click Partner Telephony Contact Centers when it displays.
- Click Tenfold Connector.

- On the Contact Center Users page, select a user and then click Add to add the user to the contact center.

Missing Something?
Check out our Developer Center for more in-depth documentation. Please share your documentation feedback with us using the feedback button. We'd be happy to hear from you.