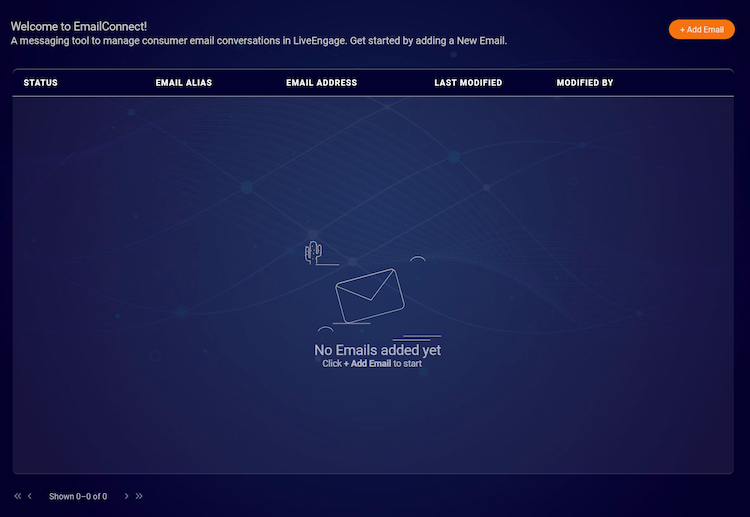
Email Connect
With Email Connect, brands can manage, analyze and respond to emails from the same command center that powers conversations on the world’s most popular messaging channels.
Brands can easily manage email conversations alongside conversations in messaging channels like Apple Messages for Business, WhatsApp, SMS, Facebook Messenger, Web Messaging, and Google RBM, eliminating the need to switch between tools to respond to emails.
Email Connect utilizes the powerful features available with other messaging channels, including support for bots powered by the Conversation Orchestrator, predefined content, reporting, and Dynamic Capacity.
Why brands should use Email Connect
Increase agent efficiency through a better email management tool
Email Connect increases agent efficiency by unifying operations so that agents can manage all messaging conversations, including email conversations, within the Conversational Cloud instead of using a separate platform for handling consumer emails.
Single interface for all messaging
Agents handle emails in the same easy-to-use Conversational Cloud interface they use for all other messaging conversations, meaning the same set of agents can support email while they simultaneously support other messaging channels.
Use bots and automation for emails
Email Connect is fully compatible with LivePerson-powered bots and AI, allowing brands to create email auto-responses or AI-powered responses based on the content of emails.
Simple email replies using predefined content
Email Connect has access to the same predefined content tools that are available across other messaging channels. Agents can drop in predefined email text to provide polish to every email response.
Rich Conversation capabilities
Send and receive email attachments using Email Connect making emailing a more visual experience, increasing communication efficiency, and reducing time to resolution. Attachments include images, pdf and Microsoft Word, and Excel documents. This may require feature enablement by LivePerson - see “Email Connect Setup” below.
Easy setup & onboarding
Brands can set up Email Connect in minutes by connecting to a company email address and uploading simple design elements, such as a header and footer (no tagging is required). Once the email address is set up, test the connection and then begin using Email Connect. Note that passwords are hidden and all your email credentials will be fully encrypted so that only you have access to them.
Email Connect Setup
Step 1: Connect your email in the Conversational Cloud
There are two ways to launch Email Connect set up page:
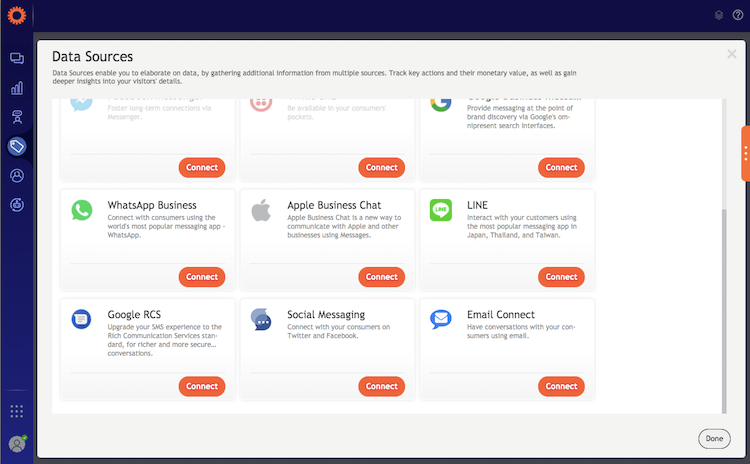
Option 1.) Email Connect Setup via Data Sources.
Login to the Conversational Cloud and click the Campaign Builder icon located in the left navigation bar. Click on Data Sources in the Campaign Builder footnote.
Click the Connect button in the Email Connect tile.

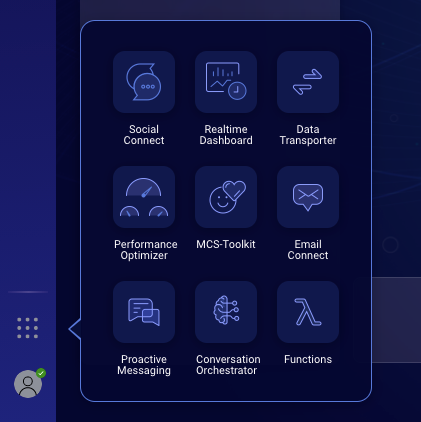
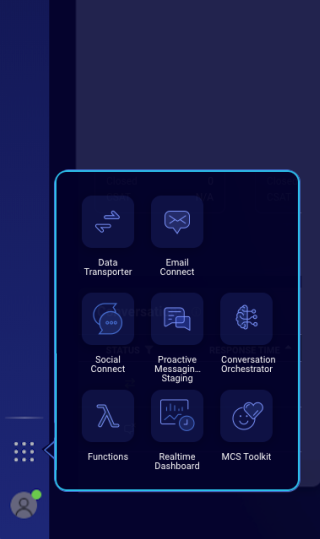
Option 2.) Email Connect Setup via Conversational Cloud Applications
Login to the Conversational Cloud and click the Quick launch menu at the bottom left of your screen. Click Email Connect.


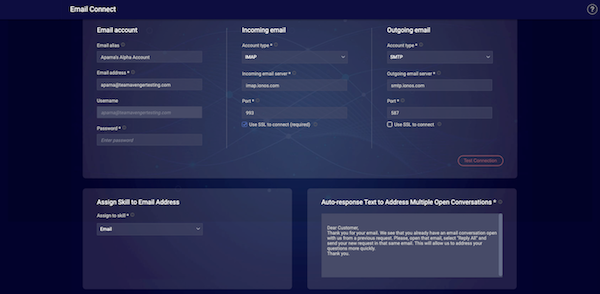
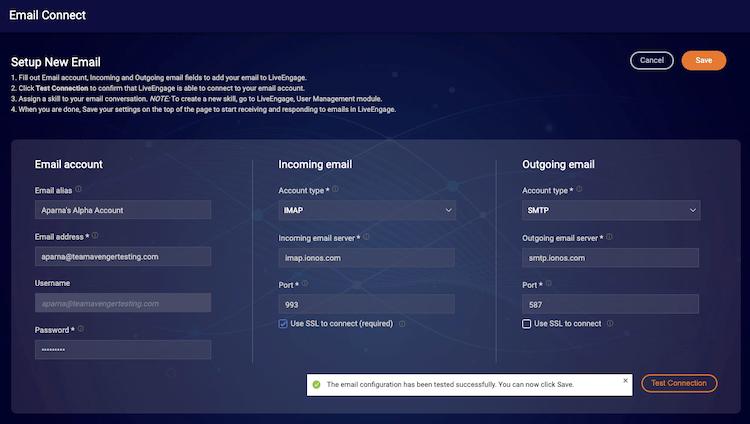
Step 2: Provide your email credentials to set up your email
Prerequisites to setting up your email
The email address must be configured as below:
- IMAP must be enabled.
- Multi-factor authentication must be disabled. “Less secure apps” must be enabled for Gmail accounts.
- Standard IMAP settings: IMAP, port 993, SSL enabled.
- Standard SMTP settings: SMTP, port 587, SSL disabled.
Follow the instructions on the screen to save your email configuration details.


Step 3: Save email configuration and skill settings
Click Test Connection and then click Save.
Step 4 Start receiving and responding to emails in the Conversational Cloud
You can test your setup by sending an email from your email account to the email address you connected to in the Conversational Cloud. When the message shows up in the Agent Workspace, you can respond like an agent and see the response in the sender’s email account.
Step 5: Setup for file attachments (optional)
Email Connect uses Agent and Consumer File Sharing feature and supports these file types - JPEG, JPG, PNG, GIF, PDF, DOCx, XLSx, and PPTx.
Once you have received a response that this step is complete, you will need to change the following settings in the Conversational Cloud.
Log into the Conversational Cloud account as Administrator to enable the following configuration:
- Select the 'Profiles' tab from the Users module

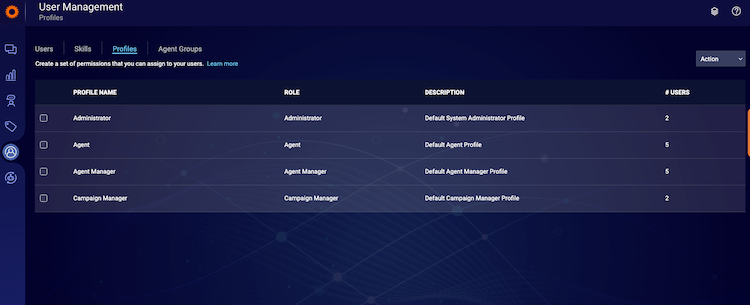
Turn on the following settings for Agent and Agent Manager Profiles:


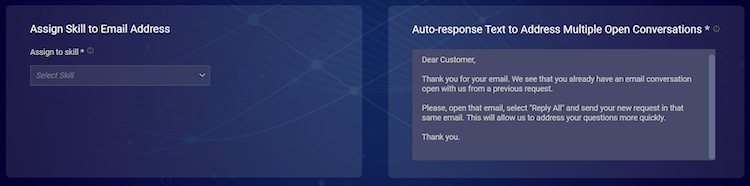
Configure Auto-Response Text
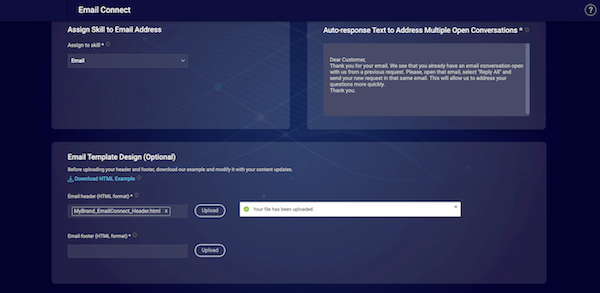
Step 6 Add custom text in your preferred language
This custom text will be used as an auto-response to consumer email when the same consumer has an existing open conversation in the Conversational Cloud. You can use any language of your choice. The maximum number of characters limit is 1000.

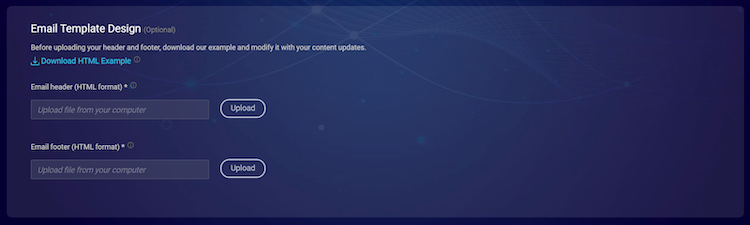
Configure Email Header and Footer (Optional)
Prerequisites to setting up HTML header and footer
Please see the table at the bottom of the article for a list of allowed HTML elements and attributes. Every header and footer provided to Email Connect during the onboarding process is subjected to a security check. Deviating from this list could yield HTML that might be rejected by the Email Connect Setup.
Step 7: Download example HTML header and footer
Click on the Download HTML example which will download a .Zip file containing 3 Files: READ ME - How to create header and footer.pdf, EmailConnect_Header_Template.html, EmailConnect_Footer_Template.html.

Step 8: Upload HTML header
Click Upload and select your custom .html header file.

Step 9: Upload HTML footer
Click Upload and select your custom .html footer file.

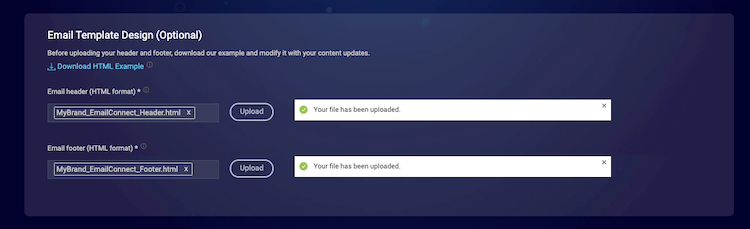
Step 10: Save Email Header and Footer
Re-enter the password for your email, click Test Connection, and click Save.

Multiple email addresses
Brands can add an unlimited number of email addresses to Conversational Cloud and even route each email address to a different skill. For example, you can route info@, support@, and sales@ to different skills, allowing specialized bots and agents to handle your email interactions.
Reporting
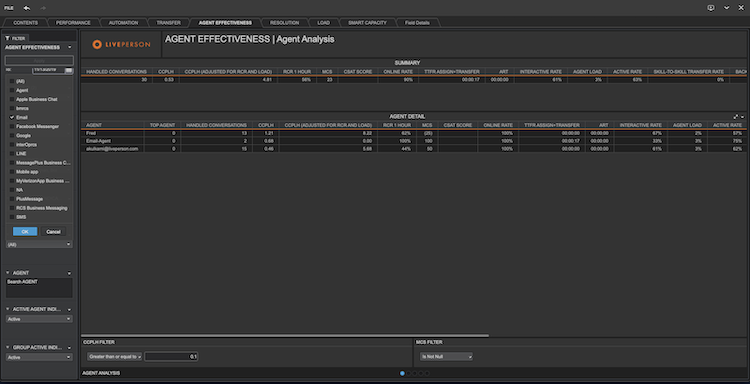
Agent Effectiveness reports are available for all email conversations to brand administrators and agent managers.
Step 11: Open the Analytics Builder
Login to the Conversational Cloud and click the Conversational Cloud Applications menu at the bottom left of your screen. Click on Analytics Builder.

Step 12: Open Advanced Messaging Dashboard
Click on RunDashboard at the bottom left of the page.


Open Agent Effectiveness| Agent Analysis Report tab and select Email in the Source filter in the left panel.

Attributes and elements allowed as part of HTML
| Elements | Attributes | Notes |
| HTML | n\a | Required, top-most element |
| body | bgcolor, width, style | Required, placed within the HTML element |
| table | align, bgcolor, cellpadding, cellspacing, border, height, width, style, color, class | Useful for creating a table in HTML that most email clients honor |
| tr | n\a | Used to define a row in a table |
| td | style | Used to define a column in a table |
| b | n\a | bold |
| i | n\a | italic |
| center | n\a | centers text in HTML |
| div | style | creates a division of sections within HTML |
| a | href, target | creates an anchor tag for HTML links |
| img | src, width, height, alt, border | Creates an image within HTML (usually placed within a tag |
| font | face | specifies the font family |
FAQs
Q. What is the status of the Email Channel integration?
A. The current Email Connect v1.0 will continue to be supported and will not be deprecated in 2024. We are investing in the development of a robust Email Connect v2.0 solution that addresses the limitations of the current v1.0. The release of v2.0 is expected in early 2025, and brands will be required to migrate to v2.0 to continue using the Email Connect channel. We are committed to ensuring a seamless migration process and will share more details in December 2024.
Q. What kind of support will be available for the current version of Email Connect?
A. For those using the current version, it will continue to operate with limited support as follows:
- No new development will occur on the Email Connect channel.
- New feature requests will not be accepted.
- Future releases will focus solely on critical incidents and security issues.
- Customer security audits and penetration tests will no longer be facilitated.
- Support will only be provided for service outages, degradation, and emergency maintenance.
- Technical support will be available only for Severity Level 0 and 1 issues.
Q. Will there be any new developments in the current version of Email Connect?
A. No, there will be no new development for the current version of Email Connect. We will not accept new feature requests; future releases will focus solely on critical incidents and security issues.
Q. Will customer security audits and penetration tests be facilitated for Email Connect?
A. No, customer security audits and penetration tests will no longer be facilitated for the current version of Email Connect.
Q. Will new onboardings to the Email Connect channel be allowed on version 1.0?
A. No, we will not be onboarding new customers to the Email Connect v1.0. This is to avoid putting customers onto a solution with many limitations and having to migrate them to v2.0. However, we commit to building a robust v2.0 that addresses these limitations and would like to seek customer feedback as we build v.20.
Q. What are the future plans for this channel - Is there a new version of Email Connect being developed?
A. Yes, we are investing in developing a robust Email Connect v2.0 solution, which addresses the limitations of the current version.
Q. When is the release of Email Connect v2.0 expected?
A. The release of Email Connect v2.0 is expected in early 2025.
Q. Will there be a migration process for moving to Email Connect v2.0?
A. Yes, brands must migrate to v2.0 to continue using Email Connect. We are committed to ensuring a seamless migration process and will share more details in December 2024.
Missing Something?
Check out our Developer Center for more in-depth documentation. Please share your documentation feedback with us using the feedback button. We'd be happy to hear from you.