Agent Workspace for live chat
Login and status
The Agent Workspace acts as a centralized location for agents to manage all of their chat conversations simultaneously. In order to begin chatting, you first need to complete the following steps:
- Your developers or website administrator need to add the LivePerson tag (a piece of code) to every page of the website. For instructions on how to get the code, click here.
- Create users for the agents that will be taking the conversations. To learn how to set up users, click here.
- Once the code is up and an agent is logged into the system, they must change their status to online. Doing so will automatically enable the chat button on the website and they can begin to accept incoming chats.
The list of visitors
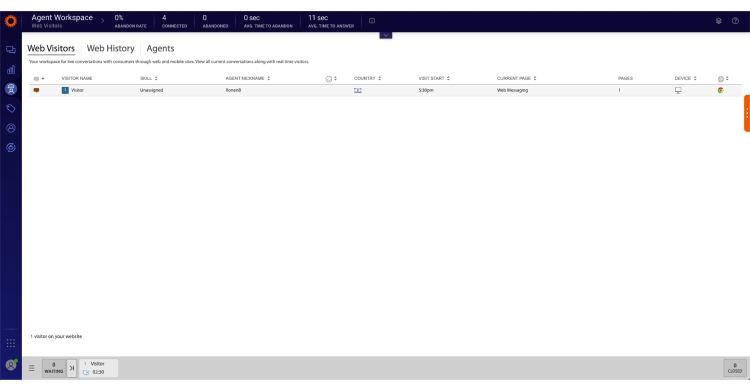
The Web Visitors list displays all visitors currently on your website, along with information about each visitor’s geolocation, browser details, and IP address. The visitor’s current location on your website is also displayed.

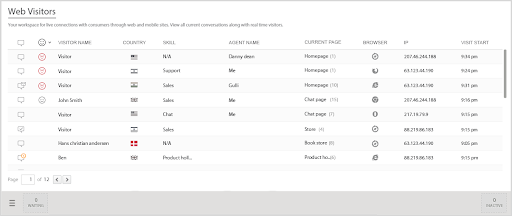
Sort visitors
You can sort the visitors according to any of the following parameters:
- Meaningful Conversation Score
- Country
- Skill
- Agent nickname
- Current page on your website that the visitors are browsing
To sort the visitors, simply click on the relevant parameter header.
View more detailed information
You can view more detailed information about your visitors, including the following:
- Visit info: Which campaign the visitor is currently exposed to, along with the campaign’s main parameters (goal, target audience, and behavioral targeting). You can also see more detailed information about the visit, including city and country, organization, operating system, browser, and more.
- Page navigation: What page the visitor is currently browsing, as well as the pages previously visited.
To view more detailed information about a visitor, simply click on the visitor’s name.
Handling chats in the Agent Workspace
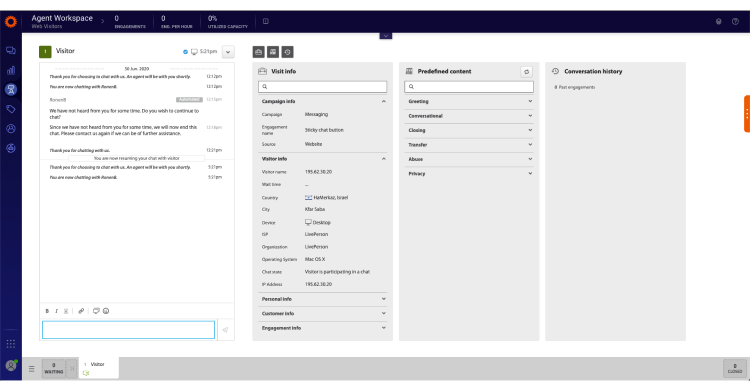
The Agent Workspace is where agents can simultaneously handle conversations with visitors and view information about these visitors in real-time.
Once a visitor initiates a conversation from your website by clicking on the chat button and completing any necessary pre-chat surveys, a notification is displayed on the relevant agent’s desktop.

Accept the chat by clicking ACCEPT on the bottom left-hand corner of the screen. The in-chat screen is then displayed.
To send a message, enter text in the lower text entry area, and click the Send button, or press Enter. The sent text is displayed in the chat display area, along with replies and text sent by the visitor. If you do not send a message to the consumer for some time, a default message is sent, apologizing for the delay.
You can always return to the visitor list while chatting with a consumer. Simply click the menu button in the bottom left-hand corner of the screen. You can terminate a conversation at any time by selecting End engagement from the dropdown menu next to the visitor name. The visitor can also terminate the chat session by closing the chat window.
Agent widgets and tools
The Agent Workspace includes several widgets to help agents manage their conversations:
- Visit info widget: Indicates who the visitor is, and how they arrived at the website.
- Predefined content widget Offers a library of ready-made responses which help streamline the conversation and improve response times.
- Page navigation widget: Allows agents to offer assistance to consumers according to their journey on the website.
- Agent survey widget: Allows agents to provide Agent Managers with input about the conversation and its outcome.
- Conversation History widget: Allows agents to read transcripts from previous chats with the visitor and provide better service by understanding their chat history.
Agents also have access to the following tools during their conversations with consumers:
- Copy as plain text
- Private message
- Transfer
- End engagement
- Predefined Content

Copy as plain text
Agents can copy the full chat conversation in plain text and paste it into a different location, for example, into an email or document.
Private message
Agents can send a private message to a different agent whilst they are in a conversation with a visitor, for example, to ask a question or request assistance.
Transfer
Agents can transfer the chat session to another agent or skill group, for example, if another agent has greater knowledge about the questions being asked by the visitor. You can select which agent to transfer the chat to and send a short message (visible only to the agent) to communicate the chat details. If the agent refuses the chat, the chat is returned to the original agent.
End engagement
The conversation is ended and the visitor receives a message in the chat window indicating that the chat session has been terminated by the agent. The state of the visitor in the Visitor List changes to Chat ended.
Predefined content
At any given time in your shift as an agent, you are expected to handle multiple chats in a competent and efficient manner. By using predefined content in your chats, you can relieve some of the pressure on yourself, achieve your goals, and maintain your high standards. The use of predefined content saves time, and can ensure consistent, error-free responses and a professional “tone of voice”.
You can access the predefined phrases while you are chatting and, rather than retyping repeatedly, you can select the relevant, ready-made response. The predefined responses are organized into categories, such as Greeting, Conversational, Closing, and additional categories that your managers create based on your business needs. Managers can also assign Hotkeys to the most useful predefined responses, and you can save time and energy by using them.
While you are chatting, you can quickly navigate through the categories and select the relevant response. Here are some examples of categorized predefined responses:
- Closing: Thank you for visiting. Please contact us any time.
- Conversational: Thank you for waiting.
- Greeting: Hello, How may I assist you?
Hotkeys
See this document for an updated list of shortcuts.
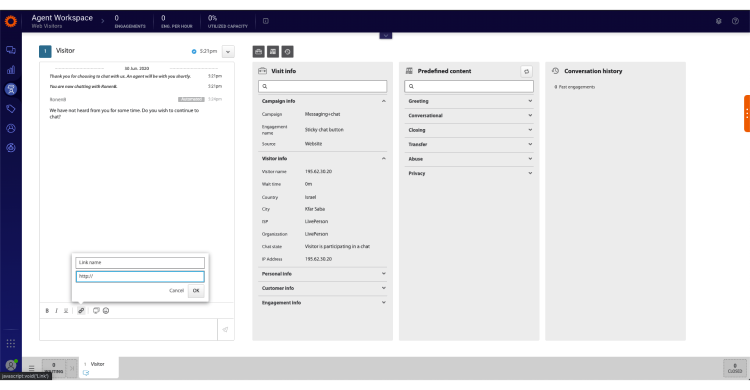
Send a link
Agents can send a direct link to a page on their website. Create the link by entering a link name and the relevant URL.

CoBrowse
CoBrowse enables agents and consumers to access and navigate web pages collaboratively. This ensures that complex online tasks and processes can be completed quickly and efficiently. With CoBrowse, chat interactions between agents and consumers are enhanced by a real-time visual layer. This increases consumer engagement by creating a higher degree of co-presence of the agent. No plugins or downloads are required, ensuring that agents and consumers are connected in an instant.

With CoBrowse, agents and visitors can view each other’s virtual mouse cursors, and simply double-clicking on an element or piece of text in the webpage creates an animation effect.
- Double click on an element to display a yellow circle around the cursor.
- Press Ctrl + click the left mouse button to animate the element with a wiggle effect.
Use cases for CoBrowse:
- Offering a concierge service
- Walking visitors through a process
- Assisting a visitor in filling out a form
- Helping visitors to troubleshoot
To initiate a CoBrowse session:
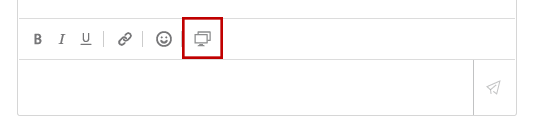
1. During a conversation with a consumer, click the CoBrowse icon.

2. Choose the session type:
- CoBrowse - View Only enables you to view the visitor’s screen only.
- CoBrowse - Shared gives you full control over the current browser tab.
The consumer receives a notification asking them to accept the CoBrowse session.
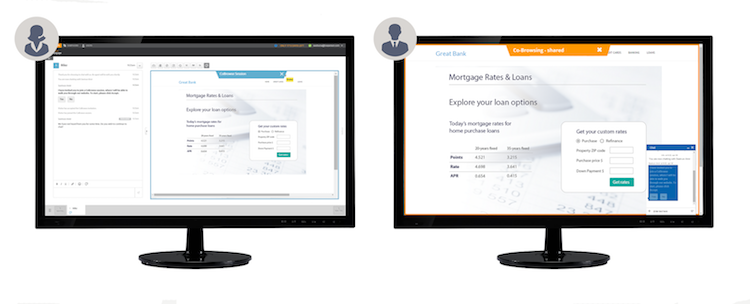
3. Once the consumer accepts, the CoBrowse session opens on the agent side and both cursors are displayed and labeled, as shown below.
4. On the visitor side, when the CoBrowse session begins, an orange frame is displayed around the browser tab, indicating an active session. While using CoBrowse, password fields are automatically masked. Other fields such as credit card numbers can also be configured as masked.
5. The visitor can close the session at any time by clicking the X at the top of the orange frame.
Clearing chats from the Agent Workspace
In order to improve agent performance and expedite the transfer of closed chats from the visitor's tab to the web history tab, it is recommended that agents regularly clear chats that have ended from the Agent Workspace.
This process is recommended in order to streamline the agent’s work and can be achieved in two ways:
- Clear continuously: The agent clears each of their chats once they have finished adding comments and/or submitting the agent survey.
- Clear upon accumulation: The agent periodically clears all the ‘Closed’ chats they have accumulated.
All chats will automatically clear once the agent logs out of the Conversational Cloud (by clicking the logout button). Any chats that have ended will appear in the Web History even if the agent closed the Agent Workspace without releasing them.
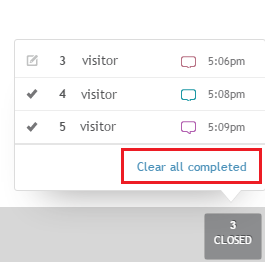
The number of accumulated chats can be seen in the bottom right corner of the page in the closed image. The number indicates how many chats were closed but not yet released. The following image shows that 1 chat has not yet been released.


To clear a single chat:
1. Make sure the chat has ended - this is confirmed in the header of the chat.

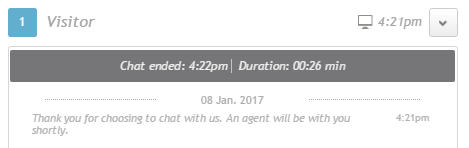
2. In the top right corner of the chat window, click the down arrow.
3. From the drop-down menu choose Hide conversation. The chat is now cleared and is available in the Web History. It will no longer be displayed in the Agent workspace.
To clear all closed chats:
- Click CLOSED in the bottom right corner of the page. A window will open listing all ended chats.
- Click Clear all completed. The chats that you selected will be cleared from the Agent workspace.

The agent data bar
As an agent, you have goals to meet, such as achieving a specific customer satisfaction rate or a certain number of engagements per hour. The Agent Data Bar allows you to monitor your performance data in real-time, and take any necessary action to meet these goals. The Data Bar displays the following metrics.
Engagements
Engagements represents the number of chats you’ve taken during your current shift. The system counts the chat once you close the Engagement window.
Average engagement length
The length of your chats varies depending on the type of inquiries you receive. Your chats should be only as long as they need to be to ensure successful resolution of your customer’s issue.
Average engagement length = total concurrent engaged time / number of interactive engagements.
For example, if you were engaged for a total of 5 hours (including concurrent chats) and in that time took five chats, your average engagement length is: 5 hours / 5 = 1 hour
Engagements per hour
The number of engagements per hour reflects how many customers you have served on the average, in a given time period. There is no one perfect number for engagements per hour; you adapt the length of your chat to the needs of your customers.
Engagements per hour = the number of interactive engagements / (online time + away time engaged + back soon time engaged)
For example, if you took six (6) engagements between 8 a.m. and 11 a.m. (and you were online during this period of time), your engagements per hour will be:
6 engagements / 3 hours = 2 engagements per hour
Utilized capacity
Utilized capacity is calculated as follows:
utilized capacity = total concurrent engaged time / total logged in time x max allowed concurrent chats
For example, if your concurrent engaged time is 4.5 hours, you’ve been logged in for 5 hours, and your maximum number of chats is 4, then your utilized capacity is:
4.5 / (5 x 4) = 22.5 = >22.5%
If your utilized capacity is low, then either you are not busy enough, or the volume of chats has decreased. If, on the other hand, your utilized capacity is high, you are fully occupied.
CSAT
This score reflects your customers’ rating of your engagement with them. The data is collected from customers in the post-chat survey. By reading your CSAT score, you can see if you need to improve your chatting skills. You can get guidance and help from your manager and your peers.
CSAT = total number of positive answers / total number of answers
Monitor your Data Bar, to make sure that you are meeting your goals. If your utilization and CSAT scores are below par, get help from your manager or your peers.
Missing Something?
Check out our Developer Center for more in-depth documentation. Please share your documentation feedback with us using the feedback button. We'd be happy to hear from you.