Attached Data Configurator
Use the Attached Data Configurator to access information sent from your PBX, TCC, or an API query. You can view tracking numbers for shipments or other information, depending on how your system is configured.
Understand attached data
Attached data is information from database fields that arrives along with a call in addition to the basic call data Tenfold knows about. This information usually relates to interactions with callers and can include tracking IDs, address information, transaction codes, and any other relevant data. Attached data can originate in TCC, a PBX, or through an API query.
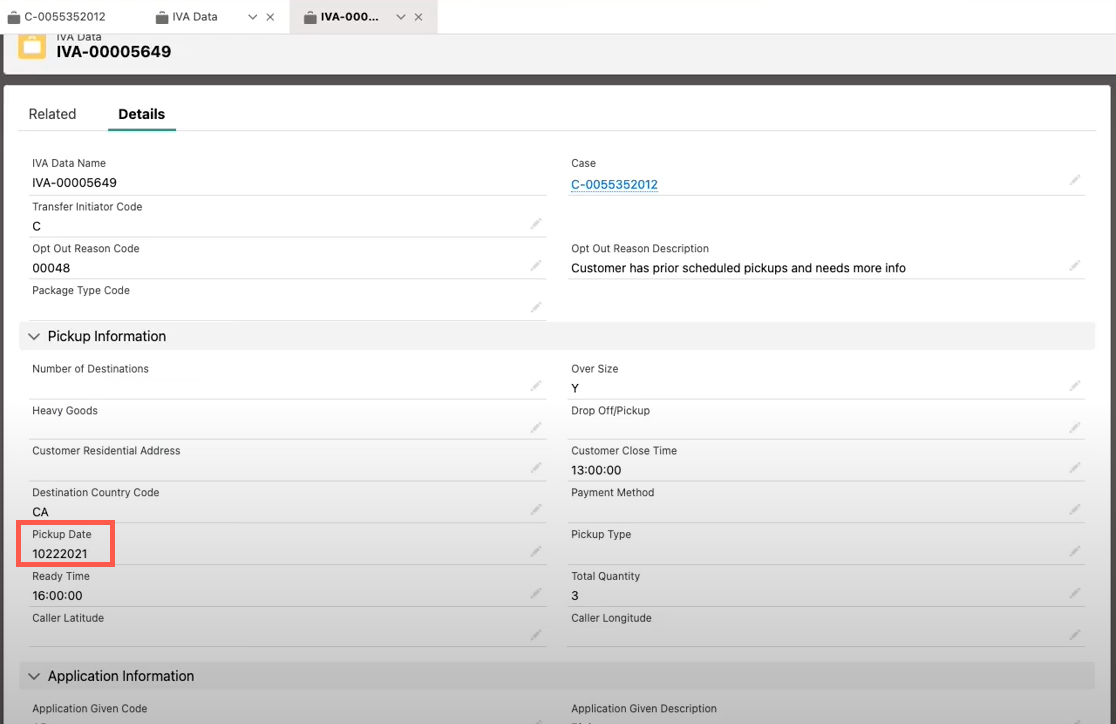
When a call with attached data is received via Tenfold, the data is saved to the CRM, as with the IVA data shown in the following screenshot:

The PIckup Date field in this data is used to illustrate how attached data works in the following examples.
Because they are highly customizable, attached data fields vary considerably between implementations. Contact Tenfold support to find out how to add new attached data fields to your integration.
Configure attached data fields
If you already have attached data fields configured that you would like to access from with in Tenfold, then you can configure those fields using the Attached Data Configurator. It is advisable to add all of your attached data fields.
- Navigate to Tenfold Dashboard > Features and enable the Attached Data Configurator feature if it is currently disabled.
- Click Attached Data Configurator to open the feature and then click Go to Attached Data Configurator.
- To add an attached data field, click + Create New Field.
- Enter a display name in the Label box. This is how the field will display when you reference it from Tenfold.
- Enter the internal database name for your attached data field in the Field Name box. Attached data always has the Interaction Data type.

- In the example above, the name of the field in the CRM is "PickupDate," and here we're mapping it to a field called "Pickup Date" in Tenfold. NOTE: Attached data fields are saved to the call object, so it is not necessary to specify the object name.
- Click Add Field.
Use attached data on the Tenfold Info tab
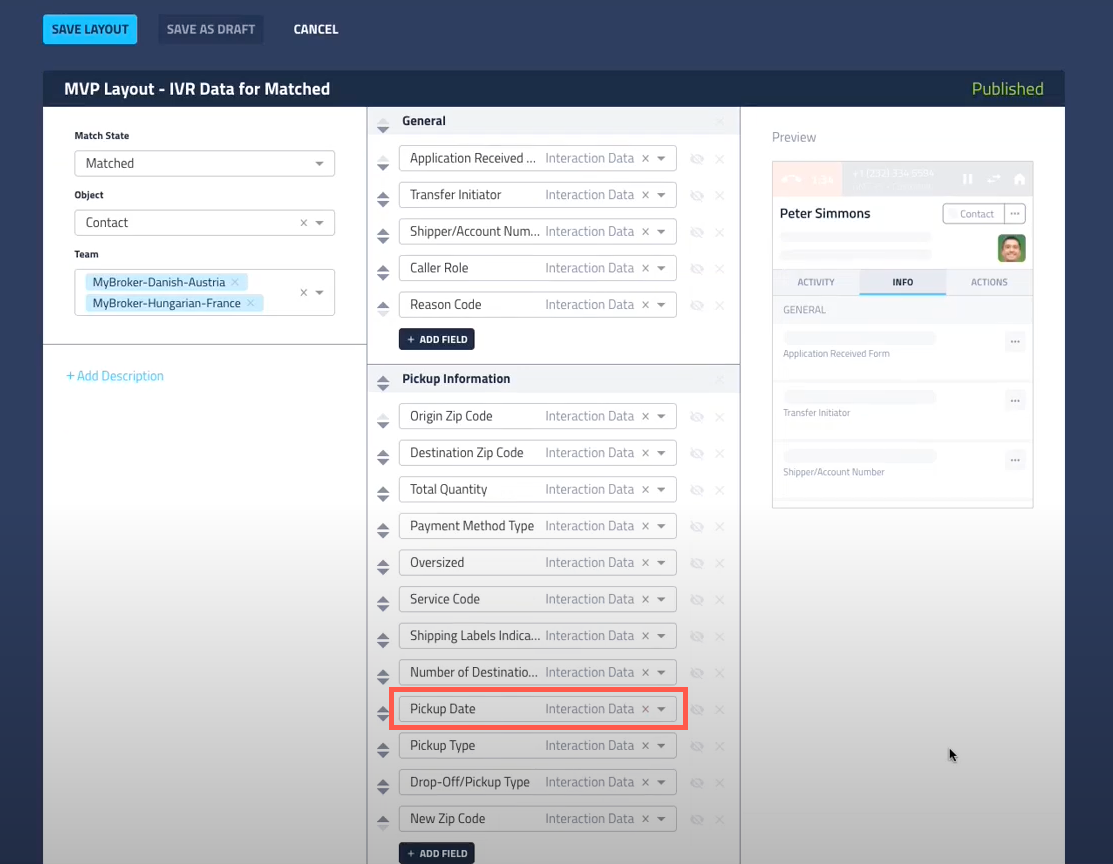
After you've added the attached data field to Tenfold, you can use it is to add it to a layout using Customize Information Tab:
- Navigate to Tenfold Dashboard > Features and enable the Customize Information Tab feature if it is currently disabled.
- Open Customize Information Tab and then click Manage Custom Information Tab.
- Create a layout, making selections for State, Object, and Team.
- Add a group and select your attached data field in the Select Field list.
- The layout includes a preview to give you and idea of how the layout will appear to members of your selected teams.

- NOTE: Only fields containing information display on the Info tab.
- Click Save Layout.
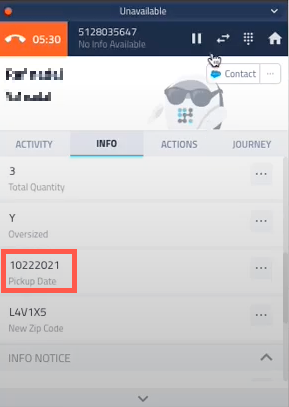
This configuration displays like this to the end user in the Tenfold UI:

Use attached data with Data Memorialization
You can use the Data Memorialization feature to map an attached data field to a different field in your CRM.
For example, if your attached data is saved to a Notes field, but you need the information to display in Description, you can map the Notes field to the Description field. The information appears where you need it without making database changes.
- Navigate to Tenfold Dashboard > Features and enable the Data Memorialization feature if it is currently disabled.
- Open Data Memorialization and then click Manage Data Memorialization.
- Click + Create New Mapping.
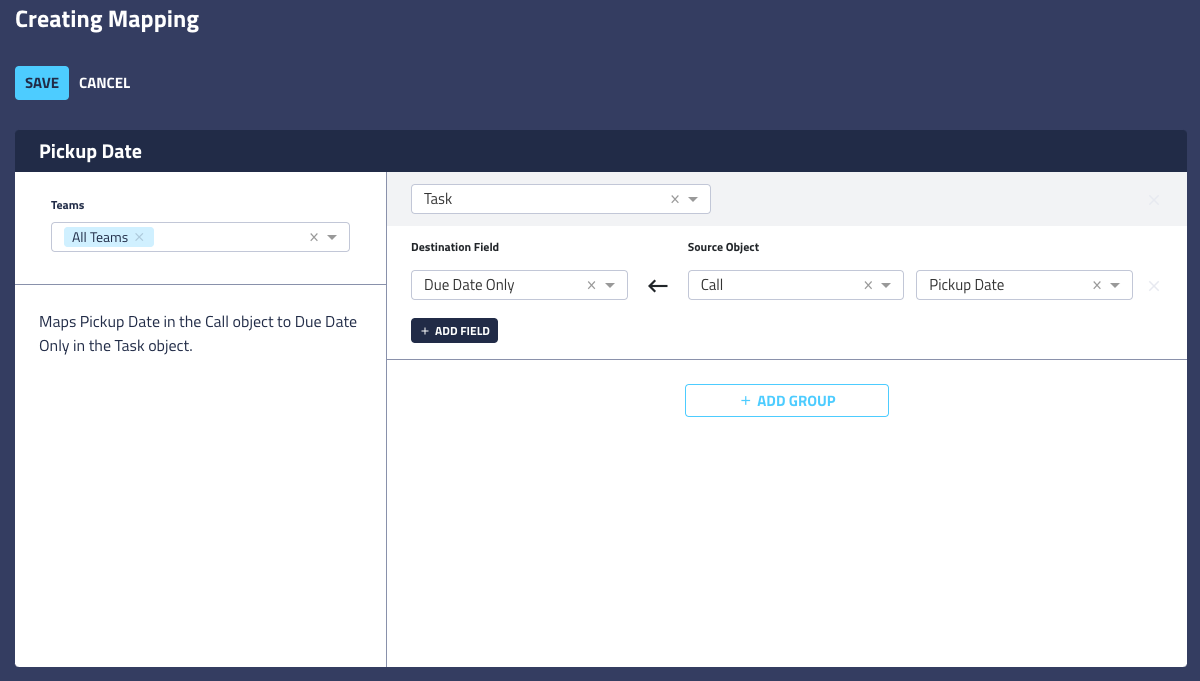
- Create your new mapping:
- Click Mapping1 and give the mapping a custom name (optional, though unique names are required for mappings with the same team assignment).
- Select the Tenfold teams that will be able to access this mapping.
- Click in the Add Description box and enter a custom description (optional).
- Click the Select Object list and choose the CRM object which contains the field you want to map.
- Click the Select CRM Field list and select the field in the CRM object to use as the target mapping.
- Click Select Source Object and select Call.
- Click Select Source Field and select your attached data field.
- In this example, the Pickup Date field is mapped to the Due Date Only field in the Task object.

- Add additional fields or groups of fields as needed.
- Click Save.
- Now the information from your attached data field will appear in the mapped CRM field.
Missing Something?
Check out our Developer Center for more in-depth documentation. Please share your documentation feedback with us using the feedback button. We'd be happy to hear from you.