Set the agent group hierarchy
Businesses are often divided into groups that reflect their organization and hierarchy. A contact center can be thought of as a group: in which sub-groups of agents are each responsible for a different area of support. To help you mirror your contact center structure in the Conversational Cloud, we’ve created the "agent groups" capability.
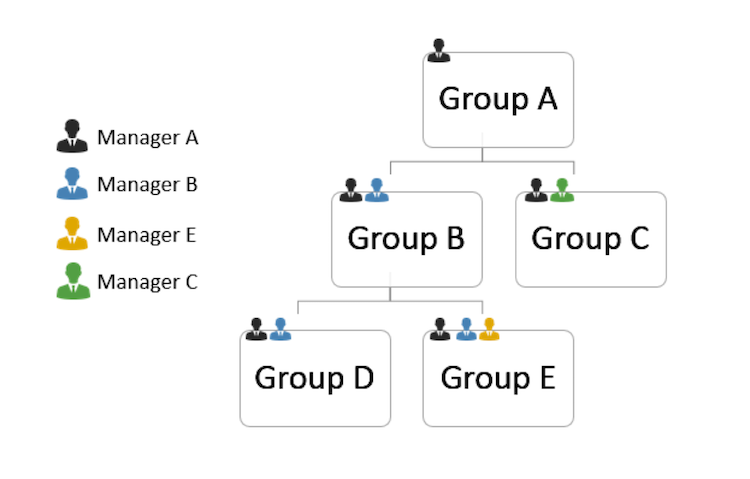
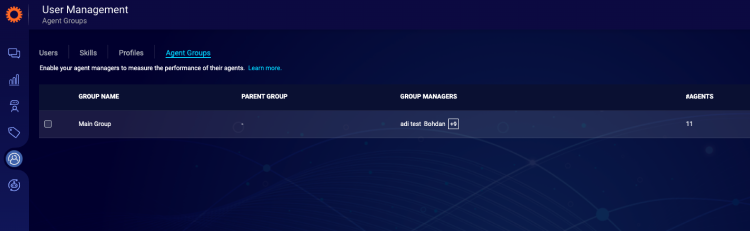
The Conversational Cloud includes a default group, called the "main group" that consists of all the users in the Conversational Cloud configured as agents and subgroups. The Main Group can’t be moved or deleted. It is the top-level group in the hierarchy and is also considered the parent group.
Groups can be divided into "subgroups." Any group that has subgroups is considered a parent group and the Main Group is always the highest parent group in the hierarchy.
Each group can have a manager(s) who is capable of viewing the data of their group members and subgroups only. If no manager is assigned to the group, the manager of the group’s parent group is considered the manager of the subgroup and will be able to see its data. This allows managers to focus on their own responsibilities and better manage their teams. In large organizations, where contact centers are managed by different vendors, groups provide a more secure view, since each vendor can view the data of their own group and subgroups only.

Managing agent groups
An agent group manager can be either an agent manager or an administrator. As an agent group manager, you can see data and run reports related to users that are assigned to your groups and subgroups. As an administrator who is also an agent group manager, you can also perform user management tasks such as creating and editing groups, subgroups, and resetting passwords. To learn how to create and edit agent groups see the procedures below.
Viewing the agent group data
The agent manager data bar and dashboard provide you with a snapshot of your agents’ efficiency and operational performance at any given time. Reports are configured to display the data related to agents assigned to your groups and subgroups and to your agents’ related skills only. If you manage more than one group, you can apply a filter to view each group’s data separately.
Initially, all agents are members of the main agent group. Once an agent is moved to a different agent group, data relating to the agent’s conversations from that point onwards are available to the manager(s) of the new group only. Data related to the agent’s conversations from before the move are available to the manager(s) of the main agent group only.


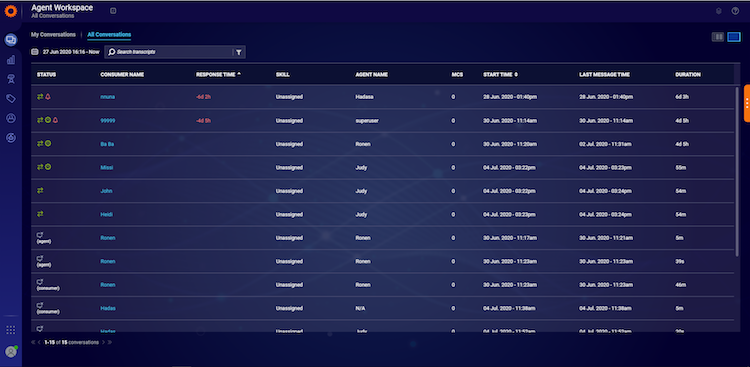
Viewing conversation transcripts
In the web history and All Conversations tabs, you can view conversations handled by agents assigned to your groups or subgroups. You can search, sort, and copy their conversation transcripts. Reading conversation transcripts is a good way to review what’s happening in your contact center; once you identify problem areas, you can take corrective actions.

To filter by agent group in web history, click on the filter icon in the agent group column header, and select the agent group(s) you want to filter by. Click filter. The page will now refresh to show data only from the agent group(s) selected.
To filter by agent group in All Conversations, click on the filter icon next to the search bar on the right side of the page. In the dropdown list next to Agent Groups, select the Agent Group(s) you want to filter by. Click filter. The page will now refresh to show data only from the agent group(s) selected.
Viewing engagements over time using the Analytics Builder dashboards
Using the agent manager Analytics Builder dashboards you can monitor, track and improve contact center performance. The dashboard displays KPIs related to agents assigned to your groups and subgroups.
In some cases, when agent managers are also configured to take conversations, they may impact the group statistics. For example, the agent manager status is usually away and will be “online” only when they are needed to take conversations. This might impact the group’s utilization KPIs. If you wish to include or exclude manager activities from the report, check/uncheck the 'is manager indicator' checkbox.
Groups are an efficient way to logically organize and manage the users in your organization. They save you time performing administrative actions: you have the ability to define, modify and set configurations for a group of agents as a mass instead of defining it many times per user.
Adding a new agent group
The add group button will be enabled once you select a parent group from the list. The new group will be set as the subgroup of the selected group.
To add a new group:
1. On the 'users' tab, go to the 'Agent Group' list.
2. Select the parent group from the list.
3. Click add group or click the action menu, and then click add.
4. Fill in group details:
- Type a group name
- Type the name of the user(s) you want to assign as a manager(s)
- Add members to the group

5. Click 'save'. The edit agent group window closes and the agent group list is displayed.
6. Click the group you edited. The edit agent group window now shows the group members that you added in the member’s name table.

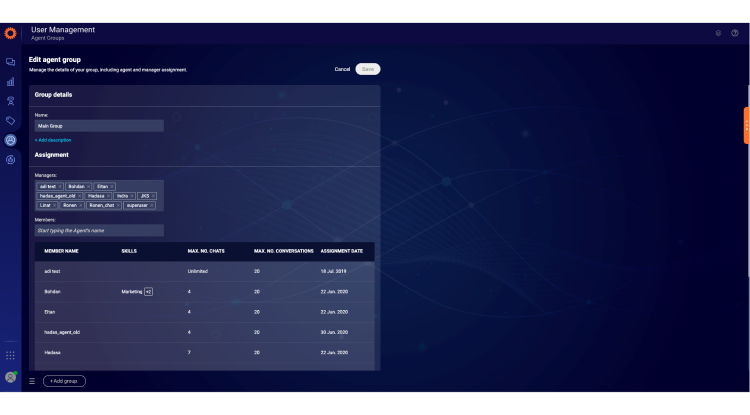
To edit an agent group:
- Click on the agent group you want to edit. The edit agent group page will open.
- After making your changes, click 'save'.
Missing Something?
Check out our Developer Center for more in-depth documentation. Please share your documentation feedback with us using the feedback button. We'd be happy to hear from you.