Workflow user guide
iHub Workflow Powered by Workato user guide
How to access Workflow Powered by Workato
Workflow Powered by Workato is a solution that resides within the Integration Hub (iHub). iHub can be accessed via the left navigation bar and is only visible to brand admins.
Workflow tab
Brand admins or LivePerson admins accessing Workflow for the first time will be required to activate their Workato account/tenant that is exclusively set up for the specific LivePerson account. Once this account is activated, the admin will then have access to Workato and can start enabling integrations with the prebuilt connectors available in Workato. LivePerson admins activating a brand tenant are required to review the Workato terms and conditions with the brand before activation.


Steps to set up Workato
- Access the Workflow tab and click on “Activate”.
- Agree to the terms of use for Workato before a Workato tenant can be created for the brand account.
- Once the Workato tenant is created, the brand admin user will be created in Workato.
- Upon creation, the brand admin can then access Workato and will not be required to enter any additional credentials.
Note: This setup is only required for the first time a brand is accessing Workflow. Going forward, brand admins will automatically be taken to the Workato embedded experience. The user will be created, on the fly, in Workato for new brand admins that will access Workflow once the Workato tenant is activated.
Brand admins will get administrator permissions which includes full recipe development access for folders, connections, administrator privileges to view the logs, platform and SDK access and recipes (i.e. view, edit, create, delete, test, start, stop and job history). LivePerson admins will also be granted a custom role that mimics the Workato Operator role to start and stop recipes and rerun jobs but will also have access to view, edit, create and delete recipes and job as needed. This role also gets access to debug jobs and view the audit logs and will be granted privileges for both the platform and the connector SDK.
Glossary
| Assets | The Assets page includes all the recipes and connections that have been established for the brand’s tenant (subaccount). |
| Recipes | Recipes are automated workflows built by users that can span multiple apps. Each recipe comprises a trigger or business event and one or more actions (i.e. proactive messages) that are carried out when a trigger event is picked up. |
| Template | LivePerson has created some out-of-the-box template recipes to make it even easier to set up your workflows. |
| Project | Projects enable you to organize your assets into folder and subfolder structures. It helps you manage assets by use case, department, app, or process, and to control who has access to them. |
| Connections | For a recipe to communicate with apps via actions and triggers, it has to be authorized to interact with apps. |
| Tools | Workato provides a more advanced set of tools to make your recipes even more powerful. Find more details on tools here. |
| Dashboard | Workato's Admin Dashboard allows users to visualize real-time data about the recipes and connections in their Workato account. It provides key insights, analytics, and actions so you can discover and resolve issues faster. |
| Community Library | Save yourself time by accessing the Community Library. Go to the Workato community to search for connectors built by other developers to immediately start building recipes rather than having to build that connector yourself. |
Please click here for more detailed information on Workato terminology and concepts.
Overview
Overview The “Workflow” page, powered by Workato, provides brands with a completely embedded experience. With access to a Workato tenant, the brand can access over 1000+ pre-built connectors to provide complete automation to power up more conversational journeys. This will allow brands access to the Proactive connector in Workato to enable different conversational triggers for Proactive Messaging.
Why use Workflow?
Brands can now seamlessly integrate and automate workflows across cloud-based and on-premise systems to LivePerson’s Conversational Cloud platform. While there are abundant use cases that are relevant to power up conversational journeys with customers, here are some examples of how brands can utilize Workflow.
Examples:
- Brands can drive up conversion rates by creating triggers or business events based on cart abandonment actions that initiate messaging conversations with customers.
- Brands can save sales teams time from having to follow up with every lead manually by creating meaningful conversations with prospects.
- Brands can spearhead more timely payments from customers by creating triggers for payment reminders.
Key Features
Workflow offers an embedded Workato experience where brands can access the assets, dashboard, tools, and community library. In addition, brands can also access content and links to videos in the “Resources” tab.

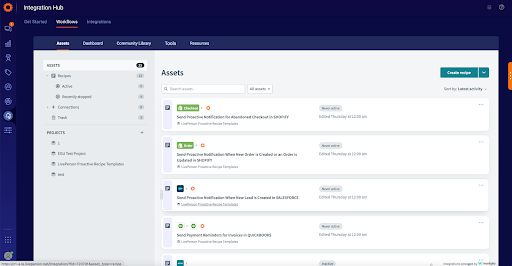
Assets
The Assets page is essential to get started. This is your central workspace, where all the recipes can be created, and where all the connections can be established to other on-premise and cloud-based systems.. For more details on assets and projects, please reference the Workato videos and documents here.
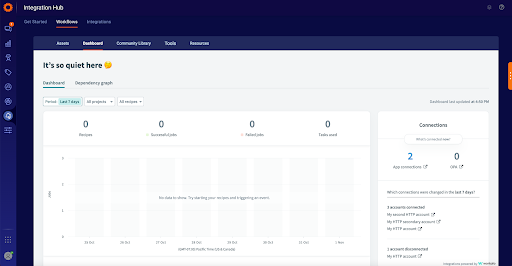
Dashboard
The Dashboard allows brands to monitor the recipes and connections that are active in the system. For more details on the Dashboard, please reference the Workato documentation here.
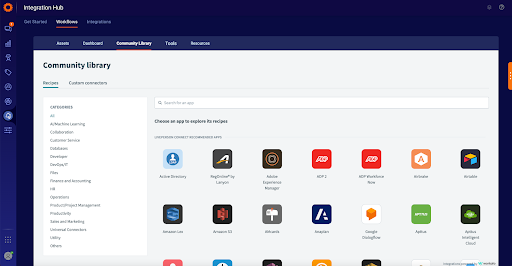
Community Library
Access thousands of prebuilt connectors here to fast track your workflows in LivePerson.
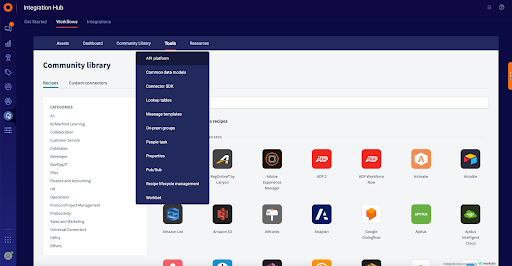
Tools
For more advanced features such as tools, please reference the details here.
LivePerson Workflow Templates
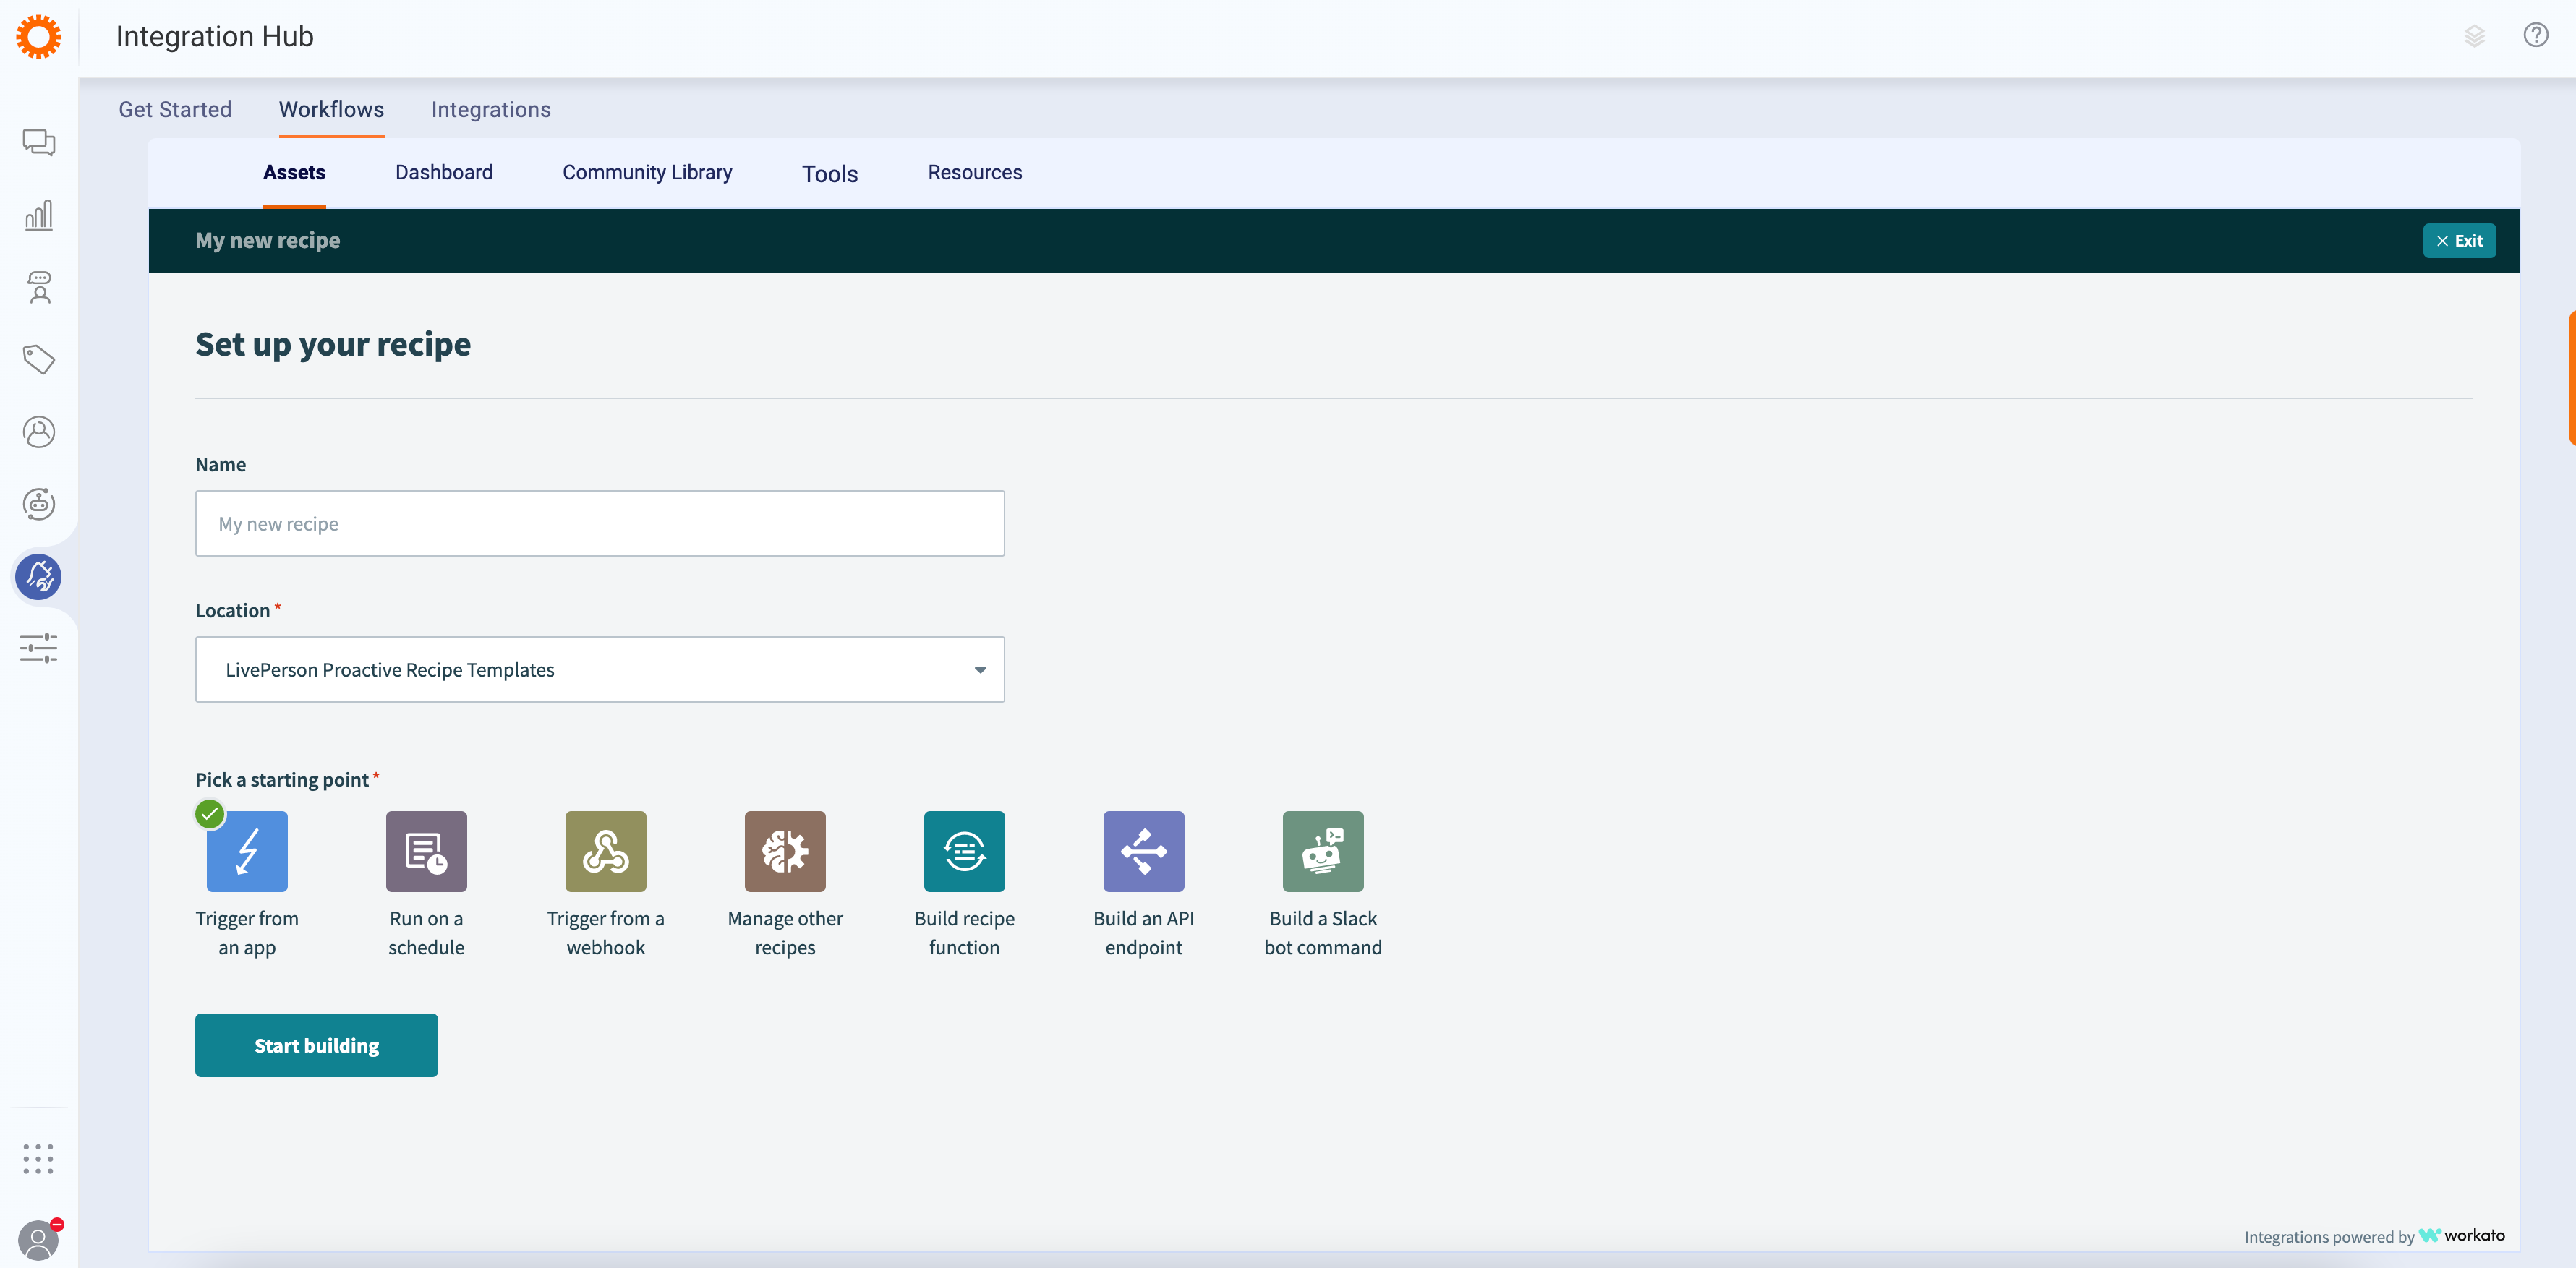
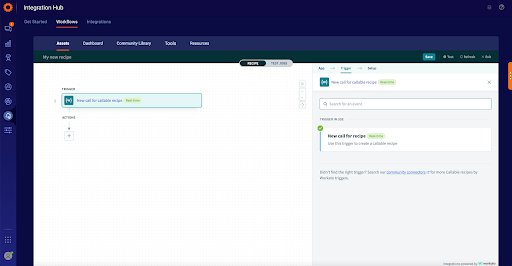
We have created some predefined workflows for brands and will continue to expand the repository of out-of-the-box templates that could be used to kick start conversational journeys. Brands can access these templates every time they click on the “Workflow” tab. A pop-up modal will appear with the curated recipes. Brands may also access these recipes in the “Assets” tab where these proactive templates will appear in the “LivePerson Proactive Recipe Templates” project folder. Brands SHOULD NOT move any of these recipes to another folder or create new custom recipes in this project folder. We strongly recommend making copies of the templated recipes and we recommend creating new project folders for custom recipes.

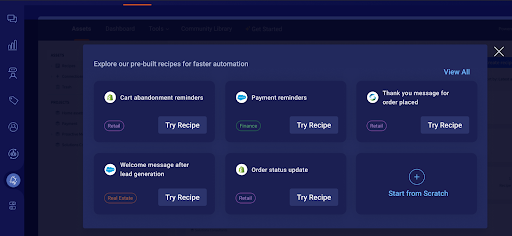
How can I use a pre-defined templated recipe?
To activate a recipe, brands can click on “Try Recipe” from the modal that displays curated recipes, or access the complete list of recipes from the project folder named “LivePerson Proactive Recipe Templates. Next, click on “Edit recipe” to ensure the connection is established to the brand’s specific applications or databases. Once the connection is established, brands can simply activate the recipe and monitor this through the dashboard tab.
How do I create a Workflow?
Proactive Messaging flows
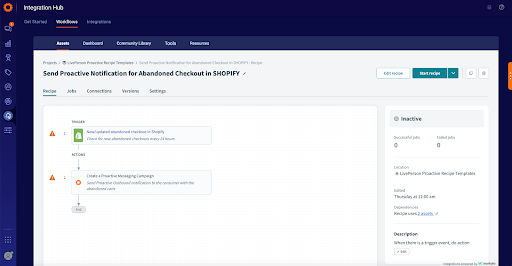
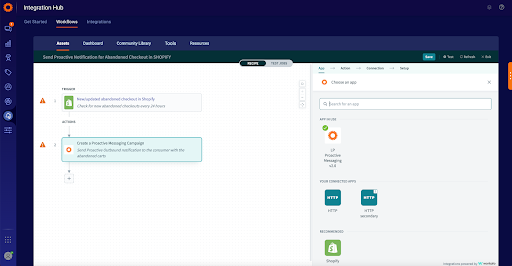
A proactive engagement campaign targets customers based on a certain set of conditions. This could be anything from cart abandonment triggers, to new lead triggers, or other conditions based on the downstream systems. A wide variety of customer profiles can be targeted based on their geolocation, onsite activities, customer information, and more. Let’s walk through an example of how to create a workflow for a Proactive cart abandonment use case.
Step 1: Create a connection to the cloud or on-premise system.
Under the assets page, click on “Connections” and then “Create connection”. There is a variety of different applications to choose from. In this example, we will use a Shopify connection. Here, you will be asked to name your connection and enter your shop name details. Authentication details will then be requested to set up the connection.
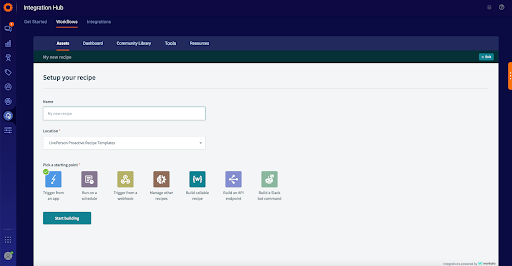
Step 2: Create and name your recipe and trigger/business event.
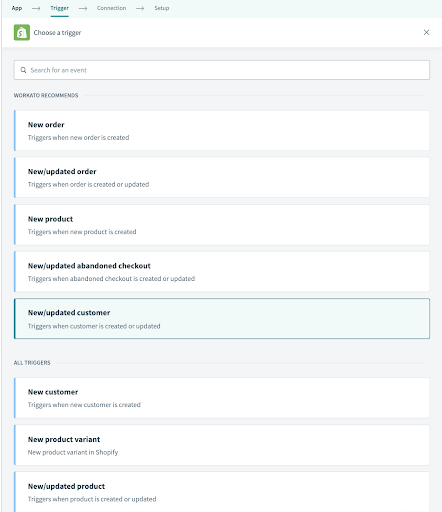
When you first create your recipe, choose the starting point “Trigger from an app”. Based on the source application, Workato provides a list of meaningful triggers that can be used. In this case, you can see recommended triggers and all triggers available from Workato. Brands can select the specific abandoned checkout trigger, which will be the business event to engage with customers over messaging.

Step 3: Create an action to enable a Proactive message.
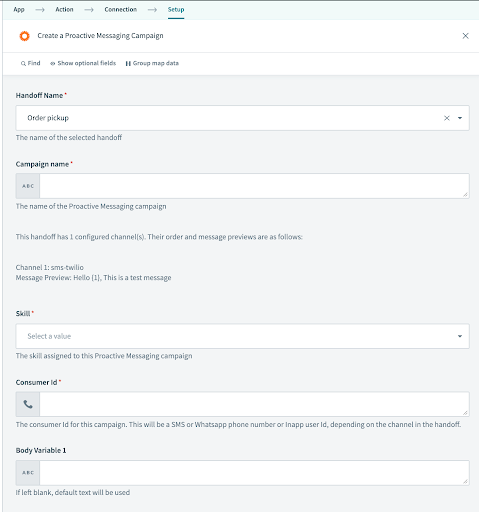
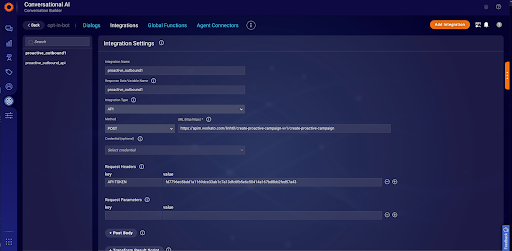
The final step would be to define the action required. Brands can select the LivePerson connector “LP Proactive Messaging 2.0” to enable Proactive messaging.
Brands can specify the following details to enable the Proactive Messages to customers who have abandoned their cart.
Handoff Name: Brands will see a list of pre-populated handoffs in the drop-down menu. For more information about the proactive API handoff, please reference our guide which can be found here.
Campaign name: Brands can type in the name of the Proactive campaign.
Skill: Brands can select from a list of skills enabled on the LivePerson account.
Consumer id: This is the information that can be retrieved from the source system, in this case, it would be the consumer phone number from Shopify. If the number does not exist for consumers, Proactive has separate reporting APIs that can be used to track this. More information about the Proactive reporting API can be found here.
Body Variable 1: Includes the message with the placeholders for the data inputs (i.e. Customer Name) from Shopify. Brands can insert text, such as “Hi {Customer Name}, thanks for visiting our site. We notice this item may be of interest to you. We only have a few of these left in stock and did not want you to miss out!”

Conversation Builder Messaging flows
Workato API recipes can be used to set up messaging flows with Conversation Builder. API recipes can be exposed as REST endpoints that can be called from Conversation Builder. Today, conversations and messaging are the most effective ways for brands to interact with consumers. Conversational commerce makes it easy for people to ask questions, purchase products or services, and get help using their preferred messaging service. Messaging transforms how brands interact with consumers, creating large volumes of conversations from phone calls, messaging channels, and more.
Once a brand adopts messaging, they will need a way to scale their contact center operations to support the personalized, accessible, and always-on relationship that messaging enables. Conversation Builder is an all-in-one platform for easily building bots that are tailor-made to be effective in conversational commerce.
Let’s walk through an example of how to create a workflow. Say you want to automate the process of recording customer opt-ins in your brand’s system of records or in a file; the recipe logic would be to record the opt-in for the customer.
Step 1: Create and name your recipe. Then select “Build an API endpoint” as the starting point.

Step 2: Set up the recipe with the Input and Response Schemas. For more information on setting up the Workato API recipes, please reference the following documentation.
Once the API recipe is set up, you can access the API platform under ‘tools’ to set up the REST endpoint for that recipe. Please find additional details here.
Step 3: Call the Recipe REST API endpoint from Conversation Builder. In Conversation Builder, you may set up the integration to call the Workato recipe REST API endpoint. As per the example for customer opt-ins, once this Workato recipe is triggered via the Conversation Builder, then the customer opt-in can be recorded in the brand’s system of records as defined in the API recipe.

How to leverage custom connectors?
Are you unable to find a specific application from the 1000+ connectors available? Brands can also create custom connectors in Workato. For more information on how to create custom connectors, please reference the Workato documentation found here.
Additional Workato Get Started Videos
- Getting Started Learn how to setup automated workflow
- Automate your work with Workato Recipes
- Building your first Recipe
- Trigger Conditions, Data mapping & Formula mode
- Jobs, Versions, Recipe Settings and Dashboard
Workato Dashboard
Brands will have complete transparency and real-time data on how recipes are performing via the ‘Dashboard’ menu in Workflow.
For more details on reporting, you can also reference the Workato dashboard.
Proactive Reporting
Brands can also access the Proactive messaging dashboard to understand the message volumes.
Limitations
- Currently, brand admins cannot grant specific permissions in Workato. The users in LivePerson are granted predefined permissions in Workato.
- Please note, if your brand already has a Workato license, you cannot log into the LivePerson Workato tenant directly from the Workato URL. You will always need to access the LivePerson Workato tenant from iHub.
- Brand admins trying to access Workato directly in the same browser session will be redirected to the LivePerson Conversational Cloud UI. This is standard behavior that Workato enables for the embedded accounts.
Missing Something?
Check out our Developer Center for more in-depth documentation. Please share your documentation feedback with us using the feedback button. We'd be happy to hear from you.