Tenfold Info Tab (Custom Information Tab)
Display your custom info in the UI
Customize the Info tab in the Tenfold UI to provide agents with important customer information at the moment of interaction! By leveraging objects and fields you already have available in your primary CRM, you can create dynamic, relevant, and organized interfaces for anyone in your organization. This feature can be customized for each team using Tenfold, helping you keep the information displayed relevant to each role!
NOTE: The Info Tab will reflect phone numbers populated in the standard phone fields as well as record type by default. Customization of this tab is currently only supported for Salesforce and MS Dynamics users.
Info Tab
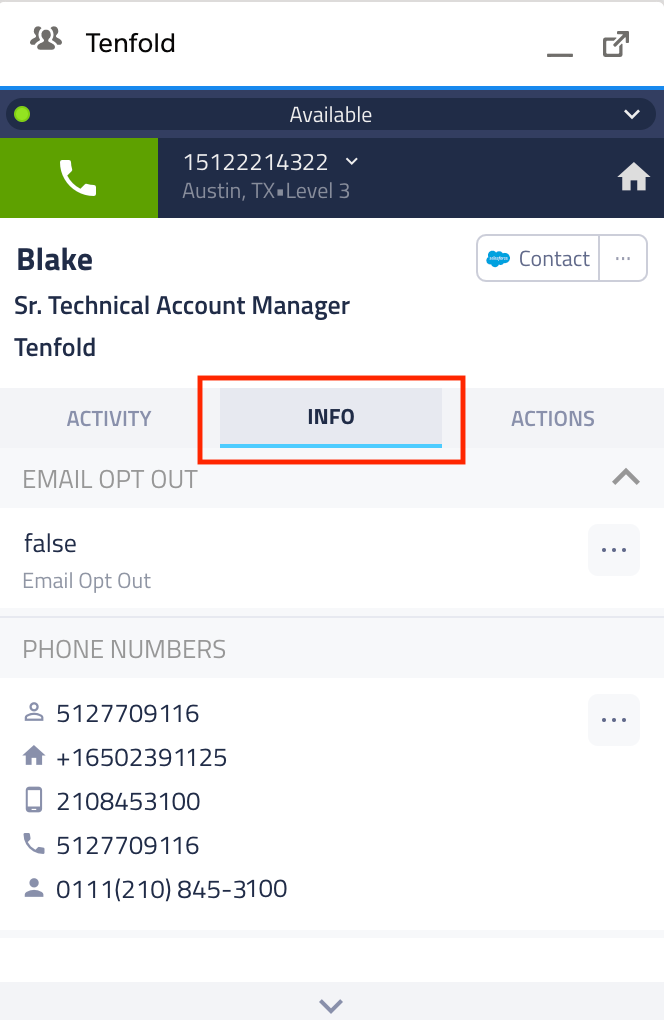
Users who are actively engaging their customers in conversation can reference the Tenfold Info Tab to help confirm basic information such as phone number, email address, and a variety of other fields. For users who are not using Salesforce or MS Dynamics as the CRM, the Info Tab only reflects phone numbers populated in the standard phone fields as well as the record type by default.
The Tenfold Info Tab is located between the Activity Tab and the Actions Tab in your Tenfold UI. To find the tab, click a single match call in your call history.

Configuration
Tenfold Admins leveraging Salesforce integrations can customize the Information tab using this guide:
- Navigate to your Tenfold Dashboard.
- Select the Features Tab
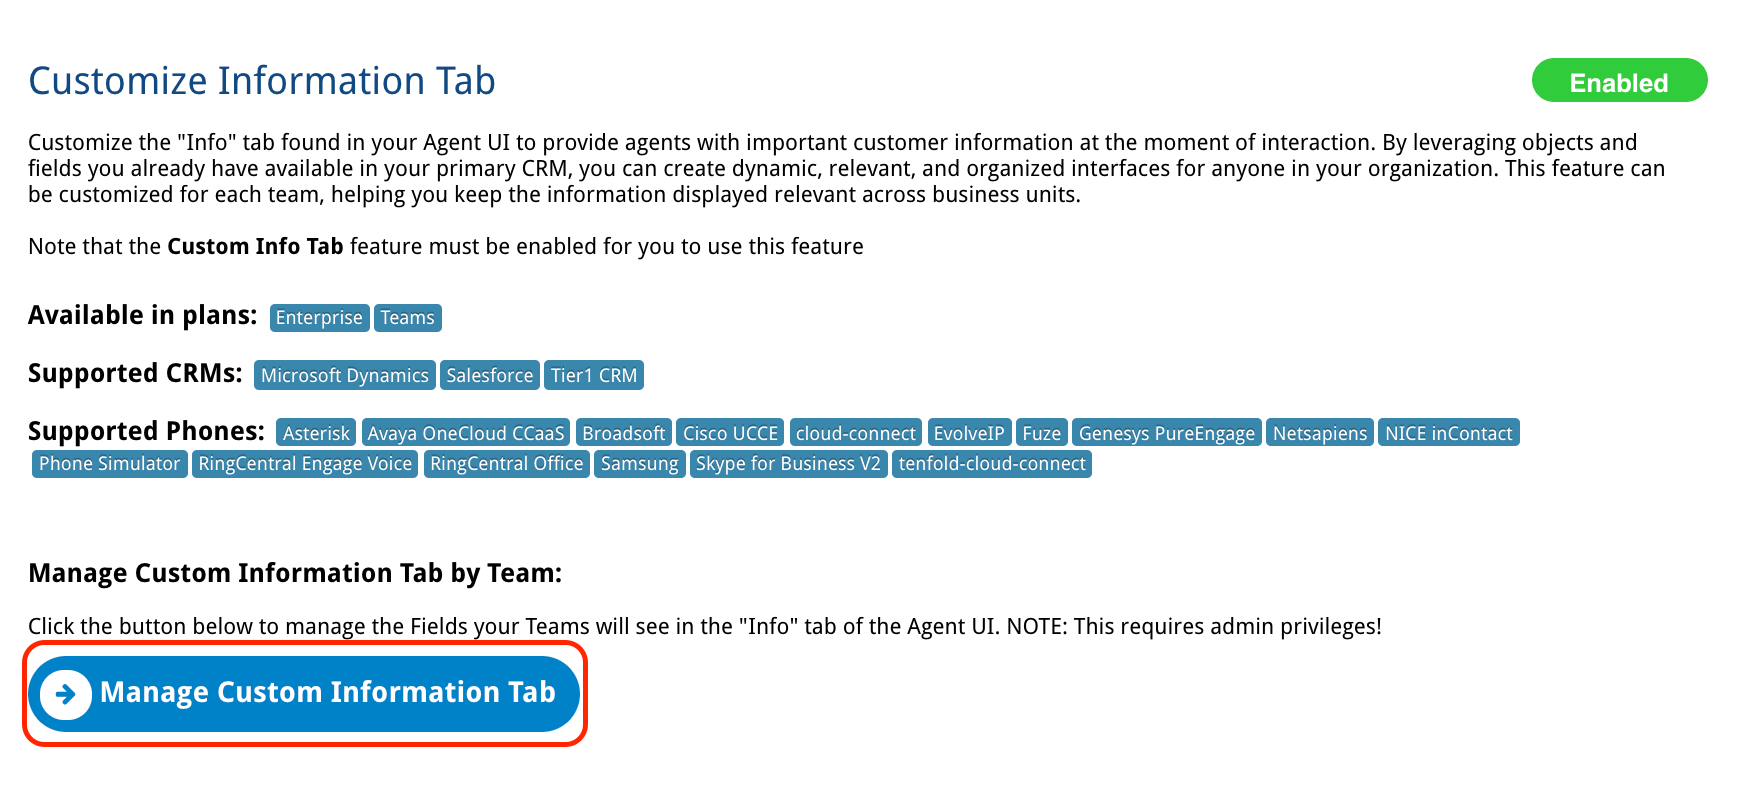
- From the features menu on the left-hand side, locate and select 'Custom Information Tab'
- Toggle the pill button in the top right corner to enable or disable the feature.
- Click Manage Custom Information Tab.

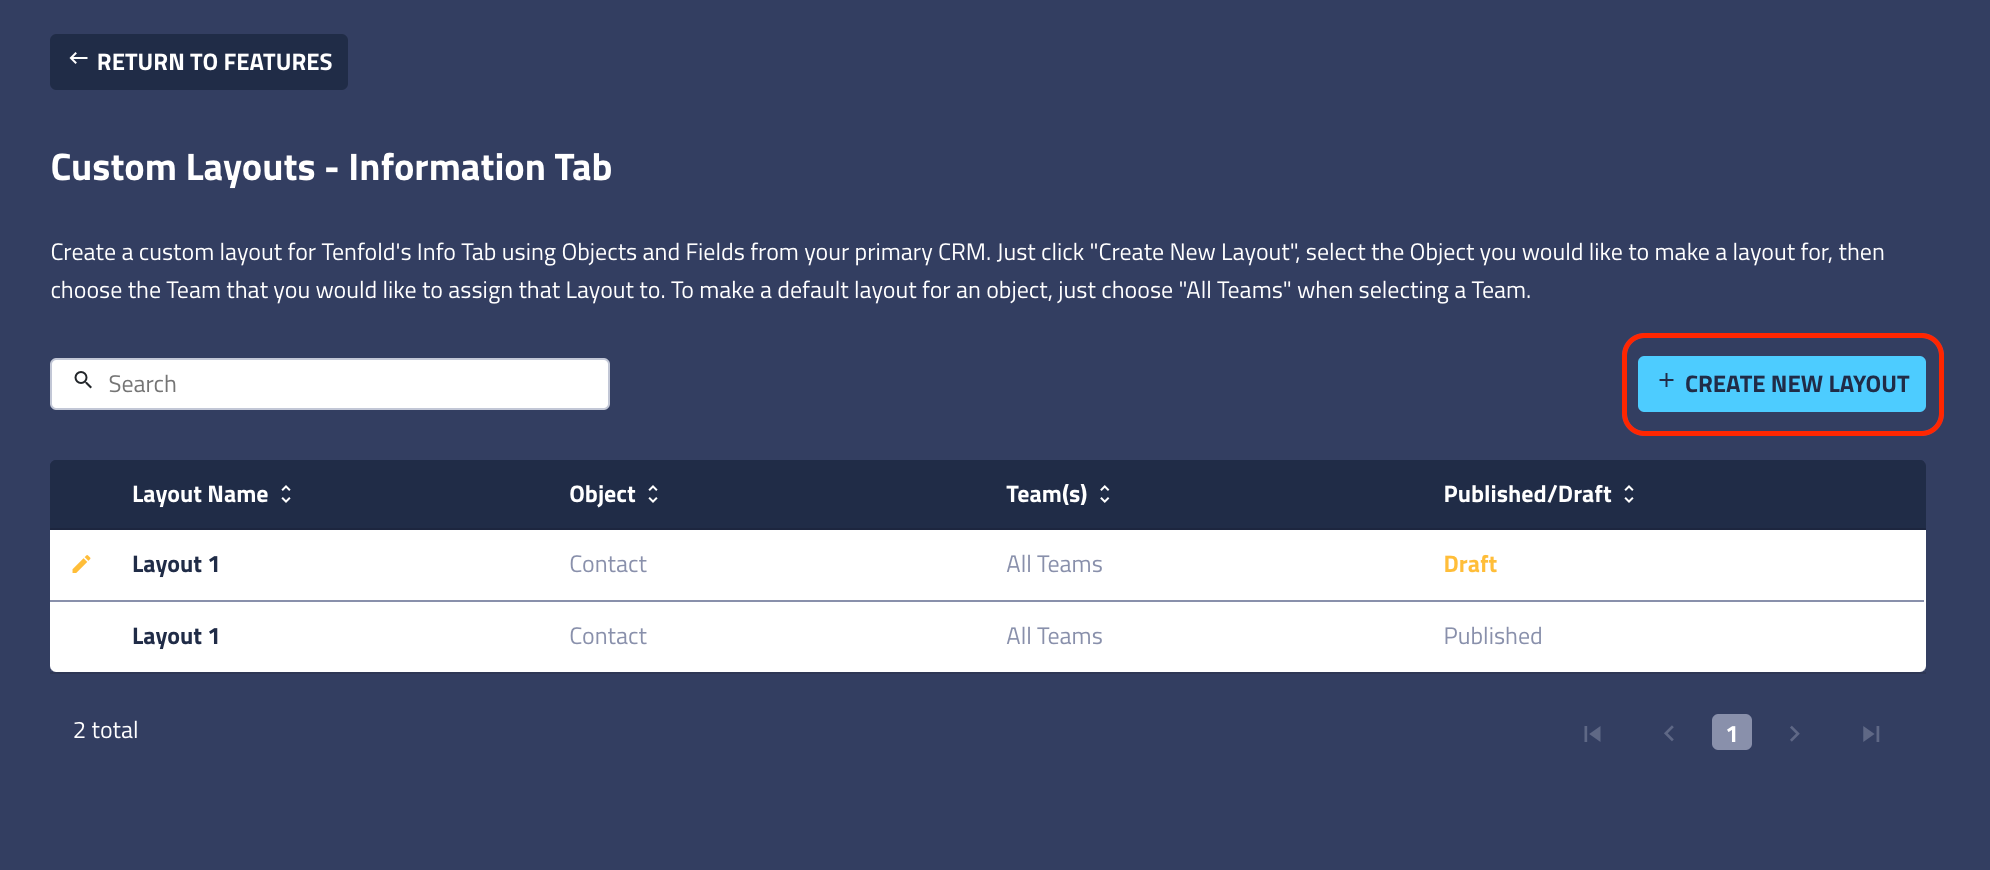
- From here, you can edit existing Info Tab Layouts, or click + Create New Layout to add a new one.

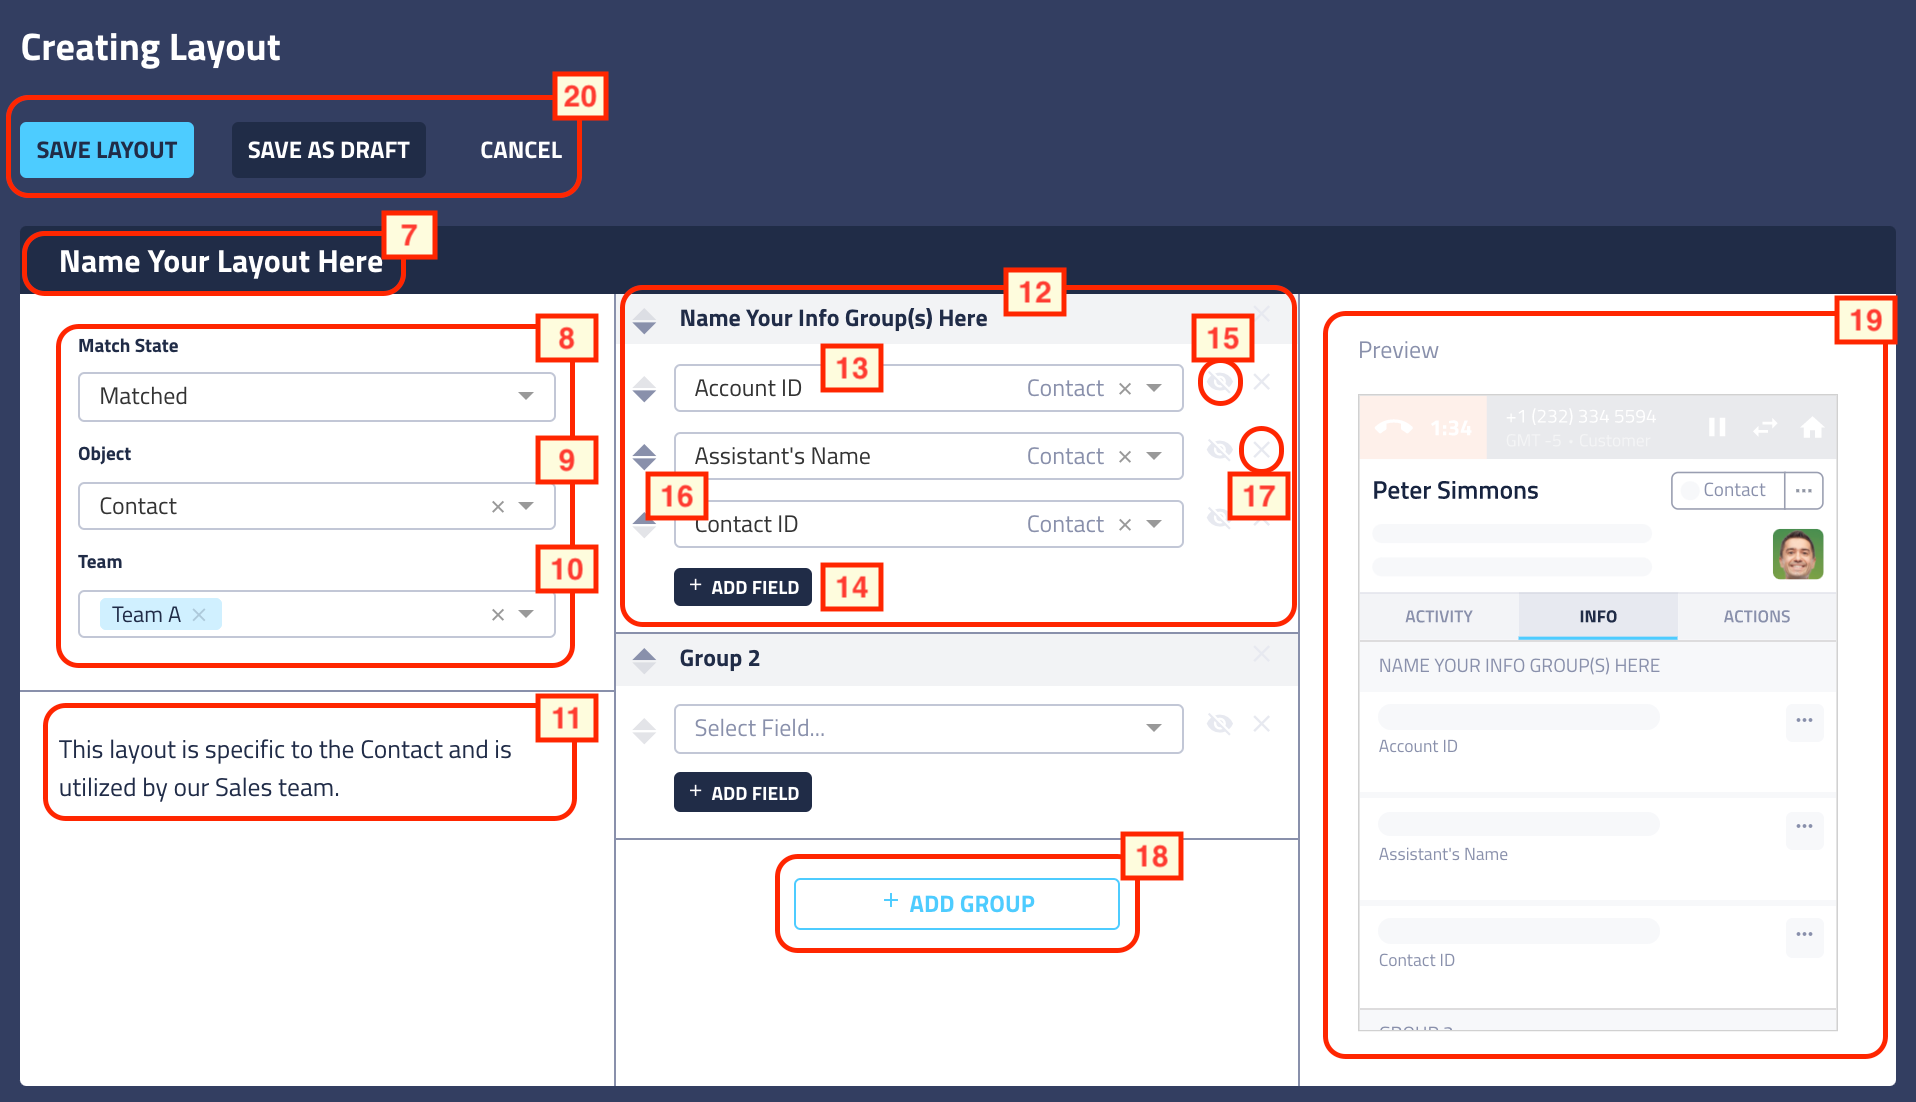
- Click on the blue bar labeled Layout 1 and give it a unique layout a name.

- The Custom Info Tab is visible in both the Single Matched call state and the unmatched call state, although the level of information available will be limited in an unmatched state. Select your desired Match State before proceeding with the configuration.
- Select the Object you would like to Configure (Lead, Contact, Account, Case, Opportunity, Event, User)
- NOTE: The associated information will only become visible if the caller is linked to one of these objects. For example, you might configure the Object: Case. However, if the Contact or Account you are on the phone with is not related to a Case, that information will not reflect automatically in the information Tab. See Cases & Opportunities in Tenfold for more information about Case relation.
- Select the Team or Team(s) you would like to have access to this Layout.
- Give your Layout a brief description.
- Give your first info group a Name - be sure to reference the preview on the right-hand side to see how this will display in your UI.
- Select the field you would like to pull into your Tenfold UI
- Use the '+ Add Field' button to continue adding fields to your Info Tab layout.
- Selecting the eye icon will allow Tenfold to hide a particular field in the event that it is not populated in the CRM.
- Use the up/down arrows to change the order in which your fields will be displayed.
- Click on the 'X' next to any field you wish to remove from the view.
- Feel free to add additional groupings of information by clicking on the '+ Add Group' button and repeating steps 13-17, as needed.
- Review your Layout before proceeding to save, publish, or abandon
- Click 'Save Layout' to publish this view and allow users to begin using it! Alternatively, you may 'Save as Draft' until you are ready to finish your configuration or 'Cancel' if you would like to abandon the Layout entirely.
Missing Something?
Check out our Developer Center for more in-depth documentation. Please share your documentation feedback with us using the feedback button. We'd be happy to hear from you.