Set up an AD FS server and configure SSO
Section 1: Install IIS Web Server
NOTE: If IIS is already installed on your Windows Server, skip to Section 2.
Steps
- Open the Server Manager application on Windows Server.
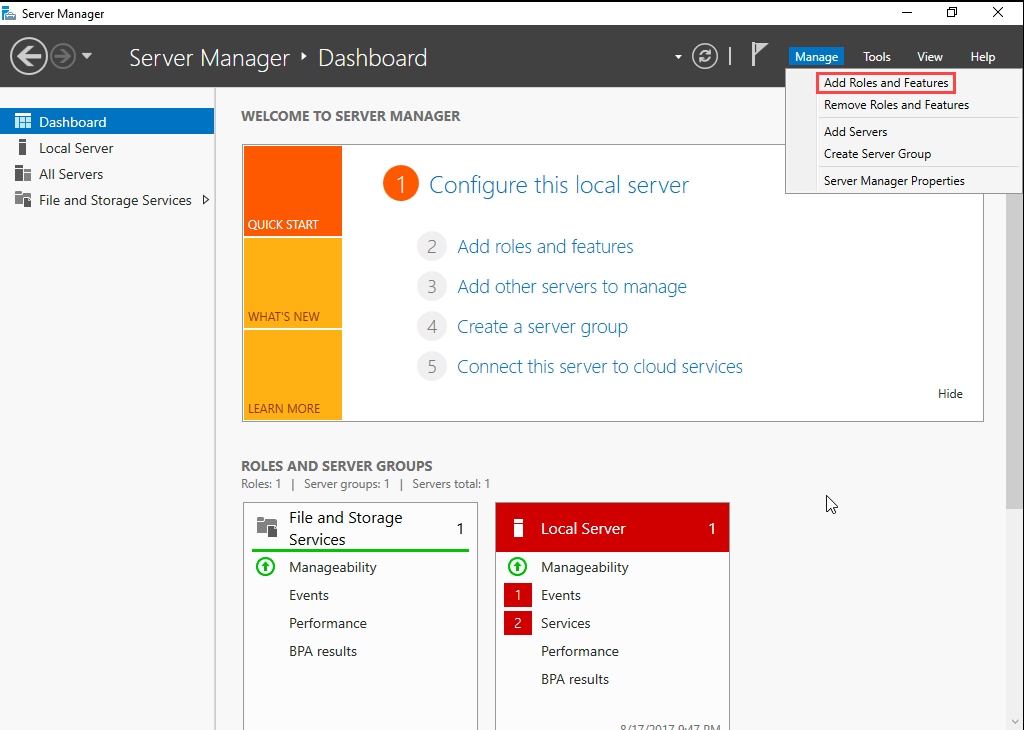
- In Server Manager, go to Manage, and then click Add Roles and Features.


- The Add Roles And Features wizard opens.
- Click Next.
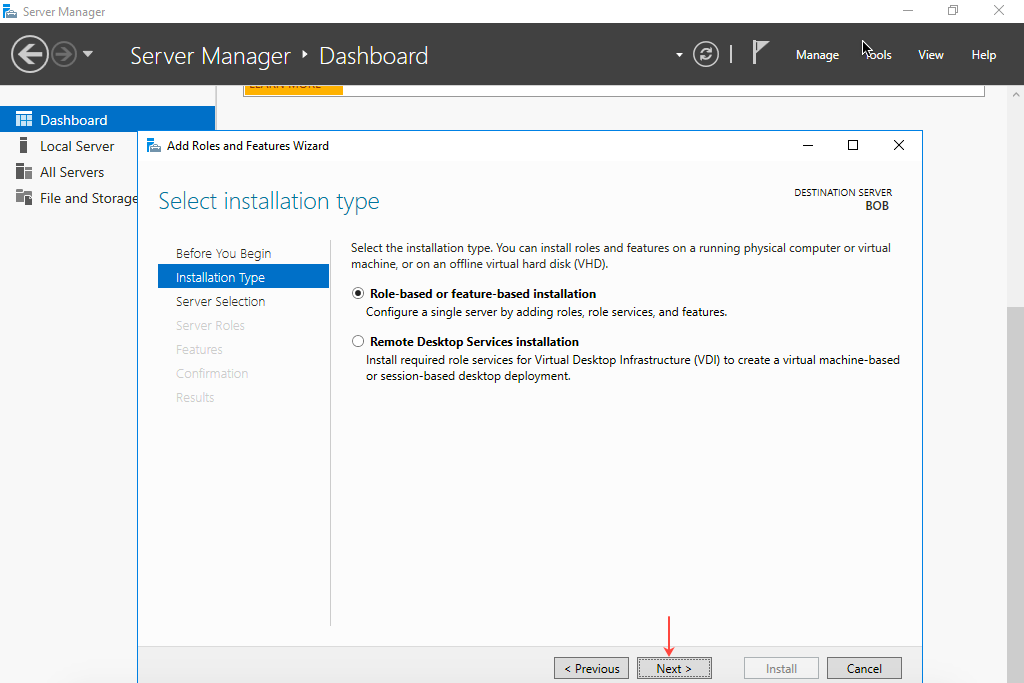
- Select Role-based or feature-based installation and then click Next.

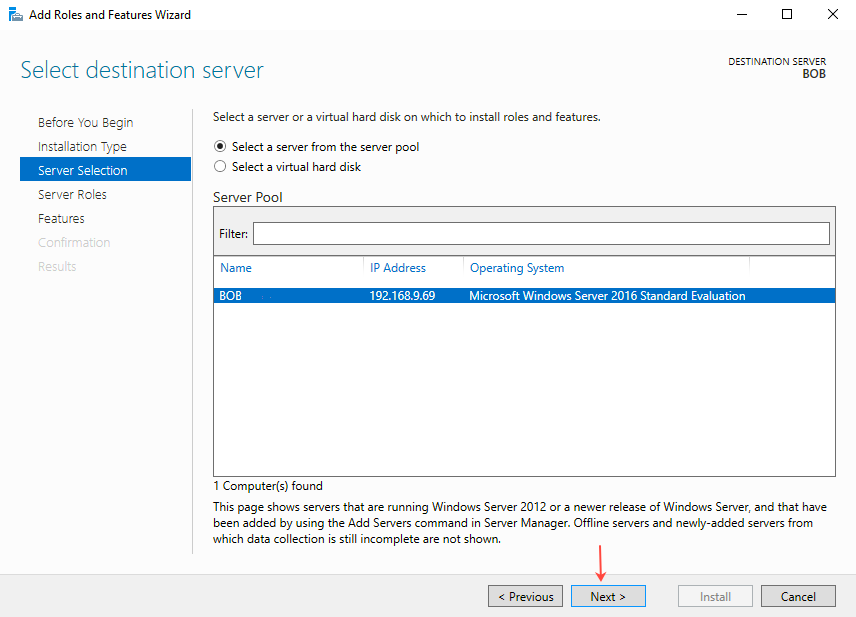
- Click Select a server from the server pool and then select the server on which to install IIS Web Server. Click Next.

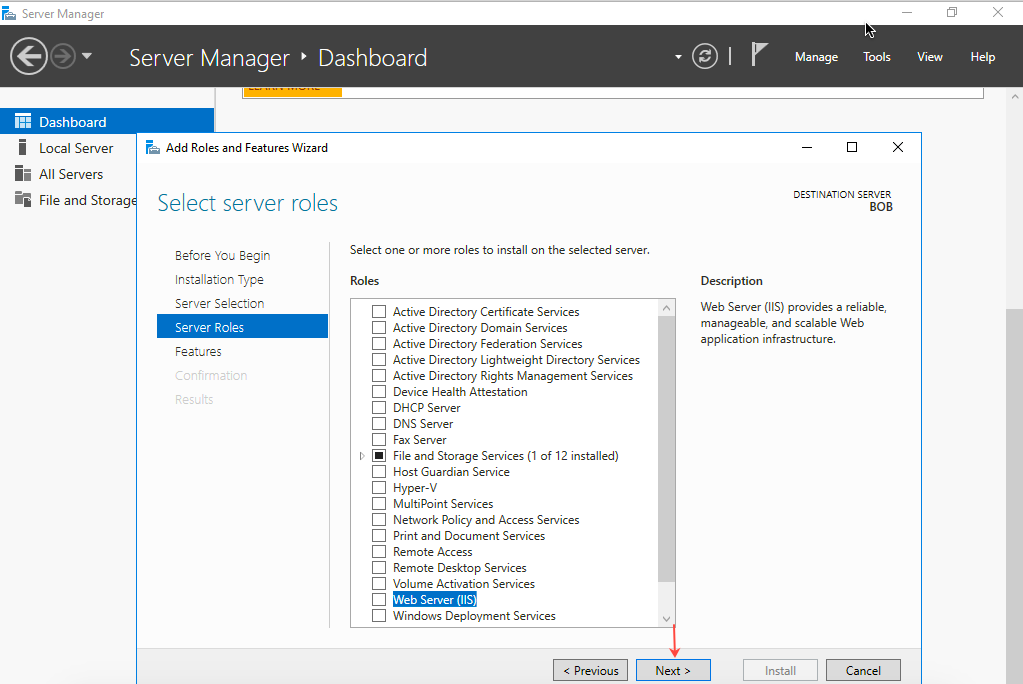
- Select Web Server (IIS) from Server Roles and then click Next.

- In the Add Roles and Features Wizard, select Install management tools (if applicable) and then click Add features.
- Select Web Server (IIS) and click Next.
- On the Select Features page, select .NET Framework 3.5 Features and then click Next.

- On next page, click Next.
- On next page (Select Role Services), keep the defaults and click Next.
- Select Restart the destination server automatically if required.
- Click Install.
- Close the window when the installation is complete.
Section 2: Install Active Directory Domain Services (AD DS)
NOTE: If AD DS is already installed on the Windows Server, skip to Section 3.
Steps
- Open the Server Manager application on Windows Server.
- In Server Manager, go to Manage, and then click Add Roles and Features.
- The Add Roles And Features wizard opens.
- Click Next.
- Select Role-based or feature-based installation and then click Next.

- Click Select a server from the server pool and then select the server on which to install IIS Web Server. Click Next.

- On the Select Server Roles page, select Active Directory Domain Services and then click Next.

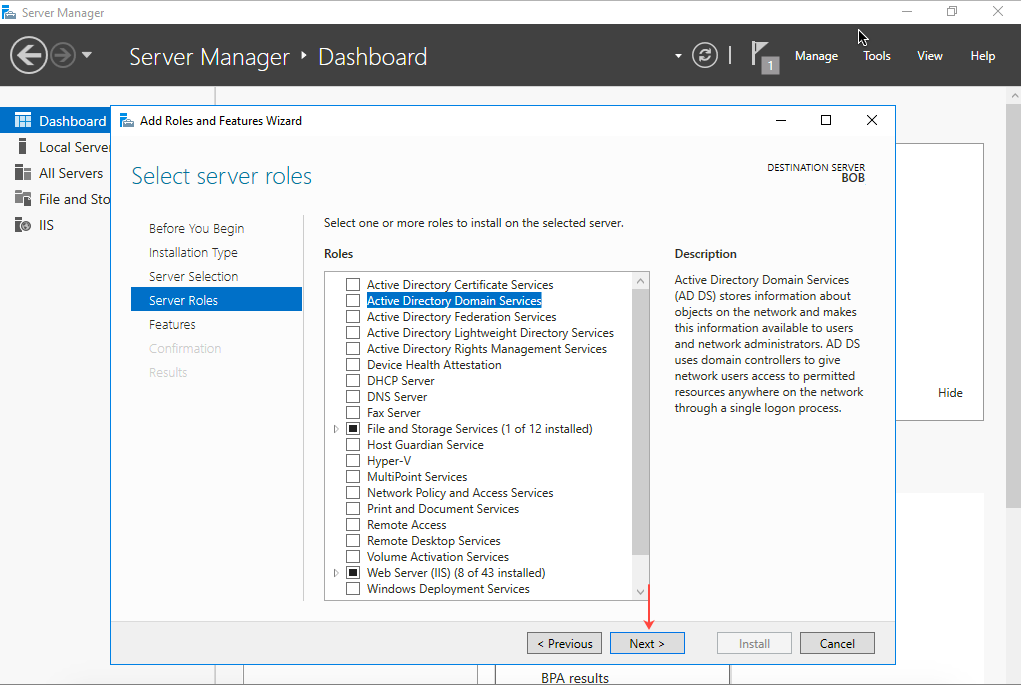
- In the Add Roles and Features Wizard, select Include Management tools (if applicable) and then click Add Features.

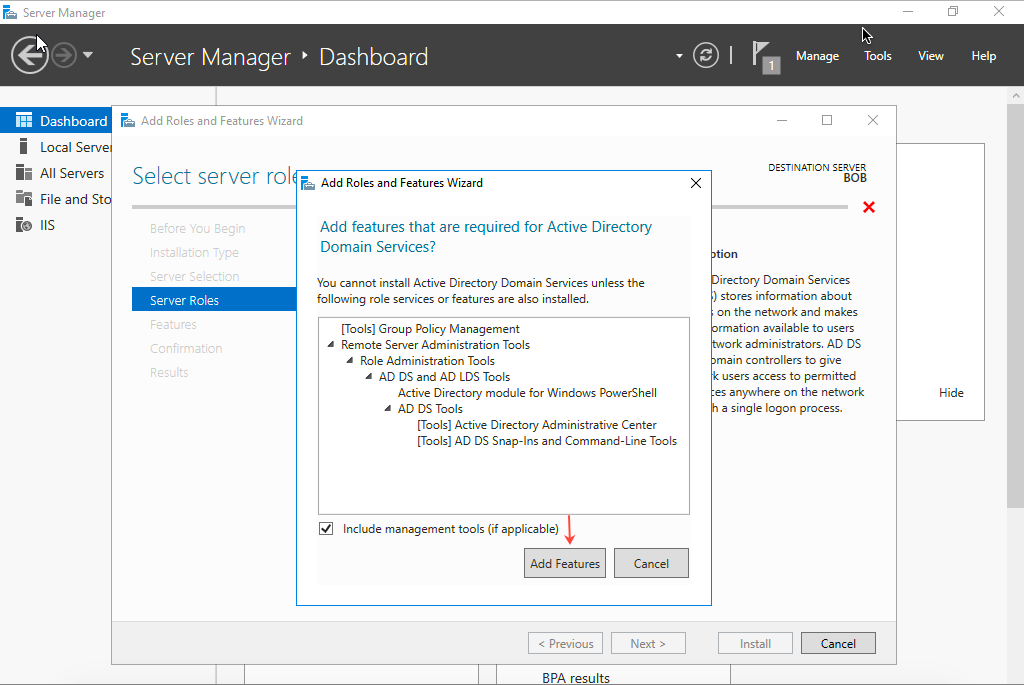
- Select AD DS and then click Next.
- On the Select Features page, select .NET Framework 3.5 Features and then click Next.
- On next page, click Next.
- On last page, select Restart the destination server automatically if required.
- Click Install.
- Click Close when the installation is complete.
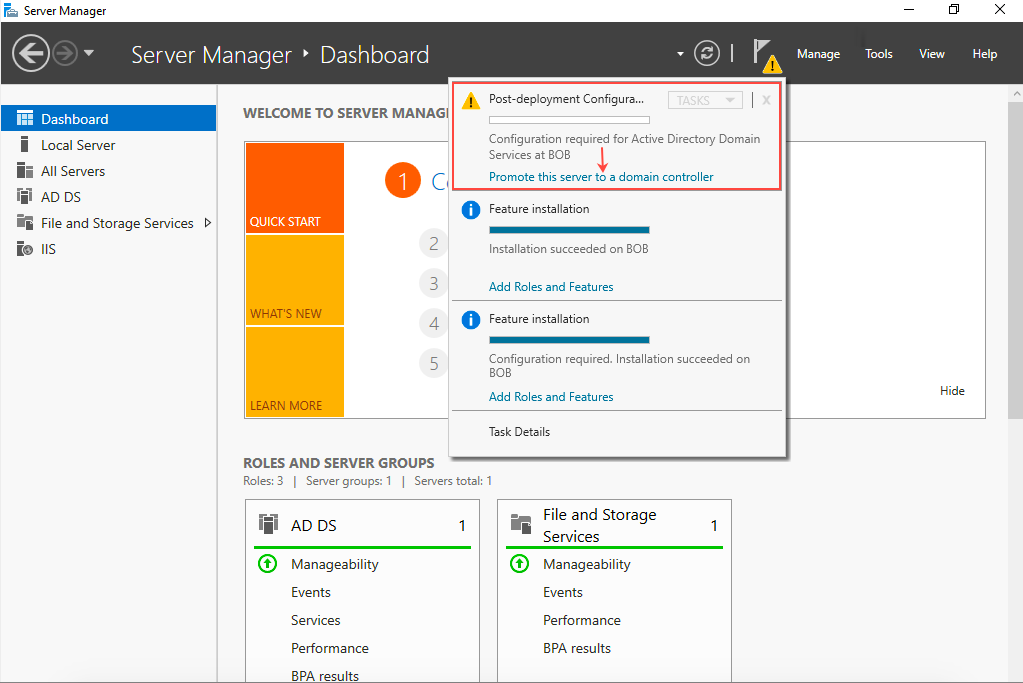
- In the Notifications section of the Server Manager page, in the Post Deployment Configuration... notification, click Promote this server to a domain controller.

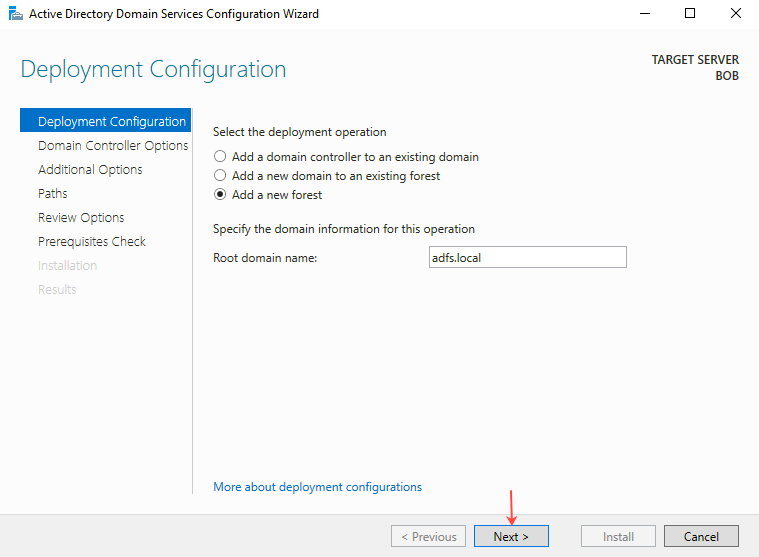
- The Deployment Configuration page opens.
- In the Windows Security pop-up panel, enter the Username and Password of the local machine and then click OK.


- On the Deployment Configuration page, select Add a new forest, provide the Root domain name (example: tenfold.local), and then click Next.

- The Domain Controller Options page opens.
- Provide and confirm the password for Directory Service Restore mode (DSRM), and make sure the configuration is same as shown below:


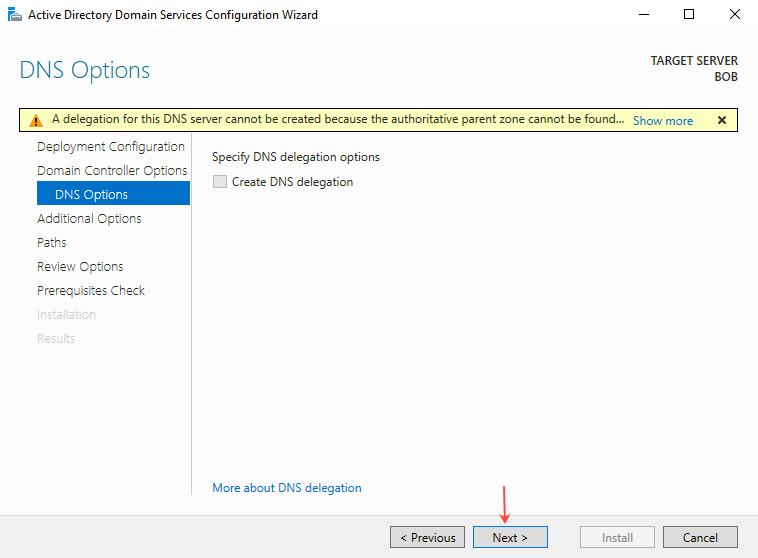
- On the DNS Options page, click Next.

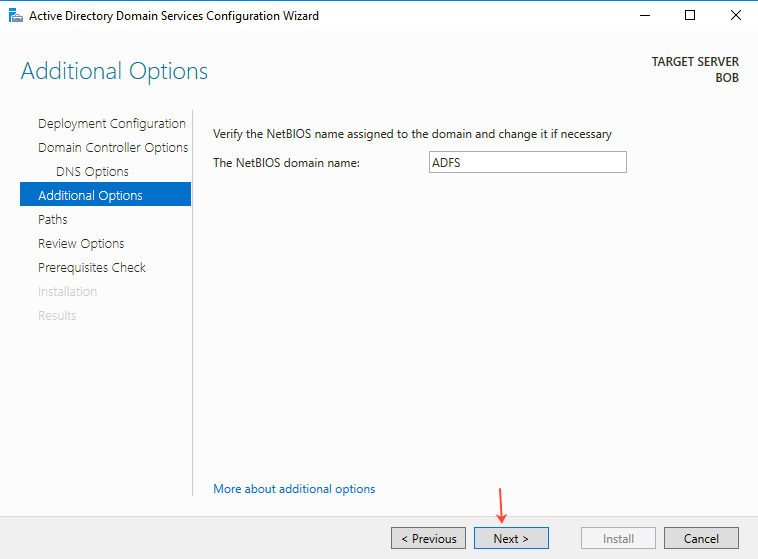
- On the Additional Options page, enter the NetBIOS domain name in the field provided and then click Next.
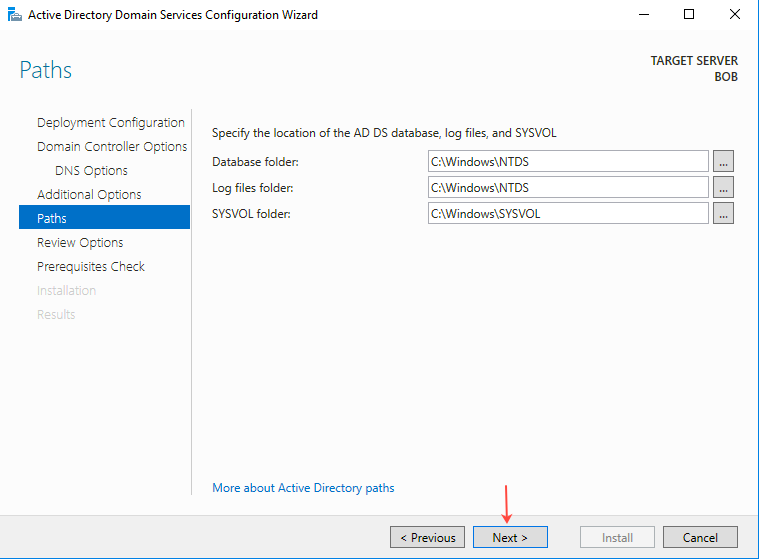
- On the Paths page, provide the required paths as shown below, and then click Next.

- Review all the options on the Review Options page and then click Next.
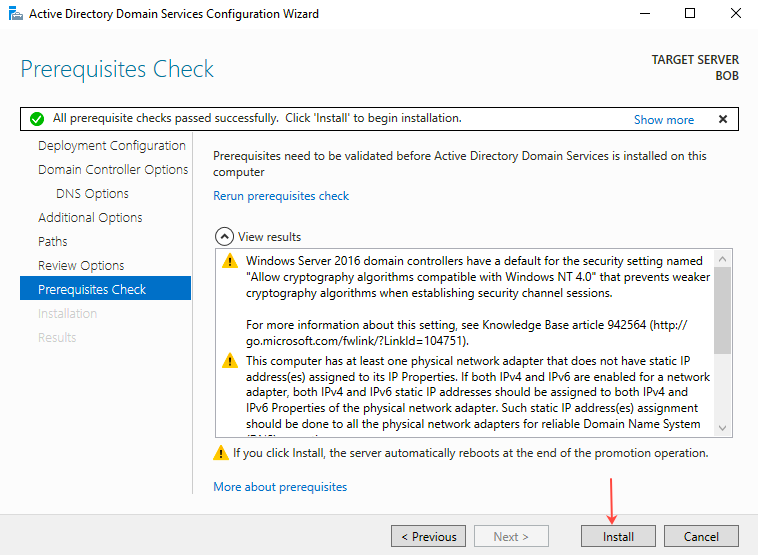
- On the Prerequisites Check page, validate the prerequisites and then click Install.

- The Installation page shows the installation progress. Click Close when the installation is complete.
Section 3: Install Active Directory Federation Services (AD FS)
Steps
- Open the Server Manager application on Windows Server.
- In Server Manager, go to Manage, and then click Add Roles and Features.

- The Add Roles And Features wizard opens.
- Click Next.
- Select Role-based or feature-based installation and then click Next.

- Click Select a server from the server pool and then select the server on which to install IIS Web Server. Click Next.

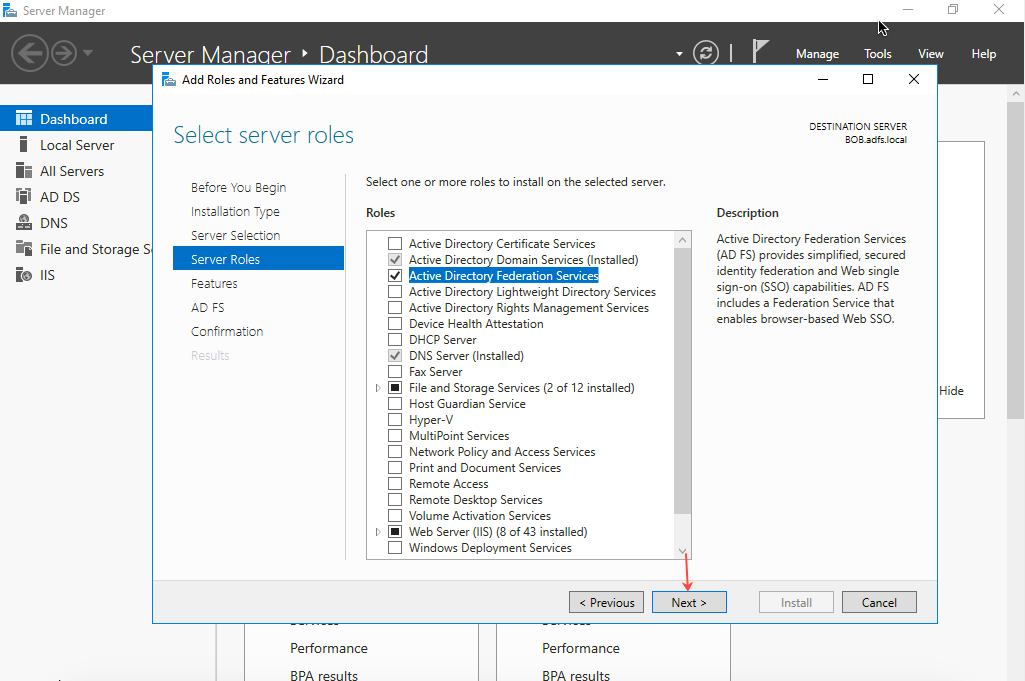
- On the Select server roles page, select Active Directory Federation Services and then click Next.

- Click Features and select .NET Framework 3.5 Features, then click Next.


- On the next page, click Next.
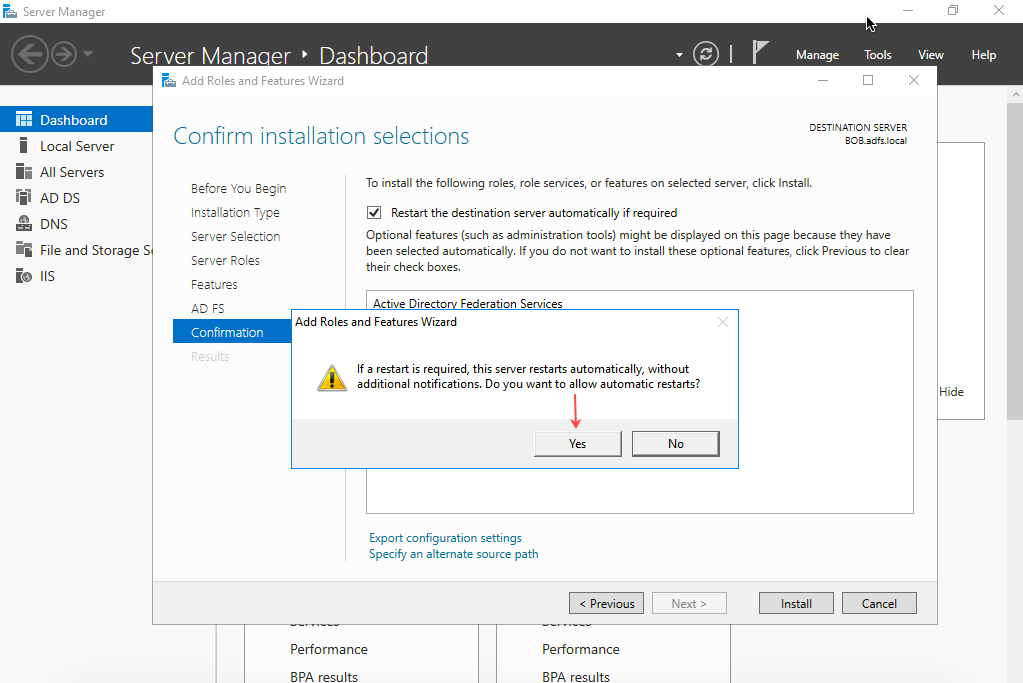
- On the Confirmation page, select Restart the destination server automatically if required, click Yes to confirm, and then click Install.
- Click Close when the installation is complete.
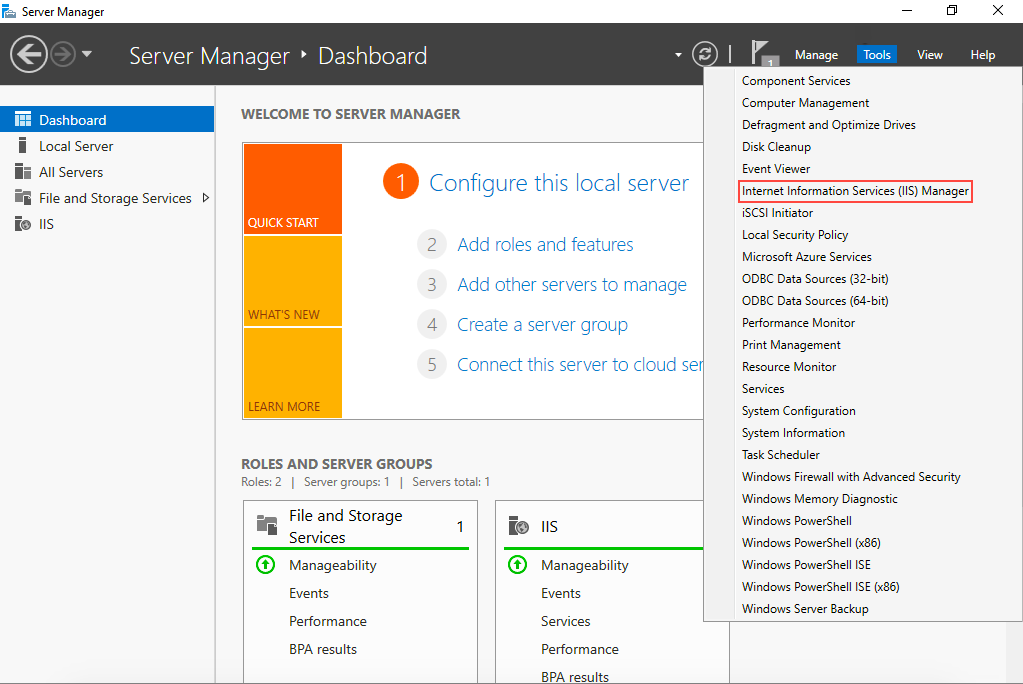
- Go to Server Manager and navigate to Tools > Internet Information Services (IIS) Manager.
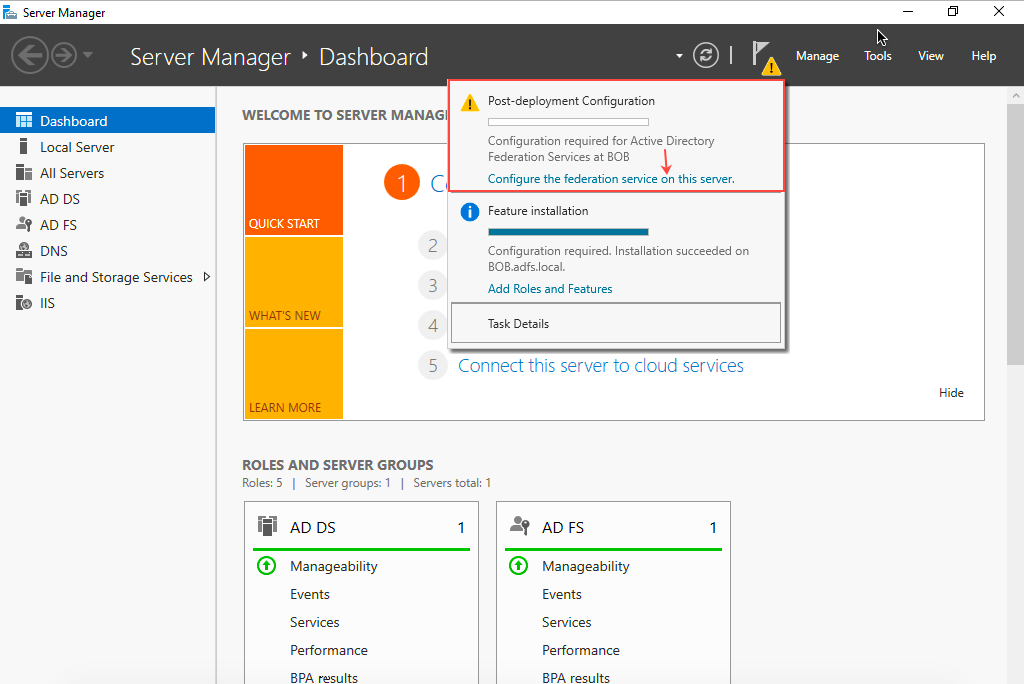
- NOTE: You will see a notification Post-Deployment Configuration for AD FS. Ignore this notification for now. You must first create a SSL Certificate first to use with AD FS Server.
- From the Home page of IIS Manager, click Server Certificates.


- In the Actions pane, click Create Self-Signed Certificate.


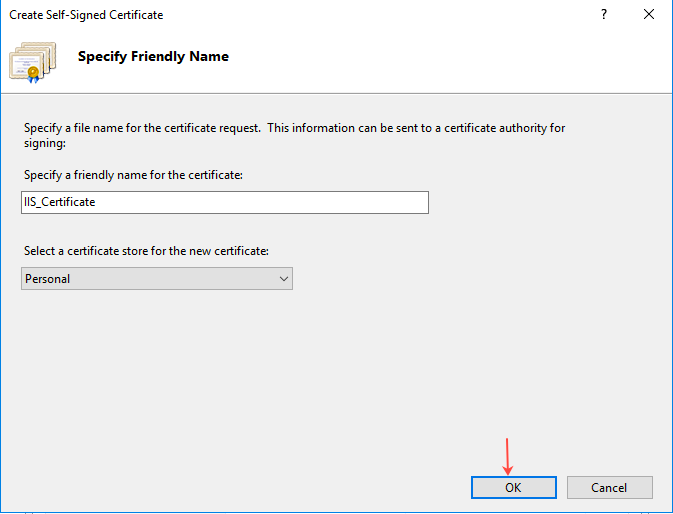
- On the Create Self-Signed Certificate tab, enter a user-friendly name in the Specify a friendly name for the certificate field, then select Personal. Click OK.

- The SSL Certificate is now created.
- Go back to Server Manager. In the notification for Post-Deployment Configuration for AD FS, click Configure the federation service on this server.

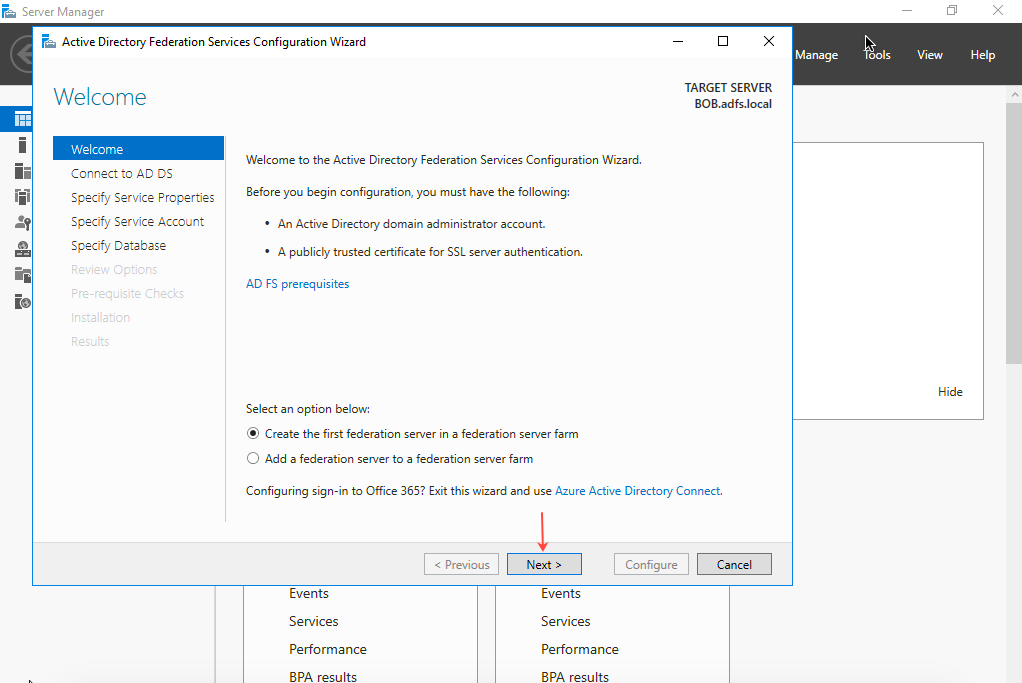
- The Active Directory Federation Services Configuration Wizard opens.
- Select Create the first federation server in a federation server farm and then click Next.
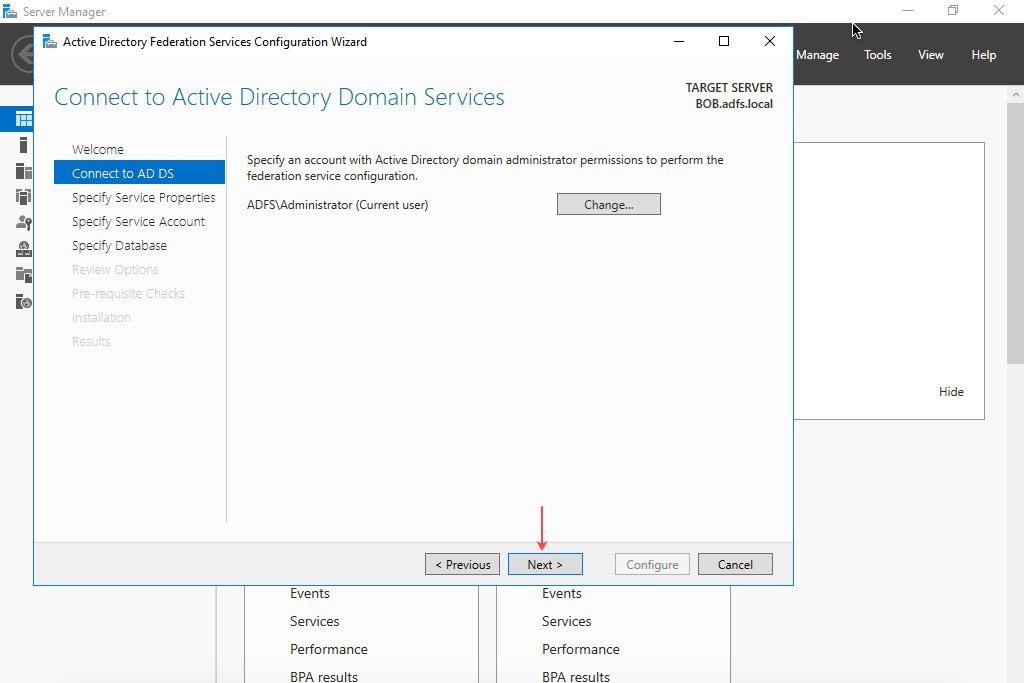
- On the Connect to AD DS page, select the account to perform the Federation Service configuration, and then click Next.
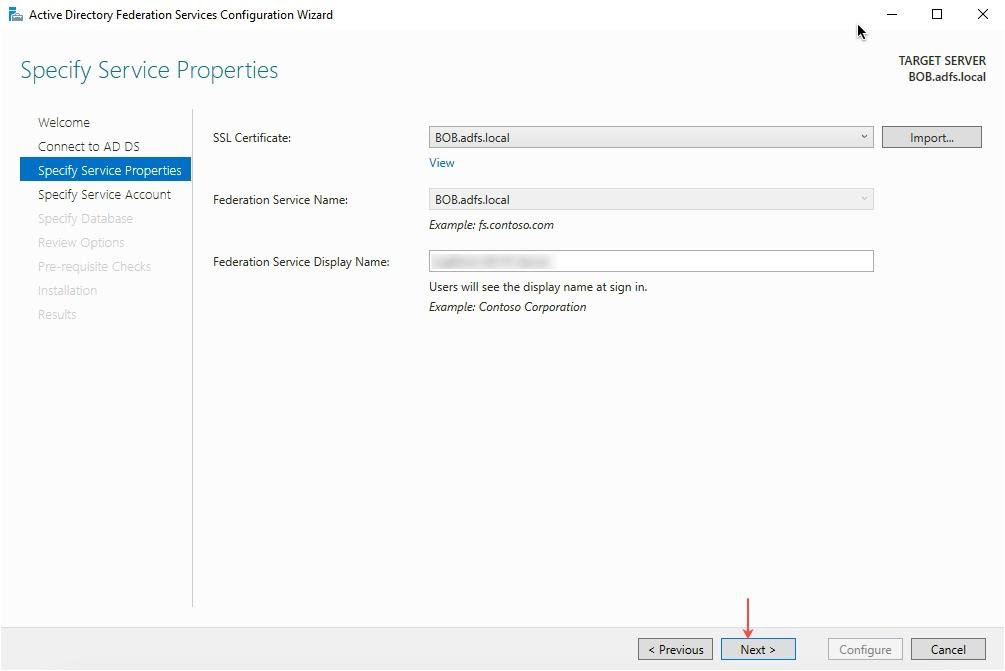
- On the Specify Service Properties page, select the SSL Certificate, Federation Service Name, and Federation Service Display Name. (Example for Federation Service Display Name: Tenfold AD FS Server)

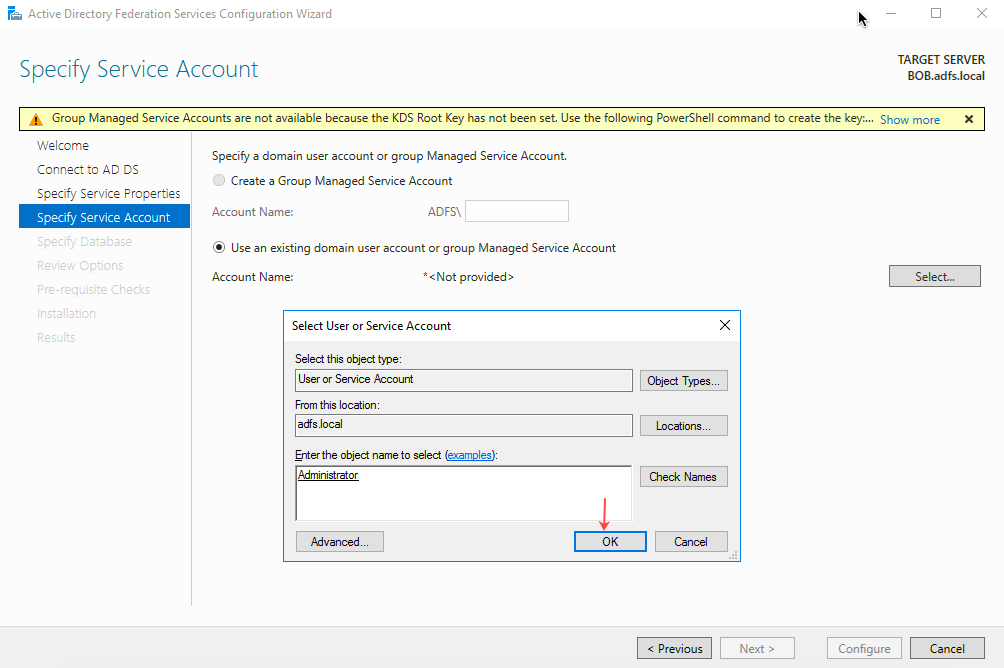
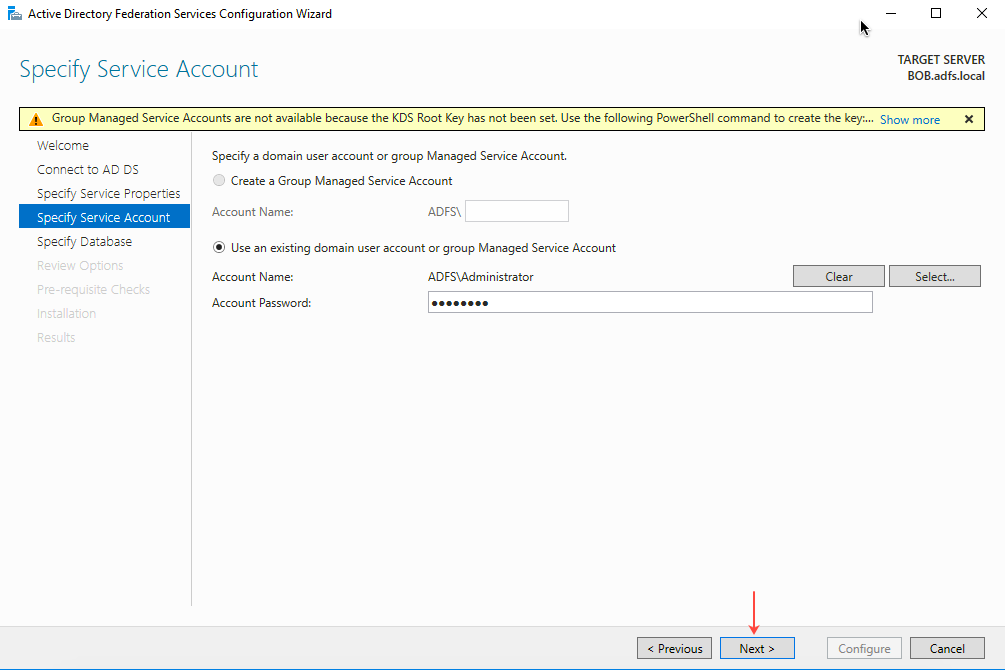
- On the Specify Service Account page, select the Use an existing domain user account or group Managed Service Account option and click OK.

- Enter the Account Password and click Next.

- On the Specify Database page, select Create a database on this server using Windows Internal Database and then click Next.
- On next page (Review Options), review all the options and click Next.
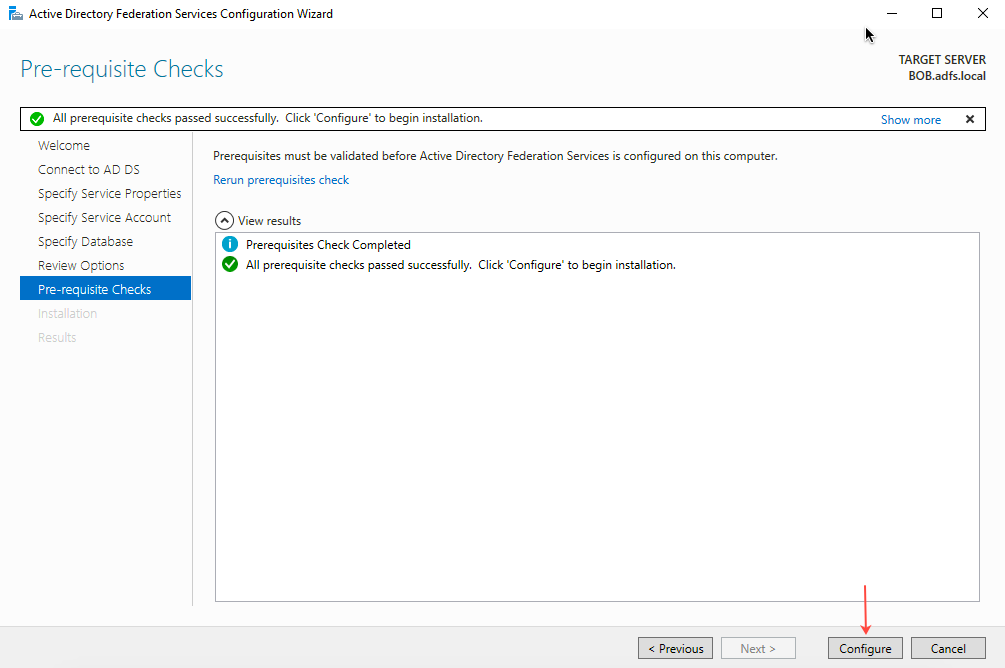
- On next page (Prerequisite check), validate the prerequisites and then click Configure.

- The next page shows the installation progress. Click Close when the installation is complete.
Section 4: Add relying party (Tenfold) to AD FS
Steps
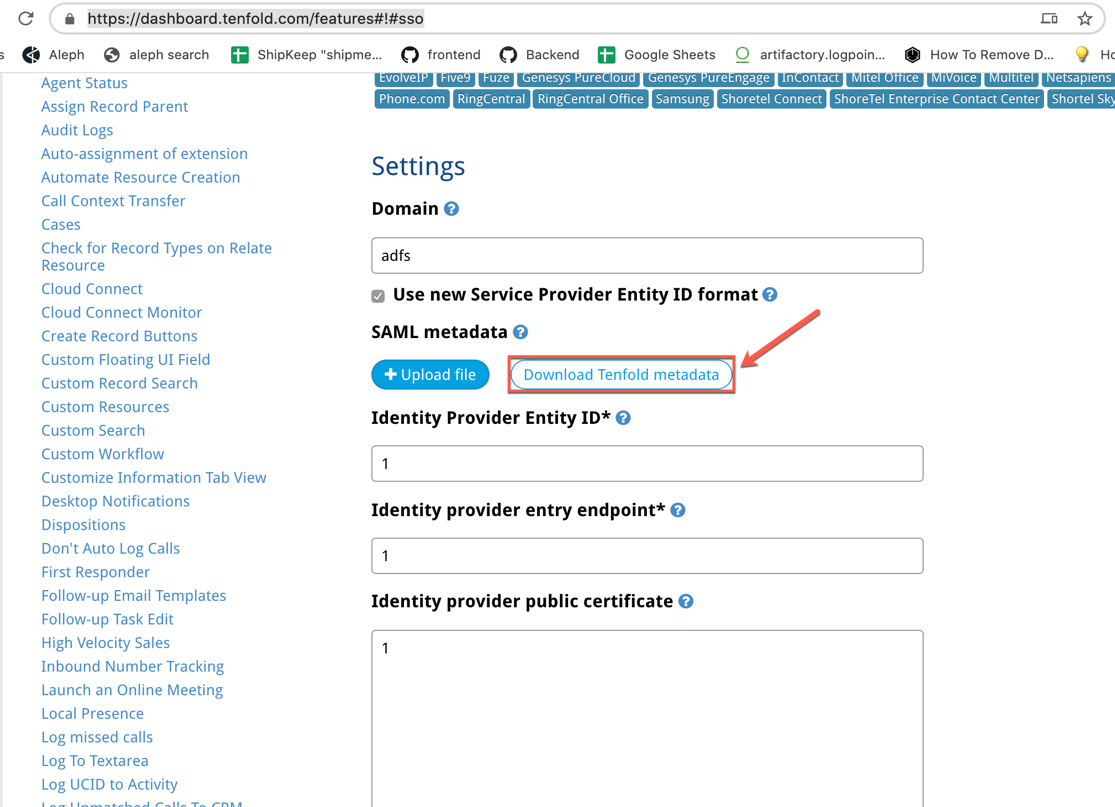
- Using the Windows server browser, go to https://dashboard.tenfold.com/features and click the link for the Single Sign-On feature. Click Download Tenfold Metadata.
- The Tenfold Metadata.xml downloads.

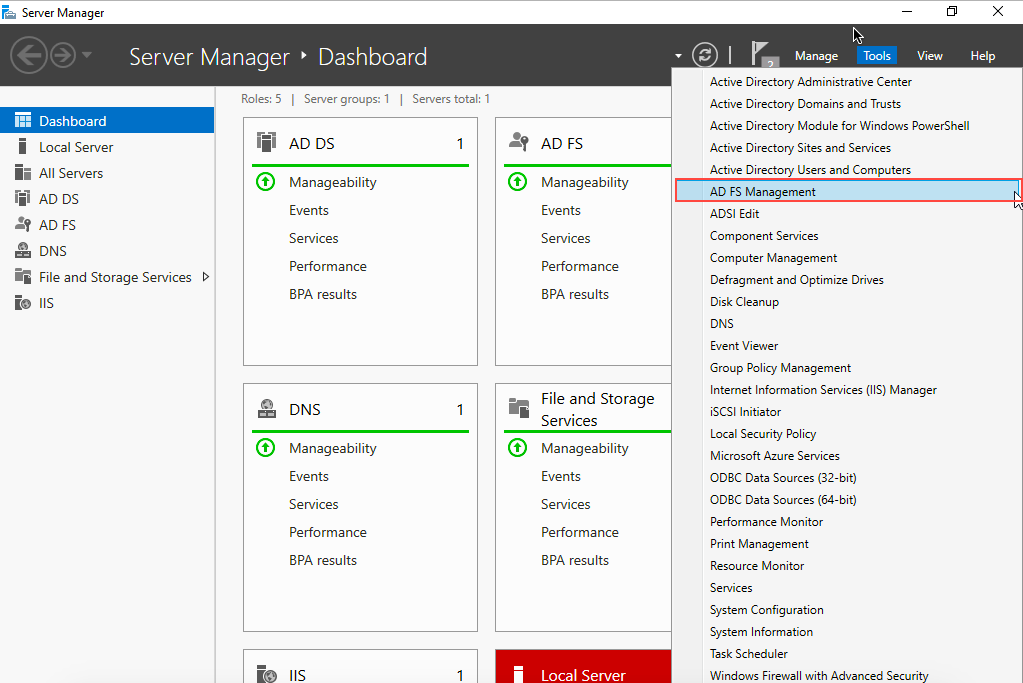
- In Windows Server Manager, navigate to Tools > AD FS Management.
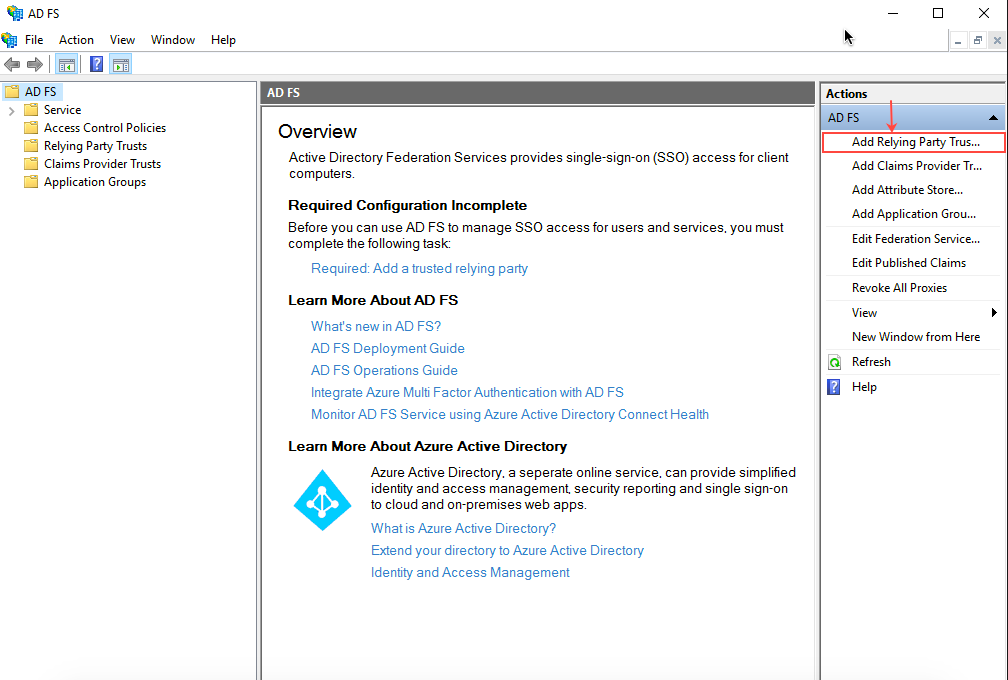
- The AD FS panel opens. In the Actions pane, click Add Relying Party Trust.

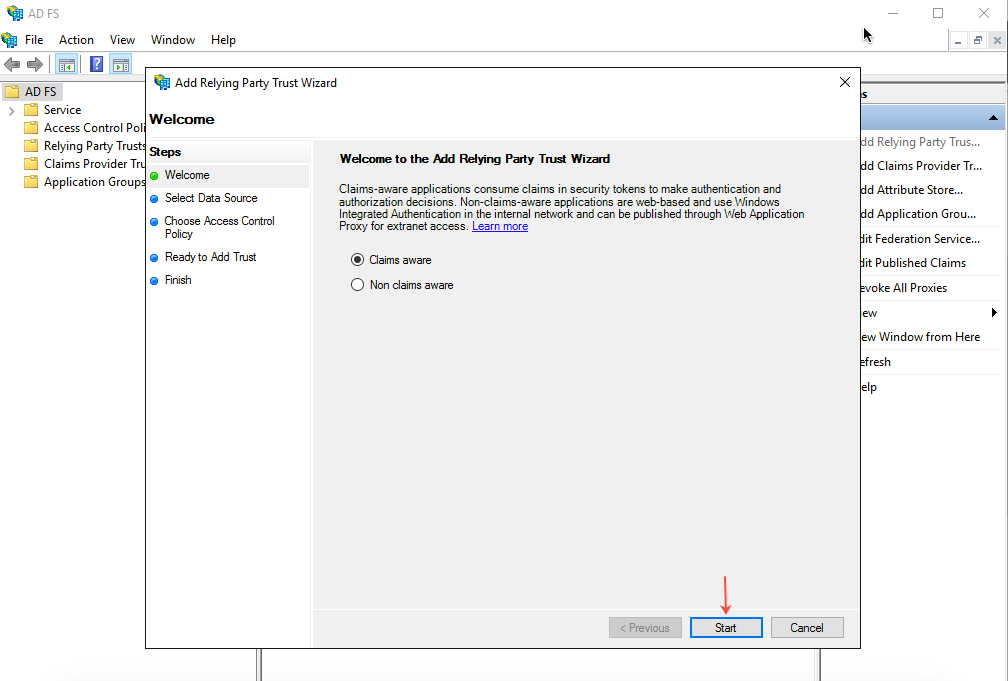
- On the Welcome page of the Add Relying Party Trust Wizard, select the Claims Aware option and then click Start.

- On the Select Data Source page, select Import data about the relying party from the file, and browse to the location of the xml file downloaded in Step 1.


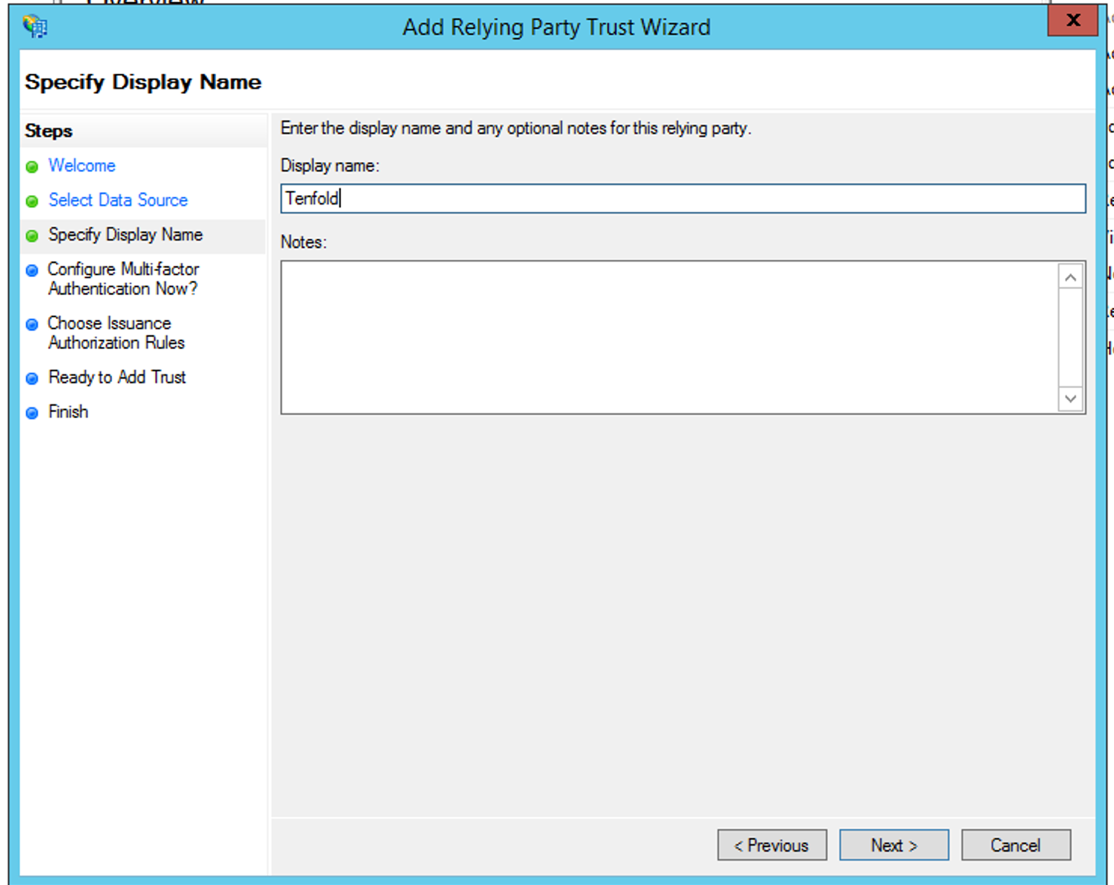
- On the Specify Display Name page, enter the Display name and click Next.

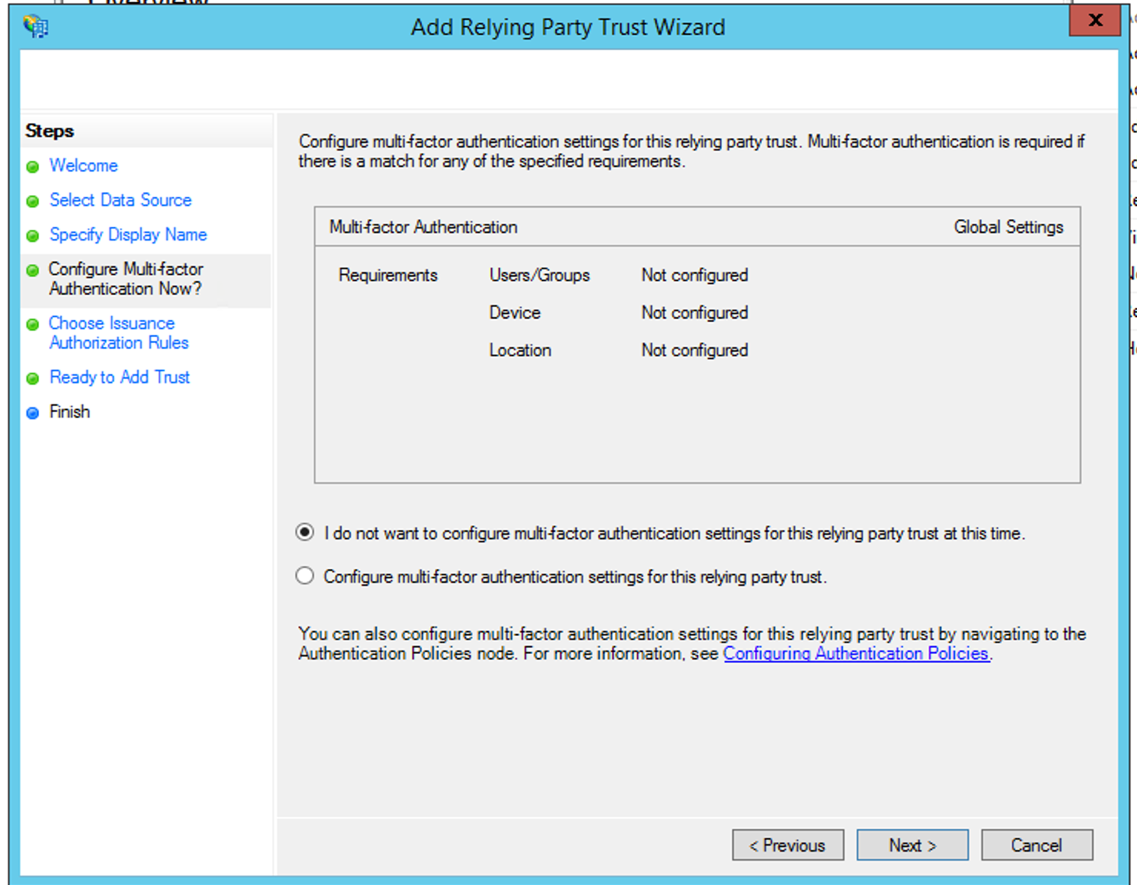
- On the Multi-factor Authentication page, select I do not want to configure multi-factor authentication settings for this relying party trust at this time and then click Next.

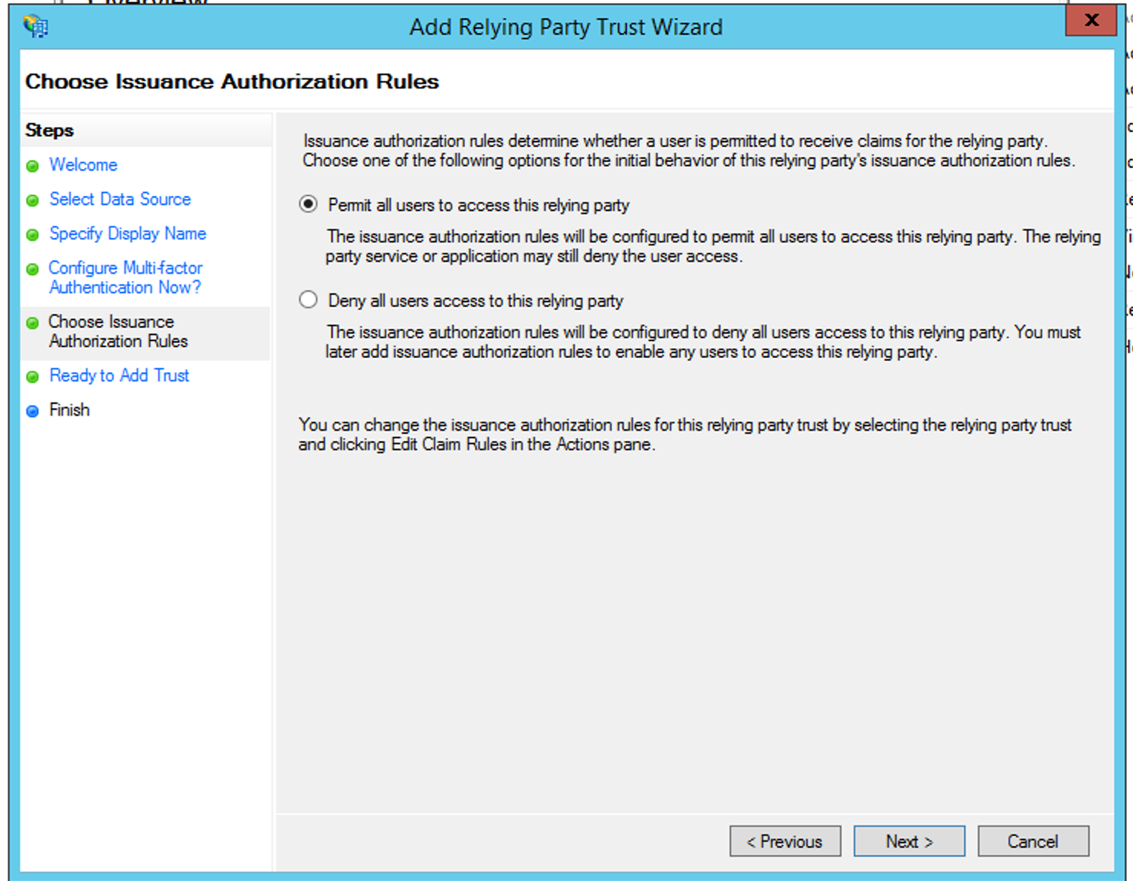
- On the Choose Issuance Authorization Rules page, select Permit all users to access this relying party and then click Next.

- On the Ready to Add Trust page, click Next.
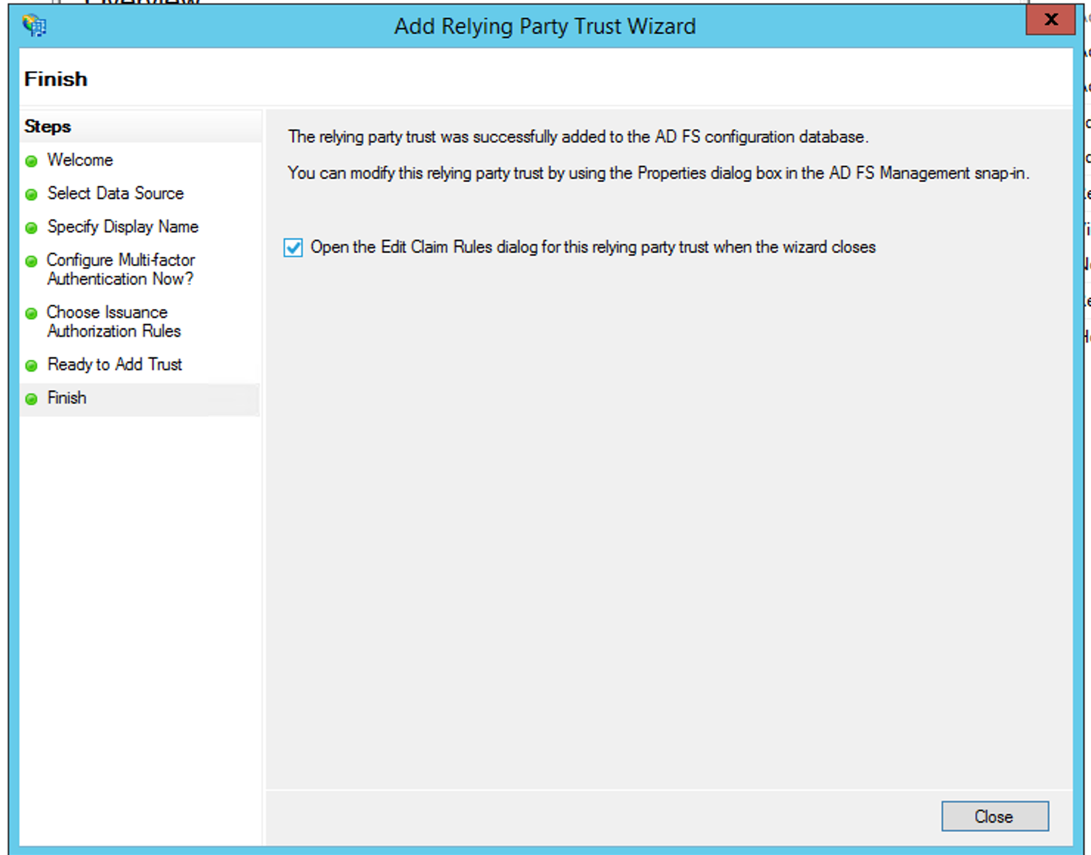
- On the Finish page, select Open the Edit Claim Rules dialog for this relying party trust when the wizard closes and then click Close.

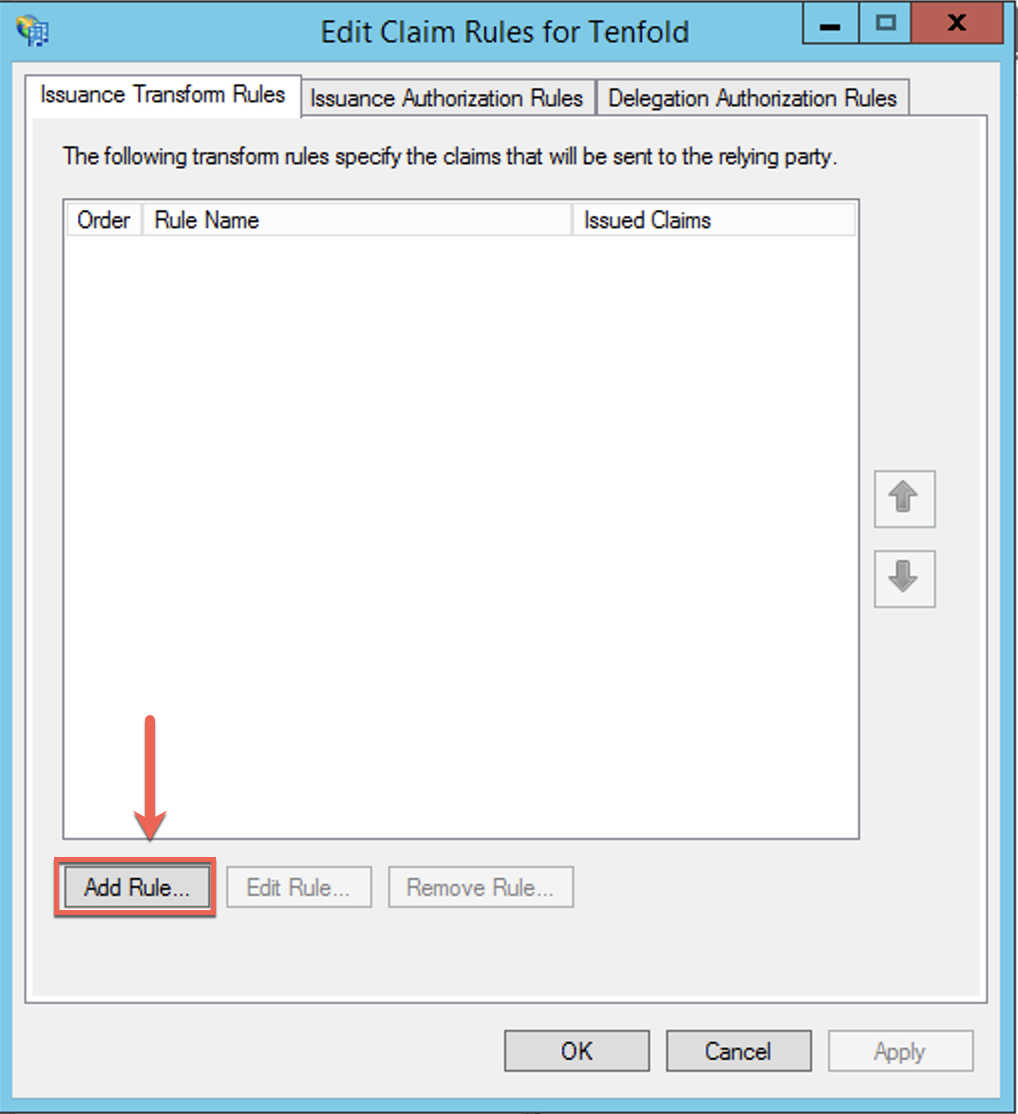
- The Edit Claims Rules for Tenfold page opens.
- Click Add Rule.

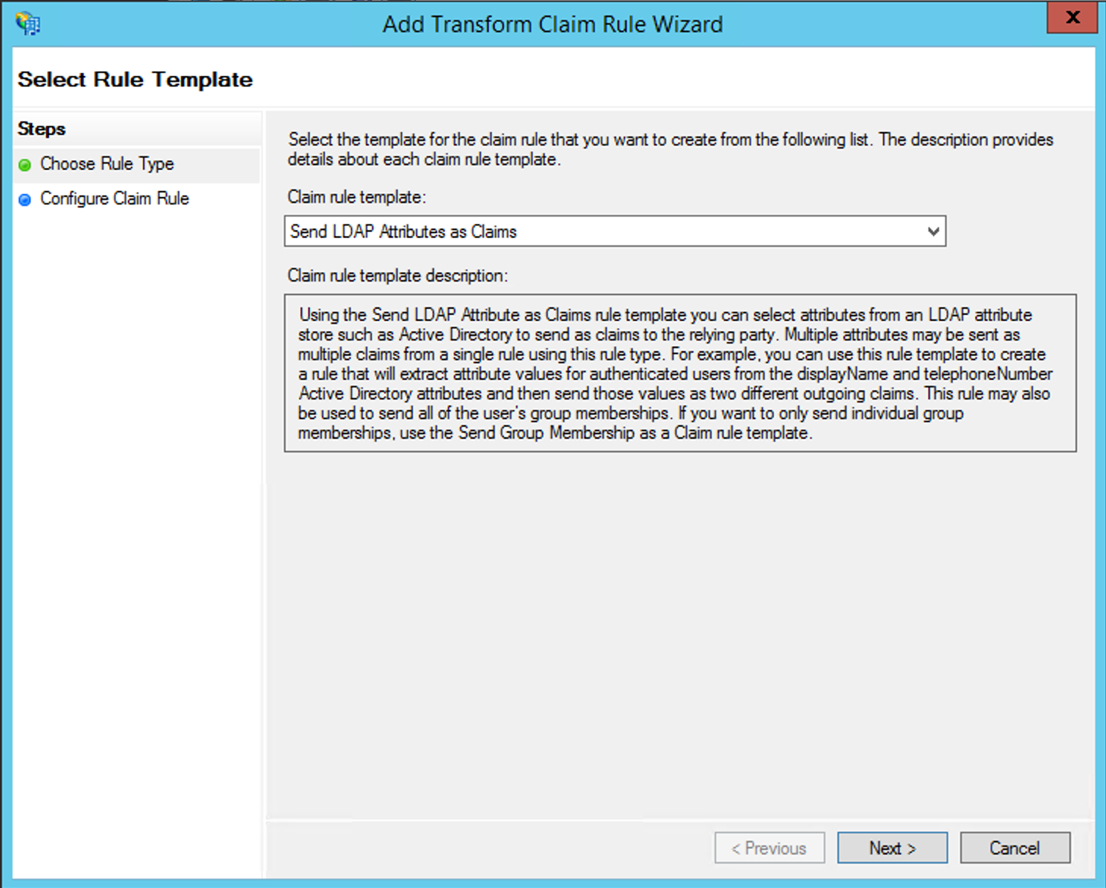
- The Add Transform Claim Rule Wizard opens.
- On the Select Rule Template page, select Send LDAP Attributes as Claims and click Next.

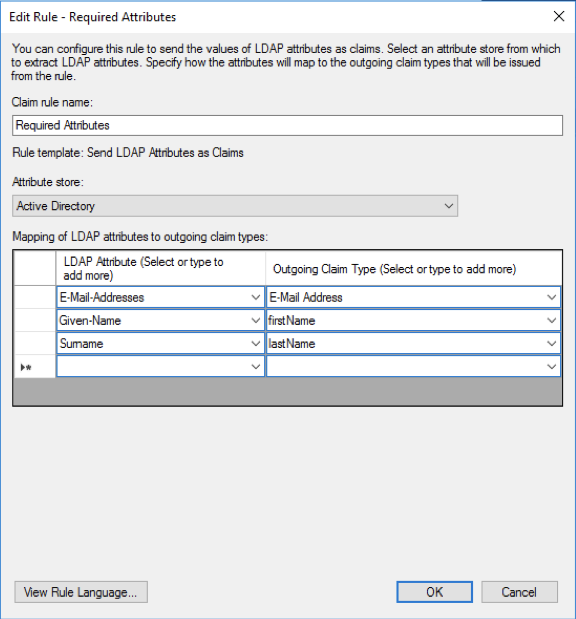
- On the Configure Rule page, enter the Claim rule name, select Active Directory as the Attribute Store, and add mappings similar to the image shown below. Click OK.

- Click Add Rule.


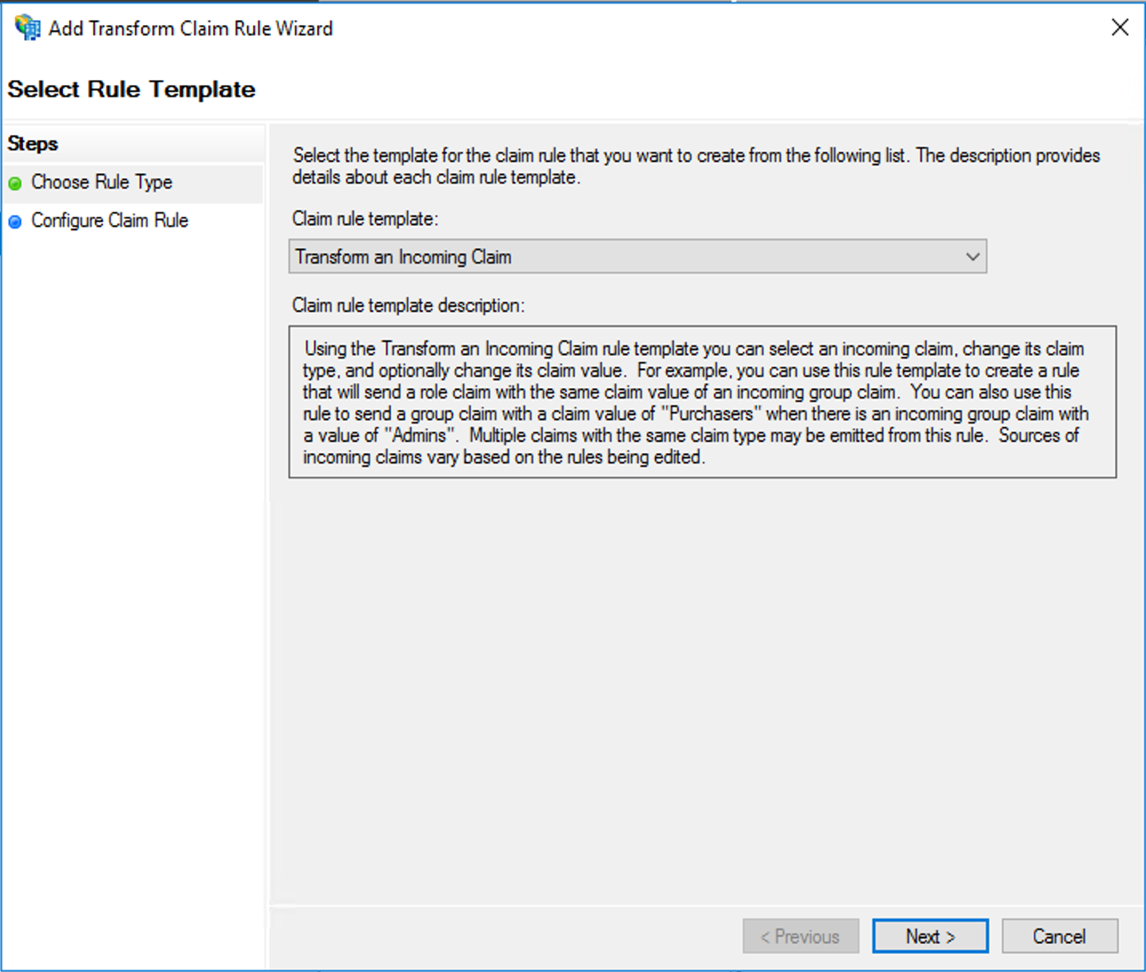
- The Add Transform Claim Rule Wizard opens.
- On Select Rule Template page, select Transform an Incoming Claim and click Next.

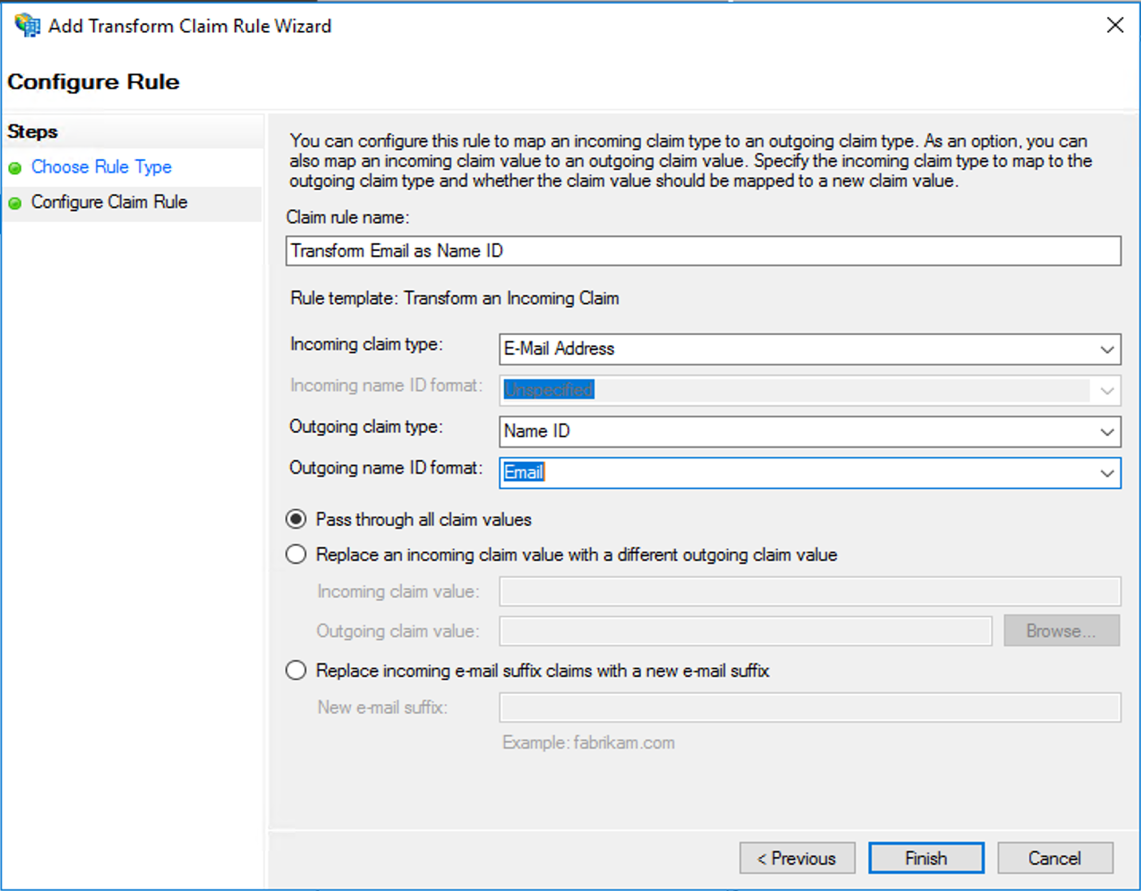
- The Configure Rule page opens.
- Configure the options as shown below and then click Finish.

- On the page that loads, click Apply and then OK.
- Note: Because the user's email address is used for the Name ID, make sure the user has this attribute. This completes the AD FS configuration.
Section 5: Configure Tenfold SSO
Steps
- Download the AD FS metadata using this URL:
- https://<adfs_server_domain_name>/FederationMetadata/2007-06/FederationMetadata.xml
- Complete the information in the Single Sign-On feature.
- NOTE: In most scenarios that do not use AD FS, Single Sign-On works by simply uploading this metadata to the Tenfold Single Sign-On settings. However, Tenfold is not able to parse the metadata correctly, so it is necessary to extract the following three parameters from the metadata and manually add them: Identity Provider Entity ID, Identity Provider entry endpoint, Identity provider public certificate.

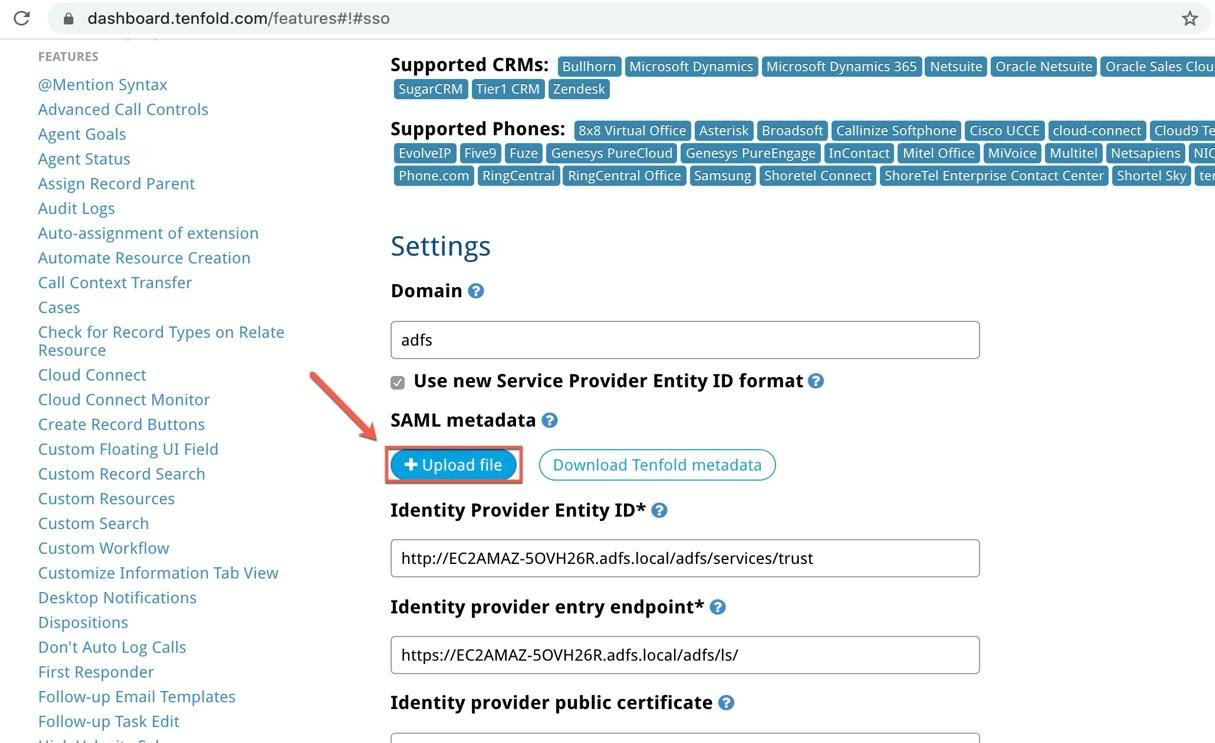
- Identity Provider Entity ID
- The
entityIDattribute ofEntityDescriptorelement. - In the example below, this value is
http://EC2AMAZ-50VH26R.adfs.local/adfs/services/trust
- The
javascript:
		* <EntityDescriptor xmlns="urn:oasis:names:tc:SAML:2.0:metadata"
ID="_b207a111-f512-4fb1-b97f-155ba7849742"
entityID="http://EC2AMAZ-5OVH26R.adfs.local/adfs/services/trust"> - Identity Provider entry endpoint
- The Location attribute of SingleSignOnService with HTTP-Redirect binding element.
- In the example below, this value is
https://ec2amaz-5ovh26r.adfs.local/adfs/ls
javascript:
<SingleSignOnService Binding="urn:oasis:names:tc:SAML:2.0:bindings:HTTP-Redirect"
Location="https://ec2amaz-5ovh26r.adfs.local/adfs/ls/" /> - Identity provider public certificate
- The signing certificate inside the
IDPSSODescriptorelement.
- The signing certificate inside the
Missing Something?
Check out our Developer Center for more in-depth documentation. Please share your documentation feedback with us using the feedback button. We'd be happy to hear from you.