Week of Jan 24th
New updates: Conversation Assist, Conversation Builder, Knowledge AI
Features
Recommend answers from any type of knowledge base
In this release, we add support for the following types of knowledge bases as recommendation sources:
- Internal knowledge bases that integrate with a KMS or CMS via LivePerson Integration Hub (iHub), which embeds Workato
- External knowledge bases without LivePerson AI
If you’re interested in offering recommended answers from these types of knowledge bases to your agents, that moment is here. Now you can.
Automatically remove an engaged bot when needed
If you’re recommending bots to your agents, so the agents can delegate conversations to them, it can be a challenge for an agent to know when the bot has finished its work. The agent must check back repeatedly on the bot’s progress.
Conversation Builder solves this issue for Conversation Assist by providing a new system pattern (LP_REMOVEBOT) that automatically and silently removes the bot from the conversation.
When you use this system pattern, the bot is removed, but the conversation itself remains unaffected, i.e., it remains open. Before leaving the conversation, the bot should notify the agent via a private message that it has finished its work and is exiting the conversation, so the agent can reengage the consumer appropriately, like so:


Features
Debugging Generative AI solutions is easier
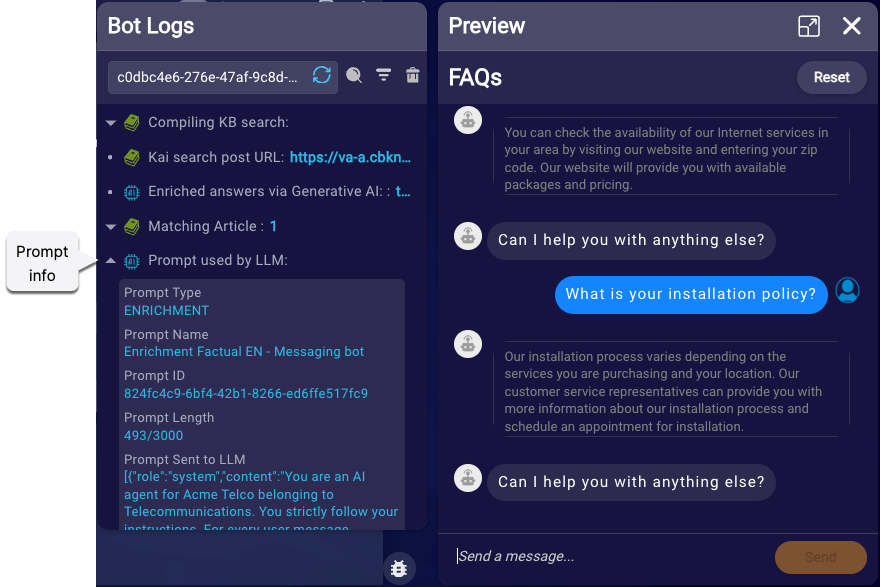
You asked; we listened. As you build and tune a bot that automates answers that are enriched via Generative AI, you need more info on the prompt that gets sent to the LLM service. What was the complete prompt, including conversational context and bot variables? This type of info is important to know when you’re debugging responses from the LLM.
In this release, we meet this need by revealing much more info in Conversation Builder’s debugging tools:
In both tools, you’ll now see more info on the articles matched by the knowledge base query. And, for those enriching answers via Generative AI, there’s info on the prompt that was sent to the LLM. Hooray!
Here’s a sneak peek at how it looks. This example is from Bot Logs.

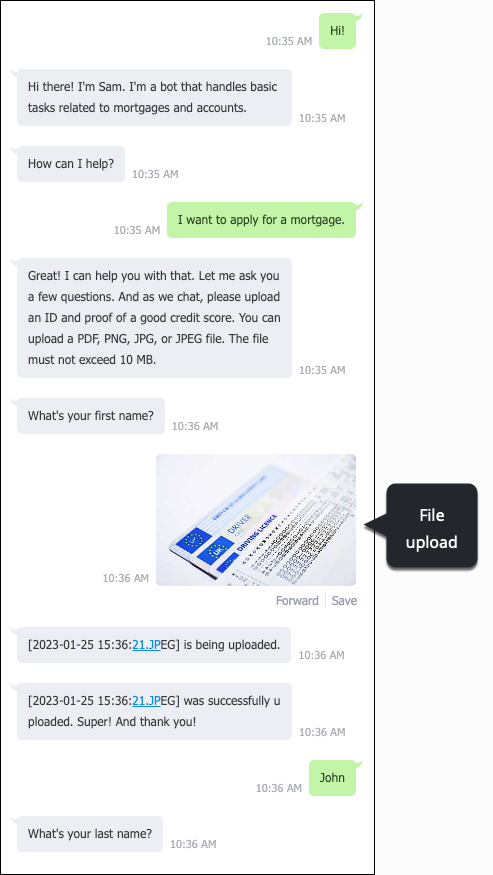
More flexibility when supporting file uploads from consumers
Sometimes during an automated conversation with a bot, the consumer needs to upload files to your organization. For example, a bot that handles mortgage applications might need the consumer to upload an ID and proof of a good credit score.
File Upload is the feature that makes it possible for consumers to upload files to your organization.
In this release, we introduce a new way to support file uploads, specifically, through the use of a new File Upload dialog in the bot. This new dialog type offers a simple way to set up file uploads, and supports the ability to upload a dynamic number of files at any point in the bot flow.

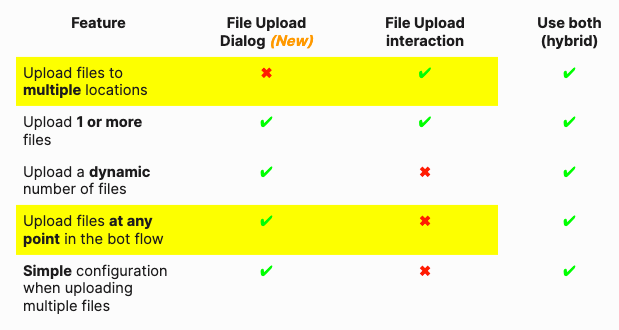
Should you use the old way (a File Upload interaction) or this new way (a File Upload dialog)? That depends primarily on your answers to two questions:
- Do you need to support uploads to one or multiple locations?
- Can the uploads happen at any point in the bot flow, or do you want the uploads to happen at specific points?

FAQs
Which approach does LivePerson recommend?
Both approaches are supported, but we recommend you use the File Upload dialog whenever possible. It’s a best practice because the configuration is simpler, and the behavior is more flexible. The dialog should suit most use cases.
Is there any impact on my existing bots in Production?
Nope, the existing approach to File Upload continues to work as it always has. You can expect no impact on your bots in Production.
Voicebots - Change the bot's voice easily via the UI
Want to change the voice that’s used by the bot without having to use SSML to do so? That day is here. In the bot, just click Voice Settings in the 3-dot menu. Voice. Rate. Pitch. It’s all there. You can even play a sample of the voice.

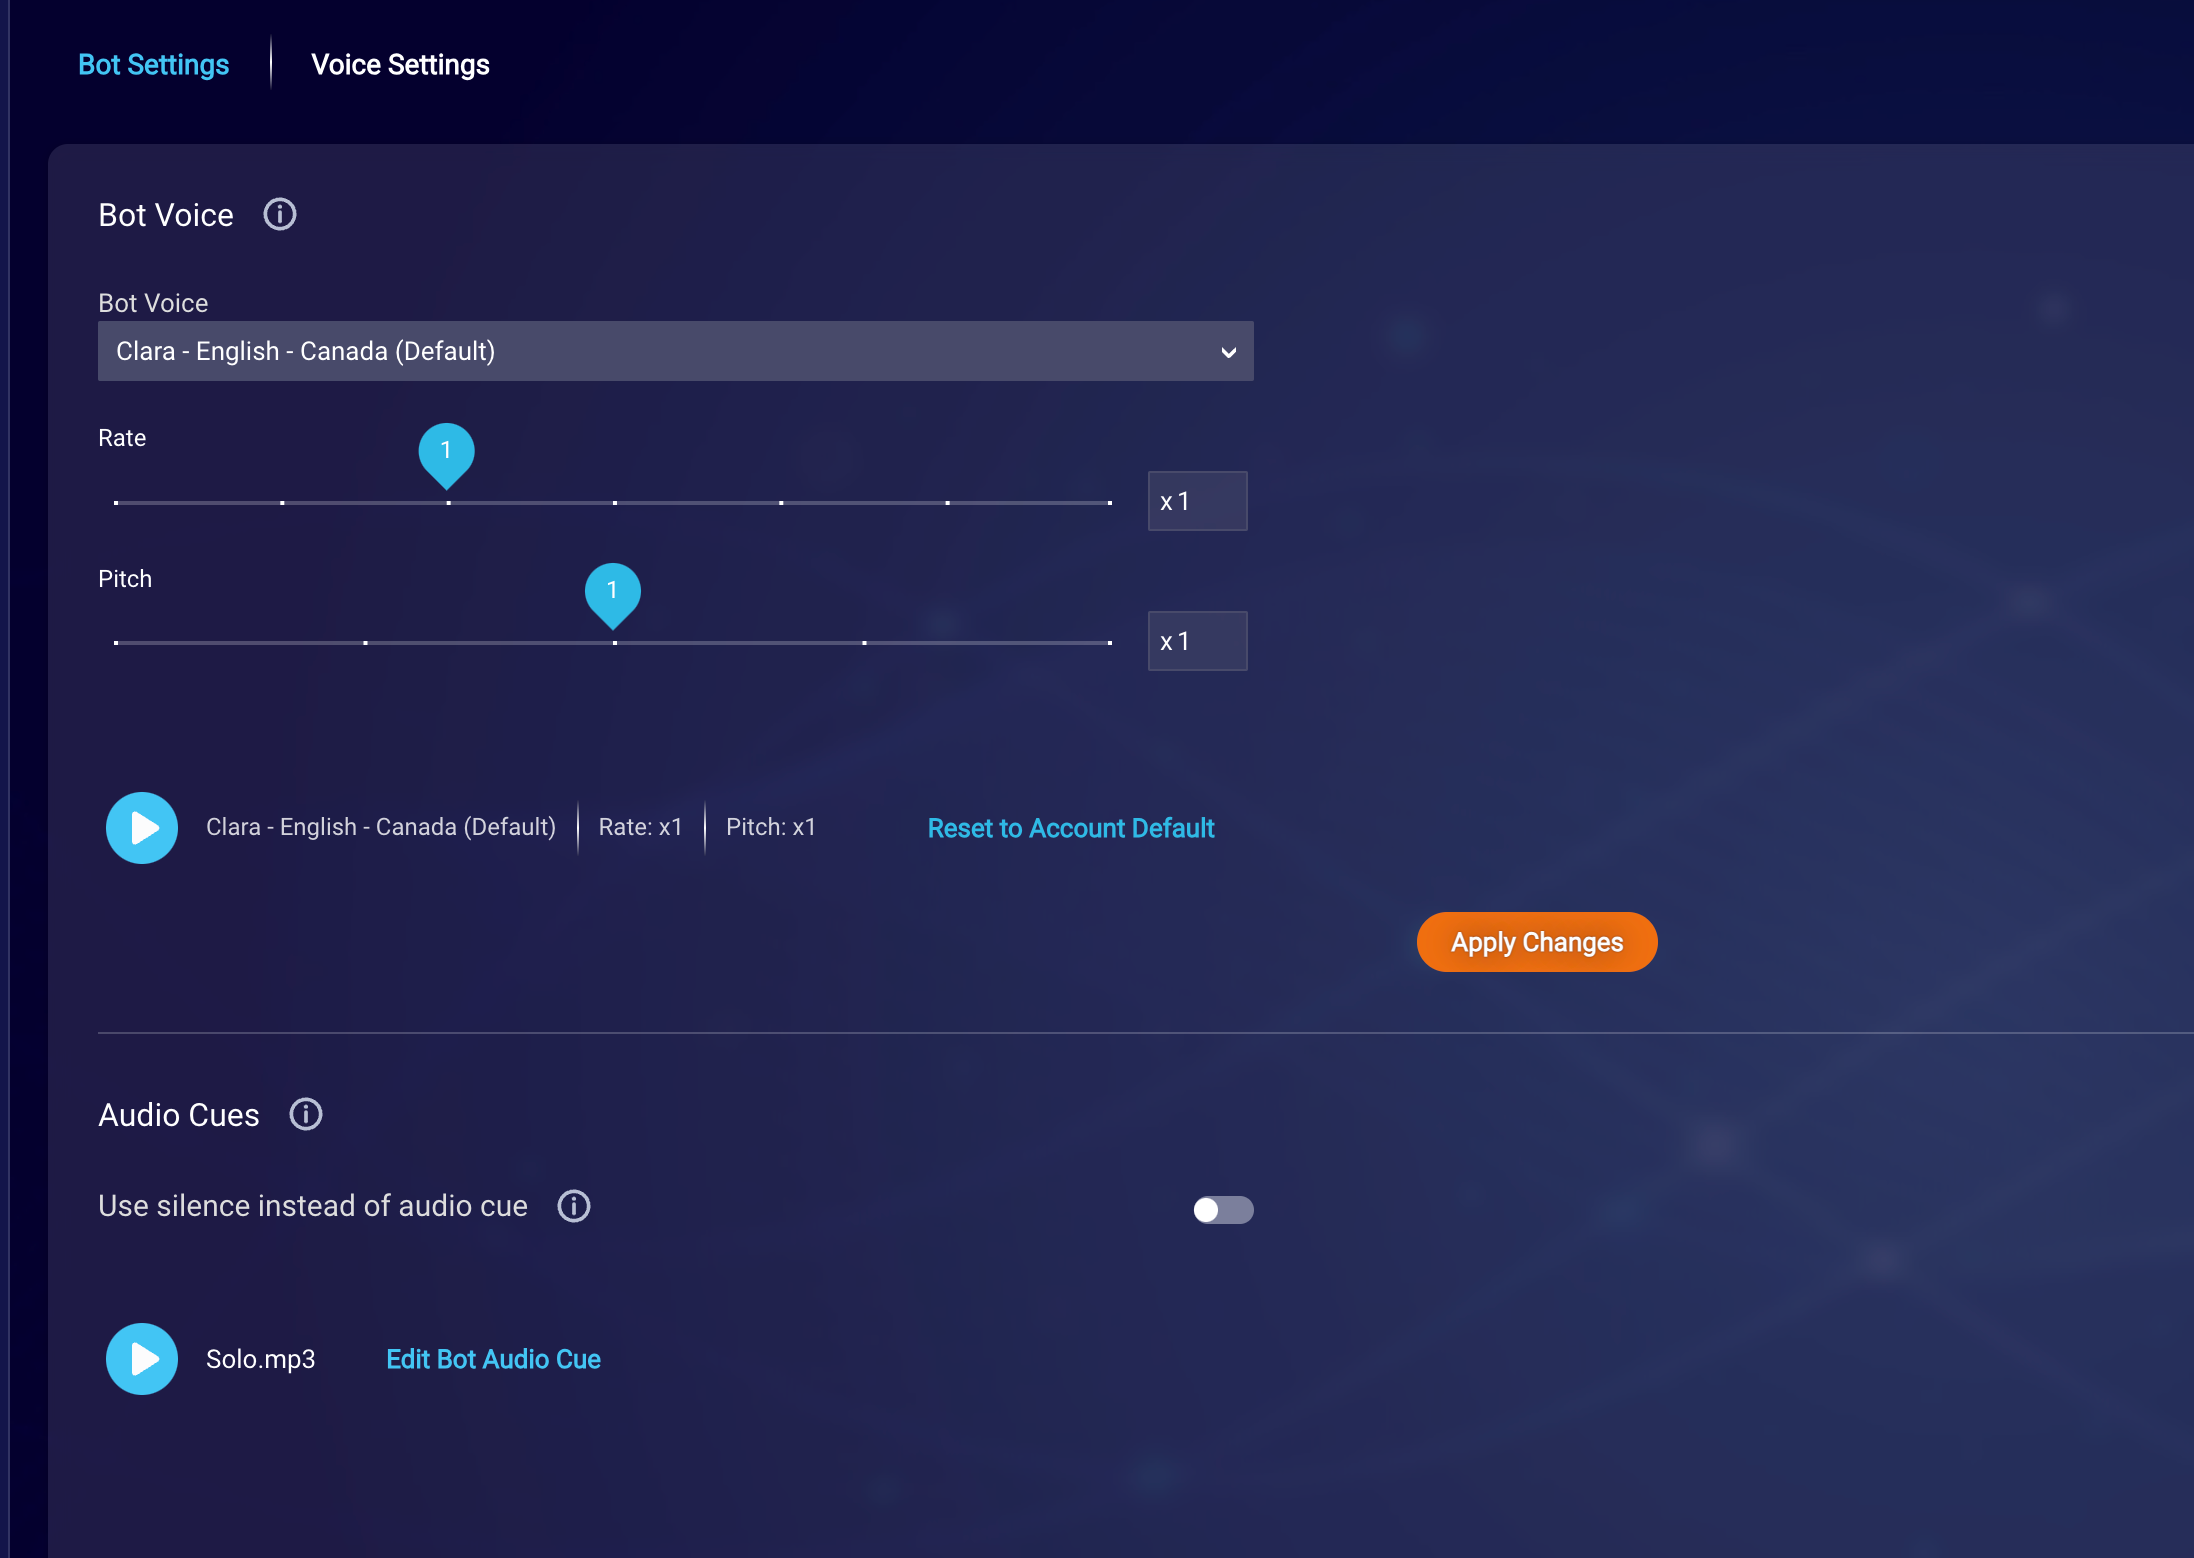
While the bot is processing a consumer’s request, you might want to play a specific audio cue (earcon or sound cue), or you might want to use silence. As shown above, there are new settings to control this too, as well as an affordance to play the audio cue.
Don’t want to bother setting the voice or an audio cue? No problem. Just keep the defaults that are used.
Voicebots - Preview how an interaction sounds
During bot development, you might want to preview how a text-to-speech (TTS) interaction sounds. Use the new play button to preview the voice.

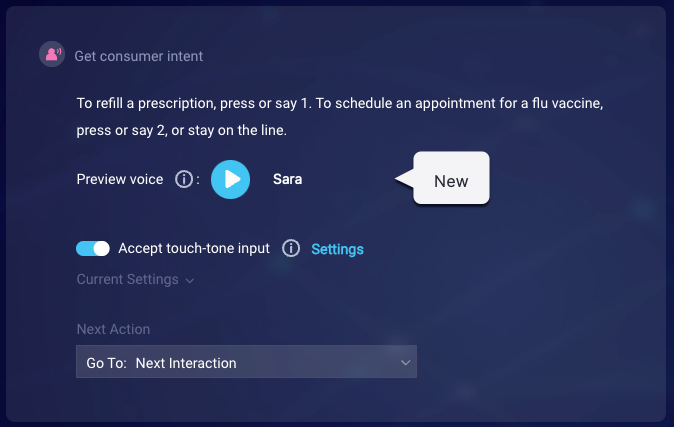
Click the button to play the voice for this interaction.
- If there isn’t any SSML in the interaction, the bot’s Voice Settings are used.
- If there is SSML in the interaction, the bot’s Voice Settings are not used. In this case, be sure to fully specify the desired voice characteristics using SSML.
Voicebots - Prevent consumer interruptions to questions
Previously, the consumer was always free to interrupt a question played by the voicebot, but we’re adding support for preventing this. Just toggle off the Allow consumer interruptions advanced setting that’s new in question interactions.

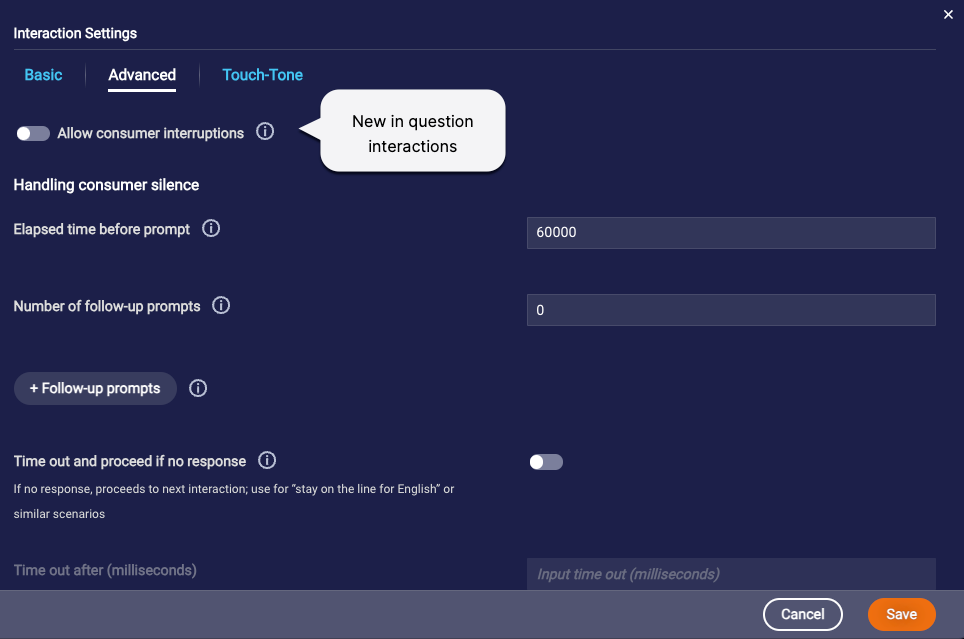
When the setting is disabled, if the consumer interrupts the Voice bot while it’s playing the message, the consumer’s input—whether speech or touch-tone (DTMF)—is simply discarded.
Features
Managing a CMS/KMS just got easier
Got an internal knowledge base that integrates with an external CMS/KMS? Managing it just got easier.
Before, the Sources page within that knowledge base didn’t do much, with just a link to get you quickly into LivePerson’s Integration Hub (iHub) to manage the underlying Workato recipe that powers the sync operation. But we’ve made this page much more useful.
Now, you can view the recipes associated with the knowledge base right on the Sources page within KnowledgeAI. This gives you greater visibility into what’s populating the knowledge base. What’s more, on the Sources page, you can:
- Activate and pause the recipe’s schedule
- View the status of sync jobs
- Quickly access the recipe in iHub to update it or run it on demand
Call to action
If you have an existing knowledge base that integrates with a CMS/KMS, you won’t initially see its associated recipes listed on the Sources page. To resolve this:
1 - In Conversational Cloud, navigate to iHub, and open the recipe.
2 - If the recipe is running, stop it.
3 - Navigate to the “Add all articles to LivePerson KnowledgeAI (KAI)” component, select it, and click Edit.
4 - In the panel on the right, click Connection, and add a new connection. (Deleting the existing connection is optional, but we recommend you do so.) Make sure all required fields in the new connection have info. Then click Connect. Note the following about the connection:
- Workato recipe ID: This required field is new. Get this ID from the URL in the browser window, e.g., {some path}/recipes/{Workato recipe ID}{some path}.
5 - Switch from the Connection tab to the Setup tab. Make sure all required fields have info. Note the following about setup:
- Workato user ID: This required field is new. Clicking this field opens a “Recipe data” window from which you can select the user ID. Scroll up and find it under “Properties.”
- Job ID: This required field is new too. Set it in the same way that you set Workato user ID.
Once this new connection is established, the recipes are shown within KnowledgeAI on the Sources page.
Enhancements
Changes to article limits for more flexibility
We’ve relaxed a few limits to make it easier to create articles. Changes include:
- Article’s title: The limit is now 300 characters.
- Article’s summary: The limit is now 1,000 characters.
- Article’s detail: The limit is now 10,000 characters.
- Name of article’s tag: The limit is now 100 characters.
- Name of article’s category: The limit is now 100 characters.