Microsoft 0365 OAuth 2.0 Enablement
This document is a configuration guide for a brand admin to set up MS 0365 OAuth 2.0 (advanced authentication) on the Email Connect platform in Early Adopter (EA) Mode.
Pre-requisites for MS 0365 enablement – EA Mode:
- Connect with your LP CSM's to enable this feature.
- You should set up test accounts initially. Production accounts should be set up only after confirmation of test accounts working correctly.
- You should test in EA mode with a small size inbox (max of 2k emails/month).
- You can move to GA phase once enabled (Q1 2023 or later).
Step 1: Log into Onboarding App for Email on LivePerson cloud
1.) On the Onboarding app Welcome page, click on Add email account to start configuring an account.

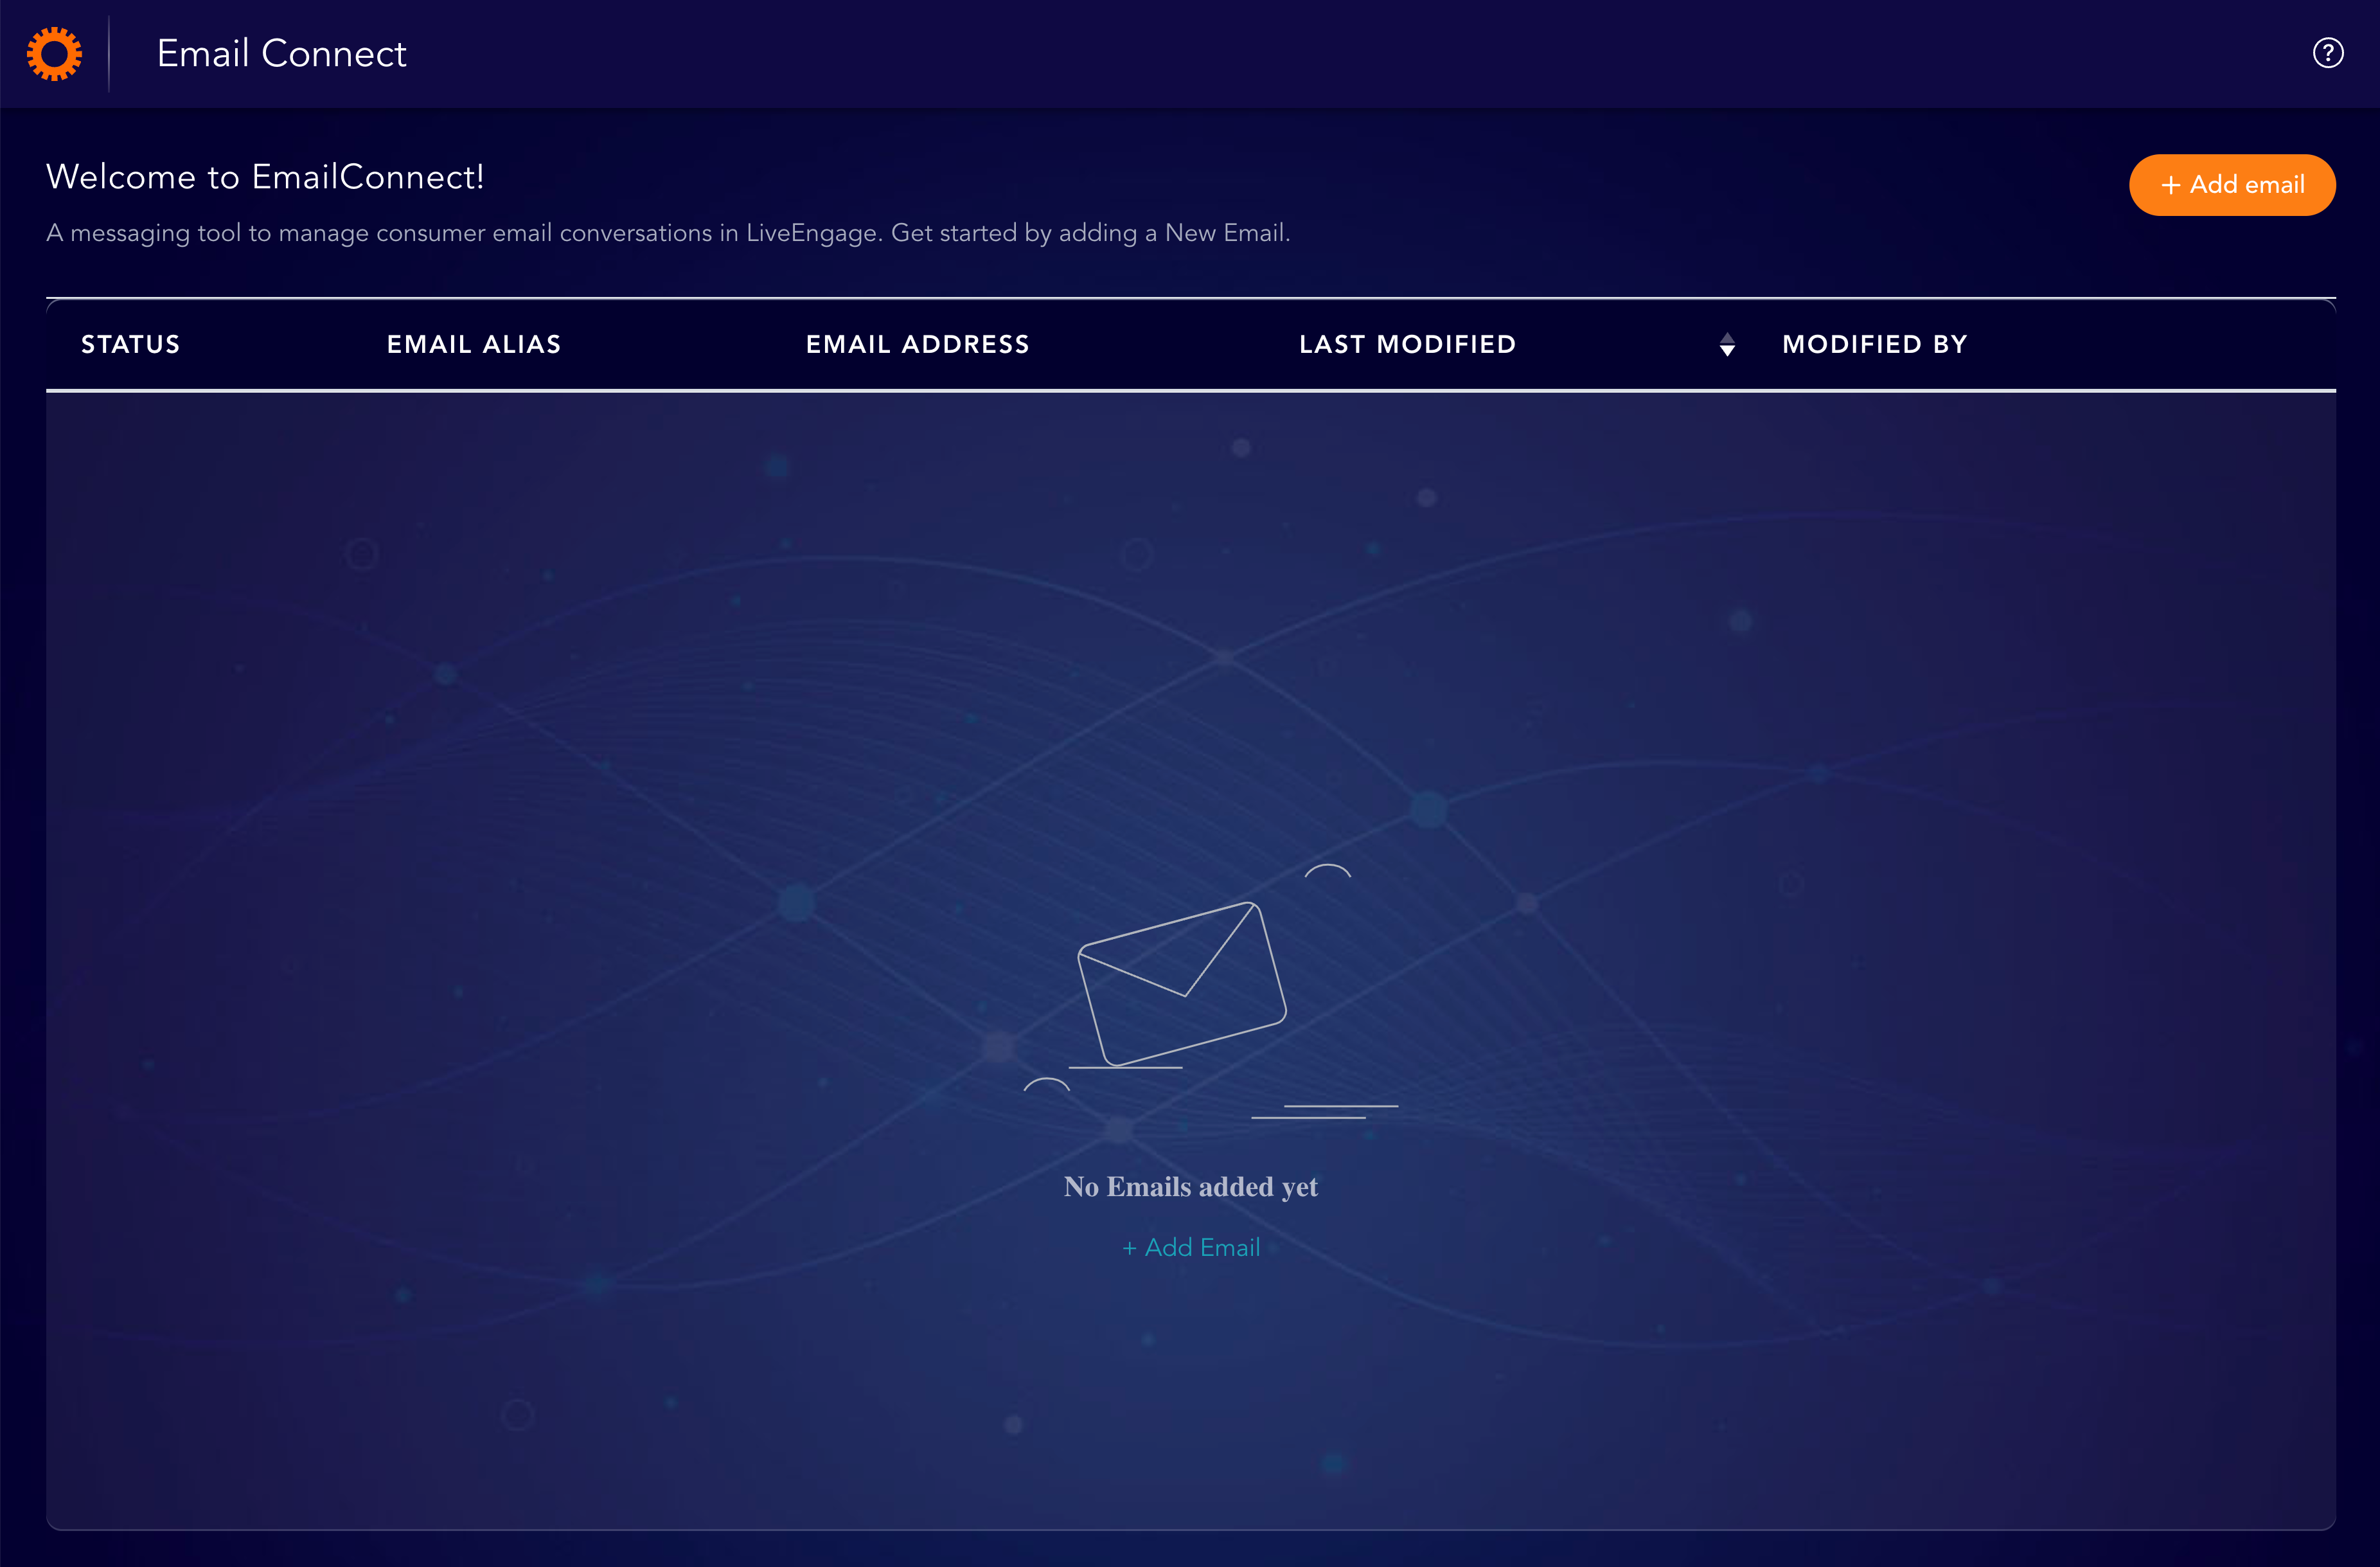
Email Connect Onboarding App - Welcome Page
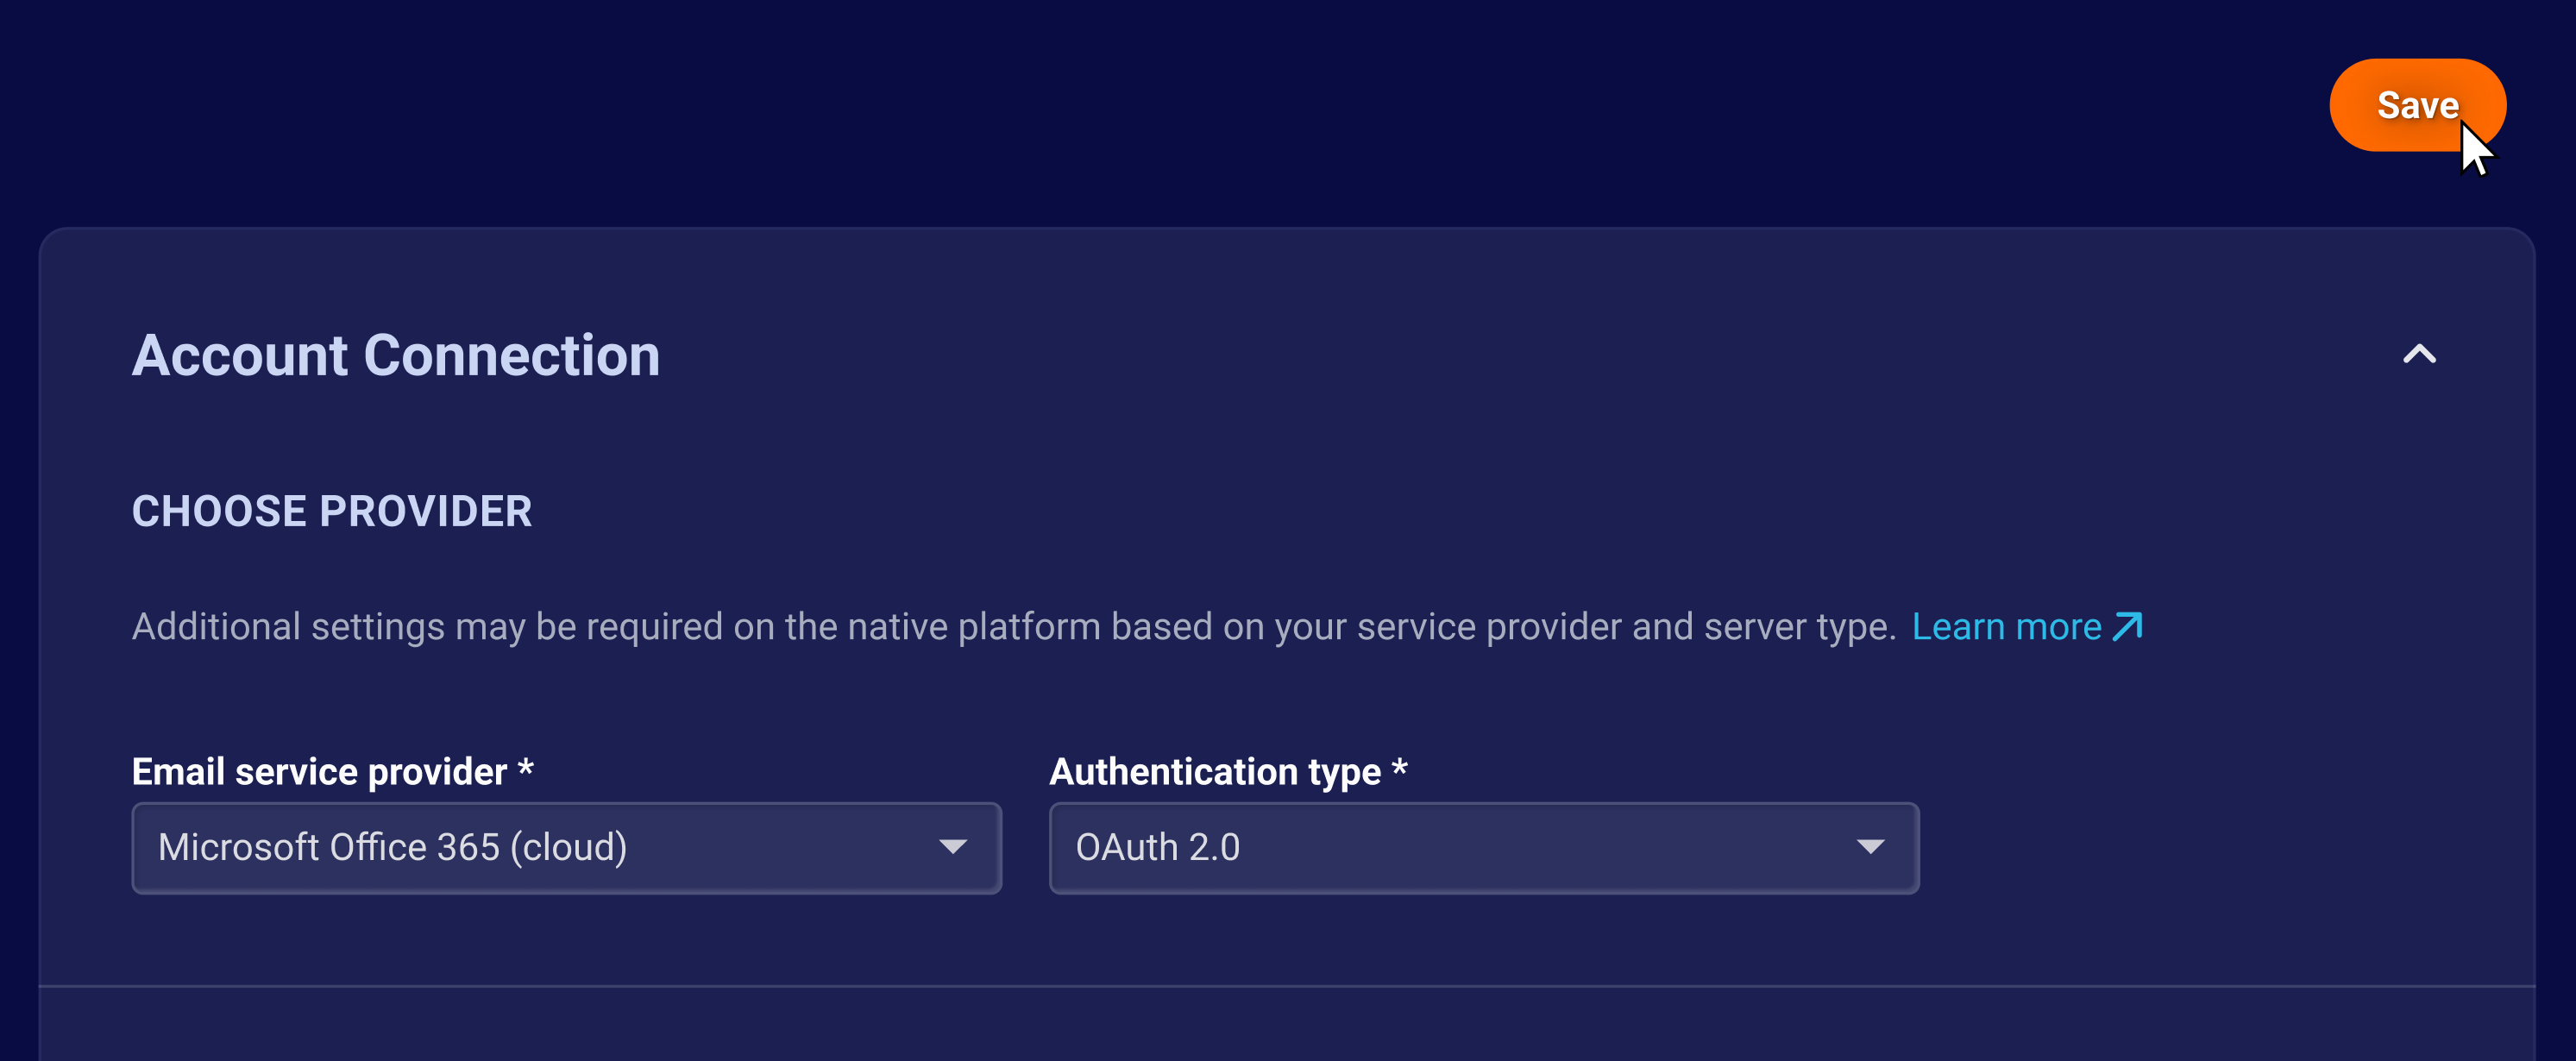
2.) Under Account Connection, select Microsoft Office 365 (Cloud) as email service provider and OAuth 2.0 as authentication type in the Onboarding app of LivePerson.

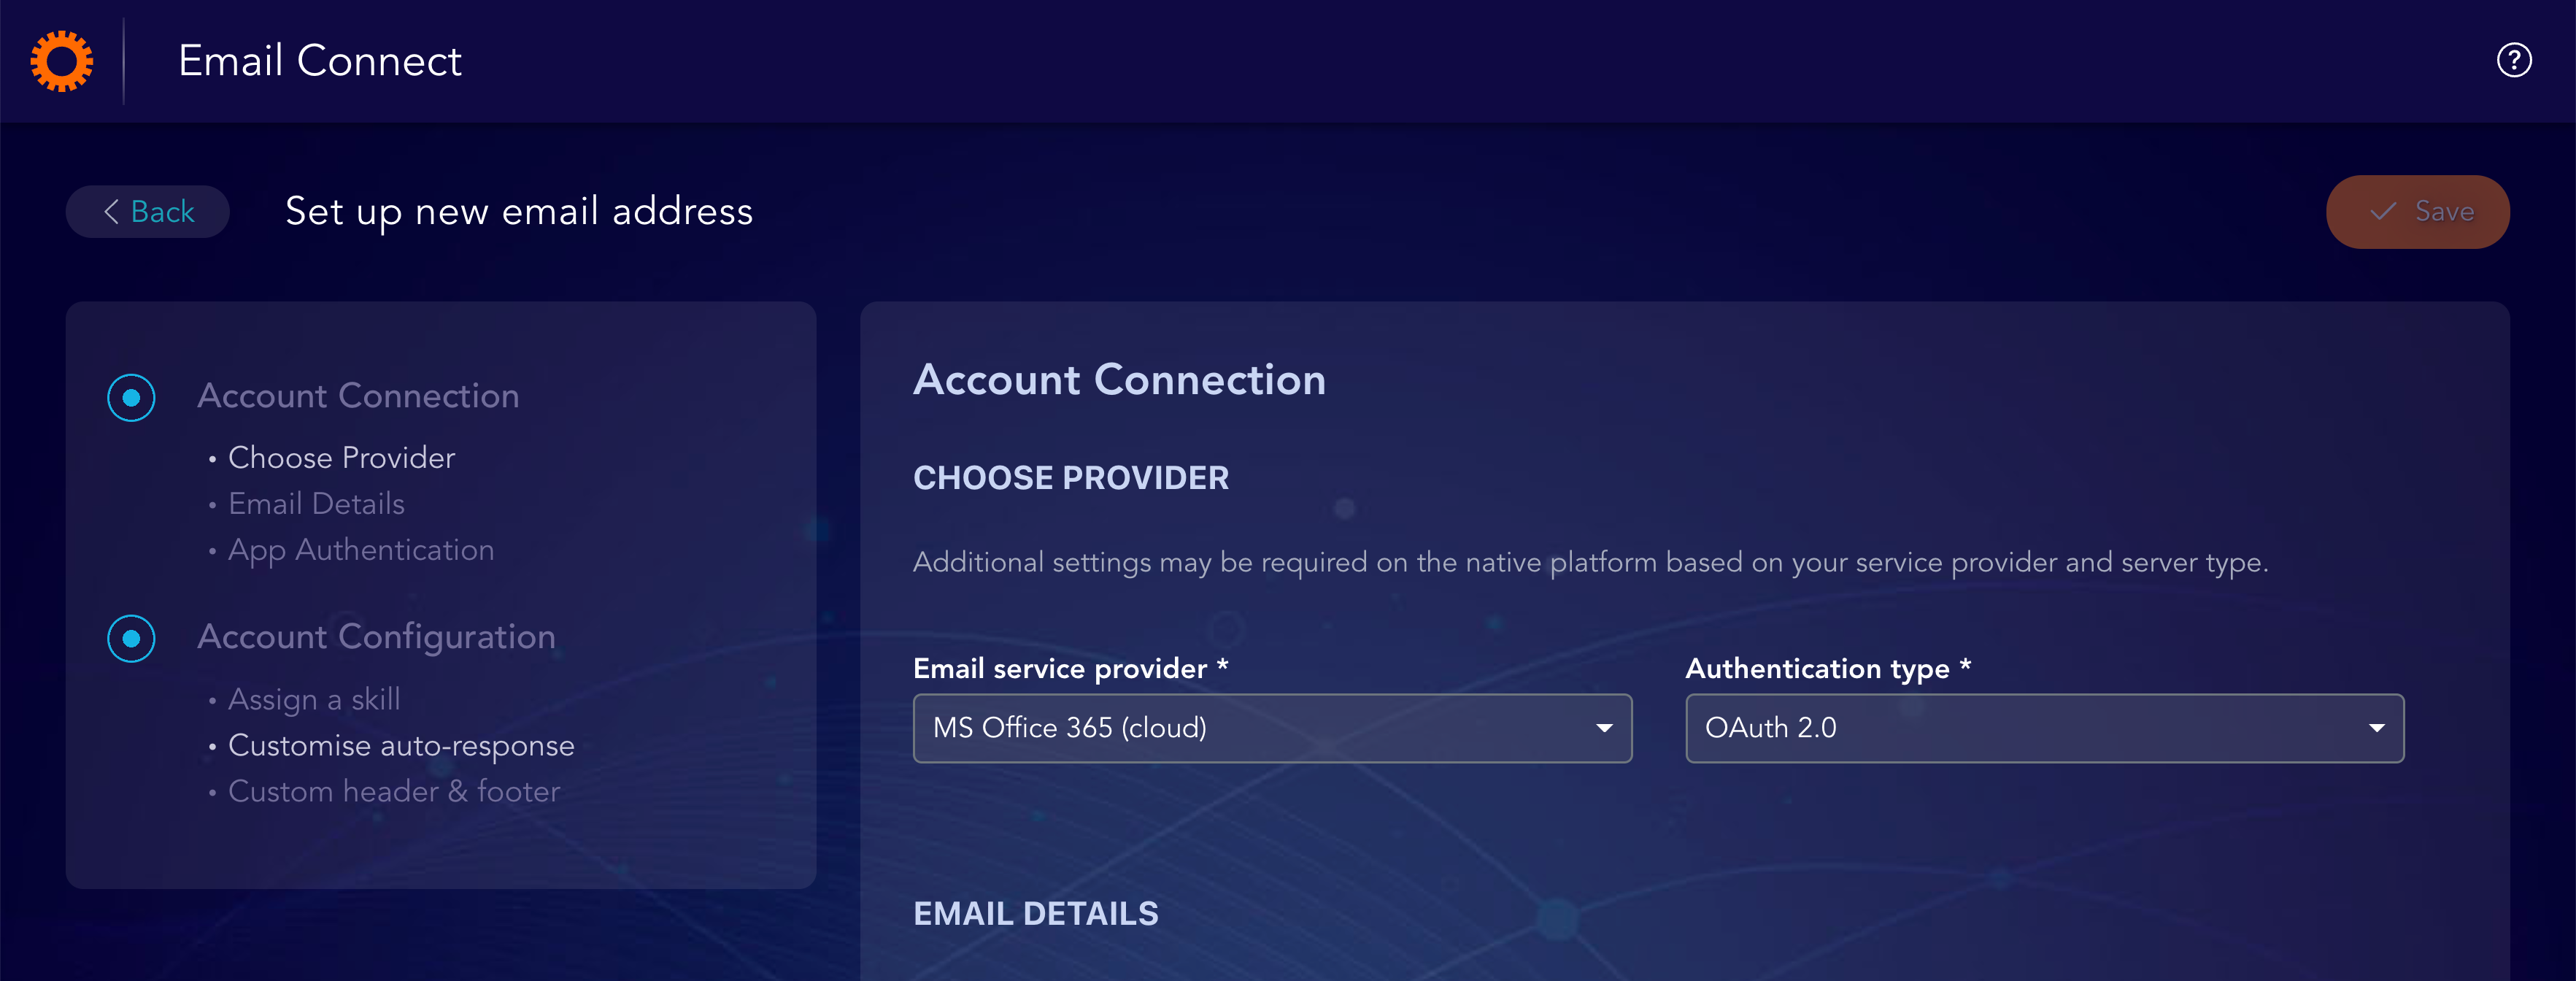
3.) Upon OAuth 2.0 selection, display the link to the Knowledge Center, on how brands should register our App on Azure Active Directory.


Step 2: Log in into MS Azure portal to register the LivePerson app
To use OAuth 2.0 as your authentication method on Microsoft Office 365 (cloud), the following are mandatory requirements:
- You should have access to your brand’s Azure accounts and/or active directory.
- Your Microsoft 365 subscription includes a free Azure AD subscription so that you can integrate your on-premises Active Directory Domain Services (AD DS) to synchronize user accounts and passwords or set up single sign-on. You can also purchase advanced features to better manage your accounts. Refer Azure integration with Microsoft 365 - Microsoft 365 Enterprise | Microsoft Docs for further details.
- You should be an Admin who will have all access rights in Azure active directory.
- You should register the LivePerson app on the brand’s Azure account.
It is recommended that you simultaneously configure on Azure and complete the onboarding on LivePerson as is explained in the steps below.
1.) Open portal.azure.com


2.) Sign in to your Microsoft account

3.) Open the menu icon on the left, click on Azure Active Directory → Under Manage → App registrations → New registration

4.) Complete registration by filling in the Name and choosing an option from Supported account types. There is no need to add a redirect URL.
You can read more about the different supported account types here.

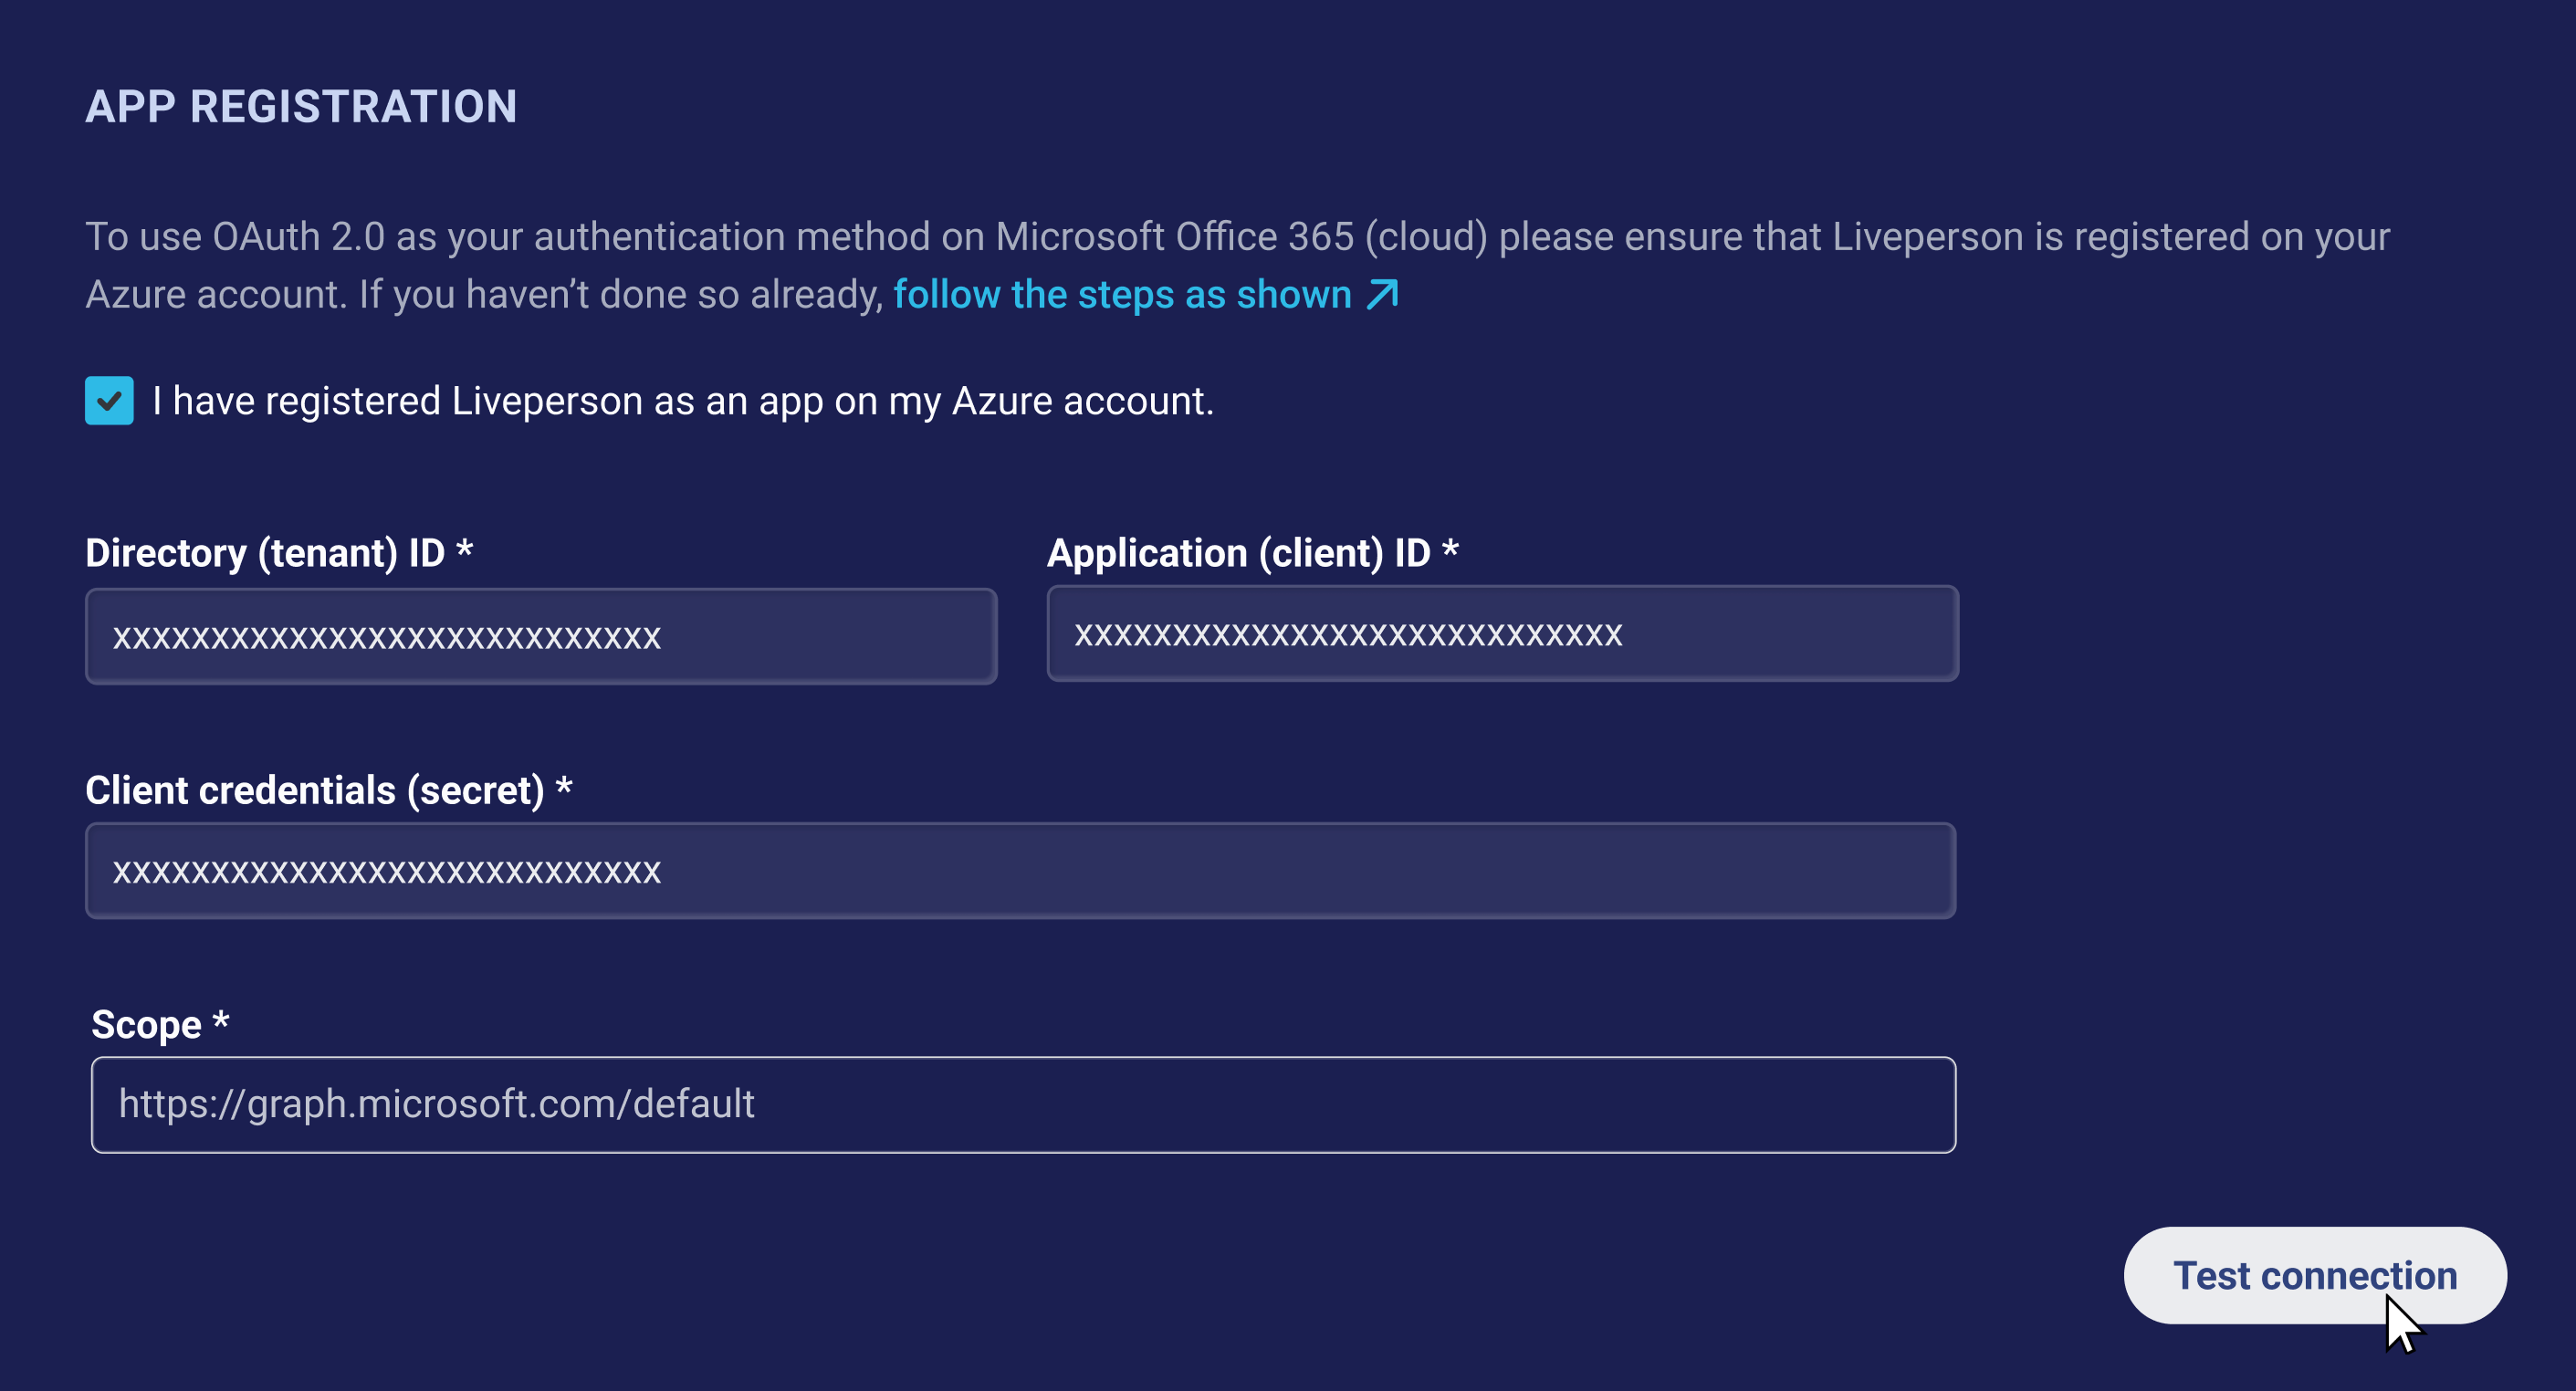
5.) Once you have registered the app (you’ll be redirected to the Overview page of the app you just registered), proceed to copy and paste the Application (client) ID and Directory (tenant) ID into the form fields with the same name in the LivePerson Email onboarding app. Scope will automatically be filled out.

As you can see these fields are mandatory.

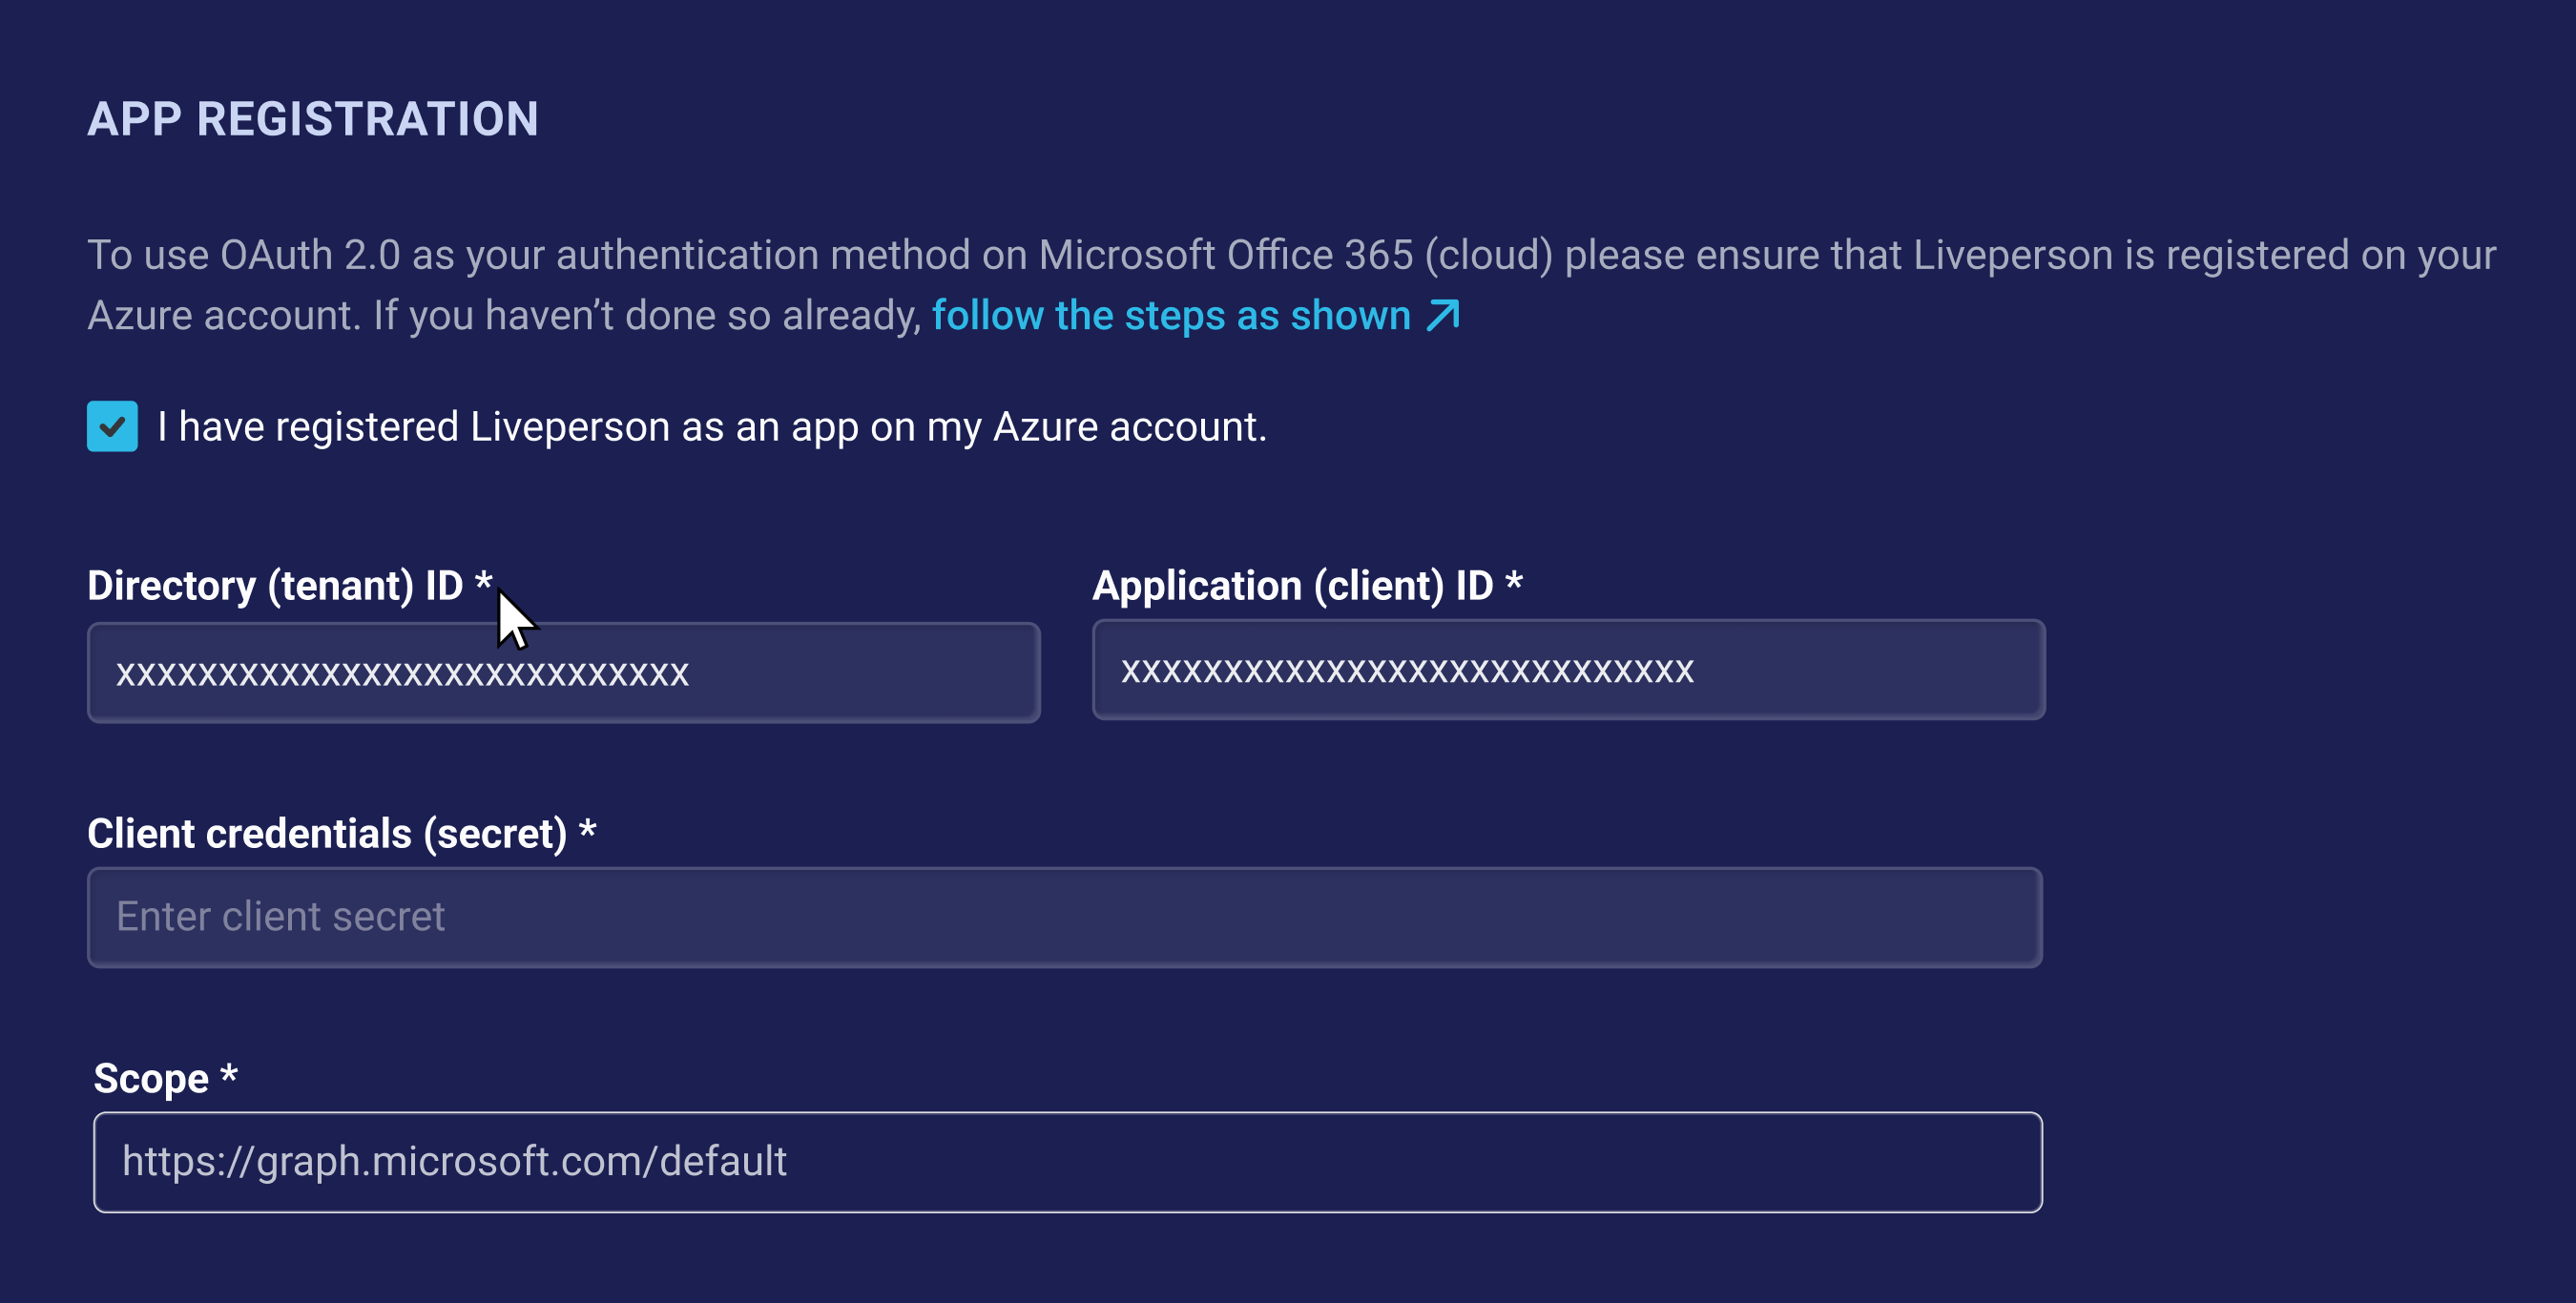
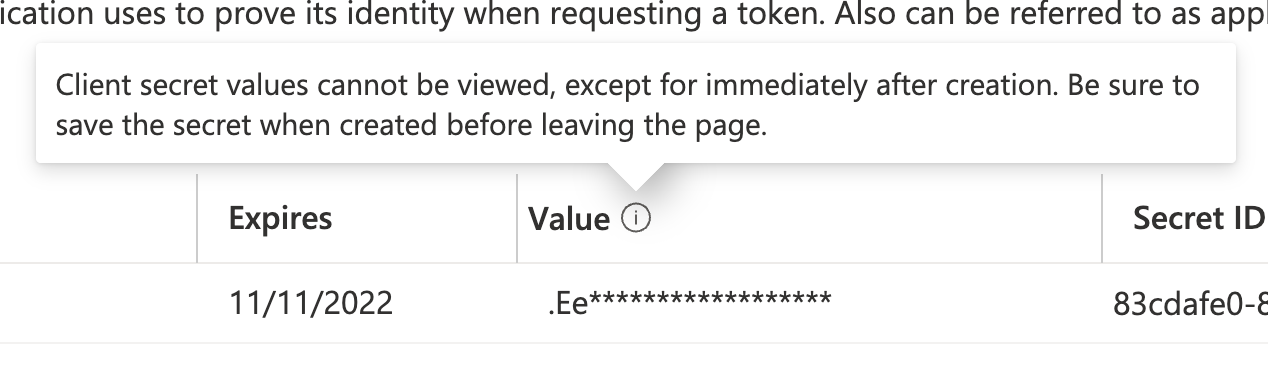
6.) Click on Add a Certificate or Secret → under Client secrets → click on New client secret → copy and paste the Value on the Client Secret form field in the LP onboarding app IMMEDIATELY as you will lose access to this value once you navigate to another page.


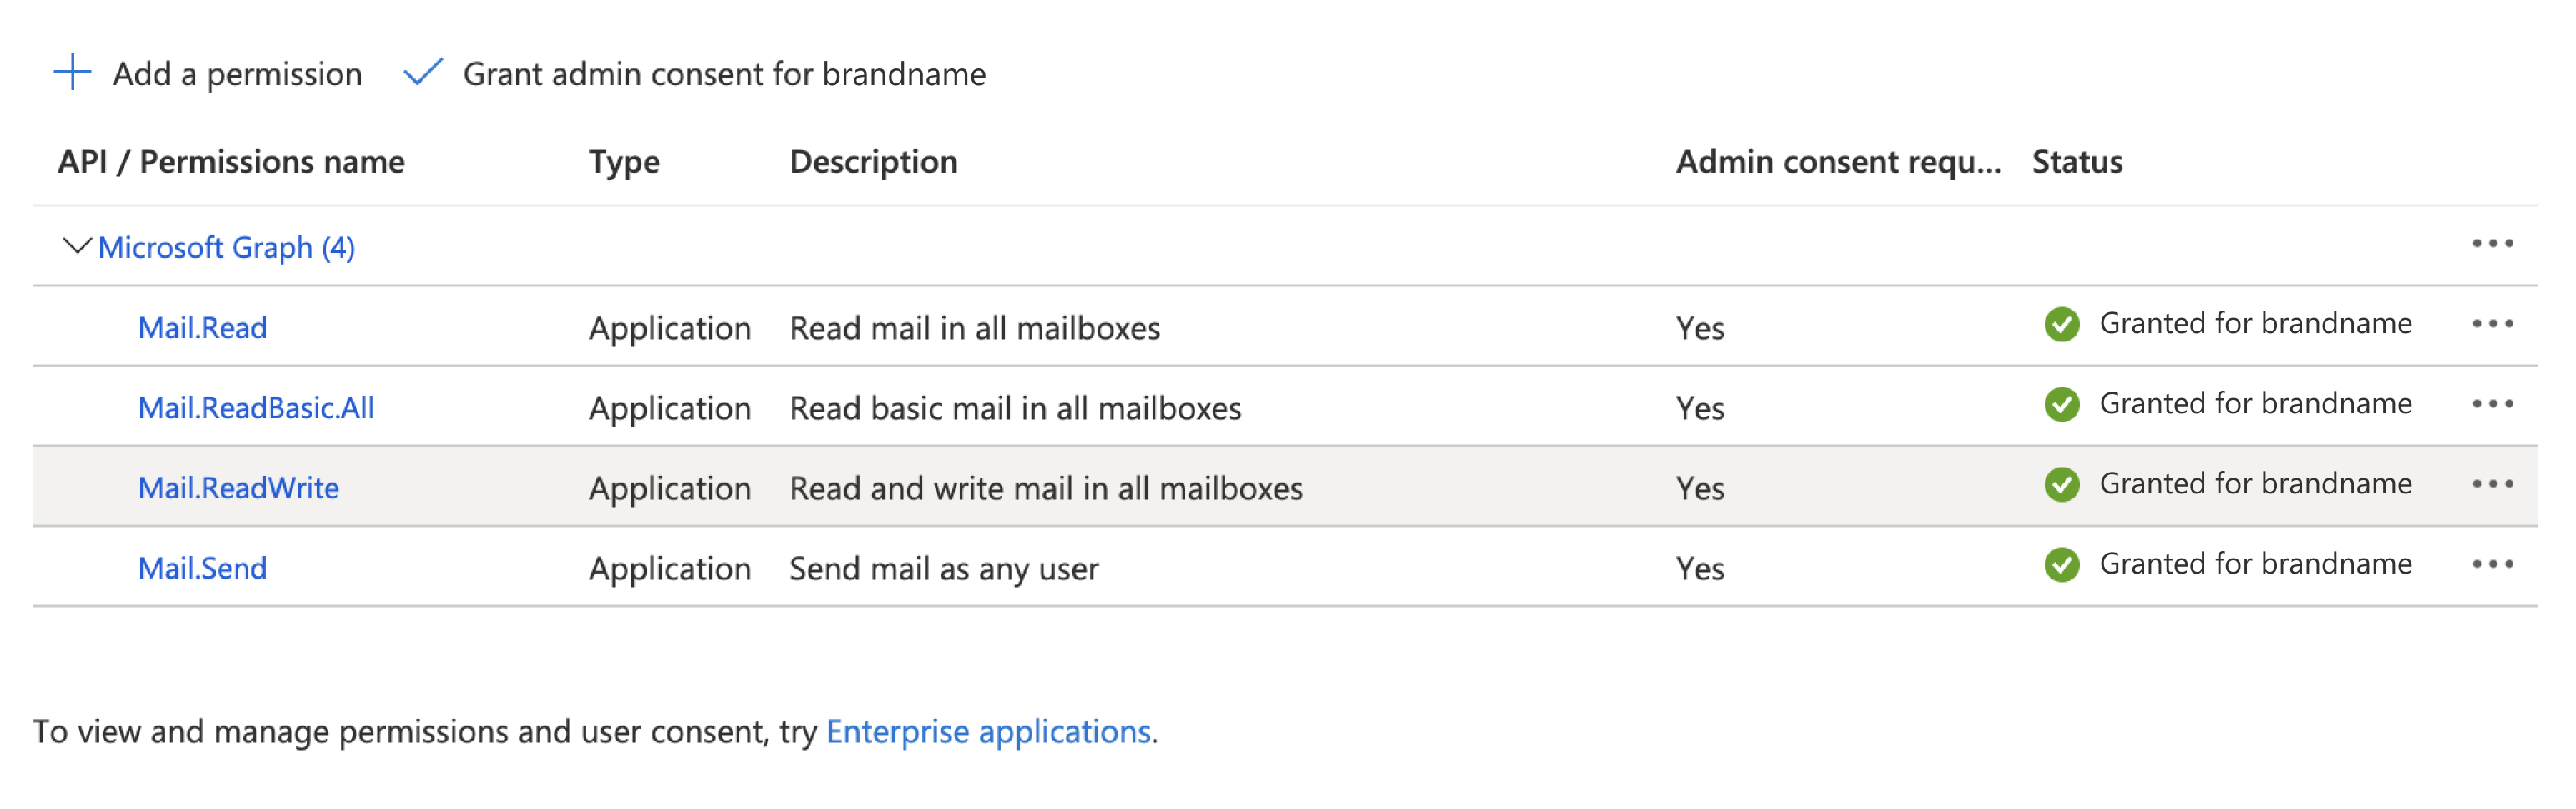
7.) Navigate to API Permissions → click on Add a permission → Microsoft Graph→ Application permissions. Proceed to search “Mail” and add the following permissions under “Mail”:
- Mail.Read
- Mail.ReadBasic.All
- Mail.ReadWrite
- Mail.Send
8.) Ensure admin consent for your brand has been granted (this is automatic).

9.) If you haven't already, ensure all information from the steps above is captured on the LivePerson email onboarding app.
Step 3: Continue the OAuth enablement on LivePerson onboarding app
1.) You should ensure that the below fields are populated (from step 2.5 & 2.6 above) on the onboarding app
- Tenant Id
- Application ID
- Client secret
- Scope - This is automatically pre filled by LivePerson.
2.) Click on “Test Connection” in the Onboarding app and validate connection is successful. In case of an error message, update the values for Tenant Id, Application Id and Client credentials (secret) and retry by clicking "Test Connection".

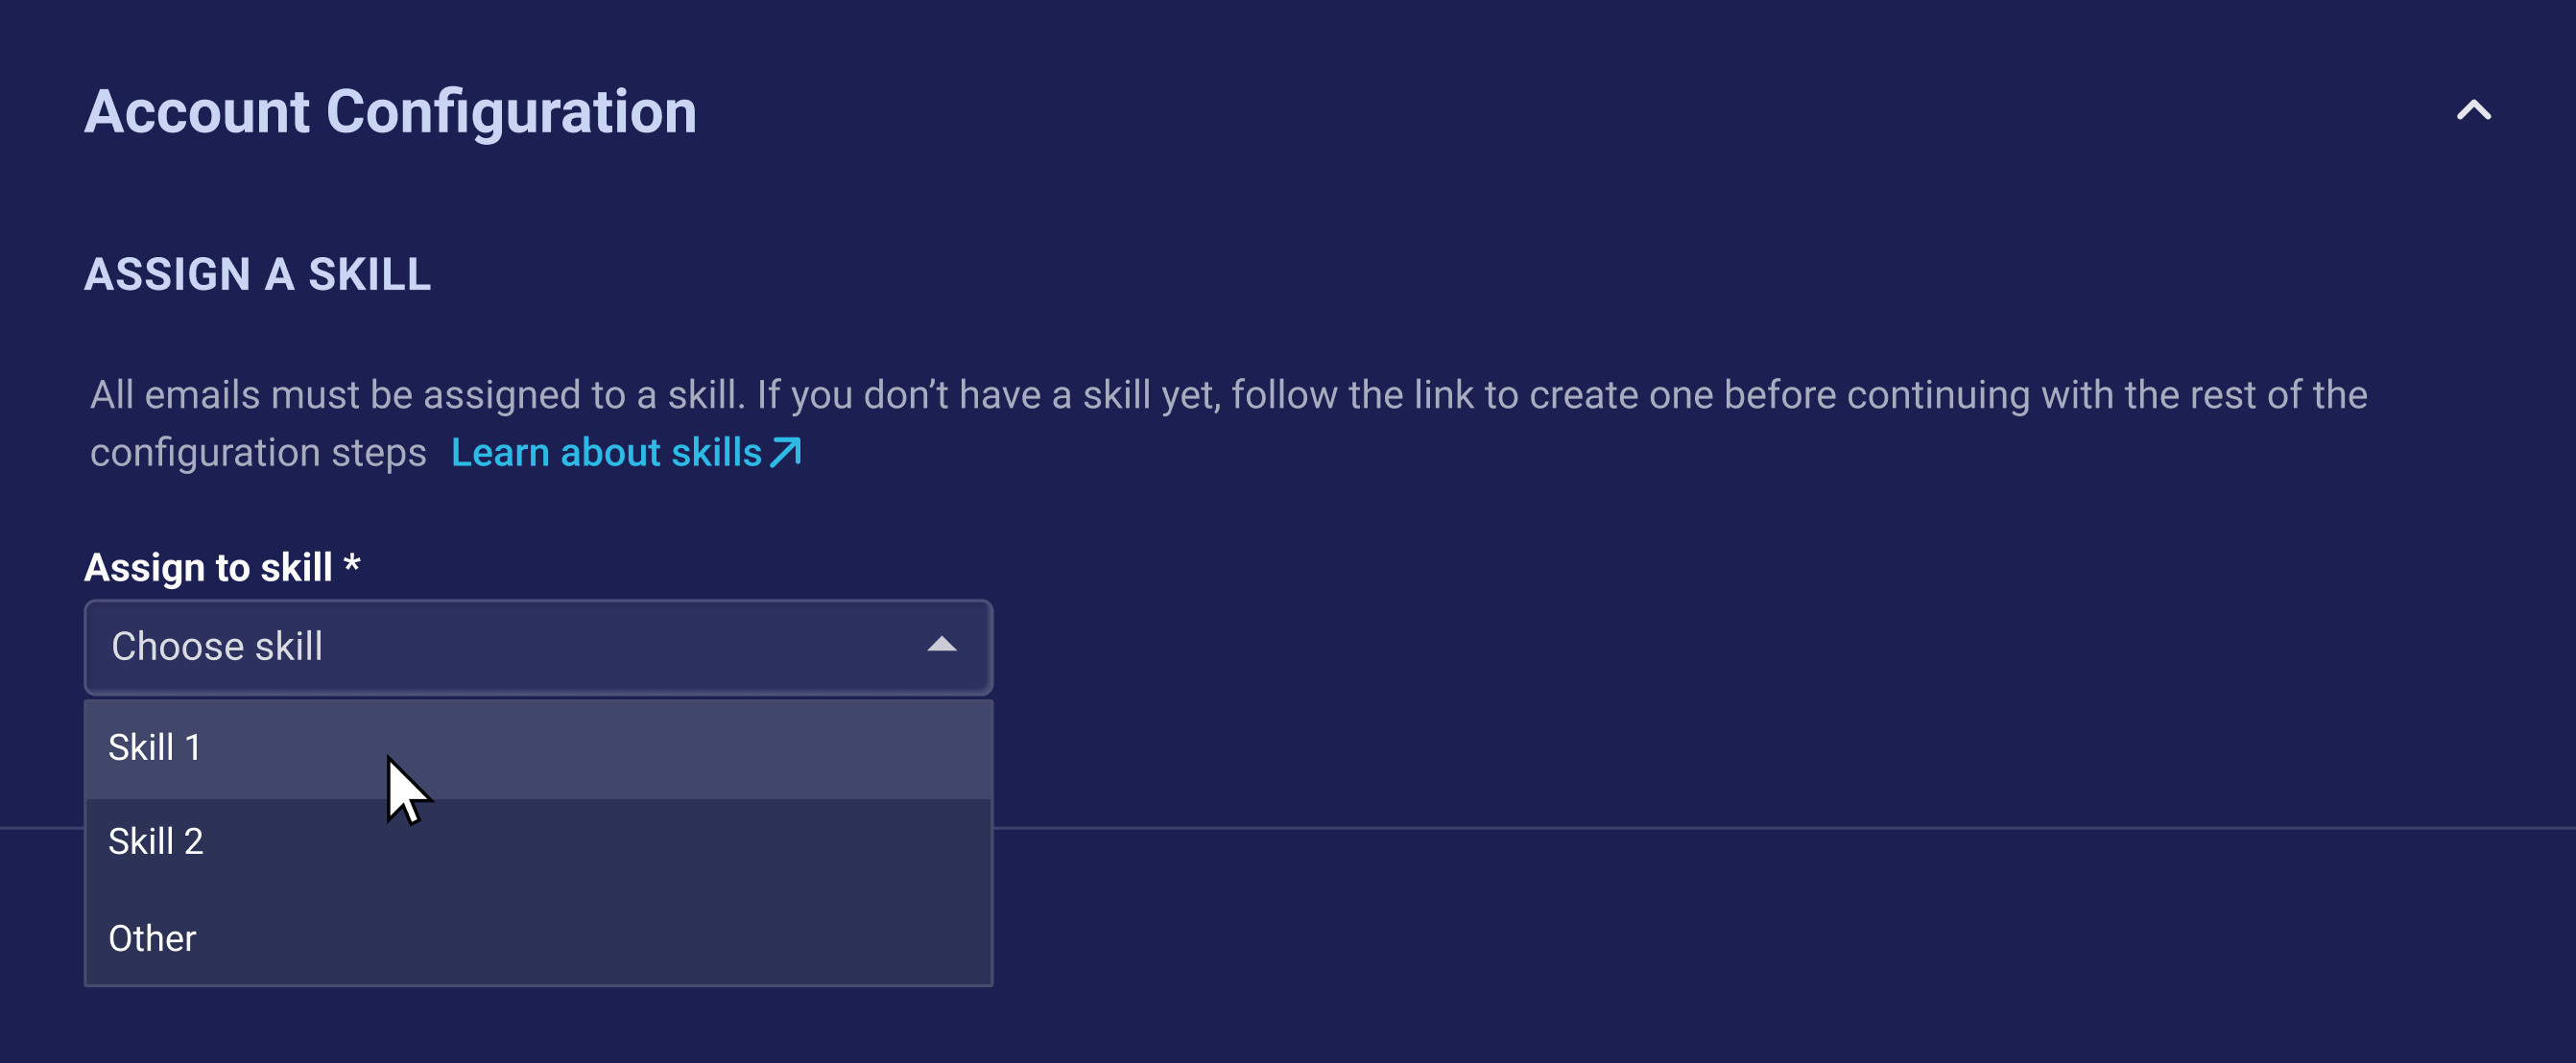
3.) Once the connection is successful, you should proceed to Account Configuration to assign the email a skill.

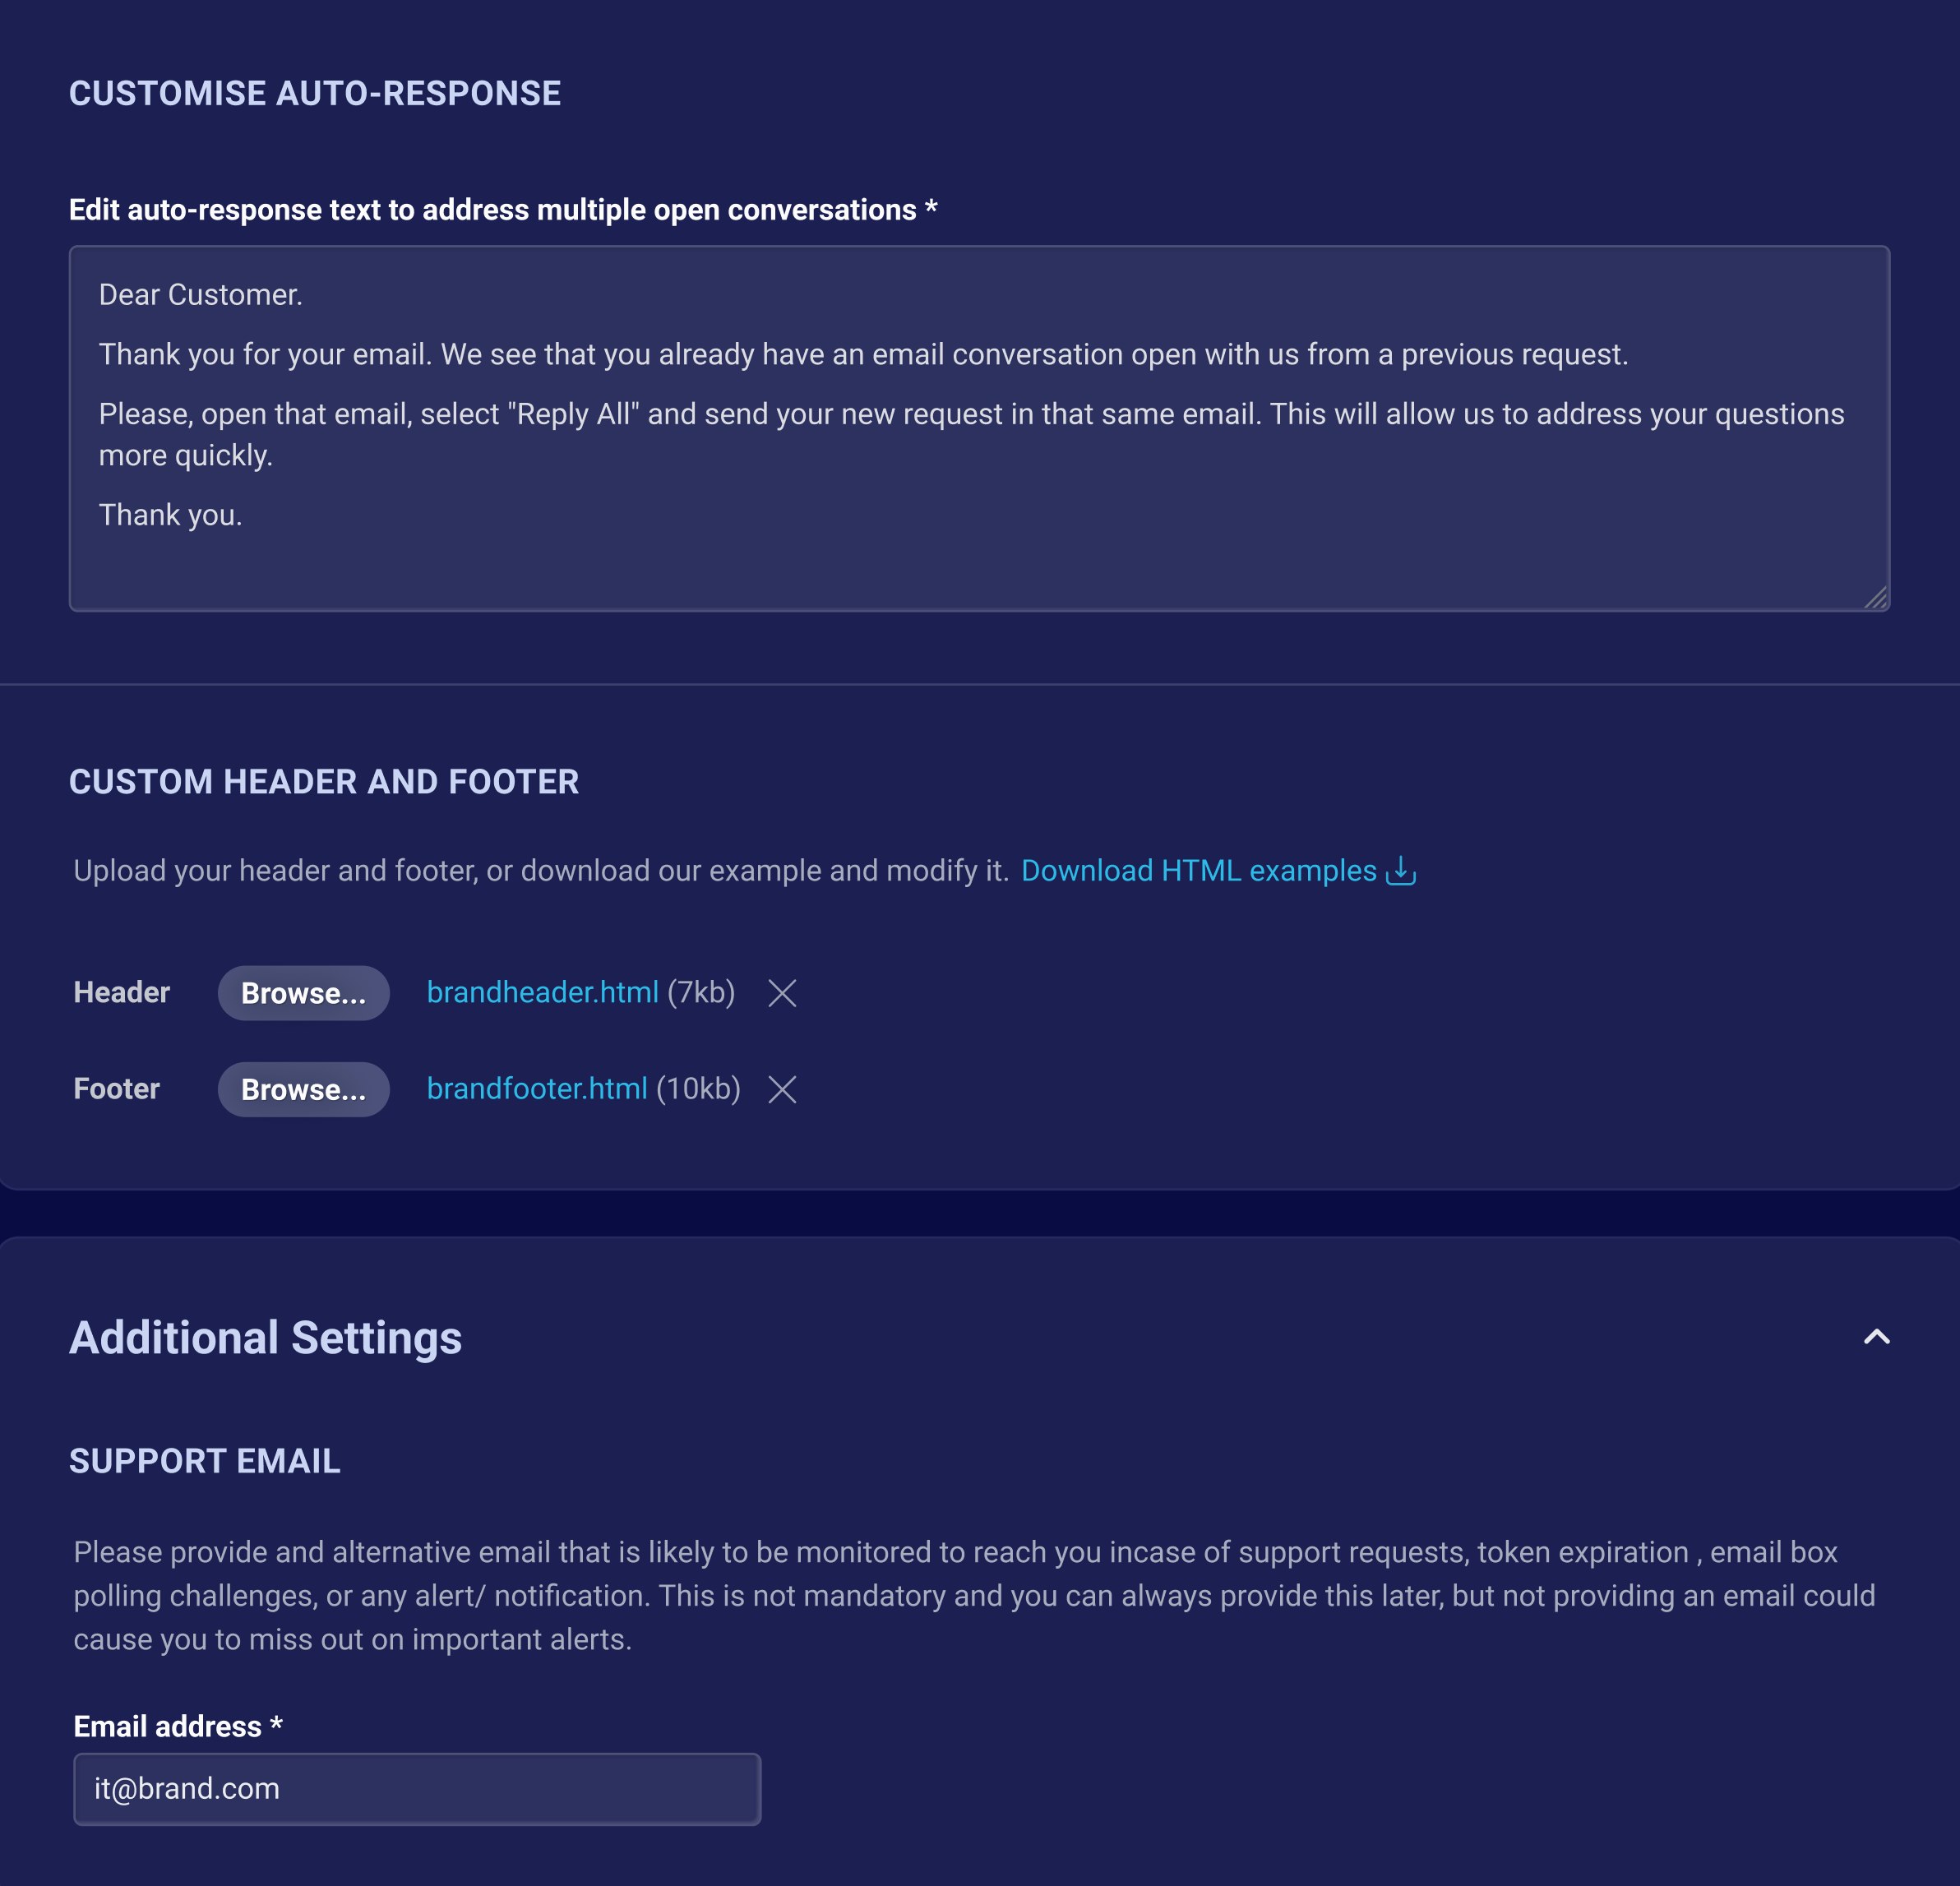
4.) Enter details for all the remaining sections outlined below as necessary.
- Customize Auto-Response
- Custom header and footer
- Support email (under Additional Settings)

5.) Click Save to store the configuration in the Email connect page.

6.) A popup is displayed for confirmation with relevant message - click Ok. In case of failure, hit save again to retry the operation.
7.) Back on the Welcome page, you should confirm Email Handle, Address & Skill values are correct and the configuration is set to status Enabled.
Missing Something?
Check out our Developer Center for more in-depth documentation. Please share your documentation feedback with us using the feedback button. We'd be happy to hear from you.